Advertisement

421-000-391
FLASHLIGHTS
repair
manual
Repairs must be performed by Mag Instrument
certified warranty service personnel
This copyrighted Manual, bearing Copy Control #_______________, is the property of
Mag Instrument, Inc., and must be returned to Mag Instrument upon demand. It is for use
only by factory-certified technicians performing authorized warranty service on the
Mag-Lite® Flashlight and/or other Mag-Lite® Flashlight components.
This Manual is a confidential document. It is not for sale and is not to be shown, lent or
otherwise disclosed to unauthorized personnel.
Copying of this document is not authorized. Copying would therefore constitute a violation
of the copyright laws. If additional copies are desired, they should be requested directly
from Mag Instrument, Inc.
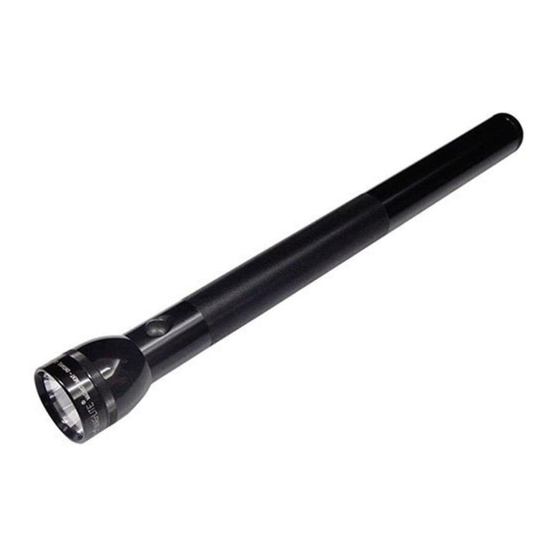
Mag-Lite
C & D Cell
Flashlights
IMPORTANT NOTICE
®
ML Rev.1 8/03
1

Advertisement

Table of Contents
loading
Need help?

Need help?

Do you have a question about the C CELL and is the answer not in the manual?

Questions and answers

Subscribe to Our Youtube Channel

Summary of Contents for Mag-lite C CELL

  • Page 1 Mag Instrument, Inc., and must be returned to Mag Instrument upon demand. It is for use only by factory-certified technicians performing authorized warranty service on the Mag-Lite® Flashlight and/or other Mag-Lite® Flashlight components. This Manual is a confidential document. It is not for sale and is not to be shown, lent or otherwise disclosed to unauthorized personnel.
  • Page 2 TROUBLESHOOTING for Mag-Lite® C&D Cell Flashlights Troubleshooting a non working flashlight must be done prior to commencing any repair operations 1. FLASHLIGHT FAILURE: Check the lamp and the batteries with the meter.. If the lamp has burned out, be sure to replace it with the correct size genuine Mag replacement lamp.
  • Page 3 BATTERY TEST - STEP 1 LAMP TEST - STEP 3 • Black Probe in COM port • Red Probe in VΩmA port Bad Lamp - If the lamp is bad the meter setting will not change and will stay at 1. •...
  • Page 4 CLEANING METAL SURFACE BARREL - STEP 1 BARREL - STEP 2 Using the emery paper, wipe the shiny Place the sheet of emery paper on a flat surfaces as shown until they are clean. surface. BARREL - STEP 3 • Place the tail cap end (shiny surface) flat on the emery paper •...
  • Page 5 WSC price schedule or, the WSC may advise the customer to contact the particular battery manufacturer for further instructions. Tools required to replace new style Mag-Lite ® C & D flashlights: Hex wrench C &...
  • Page 6 SCHEMATIC - FLASHLIGHT PARTS LIST FOR BLACK ‘D’ AND BLACK ‘C’ MAG-LITE® FLASHLIGHTS (PREFIX 'D' or 'C' SERIAL NUMBER) ITEM NO. QTY. PART NO. DESCRIPTION HEAD SUB-ASSEMBLY, ‘D’ or ‘C’ 201-000-157 FACE CAP, Black 108-000-026 O RING, FACE CAP 108-000-031...
  • Page 7 STEP 1 STEP 2 Unscrew & remove the entire TAIL CAP Unscrew and remove the the entire HEAD ASSEMBLY (16) and remove the BATTERIES. ASSEMBLY(1). STEP 3 STEP 4 Remove the LAMP (10). Remove the SWITCH SEAL (12) By grasping with the thumb and index finger, buckle and pull to extract.
  • Page 8 STEP 5 STEP 6 Insert the HEX WRENCH (22) into the Back out the SET SCREW (21) three turns to SWITCH BUTTON (A) , through the SWITCH release the SWITCH (15) from the pocket in (15) and into the SET SCREW (21). the BARREL (13).
  • Page 9 STEP 9 STEP 10 Push the SWITCH ASSEMBLY (15) into the Using the HEX WRENCH (22) center the BARREL (13) until it stops at the SNAP RING SWITCH (15) and Tighten the SET SCREW (14). (21). STEP 11 STEP 12 Replace the LAMP (10).
  • Page 10 Replace the BATTERIES and TAIL CAP ASSEMBLY (16). C&D SWITCH REPLACEMENT OLD STYLE Tools required to replace old style Mag-Lite ® C&D flashlights: C & D F l a s h l i g h t ML Rev.1 8/03 421-000-391...
  • Page 11 OLD STYLE C&D FLASHLIGHT SCHEMATIC PARTS LIST FOR BLACK ‘D’ (OLD STYLE, PRIOR TO 1992) AND BLACK ‘C’ MAG-LITE® FLASHLIGHTS ITEM NO QTY. PART NO. DESCRIPTION HEAD SUB-ASSEMBLY, ‘D’ or ‘C’ 201-000-157 FACE CAP, Black 108-000-026 O RING, FACE CAP...
  • Page 12 Follow instructions for Steps 1-7 from new style instructions (pg. 3-4) STEP 8 STEP 9 Unscrew the retaining ring Match the pins on the Spanner Wrench (25) (counterclockwise). with the holes in the retaining ring. STEP 10 STEP 11 Insert the Spanner (25) into the front of the Depress the switch button.
  • Page 13 STEP 12 STEP 13 REPLACE THE SWITCH Pull the Switch Assembly (13) out the front of the barrel (16). Make sure the switch button is depressed. Insert the Switch Assembly (13) into the front of the barrel (16). STEP 15 STEP 14 Insert the proper hex wrench (23) or (24) Line up the switch button on the Switch...
  • Page 14 STEP 16 STEP 17 Replace the switch seal (15) by grasping with Replace the lamp (11). the thumb and index finger, buckle and push it into the hole. Make sure it is seated all the way around the hole. STEP 18 STEP 19 Replace the batteries and the tail cap Replace the head (7).
  • Page 15 C & D F l a s h l i g h t 421-000-391 ML Rev.1 8/03...
  • Page 16 Mag® flashlights include Nos. 2,687,693; 2,074,795 and 1,808,998. ©2003 MAG INSTRUMENT, INC. The Mag-Lite® flashlight is covered by pending U.S. Patent Applications and one or more of U.S. Patent Nos. 4,286,311; 4,388,673; 5,260,858; 5,749,645; 6,196,698; 6,428,182; Des. 263,170 and by foreign patents.

This manual is also suitable for:

D cell

Table of Contents