
Related Manuals for MPPT SMPPT10D


Summary of Contents for MPPT SMPPT10D
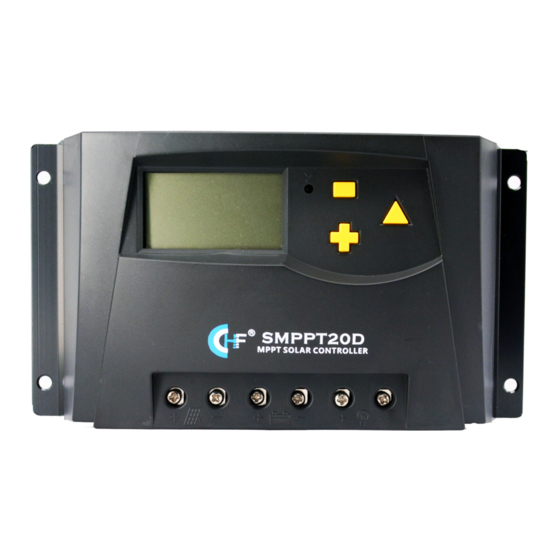
- Page 1 SMPPT Solar Charge Controller with Maximum Power Point Tracking 10A/20A/30A 12V/24V Installation & Operation Manual...
- Page 2 SMPPT Installation & Operation Manual Version 1.0...
- Page 3 Thank you very much for using our product! We will offer you the permanent and reliable service for your solar system! The manual gives important recommendations for installing and using the MPPT controller. Please read the manual carefully and thoroughly before using this product.
-
Page 4: Safety Instructions
When the circumstances change, the working point of solar panels deviate from the maximum power point, MCU will adjust the solar panels working point based on MPPT calculation to make the solar panels back to the maximum power point again(refer to Chapter 2.4 about MPPT technology introduction). - Page 5 The controller uses Buck conversion circuit and MCU technology to track the maximum power point to implement the maximum output power of solar panels in different illumination intensity and temperature. The MPPT algorithm increases efficiency of your PV system and decreases the quantity of solar panels.
- Page 6 SMPPT Installation & Operation Manual Version 1.0 battery and prevents battery from leaking gas, and this can increase the lifetime of battery. Float Charge: The battery is at saturation state, and the controller charges the battery at a trickle current to make the battery voltage fixed at the settled float charging voltage (this voltage has temperature compensation).
-
Page 7: Mppt Technology Instructions
Load key(Load key chapter 5.2.2). 2.4 MPPT technology Instructions Solar panels are nonlinear materials, and the output power is mainly affected by illumination intensity, solar panels temperature and load impedance. When the illumination intensity and solar panels temperature are fixed, the output power of solar panels is only affected by load impedance. - Page 8 Compare working point A & B, it is easy to find using MPPT controller can increase the using efficiency of solar panels. Compared to normal controller, MPPT controller can generate more power.
-
Page 9: Solar Modules Configuration
SMPPT Installation & Operation Manual Version 1.0 Figure 2-5: Voltage-Power Curve 3. PV System Planning Reference 3.1 System Voltage The common system voltage of solar system has 3 types: 12V, 24V and 48V. The higher the system voltage, the more power the system can handle. In reality application, user should consider the load power, and the voltage scope permitted by load, and then confirms which system voltage you should use. -
Page 10: Wire Sizing
SMPPT Installation & Operation Manual Version 1.0 Model Category Pmax Vpmax Ipmax Single STP140D-12/ Crystallin 140W 22.4V 8.33A 17.6V 7.95A e Silicon Module Thin-film MS140GG-02 140W 29.0V 7.12A 23.0V 6.52A Module Single STP190S-24/ Crystallin 190W 45.2V 5.65A 36.6V 5.2A e Silicon Module Thin-film NS-F130G5... -
Page 11: Over Current Protection
SMPPT Installation & Operation Manual Version 1.0 customer to control the maximum battery voltage loss under 1.5%, and control the maximum voltage loss of solar panels under 2.5%. The following is the cable length between controller and battery, and the suggested copper cables: Battery Voltage Loss Voltage Loss... -
Page 12: System Expansion
2. Place the controller in a dry environment. 3. A free space of at least 15cm on all side of the controller must be provided. 4. Mount the controller as close as possible to the batteries. 4.1 Dimensions Figure 4.1-1: Dimensions for SMPPT10D (Unit: mm) - Page 13 SMPPT Installation & Operation Manual Version 1.0 SMPPT10D dimensions(Figure 4.1-1): Mounting hole pitch: 60mm*169mm Mounting hole diameter: Ф4.2mm Height*Width*Thickness: 101.4mm*178mm*45.5mm Connecting terminals: Maximum 10mm² Figure 4.1-2: Dimensions for SMPPT20D (Unit: mm) SMPPT20D dimensions(Figure 4.1-2): Mounting hole pitch: 80mm*184mm Mounting hole diameter: Ф5mm...
-
Page 14: Connecting Diagram
SMPPT Installation & Operation Manual Version 1.0 Figure 4.1-3: Dimensions for SMPPT30D (Unit: mm) SMPPT30D dimensions(Figure 4.1-3): Mounting hole pitch: 98mm*177mm Mounting hole diameter: Ф5mm Height*Width*Thickness: 128mm*187mm*59mm Connecting terminals: Maximum 35mm² 4.2 Connecting Diagram... -
Page 15: Installation Process
SMPPT Installation & Operation Manual Version 1.0 Fuse ③ ① ② Figure 4-2: Connecting Diagram 4.3 Wiring A、 Choose the appropriate cables(fix the controller on the wall or other vertical plane). B、 Prepare cutting pliers, cross screwdriver and multi-meter, etc. 4.4 Installation Process Note: Please switch off the breakers of battery, solar panels array before installing the controller. - Page 16 SMPPT Installation & Operation Manual Version 1.0 (1) Connect the battery with the battery terminal on the controller by cables and fasten the screws. (2) Connect the load with the load terminal on the controller by cables and fasten the screws. (3) Connect the solar panels array with the solar panel terminal on controller by cables and fasten the screws.
-
Page 17: Internal Temperature
SMPPT Installation & Operation Manual Version 1.0 5.2.2 LCD Main Loop Interface Photo 5.2-2 1> Switching between interfaces is performed by short pressing . If there is no failure, interface presents. If there is failure, error code interface is presented automatically.(Failure is in section 6) 2>... -
Page 18: Parameters Setting
SMPPT Installation & Operation Manual Version 1.0 temperature by long pressing (>3S),and distinguished by h. 2> Environment temperature is for temperature compensation when charging. Internal temperature is for over-heat protection. 5.2.5 AH Statistics Photo 5.2-5 1> AH and KAH are indicated with Photo 5.2-5. 2>... -
Page 19: Battery Type
SMPPT Installation & Operation Manual Version 1.0 pressing ,and quit by long pressing . (Photo 5.2-6).A 15s absence of operation brings you to the main loop interface. 2> In loop interface, you can adjust parameters by long pressing (>3S )after you choose corresponding setting item(Photo 5.2-7,value flashes)Then modify value by short pressing . -
Page 20: Restore Factory Defaults
SMPPT Installation & Operation Manual Version 1.0 1> Load mode(see below table) Regular control mode Light control mode 0~13h Light control with switch-off point at night (0 ~ 13 hrs) Table 5.2-1 Photo 5.2-11 5.2.9 Restore factory defaults Photo 5.2-12 1>... -
Page 21: Common Faults And Remedies
SMPPT Installation & Operation Manual Version 1.0 and load switched off good. Make sure battery capacity is not too low. Make sure voltage of other battery charger connected to battery is not too high. When battery voltage is 0.5V lower than defined overvoltage protection point,... -
Page 22: Technical Data
SMPPT Installation & Operation Manual Version 1.0 7. Technical Data Model SMPPT10DU SMPPT20DU SMPPT30DU Maximum PV voltage Input Maximum 130W (12V), 260W (12V), 390W (12V), input power 260W (24V) 520W (24V) 780W (24V) System 12V (24V) 12V (24V) 12V (24V) voltage Maximum battery... - Page 23 SMPPT Installation & Operation Manual Version 1.0 load current ≤12mA ≤12mA ≤12mA consumption 3-stage 3-stage 3-stage Charging (MPPT, (MPPT, (MPPT, control mode Absorption, Absorption, Absorption, Float) Float) Float) 13.8V 13.8V Float charge 13.8V (27.6V) (27.6V) (27.6V) 14.4V 14.4V 14.4V (28.8V), Absorption (28.8V),...
-
Page 24: Quality Assurance
SMPPT Installation & Operation Manual Version 1.0 Storage -20 to +60 °C -20 to +60 °C -20 to +60 °C temperature 0 to 90%, no 0 to 90%, no 0 to 90%, no Humidity condensation condensation condensation 178x101X45.5 196x111x54 188*133*59 Dimensions Net weight 346g... - Page 25 SMPPT Installation & Operation Manual Version 1.0 8.2 If it is impossible to identify the using date of the controller, we would refer to the ex-work date, and prescribe 18 months as the warranty period. We need to charge beyond the warranty period.
Need help?
Do you have a question about the SMPPT10D and is the answer not in the manual?
Questions and answers