Table of Contents
Advertisement
Advertisement
Table of Contents

Subscribe to Our Youtube Channel
Related Manuals for CAS Scale CL5000-P


Summary of Contents for CAS Scale CL5000-P
-
Page 2: Table Of Contents
Table of Contents 1. GENERAL 1.1 Precautions 1.2 Introductions 1.3 Specifications 1.4 Name and Functions 1.5 Basic Set - Up 1.6 Symbols 1.7 Key Functions 1.8 Installation of the Label Roll 2. PROGRAMMING 2.1 PLU Programming 2.1.1 Create By-Weight PLU (Menu code 1120) 2.1.2 Create By-Count PLU (Menu code 1120) 2.1.3 Create By-PCS PLU (Menu code 1120) 2.1.4 Editing PLU (Menu code 1120) - Page 3 Table of Contents Table of Contents 2.2.14 New/Edit Sales Message (Menu code 1241) 2.4.7 Delete ALL (DC) (Menu code 1139) 2.2.15 List Sales Message (Menu code 1242) 2.5 Global Discount Programming 2.2.16 Delete Sales Message (Menu code 1243) 2.5.1 Global Discount (Menu code 1530) 2.2.17 Origin (Menu code 1250) 2.5.2 Priority Setting (Menu code 1531) 2.2.18 New/Edit Origin (Menu code 1251)
- Page 4 Table of Contents Table of Contents 2.11.10. Configuration (Menu Code 1431) 2.14.9 List User (Menu code 1853) 2.11.11. Edit Scroll Message (Menu Code 1432) 2.14.10 Delete User (Menu code 1854) 2.11.12. List Scroll Message (Menu Code 1433) 2.14.11 Config Permission (Menu code 1855) 2.11.13 Currency (Menu code 1440) 2.14.12 Clerk Key ( Menu code 1856) 2.11.14.
- Page 5 Table of Contents Table of Contents 3.3.5 Successive Tare 3.20 Sales Operation Control Parameters 3.3.6 Tare Override 3.20.1 Fixed Weight 3.4 Calling Up a PLU 3.20.2 Prepack Without Report 3.4.1 Using Numeric Key 4. Appendix 3.4.2 Using Speed Key 4.1 Label Format 3.5 Override (FOR key) 4.2 Fixed Label Format Sample 3.5.1 By-Weight PLU...
-
Page 6: Precautions
PRECAUTIONS Warning Attention Precautions when installing the scale. To ensure that you get the most from your Make sure to plug your scal into the proper power outlet. For maximum scale, please follow these instruction. performance, plug into a power outlet 30 minutes before the usage for warm up. Do not disassemble the Do not overload beyond the Scale must be grounded to... -
Page 7: Introductions
INTRODUCTIONS SPECIFICATIONS Thank you for purchasing the CAS CL5000 price computing electronic Max. Capacity 6/15kg 15/30kg 15/30 lb 30/60 lb printing scale. We have designed this equipment with many advanced features, high quality construction, and user-friendly menu driven Interval 2/5g 5/10g 0.005/0.01 lb 0.01/0.02 lb... -
Page 8: Name And Functions
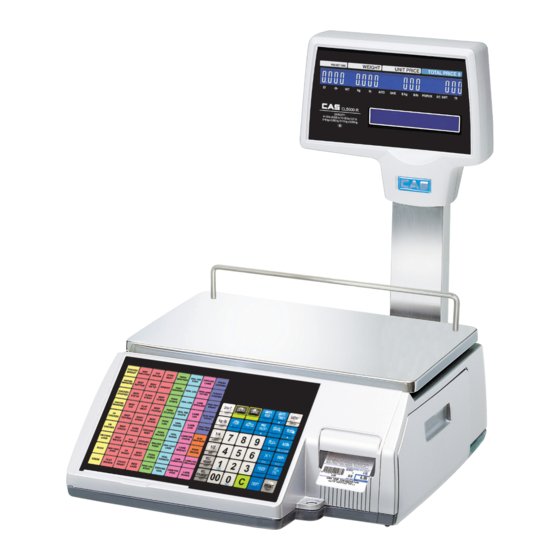
Operating Temp. -10°C ~ 40°C (14°F ~ 104°F) NAME AND FUNCTIONS Power AC 100~240V 50/60Hz 1.5A Number Range OVERALL VIEW 3000 1~99999 Ingredient 510 character 1~999 User Defined Barcode Format 1~99 Department 1~99 Tax Type Group 1~99 Clerk 1~31 Discount 1~99 Origin 1~499... - Page 9 DISPLAY KEYBOARD...
-
Page 10: Basic Set - Up
Basic set - up B,P,R type H - type tray NOTE: Push down ball connection... -
Page 11: Symbols
KEY FUNCTIONS SYMBOLS Numeric keys. Used to enter pricing, qty, count, tare, etc. SYMBOLS DESCRIPTION Stable weight indicator Double zero key. Zero weight indicator Net weight indicator Clear key. Used to clear erroneous entries and error conditions. AUTO Print Mode indicator SAVE Auto clearing status indicator Re-Zero key. - Page 12 ADD-Up key. This key when used in conjunction with ST/TTL key To change the price of PLU called-up to negative price. allows you print a customer-total label as well as individual transaction labels. Multi-Label key. Use this key to print multiple sales of the same Change Fixed Price Called PLU transaction.
-
Page 13: Installation Of The Label Roll
Installation of the Label Roll Label Specifications Indirect Clerk Call Outer diameter of roll : 100mm Inner diameter of roll : 40mm Width of receipt roll : 40, 50, 60mm Alpha keys. Used to type text data. Width of label roll : 60mm(MAX) Used to type $ For future Backspace key. - Page 14 To install the label roll at ANY time you must follow the Program Mode Menu Tree (Menu code : 1000) directions in this section: Press the FEED key. two or times forauto Label adjustment *If label position is not correct, you have to check follows : a, Label size.(Label setting menu) b.
- Page 16 You can set 47 items for a PLU as below table and if you do not want to use some items, you can prohibit those items in menu code:1144. Item Description Department Department No. PLU No PLU No. PLU Type Select PLU type among By Weight, By Count or By-PCS Name Enter name 1 of item.
-
Page 17: Create By-Weight Plu (Menu Code
Item Description Item Description You can enter tare weight manually or enter No. of tare data. # of Link PLU (0~2) Enter the number of linked PLU. Tare / Tare No. (By-weight PLU) Link PLU1 Dept. (0~99) Enter PLU1 department No. 0~99.99 You can enter tare weight as percentage of item. - Page 18 3. Enter PLU Name 1 8. Select Origin If you do not want to use origin, enter 0 EX) “BEEF” EX) 49. China 4. Enter PLU Name 2 9. Enter Fixed Weight The weight of an item is fixed. EX) “Sirloin” If you do not want to use, enter 0.
- Page 19 20. Produced Date 14. Special Price Special price key must define first 0 : No print on meun code 1880 1 : Today 2 : Yesterday EX) Price = $10.00 15. Tax No. 21. Packed Date May be changed by setting Menu code 0 : Today 1541.
- Page 20 30. Sales Massage No. If you do not want to use, enter 0 Note: You can preset sales massage at meny code (1241) EX) Sales Message 1 31. Reference PLU Department If you do not want to use, enter 0 EX) Do not use Reference PLU Department 26.
-
Page 21: Create By-Count Plu (Menu Code 1120)
36. Link PLU1 Dept 2. Select PLU Type If you do not want to use, enter 0 1. By Weight 2. By Count EX) Do not use Link PLU1 Dept 3. By PCS EX) BY-Count Item 37. Link PLU1 No. 3. -
Page 22: Create By-Pcs Plu (Menu Code 1120)
2.1.3 Create By-PCS PLU (Menu code 1120) 2.1.4 Editing PLU (Menu code 1120) Showing only the different pars of PLU field You can call up existing PLU information for edit. By-PCS PLU is used depending on the Parameter 593. You can press the SAVE key at anytime to save the current PLU data 2.1.5 Sample Printing (Menu code 1170) and if you want to exit without saving, press the ESC key. -
Page 23: Copying Plu (Menu Code 1141)
2.1.7 Copying PLU (Menu code 1141) 2.1.9 Moving PLU (Menu code 1143) If there is a similar PLU, you can copy it. All the PLU information will move with commend (discount, Tax, barcode type, etc) 1. Select Source Enter the Department No. and PLU No. 1. -
Page 24: Plu Sale Count (Menu Code 1145)
2.1.11 PLU Sale Count (Menu code 1145) Programming PLU Data Table I You can count each PLU sale and also you can clear this count. As Department, Group and PLU are organized as following figure. This is important to understand this structure to maximize the CL5000’s sophisticate This sale count is used for serial number features (label formats, XZ Reports, TAX type, etc) printing of... -
Page 25: New/Edit Department (Menu Code 1211)
2.2.2 New/Edit Department (Menu code 1211) 2.2.4 Delete Department (Menu code 1213) You can press the SAVE key at anytime to save the current data and if 1. Enter Department number you want to exit without saving, press the ESC key. EX) Delete department 2 1. -
Page 26: List Group (Menu Code 1222)
2.2.7 List Group (Menu code 1222) 2.2.10 New/Edit Tax Rate (Menu code 1231) 1. Set the group range that you wish to 1. Enter tax number TAX number is available 1 to 9 EX) 1~10 EX) TAX No. = 1 If you want to print list, press the TEST key. -
Page 27: List Tax Rate (Menu Code 1232)
2.2.11 List Tax Rate (Menu code 1232) 2.2.14 New/Edit Sales Message (Menu code 1241) You can press the SAVE key at anytime to save the current data and if 1. Set the range of tax rate you want to exit without saving, press the ESC key. EX) 1~9 1. -
Page 28: Delete Sales Message (Menu Code 1243)
2.2.19 List Origin (Menu code 1252) 2.2.16 Delete Sales Message (Menu code 1243) 1. Set the List Range 1. Enter Message No. Set the range of origin that you wish to EX) Delete message 1. check EX) 1~20 If you want to print list, press the TEST key. - Page 29 The following defines the format characters for Barcode Formats : 2. Barcode Description (Example EAN13 ) EX) Barcode Description = EAN13-1 Form No. Format Form No. Format User Defined Barcode DIIIIIPPPPPPC DDIIIIIPPPPPC DIIIIIIPPPPPC 3. Barcode Type DDIIIIPPPPPPC Reference following table. Barcode format symbol EX) Barcode Type = 1.
-
Page 30: List Barcode (Menu Code 1262)
2.2.25 Tare (Menu code 1270) Symbol Description %: print next fixed character* numbers If Parameter 584 option (Use Tare No.) is “Yes” You can set tare number when you create PLU. If it is set to “No” you have to program tare weight again. -
Page 31: List Tare (Menu Code 1272)
2.2.29 Tare Key (Menu code 1274) 4. Enter Tare Value EX) Tare = 0.010 Kg You can assign Tare Key. There are 9 Tare keys and you have to set these keys in menu (1880 Key define). See Chapter 2.14.22 Note: can not set double click key 5. -
Page 32: List Unit Symbol (Menu Code 1282)
2. Enter unit symbol Programming PLU Data Table II EX) Symbol = TH If you want to enter special symbol, press the CHAR key and enter the code value. 2.3.1 Ingredient (Menu code 1310) (See ASCII code table on chapter 4.4) 3. -
Page 33: List Ingredient (Menu Code 1312)
2.3.3 List Ingredient (Menu code 1312) Nutrition facts table Nutrition Facts Unit Calories 1. Set the list range Calories From Fat EX) 1~10 Total Fat If you want to print list, press the TEST Saturated Fat key. Cholesterol Sodium Total Carbohydrates Dietary Fibers Sugars 2.3.4 Delete Ingredient (Menu code 1313) - Page 34 7. Total Fat 2. Enter description EX) BEEF STEW EX) Total fat = 14 g 8. Saturated fat EX) Saturated fat = 7 g 3. Enter Serving Size EX) Serving size = 1CUP 9. Cholesterol EX) Cholesterol = 40 mg 4.
-
Page 35: List Nutrition Facts (Menu Code 1322)
13. Sugars 19. Etc EX) Sugars = 3 g EX) Etc = 2 14. Protein 20. Exit menu If you want to exit, press ESC key. EX) Protein = 11 g 2.3.7 List Nutrition Facts (Menu code 1322 ) 15. Vitamin A 1. -
Page 36: Discount Programming
Discount Type Discount Programming Type Description - By Weight PLU: Set the discount amount on unit price, 2.4.1 Discount (Menu code 1130) depending on weight. Unit Price Discount - By Count/PCS PLU: Set the discount amount on unit price, depending on number of items. - By Weight PLU: set discount % of unit price, You can set more easy and detailed sales promotion by CL - works (PC depending on weight. -
Page 37: List Discount (Menu Code 1132)
5. Discount Condition 2 : (Set date and 3. Enter discount value time) Refer to below table. If you set date and time to 0, it means Target unit is different depending on the discount all the time PLU type. This is By Weight PLU EX) Start Date: 04-07-01 therefore this unit is weight. -
Page 38: Delete Discount (Menu Code 1133)
2.4.4 Delete Discount (Menu code 1133) 2.4.7 Delete ALL (DC) (Menu code 1139) There are three ways to delete Discount. Simply enter the number that EX) Press 3 key to select Delete all(DC) you wish to delete. 2.4.5 Delete by PLU No. (DC) (Menu code 1137) EX) Press 1 key to select Delete by PLU 1. -
Page 39: Global Discount Programming
2.5.3 Weight/Count/PCS Discount (Menu code 1532/1533/1534) Global Discount Programming If you want to apply same discount regardless of PLU, you can set discount information in menu code, 1532, 1533 and 1544. Refer to Discount Programming on chapter 2.4.2 2.5.1 Global Discount (Menu code 1530) Global Discount condition by weight Item (Menu code 1532) You can apply same discount regardless of PLU. -
Page 40: Speed Key Setting
Traceability Speed Key Setting This menu is to set speed keys , short-cut keys, for most frequently used 2.7.1 Traceability (Menu code 1330) PLUs to simply call up them. You can program up to 5 speed key set. Remember that there is a SHIFT (double click) key that allows you to double- use the Speed Keys. -
Page 41: List Traceability (Menu Code 1332)
2.7.4 Delete Traceability (Menu code 1333) 4. Bred in country number EX) Bred in country No. = 95. KOREA 1. Enter traceability number to delete EX) Delete traceability no. 2 5. Slaughter house number EX) Slaughter house No. = 12. BILLY S 6. -
Page 42: Country Programming
2.8.3 List Country (Menu code 1342) Country Programming 1. Set the list range 2.8.1 Country (Menu code 1340) Set the list range to check EX) 1~10 If you want to print list, press the TEST You can use country data when you program traceability. key. -
Page 43: Programming Slaughter House
4. Exit menu If you want to exit, press ESC key. Programming Slaughter House 2.9.3 List Slaughter House (Menu code 1352) 2.9.1 Slaughter House (Menu code 1350) 1. Set the list range You can use slaughter house data when you program traceability. Enter list range to check EX) 1~10 2.9.2 New/Edit Slaughter House (Menu code 1351) -
Page 44: Programming Cutting Hall
4. Exit menu If you want to exit, press ESC key. Programming Cutting Hall 2.10.3 List Cutting Hall (Menu code 1362) 2.10.1 Cutting Hall (Menu code 1360) 1. Set the list range You can use this cutting hall data when you program traceability. Set the list range to check EX) 1~10 2.10.2 New/Edit Cutting Hall (Menu code 1361) -
Page 45: Programming Store Data
4. Press PRINT key and user may go back to STORE main menu by using Programming Store Data ESC key. 2.11.3 List Store (Menu code 1412) This chapter explains how to access, program STORE data table (Price Look Up) in CL5000 series. 2.11.1 Store Data (Menu code 1410) This menu shows the list of STORE saved. -
Page 46: Customer (Menu Code 1420)
2.11.5 Customer (Menu code 1420) 4. Press “PRINT” key, to enter the information. User may go back to main CUSTOMER menu by pressing “X/ESC” key. This section shows how to register customers account and their information. Customer information is to manage the specific customer s 2.11.7 List Customer (Menu code 1422) account receivable. -
Page 47: Scroll Message (Menu Code 1430)
2.11.9 Scroll Message (Menu code 1430) 4. Set date of scroll message If you set Y [1] at Date Setting, you can go to next screen to set day of week. (For example, if you set M to 0, scroll This function is to set the scrolling advertisement on LCD Display. -
Page 48: New/Edit Currency (Menu Code 1441)
2.11.14. New/Edit Currency (Menu Code 1441) 6. Price Decimal Digit Enter the number of decimal digit EX) Price Decimal point digit = 2 1. Numbering Currency You can save up to 4 different currencies by numbering 1~4. Printing formats of currency symbol EX) Currency No. -
Page 49: Delete Currency (Menu Code 1443)
2.11.16 Delete Currency (Menu code 1443) Programming Global Setting 1. Currency number to delete 2.12.1 Global Label Format (Menu code 1510) EX) Delete Currency no. 2 Pre-programmed fixed label formats are from #1 to #30 and these formats cannot be modified. Label format #51~#70 are free formats that users may modify at their needs. -
Page 50: Barcode Format (Menu Code 1520)
4. Set total label number 1. Set Global Barcode Set label format of total label for Add-Up If you use global barcode, enter 1. If not, sales. enter 0. If you set it to 1, barcode number is EX) Total label No. = 10 , TC6060- ignored which is set in PLU programming 0002(60x60) EX) Use global barcode... -
Page 51: Printing Programming
6. Set barcode number for Misc. weight item Printing Programming EX) Misc. weight barcode No. = 2 This chapter explains how to set printing-related environments, such as print label item, markdown, Hardware, serial number format, and ticket. 2.13.1 Printing (Menu code 1700) 7. -
Page 52: Markdown (Menu Code 1720)
1. If you do not want to print, enter 0(N), 2.13.3 Markdown (Menu code 1720) if you want to print, enter 1(Y). Markdown is to select “Yes” or “No” to print both of original and discount information on the label. There are 4 selectable sub-menus on label. Markdown Sub-menu Print Label Item Sub-menu... -
Page 53: Print Mode (Menu Code 1731)
1. Press “3” to get into H/W setting 2.13.5 Print Mode (Menu code 1731) mode on Print Menu. Select “0” for Label Mode, “1” for Ticket Mode or “2” for Continuous Label Mode. Printer Hardware Sub-Menu Press “PRINT” to save. Sub-menu Description Print Mode... -
Page 54: Sensor & Motor (Menu Code 1734)
2.13.11 Label Preprint (Menu code 1737) 2.13.8 Sensor & Motor (Menu code 1734) Enter appropriate values or “Yes” or “No” for “PRINT METHOD TYPE”, Enter “Y(Yes)” or “N(No)” to select “ACTIVE PEEL-OFF”, “ACTIVE REWIND MOTOR”, and “LABEL Preprint mode and any value of the preprint PAPER”. -
Page 55: Add-Up Total (Menu Code 1750)
Press “0” for “No” or “1” for “Yes” in Meaning [ ]. I : Item Code EX) Print Total Label - Yes N : PLU Number Print Item Label - No P : Price U : Unit Price W : Weight Press “PRINT”... -
Page 56: Select List Item (Menu Code 1762)
2.13.16 Select List Item (Menu code 1762) Ticket Format Before setting list item, you have to set “Print List” to “Y” in menu 1761. Press “2” to get into SELECT LIST ITEM menu. Select “Yes” or “No” for “Print Store SELECT LIST ITEM (1/3) Prt. -
Page 57: Programming Scale Configuration
Selecting one of following sale modes, user may select an one-stop setting for Clerk, Operation, Print, and Prepack mode. Programming Scale Configuration MODE Clerk Mode Operation Mode Print Mode Prepack Mode 1. REG: Ticket & Floating Floating Clerk Regist Ticket 2.14.1. -
Page 58: Department (Menu Code 1830)
1. Select “DEPARTMENT No.” and Clerk Modes “STORE ID”. Clerk Modes Description EX) DEPARTMENT No.= 2 (Grocery) No Clerk Sales clerk do not log in and makes sales using PRINT key. Standard Clerk Sales clerk can make sales when he/she logs in. Floating Clerk Plural sales clerks can make sales using own clerk ID. -
Page 59: User/ Security Configuration (Menu Code 1850)
2.14.6 User/ Security Configuration (Menu code 1850) Clerk level: This value can be from 0 to 3. This level is related to menu 1855(Config permission). If clerk 2 is set to level 2, this clerk can use the function which is set to level 1, 2 in menu 1855 and cannot use the function which is set to level 3. -
Page 60: List User (Menu Code 1853)
Setting Configuration Permission 2.14.9 List User (Menu code 1853) 1. Enter start number and end number to check To list all, press the SAVE key EX) 1~10 2.14.10 Delete User (Menu code 1854) 1. Enter clerk number to delete EX) Delete clerk no. 2 2.14.11 Config Permission (Menu code 1855) Permission level is related to clerk level and if the clerk level is lower than permission level, this clerk cannot access that function.
Need help?
Do you have a question about the CL5000-P and is the answer not in the manual?
Questions and answers