Advertisement
Advertisement
Table of Contents

Related Manuals for Btwin ORIGINAL 900E


Summary of Contents for Btwin ORIGINAL 900E
- Page 1 EN - User manual ORIGINAL 900E...
- Page 3 Important, this instruction manual only applies to the electrical characteristics of your bicycle. You should refer to the B’TWIN user manuals common to all our bicycles that ac- company this document and are also available on our website www.btwin.com or on request in our DECATHLON stores.
- Page 4 10 best practices for getting the most out of your electrically-assisted bicycle. 3,5 - 4,5 bar 2. In order to improve battery life and efficiency, pump 1. You need to pedal to go further the tyres to between 3.5 and 5 bar <...
-
Page 5: Table Of Contents
TABLE OF CONTENTS PRODUCT DESCRIPTION ................6 Electrically-assisted bike technical features ..............6 General operation of the electrical assistance ..............6 SCREEN AND CONTROL ELEMENTS ............7 Screen data and function ....................7 BATTERY AND CHARGER ................8 Precautions for use ......................9 Installing and removing the battery.................. -
Page 6: Product Description
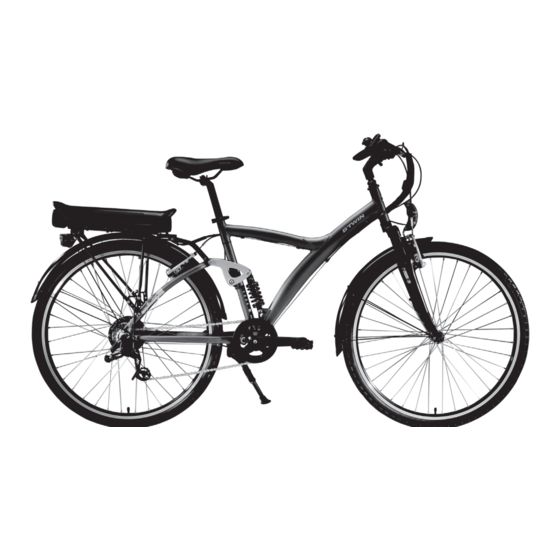
PRODUCT DESCRIPTION Electrically-assisted bike technical features Rear LED light Battery and controller Beam + connectors: brakes / control screen Control screen Braking detector Front LED light Motor wiring harness Motor Pedalling detector General operation of the electrical assistance The electrically-assisted bike can be used with or without assistance by pressing the ON/OFF button. Always lock the battery with the key when in use. -
Page 7: Screen And Control Elements
SCREEN AND CONTROL ELEMENTS Screen data and function Assistance mode (0-1-2-3): «0» no assistance. «1» is the default assistance mode. Change from one mode to the next by briefly pressing on Each mode corresponds to the maximum speeds of assistance defined below: Mode Maximum assistance speeds*** 0 km/h... -
Page 8: Battery And Charger
Units Setting parameters: Hold to enter into the settings. Press the buttons to select the desired value for each parameter. Push the button to go to the next parameter. Unit: Km or miles Blt: Adjusting the brightness (from 1 to 8) Oft: Selection of the time before the screen is switched to standby (from 0 to 60 parameters minutes) -
Page 9: Precautions For Use
Precautions for use Do not expose to temperatures exceeding 50°C. +50° < +10°C +10°C / +50°C > +50°C Storage conditions: It is essential to store the battery charged and in a dry, cool place (between +10°C and +25°C), out of sunlight. +10°C <... - Page 10 Never permit children to play with or handle the battery. Do not immerse in water. Do not clean using a high-pressure washer. Rain resistant. x : 1..500 Your battery can be completely charged and drained 500 times. Hereafter, the capacity and autonomy of the battery is reduced. Always make sure that the battery and charger are compatible.
-
Page 11: Installing And Removing The Battery
Installing and removing the battery Insertion: Prior to inserting your battery into its slot, unlock it using the key and check that there are no foreign objects or matter in the battery sheath. Removal: Prior to removing your battery from its slot, unlock it using the key. -
Page 12: Recharging The Battery
Recharging the Battery Orange LED when charging starts. 6h30 Green LED when charging is complete. Flashing Orange LED, problem during charging, contact after-sales service. Maintenance and lifetime (warranty conditions) Do not store the discharged battery (1 flashing blue LED) to avoid deep discharge, which may cause it to malfunction. - Page 13 Battery self-diagnostic 6 months 11% - 20% 21% - 40% 41% - 60% 61% - 80% 81% - 100% Battery recharge is needed urgently <10% Undervoltage protection temperature protection short circuit protection Return your battery to your af - ter-sales service other protection LED off LED on...
- Page 14 Putting the battery into hibernation mode The battery can be put into hibernation in case of prolonged storage (maximum 1 year). Press for 10 seconds on the button of the battery until the battery LEDs go out. The battery is now in hibernation mode. Charge the battery with its charger at a power socket to awaken it.
-
Page 15: Additional Precautions For Use
Additional precautions for use Always carry out maintenance operations in sufficient light. Warning, in the event of wheel removal, you must ensure the direction of rotation of your wheel is correct. Before each use you must make sure that your brakes and electric system are working properly The weight, power, manufacturing year and maximum speed are indi- cated on your bicycle’s frame. -
Page 16: Maintenance
The bicycle must be parked with its kickstand on flat, stable ground or using a parking device. Maintenance Warning - the maintenance of electrical components requires special skills and is not carried in stores but in Decathlon regional workshops and can take several days. All cleaning and electrical or mechanical maintenance must be carried out with the power switched off and the battery removed from the bike! Maintenance operations specific to the electric system must be perfor-... -
Page 17: Error Code Definition
Prohibited: cleaning using a high-pressure jet. Not recommended: cleaning under running water. Recommended: cleaning using a damp sponge. The rims are subject to wear which must be checked to ensure they are intact. The motorised wheel is also subject to higher stress than a standard bike wheel, and although it is reinforced, it is possible that spokes may break. - Page 18 Battery overheating Appointment at your Decathlon regional workshop to repair your bike Motor overheating Checks that the motor connector is correctly inserted Battery / controller communication Appointment at your Decathlon regional error workshop to repair your bike Bad connection between the Check that all connectors are pressed in properly control screen and the controller Cable accessories connector...
-
Page 19: Contents Of The Commercial Warranty For Your Electri- Cally-Assisted Bike
DECATHLON store loyalty card and register his/her purchase on it at the time of checkout, or complete the warranty certificate available online on the www.btwin.com site within one month of the purchase date. During this re- gistration, the buyer must provide the following information: last name, first name, purchase date, e-mail address, and bicycle tracking number.
Need help?
Do you have a question about the ORIGINAL 900E and is the answer not in the manual?
Questions and answers