Table of Contents
Advertisement
Customer service
In case of problems you cannot solve
yourself, please contact your supplier
our the ABK InnoVent service
department
All rights reserved [Rev.110610] Art.nr. KDI0100004
Plakhorstweg 12
NL-7008 AT DOETINCHEM
t: +31 [0]314-320910
f: +31 [0]314-320919
e: info@abk-innovent.nl
w: www.abk-innovent.nl
Advertisement
Table of Contents

Related Manuals for ABK i-Cooking

Summary of Contents for ABK i-Cooking
-
Page 1: Customer Service
Customer service In case of problems you cannot solve yourself, please contact your supplier our the ABK InnoVent service department Plakhorstweg 12 NL-7008 AT DOETINCHEM t: +31 [0]314-320910 f: +31 [0]314-320919 e: info@abk-innovent.nl w: www.abk-innovent.nl All rights reserved [Rev.110610] Art.nr. KDI0100004... - Page 2 USER | INSTRUCTION MANUAL i-Cooking induction Read this manual carefully before installing and using your i-Cooking induction product, for your own safety and to prevent any unnecessary damage to the product and/or your kitchen.
- Page 3 EN 2...
-
Page 4: Table Of Contents
Contents Chapter 1 1.1 Introduction 1.2 Description 1.3 Components Chapter 2 2.1 Safety regulations 2.2 Safety instructions Chapter 3 3.1 Induction technology 3.2 Using the appliance 3.3 Display 3.4 Cooking functions 3.5 Pans Chapter 4 4.1 Maintenance 4.2 Helpful tips 4.3 Troubleshooter Chapter 5 5.1 Electrical installation... -
Page 5: Introduction
It will function perfectly for worktops. many years if maintained carefully and used properly. i-Cooking induction is a personal cooking system. You can determine the number, This i-Cooking appliance is designed and position and type of inducion zones, to suitable for private use only, under normal, your personal preference. -
Page 6: Components
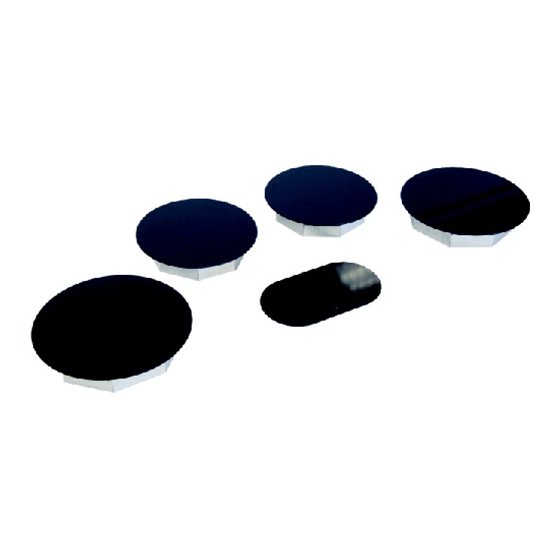
1.3 Components i-Cooking induction example Power zone | boost 3100W Standard zone | boost 1770W Control panel | touch control Power unit | loaded rate 3600W to 7200W [2 separate branch circuits] EN 5 Components... - Page 7 [700/1000mm long] cable. The zones and control panel can be flush or top mounted A silicone material must be used to guarantee a waterproof fixation.
-
Page 8: Safety Regulations
The i-Cooking product meets all current Make sure that children are not able to pull safety instructions. By using it pans from the i-Cooking product, while or incorrectly, a risk of personal or right after using it. At your local specialist, material injury may arise. - Page 9 If the grease or oil should catch fire 2.2 Using the appliance safely unexpectedly, never use water to extinct the flames! Extinct the flames with an The i-Cooking product becomes very hot appropriate cover, damp cloth or and also remains hot a considerable time something similar.
- Page 10 If the i-Cooking appliance is or was used properly. intensively, we advise to ventilate the room extra, or switch the kitchen If the i-Cooking appliance should become extractor in a higher motor position. defective within the guaranteed period, it may only be repaired by ABK InnoVent, If a power socket is near the appliance, otherwise the guarantee expires.Niet...
-
Page 11: Induction Technology
Chapter 3 3.1 Induction technology 3.2 Using the appliance Induction cooking is considered, just The i-Cooking appliance is operated by an like gas cooking, as an energy friendly electronic touch control panel. By way of cooking. It is based on the... - Page 12 3.3 Symbolism control panel On | off 0-9 Power adjuster [slider] Pan detector[no suitable or too small pan] Automatic cooking Error | electronic failure Rest warmth indicator Power booster Lock Warming function [70°C] Pause position Touch control display [varies per model EN 11 Use...
-
Page 13: Display
3.4.4 Rest warmth indication 3.4 Cooking functions After use of the cookingzone, the surface will remain hot for some time. After 3.4.1 Start-stop switching off the zone or the appliance, in To start, push the on/off button. On the the display the letter ”H“ lights up for some display the ”0"... - Page 14 3.4.6 Individual zone timer 3.4.7 Timer The timer enables you to simultaneously Additionally to the individual zone timer set an individual timing on each of the 3 or you can also set a separate timer. 4 zones [from 0 to 99 minutes] Follow the above steps, but WITHOUT selecting a cooking zone [skip steps 2 and Example: 16 minutes on power 7.
- Page 15 3.4.9 Pause 3.4.12 Lock With this function, all current cooking The prevent unwanted switching on of the settings are temporarily interrupted. Press zones, for example while cleaning, the the pause symbol for app. 2 seconds. To control panel can be locked, with continue, press again for app.
-
Page 16: Pans
Chapter 4 3.5 Pans 4.1 Maintenance If the pan diameter is too large, this will Clean the appliance after each use and rub easier cause damages to your worktop. it dry again. Make sure that the The manufacturer cannot be held liable for components are cooled down sufficiently such damages. -
Page 17: Helpful Tips
One or more zones have been switched- 4.2 Helpful tips The safety system may have interefered Make sure that the pans are positioned in because: the middel of the zone while cooking, -you forgot to switch-off the cooking zone. because of the automatic pan detection -one or more switches are covered. -
Page 18: Electrical Installation
Chapter 5 Rated load: 5.1 Electrical installation See type plate on your appliance. The i-Cooking appliance may only be Connection: connected to an effectively grounded AC 230V | 50 Hz power socket. This power socket must always remain freely accessible for Fuse: possible servicing purposes. - Page 19 1. Carefully unpack all components and 7. Do not use extension cables to check them on possible damage. connect the appliance. 2. Before putting the appliance into use, 8. This appliance may not be placed it must be fully finished and installed in above a dishwasher or tumble dryer: the a kitchen environment and in a suitable steam may damage the electrical...
- Page 20 Make sure during installation and use, that there is no tensile stress on components and wires. The required wiring diagram are printed on the stickers on both the wires as the power unit. Installation to the electrical network must be done with earthed power plugs. A fuse must always be placed between 5 - 6 - 7 the appliance and the electrical network...
-
Page 21: Installation
5.2 Installation Making the appliance tension free If the appliance must be made electrical tension free, do as follows [depending on the situation]: 1. Fuse Unscrew the fuse and remove it from the container. 2. Fuse machine Press the [red] test button untill the middle [black] button pops out. -
Page 22: Configuration
C. Release all switches and now press the 5.3 Configuration on/off switch during several seconds, unless blinking ”E“ codes appear. Before the first use, the controls of the D. Wait until the “E“ codes stop blinking. appliance must be configurated. In this After a few seconds the ”E“... -
Page 23: Ce-Declaration
Plakhorstweg 12 NL-7008 AT DOETINCHEM NETHERLANDS Hereby declares that the i-Cooking induction appliance: is in conformity with all relevant provisions of the Low Tension Council Directive 2006-95-EC, according to the most recent version. is in conformity with all relevant provisions of the EMC Council Directive 2004-108-EC, according to the most recent version. - Page 24 Notes EN 23 Notes...
Need help?
Do you have a question about the i-Cooking and is the answer not in the manual?
Questions and answers