Table of Contents
Advertisement
Advertisement
Table of Contents

Subscribe to Our Youtube Channel
Related Manuals for Nisca PR-C201


Summary of Contents for Nisca PR-C201
- Page 1 Operation Guide...
-
Page 2: Easy Operation
Features of the card printer PR-C201 Easy Card Loading Thanks to the Multifunctional Card Case, it is possible to feed cards without detaching the Card Case. (→ p10) Strengthened Security • You can anchor the printer with a cable using the Security Cable Slot. (→ p53) •... -
Page 3: Table Of Contents
Contents Contents Operating the Printer Safely ..................1 Regulations for this product FCC Regulations.............. 3 Part Names and Descriptions..................4 Front Side of the Printer....................4 Inside the Top Cover ..................... 5 Rear Side of the Printer ....................6 Front Cover ........................7 Operation Panel ...................... - Page 4 Full Color Card Printer Adjusting the contour level ................37 Adjusting the hue ..................38 Setting the Type of Ink Ribbon or Transfer Film to Use..........39 Notification of Time for Ink Ribbon and Transfer Film Replacement ......41 Setting the Types of Card to Use ................42 Adjusting the Feed Gate Depending on Card Thickness......
-
Page 5: Operating The Printer Safely
Operating the Printer Safely Operating the Printer Safely The following precautions must be observed to assure safe operation of the printer. Also, do not do anything that is not described in this manual. Doing so may cause an unexpected accident. Failure to observe the following items while using the printer may cause fire, electric shock or other unexpected accident. - Page 6 Full Color Card Printer The lower part of the Top Cover, the printer internal heat roller section, High Temperature and the thermal head section get Warning Label very hot. Ensure you do not touch these three locations. Heat Roller Section Thermal Head Section Failure to observe the following items while using the printer may cause injury or a malfunction.
-
Page 7: Regulations For This Product Fcc Regulations
Operating the Printer Safely Under the following conditions images on cards may deteriorate or cards may warp after printing. The surface of the card is in contact for an extended period of time with a vinyl card holder or synthetic leather or other material that contains plasticizer. -
Page 8: Part Names And Descriptions
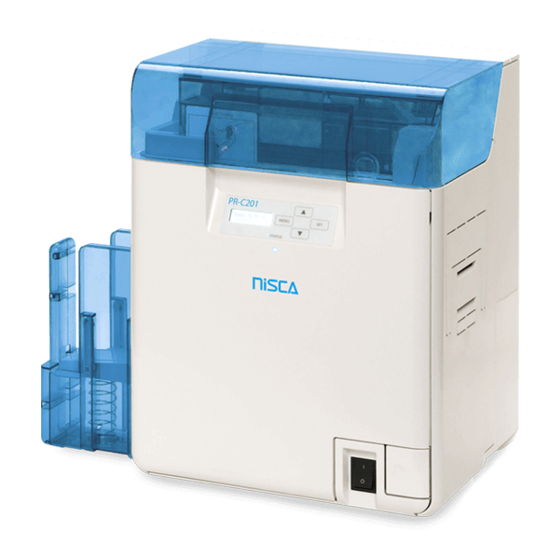
Full Color Card Printer Part Names and Descriptions Front Side of the Printer a Top Cover e Power Switch Open when loading cards or cleaning the Turns the power on and off. feeding roller. →See "Turning On and Off the Printer" on page 9 for instructions on turning the power on and off. -
Page 9: Inside The Top Cover
Part Names and Descriptions Inside the Top Cover Interior of the Top Cover. a Card Case c Top Cover Up to 250 cards can be loaded at one time. Open when cards are jammed or similar. You can adjust the gate gap to match the →See "When a Card is Jammed..."... -
Page 10: Rear Side Of The Printer
Full Color Card Printer Rear Side of the Printer (OPTION) (PC) (10/100) RS-232C(PC) RS-232C(OPTION) a Card Ejection Slot (Right) e Security Cable Slot Ejects correctly printed cards and cards with Use the Security Cable Slot to prevent theft of errors. the printer. -
Page 11: Front Cover
Part Names and Descriptions Front Cover Interior of the Front Cover. a Card Feeding Knob e Reverse Knob Rotating the dial to the left or right ejects cards Rotate the knob to the left to change the jammed in the secondary transfer section from direction of the cards in the reverse section. -
Page 12: Operation Panel
Full Color Card Printer Operation Panel Ready to Print a MENU Key d LED Indicator Switches between Normal Mode and User This indicator is lit blue depending on the status Mode. In User Mode, it is used to go up one of the printer. -
Page 13: Basic Card Printing Methods
Basic Card Printing Methods Basic Card Printing Methods This section explains the basic flow of operations, from turning on the power through printing a card. Turning On and Off the Printer Turn on the printer before starting to print. Before turning on the power, make sure the following preparations are complete: •... -
Page 14: Loading Cards
Full Color Card Printer Loading Cards Cards can be loaded in two ways: using the card retainer, and using the card feeding slot. The Card Retainer can be loaded with a large quantity of cards, making it useful for mass printing. Use the Card Feeding Slot to manually load cards when you want to print only 1 particular card or to print many types of cards. - Page 15 Basic Card Printing Methods Pull the card retainer, and load cards. • Hold the card retainer lever with your fingers, and pull it right out. • Load the card case with the printing side (front surface) to the left. • When loading the cards, be sure to hold their edges, and never touch the front or rear printing sides. Return the card retainer, and close the Card Case cover.
-
Page 16: Manually Loading Cards One By One
Full Color Card Printer Manually Loading Cards One by One Open the Top Cover. Open the Card Case, and insert cards into the Card Feeding Slot. • Pull the lock, and open the Card Case lid. • Insert cards with the printing side to the left into the Card Feeding Card Feeding Slot. -
Page 17: Loading Magnetic/Ic Cards
Basic Card Printing Methods Loading Magnetic/IC Cards The factory default for magnetic cards/IC cards is to be loaded as below. →See "Loading Cards into the Card Case" on page 10 for the procedure on loading cards into the Card Case. If using cards with JIS2 magnetic strips Card Case Rear •... -
Page 18: Printing
• Open the printer driver settings screen. Specify various settings for printing if necessary. • Select [NISCA PR-C201] if it is not already selected. • Click [Preferences] (or [Properties]), and set the card size and the number of cards to be printed. -
Page 19: Removing Cards
Basic Card Printing Methods Click [Print]. • Printing starts. • Cards are pulled into the printer and the LED Indicator blinks blue. [Now Printing] appears on the LCD Panel. • If the cards are not loaded, [Card Empty] appears on the LCD Panel. -
Page 20: Changing The Ink Ribbon And Transfer Film
Full Color Card Printer Changing the Ink Ribbon and Transfer Film Change the Ink Ribbon and Transfer Film when these run out. →See "Ink Ribbon/Transfer Film" on page 81 for details about Ink Ribbon and Transfer Film. You can check the amount of Ink Ribbon and Transfer Film remaining. Note →See "Correcting image and text misalignment"... -
Page 21: Changing The Ink Ribbon
Basic Card Printing Methods Changing the Ink Ribbon Use the following procedure when replacing the Ink Ribbon. Remove the Ink Ribbon Cassette. • Pull out the handle of the ink ribbon cassette with the handle turned up. Note When placing the Ink Ribbon Cassette down, prevent contamination adhering by placing it with the handle on the bottom. - Page 22 Full Color Card Printer Take up the Ink Ribbon slack. • Turn the knob as in the diagram at right, and take up the ribbon slack. • If the slack is not taken up properly, then the Ink Ribbon may jam. Insert the Ink Ribbon Cassette.
-
Page 23: Transfer Film Replacement
Basic Card Printing Methods Transfer Film Replacement Use the following procedure when replacing the Transfer Film. Remove the Transfer Film Cassette. • Pull out the handle of the transfer film cassette with the handle turned up. When placing the Transfer Film down, Note prevent contamination adhering by placing it with the handle on the bottom. - Page 24 Full Color Card Printer Load new Transfer Film in the Cassette. • Insert the spool spindle into the feed side (white) holder. As in the diagram at right, unwind and load onto the shaft. Finally, insert the spool spindle into the winding side holder.
- Page 25 Basic Card Printing Methods Insert the Transfer Film Cassette. • Insert the Transfer Film Cassette until a "click" is heard. →For replacing Cleaning Tape, See "Cleaning Tape Replacement" on page 22. When inserting the Transfer Film, insert Note while turning the knob in order to prevent slack.
-
Page 26: Cleaning Tape Replacement
Full Color Card Printer Cleaning Tape Replacement Remove the Cleaning Tape Cassette. • Hold the Cleaning Tape Cassette handle, lift it, and pull. Lift up the tape spindle. • As in the diagram at right, lift the tape spindle by hand. Remove the used Cleaning Tape, insert the new tape, and return the tape spindle. -
Page 27: Normal Mode And User Mode
Normal Mode and User Mode Normal Mode and User Mode You can switch the printer from Normal Mode to User Mode while it is operating. This section provides an outline of both modes, explains how to change modes and explains the basic operations of the User Mode. Normal Mode and User Mode ... -
Page 28: User Mode
Full Color Card Printer User Mode User Mode is used to set operations and check the status of the printer. Menu names such as [Card Count] and [Ribbon Type] appear on the LCD Panel. Switching to User Mode This section explains how to switch from Normal Mode to User Mode. →See "Switching to Normal Mode (Exiting User Mode)"... -
Page 29: Basic User Mode Operations
Normal Mode and User Mode Basic User Mode Operations The User Mode has multiple menus in a hierarchical tree organized according to function. This section explains how to switch menus in the User Mode hierarchy tree and how to switch from User Mode to Normal Mode. -
Page 30: Returning To The Main Menu (Switching To Menus On A Higher Level)
Full Color Card Printer Returning to the Main Menu (Switching to Menus on a Higher Level) You can return to a higher level by pressing the Printer Setup Printer Setup Buzzer Buzzer MENU Key. You can return to the main menu by SET:>>... -
Page 31: Printer Settings
Printer Settings Printer Settings This section explains how to check the printer's status and change the printer's settings. Counting the Number of Cards that Are Printed You can count the number of cards that are printed. You can also count the number of cards that have been printed in a specified period of time by resetting the count with the SET Key. -
Page 32: Displaying The Total Number Of Sides That Are Printed
Full Color Card Printer Press the SET key. • The display changes to [Reset ?]. Card Count Card Count Reset ? Reset ? Change the setting to [YES] by using Reset ? the / Keys then press the SET key. •... -
Page 33: Checking The Type And Remaining Quantity Of The Ink Ribbon Or Transfer Film
Printer Settings Press the Key until [Total Count] is Card Count Card Count displayed. • The total number of sides is displayed. Total Count Total Count The count cannot be reset. Checking the type and remaining quantity of the Ink Ribbon or Transfer Film You can check the type and remaining quantity of the Ink Ribbon or Transfer Film. -
Page 34: Checking The Program Version And Serial Number
Full Color Card Printer Checking the Program Version and Serial Number You can check the version of the program and the printer's serial number. You can also display the status on the printer driver (→See "Opening the Printer Note Driver Settings Screen"... -
Page 35: Turning The Error Alarm On Or Off
Printer Settings Turning the Error Alarm On or Off The initial setting is for the buzzer to sound when an error occurs. You can set the buzzer so that it does not sound. You can also change the settings by using the printer driver (→See "Opening the Note Printer Driver Settings Screen"... -
Page 36: Reduce Printer Power Consumption
Full Color Card Printer Reduce Printer Power Consumption Select the power-saving mode for when the printer is not being used. You can also change the settings by using the printer driver (→ See "Opening the Note Printer Driver Settings Screen" on page 87). Switch from Normal Mode to User Normal Mode User Mode... -
Page 37: Adjusting The Print Results
Printer Settings The factory default setting is [MAIN POWER OFF]. Note If the printer is off ([MAIN POWER OFF]), turn it on by pressing the Power Switch to use it (→See "Turning On and Off the Printer" on page 9). Adjusting the Print Results You can adjust the print results by changing the hue and the strength of the edge. - Page 38 Full Color Card Printer Change the settings by using the / Print Vertical Keys, then press the SET key. • If you increase the setting value of [Print Vertical] , the printing position will move downwards. (Setting values Print Vertical are by increments/decrements of approximately 0.04 mm) •...
-
Page 39: Quality Printing/Quick Printing
Printer Settings Quality printing/Quick printing You can change the printing speed of color images. Quick printing is set as a factory default. You can perform quality printing by changing the settings. Switch from Normal Mode to User Normal Mode User Mode MENU Mode. -
Page 40: Correcting Image And Text Misalignment
Full Color Card Printer Correcting image and text misalignment You can correct the misalignment (horizontal) of the color image and black text printing position. Switch from Normal Mode to User Normal Mode User Mode MENU Mode. Ready to Print Ready to Print Printer Info. -
Page 41: Adjusting The Contour Level
Printer Settings Adjusting the contour level You can adjust the sharpness of edges such as facial contour. Switch from Normal Mode to User Normal Mode User Mode MENU Mode. Ready to Print Ready to Print Printer Info. Printer Info. SET:>>... -
Page 42: Adjusting The Hue
Full Color Card Printer Adjusting the hue You can adjust the level of each hue (Yellow, Magenta, Cyan, Black). Adjusting the levels changes the hues of Yellow, Magenta, and Cyan for color images, and the thickness of black text for Black printing. Switch from Normal Mode to User Normal Mode User Mode... -
Page 43: Setting The Type Of Ink Ribbon Or Transfer Film To Use
Printer Settings Setting the Type of Ink Ribbon or Transfer Film to Use Set the type of Ink Ribbon or Transfer Film to use. →See "Changing the Ink Ribbon and Transfer Film" on page 16 for details about changing the Ink Ribbon and Transfer Film. - Page 44 Full Color Card Printer Change the settings by using the / Ribbon Type OOOOO Keys, then press the SET Key. Ribbon Type xxxxx If the Ink Ribbon type set in the printer and the [Ribbon Type] setting are different, an Note Ink Ribbon error or a transfer problem occurs.
-
Page 45: Notification Of Time For Ink Ribbon And Transfer Film Replacement
Printer Settings Notification of Time for Ink Ribbon and Transfer Film Replacement If there is little remaining Ink Ribbon or Transfer Film, the LCD Panel will display the remaining quantity to notify you that it should be replaced soon. You can also change the settings from the printer driver (→See "Opening the Printer Note Driver Settings Screen"... -
Page 46: Setting The Types Of Card To Use
Full Color Card Printer As time approaches for replacement of the Ink Ribbon or Transfer Film, a remaining quantity notification for these is displayed. • In Normal Mode, if the Ink Ribbon and Transfer Film remaining quantity drops below the settings value (%), then the remaining quantity notification will appear at a set frequency (approximately 4 seconds). -
Page 47: Optimizing Transfer Conditions
Printer Settings Rotate the dial on the lower surface of Align the Card Case and adjust the gate gap. Knob with Marks • The figures on the knob indicate the size of the gate gap. • If cards do not pass through the gate, turn the knob to the right. - Page 48 Full Color Card Printer Change the settings by using the / Card Type Card Type PVC (0.76mm) PVC (0.76mm) Keys, then press the SET Key. • Settings values that can be changed are as below. • If CARD1-3 are selected, then go to Step 5. If other Card Type Card Type settings values are selected, then you have finished.
-
Page 49: Correcting Card Curl
Printer Settings Correcting Card Curl Depending on the cards you use, even given optimum secondary transfer conditions (speed and temperature), cards may curl. After secondary transfer, by correcting card curl (decurl), you can reduce the amount of curl. You can also change the settings by using the printer driver (→See "Opening the Note Printer Driver Settings Screen"... -
Page 50: Switching The Card Ejection Slot
Full Color Card Printer Switching the Card Ejection Slot You can switch the slot from which printed cards are output to Card Ejection Slot (Left) and (Right). The factory default is set so that correctly printed cards are output from the Card Ejection Slot (Left), and cards with errors are output from Card Ejection Slot (Right). -
Page 51: Set The Orientation Of Magnetic Cards/Ic Cards To Load
Printer Settings Change the settings by using the / Normal Exit Normal Exit LEFT SIDE LEFT SIDE Keys, then press the SET Key. • Use the / Keys to switch between [LEFT SIDE]/ [RIGHT SIDE]. Normal Exit Normal Exit • Set it to [LEFT SIDE] to output cards from Card RIGHT SIDE RIGHT SIDE Ejection Slot (Left), or [RIGHT SIDE] to do from Card... - Page 52 Full Color Card Printer Press the Key until [Set Face] is Card Type displayed, then press the SET Key. Set Face Set Face STANDARD STANDARD STANDARD Change the settings by using the / Set Face Set Face STANDARD STANDARD Keys, then press the SET Key.
-
Page 53: Set The Orientation Of Cards To Eject
Printer Settings Set the Orientation of Cards to Eject Set the orientation of correctly printed cards. You can also change the settings by using the printer driver (→See "Opening the Note Printer Driver Settings Screen" on page 87). Switch from Normal Mode to User Normal Mode User Mode MENU... - Page 54 Full Color Card Printer Change the settings by using the / Eject Face Eject Face NOT SPECIFY NOT SPECIFY Keys, then press the SET Key. • Settings values that can be changed are as below. Eject Face Eject Face Eject Face Eject Face DOWN DOWN...
-
Page 55: Changing Network Connection Settings
Printer Settings Changing Network Connection Settings You can configure Internet communications settings such as the individual printer ID and TCP/ IP-related settings. You can also change the settings by using the printer driver (→See "2. Print over a Note network"... - Page 56 Full Color Card Printer Change the settings by using the / Keys, then press the SET Key. • When setting numerical values, change each digit using the / Keys. Fix changes using the SET Key then progresses to the next digit. Pressing the SET Key after the final digit fixes the changes.
-
Page 57: Preventing Theft And Unauthorized Usage
Printer Settings Preventing Theft and Unauthorized Usage Preventing Theft of the Printer (Security Cable Slot) You can prevent theft of the printer by locking it with a wire cable. Use a wire cable that fits the Security Cable Slot (0.12"... -
Page 58: Cleaning
Full Color Card Printer Cleaning The rollers need to be cleaned to maintain good print quality. This section explains which rollers need to be cleaned and how to clean them. Before Cleaning Note the following cautions when cleaning the rollers. ... -
Page 59: Open The Top Cover
Cleaning Press the Key until [Cleaning] is Printer Info. Printer Info. SET:>> SET:>> displayed, then press the SET Key. Cleaning Cleaning Cleaning Cleaning SET:>> SET:>> Remove Cards Remove Cards When [Cool Down ---] is displayed, wait Cleaning Cleaning Cool Down 75 Cool Down 70 until the figure drops to 70 or lower. - Page 60 Full Color Card Printer When [Set Cleaning Crd] is displayed, load the Cleaning Card in the Card Feeding Slot. Card • When the Cleaning Card is loaded, close the Card Feeding Case cover and the Top Cover. Slot • Align the adhesive side of the Cleaning Card to the right.
-
Page 61: Cleaning The Cleaning Roller
Cleaning Cleaning the Cleaning Roller Clean the Cleaning Roller if cards are printed with missing colors or if there are foreign objects on them. Be sure to turn off the printer before cleaning the rollers. Read the cautions in "Before Cleaning" on page 54. Turn off the power. - Page 62 Full Color Card Printer Wipe the roller clean. • Use a soft cloth fully moistened with water and wrung out to wipe the roller clean. Load the Cleaning Roller and Cleaning Tape Cassette in order, and close the Front Cover.
-
Page 63: Cleaning The Feeding Roller
Cleaning Cleaning the Feeding Roller Clean the Feeding Roller under the Card Case if cards do not feed smoothly into the printer. Be sure to turn off the printer before cleaning the rollers. Read the cautions in "Before Cleaning" on page 54. Turn off the power. -
Page 64: Cleaning The Feeding Roller
Full Color Card Printer Cleaning the Feeding Roller If the printing location on printed cards is out of adjustment, or there is white space at the edge of printed areas, then clean the secondary transfer section feeding roller at the bottom of the top cover. - Page 65 Cleaning Wipe the roller clean. • Use a soft cloth fully moistened with water and wrung out to wipe the roller clean. • As you turn the card feeding knob, fully clean the roller. • Clean the card feeding roller (5 locations). Card Feeding Roller ...
-
Page 66: Cleaning The Reverse Roller
Full Color Card Printer Cleaning the Reverse Roller If card delivery from the reverse section to the secondary transfer feeding roller is not possible, then clean the Reverse Roller. Be sure to turn off the printer before cleaning the rollers. ... - Page 67 Cleaning Wipe the roller clean. • Use a soft cloth fully moistened with water and wrung out to wipe the roller clean. • Rotate the reverse feeding knob, and fully clean the roller. • Turn the reverse knob to rotate the reverse section one Reverse Roller turn, and clean the other side of the Reverse Roller.
-
Page 68: Primary Transfer Feeding Roller Cleaning
Full Color Card Printer Primary Transfer Feeding Roller Cleaning If a film-related error occurs such as [Film Wind up], or there is color bleed or image distortion, then clean the primary transfer feeding roller. Be sure to turn off the printer before cleaning the rollers. ... - Page 69 Cleaning Insert a flat screwdriver or coin into the groove on the end of the feeding roller. Flat Screwdriver Feeding Roller • Ensure you have a flat screwdriver or coin that can fit into the groove on the end of the feeding roller. Wipe the roller clean.
-
Page 70: Filter Cleaning
Full Color Card Printer Filter Cleaning If the filter becomes clogged, then dirt may enter the printer. It is recommended that the filter be cleaned monthly. Be sure to turn off the printer before cleaning the rollers. Read the cautions in "Before Cleaning" on page 54. Turn off the power. -
Page 71: Troubleshooting
Troubleshooting Troubleshooting This section explains what to do when an error message appears, a card is jammed, or there is a problem with the printed side of a card. When an Error Message Appears The LED Indicator is lit orange or blinks, and a description of the error appears on the LCD Panel when an error occurs. - Page 72 Full Color Card Printer Error message Cause and solution The Ink Ribbon has been used up. Replace the Ink Ribbon. Ribbon Empty → See "Changing the Ink Ribbon and Transfer Film" on page 16 for details about changing the Ink Ribbon. The Ink Ribbon could not be detected correctly.
- Page 73 Troubleshooting Error message Cause and solution The Transfer Film could not be detected correctly. Reload the Transfer Film. Film Type →See "Changing the Ink Ribbon and Transfer Film" on page 16 for details about changing the Transfer Film. The Transfer Film set in the printer and printer settings may be different.
- Page 74 Full Color Card Printer Error message Cause and solution Cards cannot be fed into printer. Press the SET Key. Card Jam Feeder Frequent occurrences of this error may mean the following: Is the Card Case loaded correctly? Correctly load the Card Case. Confirm that the Card Case card retainer is loaded properly.
-
Page 75: Service Call
Troubleshooting Error message Cause and solution An error that requires repair may occur. Service Call The cause of the error differs depending on the error code. Turn off and on the power. Repairs are necessary if the error reoccurs. Program version update was interrupted. Turn off and on the power, then start version update again. -
Page 76: Cover Is Open
Full Color Card Printer If the following messages appear after pressing the SET key, resolve the problem according to the instructions below. Message Solution Press the SET Key. Push SET key Load the card in the Card Case. Card Empty Correctly close the cover. -
Page 77: When A Card Is Jammed
Troubleshooting When a Card is Jammed... Use the following procedure to remove cards jammed during printing or when the jammed card is unable to be removed despite the SET Key being pressed. Ejection Dials are at 3 locations within the printer. ... - Page 78 Full Color Card Printer (If cards can be seen in the feed slot) Rotate the reverse feeding knob. Reverse Feeding Knob • Remove cards jammed in the cleaning section from the feed slot. • Cards jammed in the reverse section can also be output.
- Page 79 Troubleshooting (If the card is in other than the reverse section) Rotate the feeding knob. • Jammed cards are ejected from Card Ejection Slot Secondary Transfer Section (left). • If the jam is cleared, then go to Step 8. Feeding Knob Close the Top Cover and Front Cover.
-
Page 80: If The Ink Ribbon Or Transfer Film Are Cut
Full Color Card Printer If the Ink Ribbon or Transfer Film are Cut If the Ink Ribbon or Transfer Film are cut for any reason, then repair these using the method below. Remove the Ink Ribbon Cassette or Transfer Film Cassette. →See "Changing the Ink Ribbon and Transfer Film"... - Page 81 Troubleshooting Rotate the winding side knob. Ink Ribbon Transfer Film • Rotate the knob until the joined section of the Ink Cassette Cassette Ribbon or Transfer Film is fully inside the winding side spool spindle. Return the Ink Ribbon Cassette or Transfer Film Cassette to their original positions.
-
Page 82: When Cards Are Not Printed Correctly
Full Color Card Printer When Cards are Not Printed Correctly... If missing or incorrect colors are printed on a card or cards are incorrectly printed, resolve the problem according to the following instructions. Problem Cause and solution There are missing or Is there dirt on the card surface? Do not use dirty cards. - Page 83 Troubleshooting Problem Cause and solution White cards (unprinted Only color image data was received with the Black Ink Ribbon cards) are output. loaded. Use the Overcoating Color Ink Ribbon when printing in color. →See "Changing the Ink Ribbon and Transfer Film" on page 16 for details about changing the Ink Ribbon.
-
Page 84: Other Troubles
Full Color Card Printer Problem Cause and solution Some or all of the printed Is the Transfer Film running between the two pins on top of the area are cloudy. Transfer Film Cassette? Make sure that the Transfer Film is correctly loaded. →See "Transfer Film Replacement"... -
Page 85: Appendix
Appendix Appendix Consumables Ink Ribbon/Transfer Film The 2 types of Ink Ribbon that can be used in this printer are as follows. Number of Name Type Product no Remarks Printable Sides Retransfer Color Ink R-YMCK PR5002-R4C 500 screens/spool – Ribbon Retransfer Reverse R-YMCKK... -
Page 86: Cards
Full Color Card Printer Cards Use only cards that conform to the CR-80 standard. Size: 3.4" × 2.1" (86 mm × 54 mm) Thickness: 0.03"-0.04" (0.76 mm-1.00 mm) Material: PVC, PET, PET-G Do not use cards that do not conform to the CR-80 standard. Such cards may not be printed properly. -
Page 87: Updating The Printer's Software
Appendix Updating the Printer's Software Please contact your reseller for upgrades to printer firmware and drivers. -
Page 88: Menu Route Map (User Mode)
Full Color Card Printer Menu Route Map (User Mode) Normal Mode User Mode Main Menu Settings Menu MENU Ready to Print Printer Info. Card Count [User Mode] SET:>> MENU Total Count MENU Exit Menu ? Ribbon Remainder Film Remainder Exit Menu ? Version Info. - Page 89 Appendix User Mode Settings Menu To Main Menu To [Image Setup] Menu (Previous Page) Ribbon Setup Ribbon Type SET:>> MENU Film Type Ribbon Notice(%) MENU Film Notice(%) Card Setup Card Type SET:>> MENU Decurl Time(s) Normal Exit Error Exit Set Face Eject Face Interface Setup Printer ID...
-
Page 90: Main Specifications
Full Color Card Printer Main Specifications PR-C201 Function Double-sided printing (full color) Print system Indirect transfer system Print media Material: PVC, PET, PET-G Thickness: 0.76-1.00 mm Size: according to CR-80 standards Print quality 600 dpi Print tones Input tones: RGB, 256 tones/color, K2 tones... -
Page 91: Opening The Printer Driver Settings Screen
If you are using Windows Server 2008 R2, open the printer driver's setting screen as follows. [Start] → [Control Panel] → [View devices and printers] → [NISCA PR-C201] → [Printing preferences] If you are using Windows 7, open the printer driver's setting screen as follows. - Page 92 4Y5-8399-010...
Need help?
Do you have a question about the PR-C201 and is the answer not in the manual?
Questions and answers