Unitech MS920 User Manual
Wireless pocket 2d imager scanner
Hide thumbs
Also See for MS920:
- User manual (153 pages) ,
- Quick start manual (2 pages) ,
- User manual (118 pages)

Related Manuals for Unitech MS920


Summary of Contents for Unitech MS920
- Page 1 Wireless Pocket 2D Imager Scanner - MS920 - User's Manual Version 3.1 © 2014 unitech Electronics Co., Ltd. All rights reserved. unitech is a registered trademark of unitech Electronics Co., Ltd.
-
Page 2: Table Of Contents
Table of Contents Chapter 1 Overview......................1 Package Contents....................1 Scanner Detail......................2 Getting Start ......................3 Battery Charging ....................3 Specification......................4 Chapter 2 Bluetooth Function Setting ................5 Pairing With PC/Notebook For The First Time ............5 Buffer Mode......................6 Switching Between HID and SPP Mode .............. - Page 3 HID Keyborad Character Delay................11 HID Keyborad Block Delay................... 12 HID Keyborad Case ..................... 12 HID Keyborad Languages..................13 Enter BT Pairing Code ..................14 Chapter 3 Symbologies ....................15 Disable all symbologies..................15 Codabar ....................... 15 Codablock ......................19 Code 11........................
- Page 4 Standard 2 of 5 ....................71 Telepen......................... 75 Chapter 4 Operating Settings................... 78 Pre-defined trigger modes ................... 78 Scanning / Triggering ................... 79 Data decoding security ..................86 Beeps / LEDs ....................... 89 Chapter 5 Data Transmission Settings................96 Symbology identifier................... 94 Preamble......................
-
Page 5: About This Manual
© 2016 unitech Electronics Co., Ltd. All rights reserved. unitech is a registered trademark of unitech Electronics Co., Ltd. - Page 6 0.5 cm from the body. Use of other accessories may not ensure compliance with FCC RF exposure guidelines. © 2016 unitech Electronics Co., Ltd. All rights reserved. unitech is a registered trademark of unitech Electronics Co., Ltd.
- Page 7 Canada. European Conformity Statement unitech Electronics co., Ltd herewith declares that the unitech product is in compliance with the essential requirements and all other provisions of the RED 2014/53/EU directive, the EMC 2014/30/EU directive and the Low Voltage 2014/35/EU directive.
- Page 8 Waste electrical and electronic equipment (WEEE) unitech has set up a policy and process to meet the EU directive 2002/96/EC and update 2003/108/EC concerning electronic waste disposal.
- Page 9 低功率電波輻射性電機管理辦法 第十二條:經型式認證合格之低功率射頻電機,非經許可,公司、商號或使用者 均不得擅自變更頻率、加大功率或變更原設計之特性及功能。 第十四條:低功率射頻電機之使用不得影響飛航安全及干擾合法通信;經發現有 干擾現象時,應立即停用,並改善至無干擾時方得繼續使用。 前項合法通信,指依電信法規定作業之無線電通信。 低功率射頻電機需忍受合法通信或工業、科學及醫療用電波輻射性電機設備 之干擾。 注意事項: 1. 使用過度恐傷害視力。 2. 使用30分鐘請休息10分鐘;2歲以下幼兒不看螢幕,2歲以上每天看螢幕不要超過 1小時。 3. 減少電磁波影響,請妥適使用。 SAR 標準值 2.0W/Kg,送測產品實測值為 0.217 W/kg@10g © 2016 unitech Electronics Co., Ltd. All rights reserved. unitech is a registered trademark of unitech Electronics Co., Ltd.
- Page 10 Laser Information The unitech product is certified in the U.S. to conform to the requirements of DHHS/CDRH 21CFR Subchapter J and to the requirements of IEC 825-1. Class II and Class 2 products are not considered to be hazardous. The unitech product contains internally a Visible Laser Diode (VLD) whose emissions do not exceed the maximum limits as set forth in the above regulations.
- Page 11 It may not be functional anymore. Please only use the original battery from unitech. Using a third party battery can damage our products. Please note that when such damage occurs, it is not covered by unitech’s warranty policy.
- Page 12 If the connector is damaged, please ensure the connector is being CAUTION! fully repaired before use the unit to avoid causing short circuited. viii © 2016 unitech Electronics Co., Ltd. All rights reserved. unitech is a registered trademark of unitech Electronics Co., Ltd.
- Page 13 Please remove the power adapter when the battery is fully recharged. The bundled power adapter that comes with your unitech product is not meant to be used outdoors. An adapter exposed to water or rain, or a very humid environment can cause damage to both the adapter and the product.
- Page 14 Alternatively, the entire warning may be given through the equipment display during use, when the user is asked to acknowledge activation of the higher level. © 2016 unitech Electronics Co., Ltd. All rights reserved. unitech is a registered trademark of unitech Electronics Co., Ltd.
- Page 15 Worldwide Support unitech’s professional support team is available to quickly answer questions or assist with technical-related issues. Should an equipment problem occur, please contact the nearest unitech regional service representative. For complete contact information please visit the Web sites listed below: Taipei, Taiwan –...
- Page 16 The warranty period is varied from each country. Please consult with your supplier or unitech local office for actual length of warranty period to your purchased product. Warranty becomes void if equipment is modified, improperly installed or used, damaged by accident or neglect, or if any parts are improperly installed or replaced by the user.
-
Page 17: Chapter 1 Overview
Overview Package Contents Please make sure the following contents are in the MS920 carton. If something is missing or damaged, please contact your Unitech representative MS912 scanner Battery Quick Guide USB Charging Cable Hand Strap NOTE: 1. The scanner’s default power off (idle mode) time is 3 minutes. -
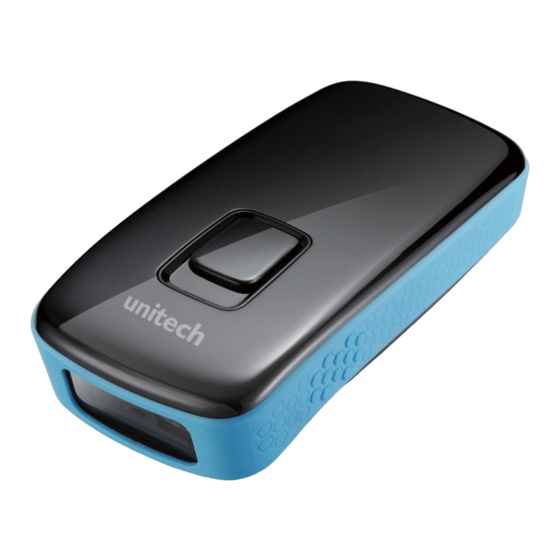
Page 18: Scanner Detail
Scanner Detail - 2 -... -
Page 19: Getting Start
Battery Charging Micro USB 1. Flip up the rubber cover to expose the micro USB port on the scanner. 2. Insert the mini USB connector into the port on the scanner and the standard USB connector of the USB cable into a USB port on the host PC. Getting Started The aiming beam can be centered over the bar code with any direction and have the proper alignment for a good read. -
Page 20: Specification
Specifications Illumination: Highly visible white LED Light source Aiming : 617 nm red LED Scan rate 240 scans/sec Sensor Linear CMOS sensor 1D codes 0.1 mm (4 mils) Resolution 2D codes 0.167 mm (6.6 mils) Housing Plastic (ABS) Profile SPP, HID Working Hours Over 13 hours (1 scan/3 seconds) Charge Time... -
Page 21: Bluetooth Function Setting
Start menu, clicking Devices and Printers. 3. Click Add a device, and then follow the instructions. 4. Click the Bluetooth enabled device (unitech BT XXXXXX) you want to add to your computer, and then click Next. If you don't see the device you want to add, make sure the device is turned on and discoverable. -
Page 22: Buffer Mode
, and then, on the Start menu, clicking Devices and Printers. 3. Click Add a device, and then click the Unitech AXXXXXX icon. 4. Open Wordpad, and select ingoing com part to make connection. 5. After one beep, start the scan then. -
Page 23: Switching Between Hid And Spp Mode
From SPP to HID If your MS920 is on SPP mode: 1. Go to Devices and Printers under Control Panel, remove the MS920. 2. Use MS920 to scan the barcode “HID”. 3. Undertake the procedure of searching new device, and then select device (Unitech BT XXXXXX) and make pairing. -
Page 24: Factory Default
Factory Default Display F/W Version BT Un-pair iOS Keypad *Press and hold the scan button for * P r e s s t he s c a n b u t t o n o n c e six seconds will also trigger w i l l display the keypad, press BT Un-pair. -
Page 25: Erasing The Buffer
Erasing the Buffer Auto Mode Batch Mode 1. Scan (Erase Batch Buffer) . 1. Scan (Erase Auto Buffer) 2. Scan (Erase) 2. Scan (Erase) For detail information about barcodes, please refers to section 5. Appendix - Bar Code Configuration And Commands. Erase Previous Entry Erase the last scanned item. -
Page 26: Mcu Power Saving
MCU Power Saving Enabled* Disabled (Good for scan with trigger) (Good for continuous scanning) BT Module Power Saving (Power off BT while no activities) 1 Minute* 3 Minutes 5 Minutes Disabled - 10 -... -
Page 27: Hid Keyborad Character Delay
HID Keyborad Character Delay 1 ms 5 ms 10 ms 20 ms 50 ms 100 ms - 11 -... -
Page 28: Hid Keyborad Block Delay
HID Keyborad Block Delay 10 ms 50 ms 100 ms 500 ms 1 Sec. 3 Sec. HID Keyborad Case Auto Trace To Lower To Upper - 12 -... -
Page 29: Hid Keyborad Languages
HID Keyborad Languages US English UK English Swiss Swedish Norwegian Italian German French Danish Partial ALT Japanese Spanish ALT Mode - 13 -... -
Page 30: Enter Bt Pairing Code
Enter BT Pairing Code Start BT pairing code Enter Abort To scan "//7" label to enter code input mode, to scan "digit" as prompted on host, to scan "$M" to finish input and exit input mode. To scan "$P" to abort input and exit input mode. -
Page 31: Chapter 3 Symbologies
Chapter 3 Symbologies - Symbology = bar code type or family (e.g. Code 39, UPC, EAN). - Activate the symbologies you need and modify the settings for your symbologies if required. - To optimize performance, only activate symbologies you need !!! (deactivate the Code 39 and EAN/UPC default symbologies if you don't need them. - Page 32 Symbology identifier User defined - User defined symbology identifier. - See "Data transmission settings - symbology identifier - UDSI" to activate or deactivate UDSI transmission. - Use the default value or compose your custom symbology identifier for this symbology (1 - 4 characters) B7 (*) Compose: Please refer to SCM (Software Configuration Manager) in www.ute.com...
- Page 33 A, B, C, D Check digit check digit verification - AIM has a recommended check character for Codabar - Each Codabar data character (including Start/Stop) has a value assigned to 0 = 0 1 = 1 2 = 2 3 = 3 4 = 4 5 = 5 6 = 6...
- Page 34 Enable Barcode length - Use the L1 as minimum length option if you know the minimum length of the codes in your application!!! - To optimize decoding performance and increase security, select the same length as the minimum length in your application (do not select a shorter length!!).
-
Page 35: Codablock
Set lengths 1, 2 and 3 - Set barcode length L1, L2 and L3 according to the barcode length mode used. Compose L1: Compose L2: Compose L3: Codablock - 2-dimensional alphanumerical symbology Codablock A Disable (*) Enable Symbology identifier User defined - User defined symbology identifier. - Page 36 K1 (*) Compose: Please refer to SCM (Software Configuration Manager) in www.ute.com Code mark - See "Data transmission settings - symbology identifier - code mark" to activate or deactivate code mark transmission. - Use the default value or compose your code mark for this symbology (1 character).
-
Page 37: Code 11
K1 (*) Compose: Please refer to SCM (Software Configuration Manager) in www.ute.com Code mark - See "Data transmission settings - symbology identifier - code mark" to activate or deactivate code mark transmission. - Use the default value or compose your code mark for this symbology (1 character). -
Page 38: Code Mark
C1 (*) Compose: Please refer to SCM (Software Configuration Manager) in www.ute.com Code mark - See "Data transmission settings - symbology identifier - code mark" to activate or deactivate code mark transmission. - Use the default value or compose your code mark for this symbology (1 character). - Page 39 Barcode Length - Use the L1 as minimum length option if you know the minimum length of the codes in your application!!! - To optimize decoding performance and increase security, select the same length as the minimum length in your application (do not select a shorter length!!).
-
Page 40: Code 39
Compose L2: Compose L3: Code 39 - Alphanumeric symbology. - Letter case not defined - transmitted in upper case. - Format: standard 43 characters (default) or full ASCII (see "format" for lists). Disable Enamle(*) Symbology identifier User defined - User defined symbology identifier. - See "Data transmission settings - symbology identifier - UDSI"... - Page 41 Code mark - See "Data transmission settings - symbology identifier - code mark" to activate or deactivate code mark transmission. - Use the default value or compose your code mark for this symbology (1 character). *(*) Compose: Please refer to SCM (Software Configuration Manager) in www.ute.com Format Standard 43 characters (*) Full ASCII (extended)
- Page 42 '$' only ' $ ' only * ' Check digit check digi verification Disable (*) Modulo 43 French CIP Italian CPI check digi transmission - You can chose to transmit or not transmitted the check digit. Disable (*) - 26 -...
- Page 43 Enable Barcode length - Use the L1 as minimum length option if you know the minimum length of the codes in your application!!! - To optimize decoding performance and increase security, select the same length as the minimum length in your application (do not select a shorter length!!).
- Page 44 Set lengths 1, 2 and 3 - Set barcode length L1, L2 and L3 according to the barcode length mode used. Compose L1: Compose L2: Compose L3: Reading range - Applies a special algorithm for long-distance reading (default setting). - Use the "normal" setting if distance reading is not required. Extended (*) Normal Reading tolerance...
- Page 45 High (*) Medium Unconventional Code 39 - Used for decoding unconventional Code 39 such as: - very large inter-character - large ratio between narrow and wide elements Disable (*) Enable Special keys interpretation - Special keyboard keys such as [Enter] and [Tab] (see list below) can be interpreted and transmitted by using dual-character combinations.
-
Page 46: Code 93/ Code 93I
Enable Code 93/ Code 93i - Code 93 Alphanumeric full ASCII symbology - letter case defined. - Code 93i (encompasses and extends Code 93) Alphanumeric, full and extended ASCII, all Unicode characters, etc Disable Enable (*) Symbology indentifier User Defined - User defined symbology identifier. - Page 47 Code mark - See "Data transmission settings - symbology identifier - code mark" to activate or deactivate code mark transmission. - Use the default value or compose your code mark for this symbology (1 character). D (*) Compose: Please refer to SCM (Software Configuration Manager) in www.ute.com Barcode length - Use the L1 as minimum length option if you know the minimum length of the codes in your application!!!
-
Page 48: Code 128 / Gs1-128
L1 as min, L2 as max Set lengths 1, 2 and 3 - Set barcode length L1, L2 and L3 according to the barcode length mode used. Compose L1: Compose L2: Compose L3: Code 128 / GS1-128 - Alphanumeric full ASCII symbology - letter case defined. - "GS1-128"... - Page 49 GS1 - 128 disable Symbology identifier User defined - User defined symbology identifier. - See "Data transmission settings - symbology identifier - UDSI" to activate or deactivate UDSI transmission. - Use the default value or compose your custom symbology identifier for this symbology (1 - 4 characters).
- Page 50 GS1 128 D (*) Compose: Please refer to SCM (Software Configuration Manager) in www.ute.com GS1 - 128 identifier - The ]C1 AIM identifier for GS1-128 is automatically added by default in front of GS1-128 bar codes. Enable (*) Disable Barcode length - Use the L1 as minimum length option if you know the minimum length of the codes in your application!!! - To optimize decoding performance and increase security, select the same...
- Page 51 L1 as Minimal length (*) L1, L2, L3 as fixed length L1 as min, L2 as max Set lengths 1, 2 and 3 - Set barcode length L1, L2 and L3 according to the barcode length mode used.. Compose L1: Compose L2: Compose L3: Reading tolerance...
- Page 52 High (*) Medium Reading range - Applies a special algorithm for long-distance reading (default setting). - Use the "normal" setting if distance reading is not required. Extended (*) Normal ISBT 128 - International Society of Blood Transfusion - Activating ISBT 128 deactivates Code 128 / GS1-128 (to avoid confusion with Code 128 / GS1-128).
-
Page 53: Datamatrix
Disable (*) Transmit Disable (*) Only transmit concatenated codes Transmit concatenated codes or single codes Concatenate Disable (*) Enable DataMatrix - Two-dimensional symbology. - Only available with models equipped with an area imager. - Can encode up to approximately 2000 characters. - Negative image DataMatrix supported. - Page 54 Disable Enamle (*) Symbology identifier User defined - User defined symbology identifier. - See "Data transmission settings - symbology identifier - UDSI" to activate or deactivate UDSI transmission. - Use the default value or compose your custom symbology identifier for this symbology (1 - 4 characters).
- Page 55 Mirrored labels activation - When enabled mirrored labels can be read as well as normal labels. - When disabled only normal labels can be read. Disable (*) Structured append Enable Disable (*) Header transmission Enable Disable (*) Enable GS1-Datamatrix The ]d2 AIM identifier for GS1-Datamatrix is automatically added by default in front of GS1-Datamatrix bar codes.
-
Page 56: Ean / Upc
EAN / UPC - Numerical symbology. UPC - A enable (*) UPC - A disable UPC - E enable (*) UPC - E disable EAN - 8 enable (*) EAN - 8 disable EAN - 13 enable (*) EAN - 13 disable - 40 -... - Page 57 UPC - E1 - Irregular UPC-E with number system equal to 1 (usually the first printed character). - UPC-E must be active for UPC-E1 to be taken into account. Disable (*) Enable Symbology identifier User defined - User defined symbology identifier. - See "Data transmission settings - symbology identifier - UDSI"...
- Page 58 EAN-8 FF (*) Compose: Please refer to SCM (Software Configuration Manager) in www.ute.com EAN-13 F (*) Compose: Please refer to SCM (Software Configuration Manager) in www.ute.com Code mark - See "Data transmission settings - symbology identifier - code mark" to activate or deactivate code mark transmission.
- Page 59 Compose: Please refer to SCM (Software Configuration Manager) in www.ute.com EAN-13 F (*) Compose: Please refer to SCM (Software Configuration Manager) in www.ute.com Add - on digits not required but transmitted if read (*) required and transmitted add-on 2 Disable (*) Enable add-on 5 Disable (*)
- Page 60 security level 10 (*) Compose: Please refer to SCM (Software Configuration Manager) in www.ute.com Check digit transmission [leading character] [number system] [data] [check digit] UPC-A Enable (*) Disable UPC-E Enable (*) Disable EAN-8 Enable (*) Disable - 44 -...
- Page 61 EAN-13 Enable (*) Disable UPC number system [leading character] [number system] [data] [check digit] UPC-A Enable (*) Disable UPC-E Enable (*) Disable - 45 -...
- Page 62 Re-encoding UPC-A, UPC-E, EAN-8 [leading character] [number system] [data] [check digit] - Converts decoded data to other code formats. - Transmission only takes into account the parameters available for the target bar code format. - Regular UPC-A has a transmitted number system equal to 0. - To transmit the additional leading character (country code), select the "UPC-A transmitted as EAN-13"...
- Page 63 ISBN - International Standard Book Number - EAN-13 code, the first 3 characters "978" or "979" (except for "9790") are ignored and the checksum (0..9, "X") is calculated on the remaining characters. Disable (*) Enable ISMN - International Standard Music Number - EAN-13 code starting with "9790", the first 3 characters "979"...
-
Page 64: Gs1 Databar (Rss)
Enable Reading range - Applies a special algorithm for long-distance reading (default setting). - Use the "normal" setting if distance reading is not required. Normal Extended (*) GS1 DataBar (RSS) - Also known as Reduced Space Symbology (RSS). Omni-directional - Numerical symbology. - Reads the following types of GS1 DataBar: GS1 DataBar Omni-Directional GS1 DataBar Truncated... - Page 65 Disable (*) Symbology identifier User defined - User defined symbology identifier. - See "Data transmission settings - symbology identifier - UDSI" to activate or deactivate UDSI transmission. - Use the default value or compose your custom symbology identifier for this symbology (1 - 4 characters).
- Page 66 Disable (*) Symbology identifier User defined - User defined symbology identifier. - See "Data transmission settings - symbology identifier - UDSI" to activate or deactivate UDSI transmission. - Use the default value or compose your custom symbology identifier for this symbology (1 - 4 characters).
- Page 67 Enable Disable (*) Symbology identifier User defined - User defined symbology identifier. - See "Data transmission settings - symbology identifier - UDSI" to activate or deactivate UDSI transmission. - Use the default value or compose your custom symbology identifier for this symbology (1 - 4 characters).
-
Page 68: Interleaved 2 Of 5
Interleaved 2 of 5 - Numerical symbology. - For GTIN compatibility set barcode length to one fixed length of 14 characters. Disable (*) Enable Symbology identifier User defined - User defined symbology identifier. - See "Data transmission settings - symbology identifier - UDSI" to activate or deactivate UDSI transmission. - Page 69 Compose: Please refer to SCM (Software Configuration Manager) in www.ute.com Check digit - Especially recommended for variable length Interleaved 2 of 5 and if "consecutive same read data validation" (data decoding security parameters) is not activated. Check digit verification Disable (*) Modulo 10 Check digit transmission Disable (*)
- Page 70 - For GTIN compatibility set barcode length to one fixed length of 14 characters - compose 1 or 2 or 3 fixed lengths provides the best performance and security if the codes in your application have fixed lengths Length mode - L1 = Codes with as many characters as specified by L1 and longer are read (L2 and L3 are not used).
-
Page 71: Matrix 2 Of 5
Compose L3: Reading tolerance - Sets the tolerance level for reading hard to read bar codes. - High = most permissive (reads codes of variable quality). - Low = least permissive (only reads high quality codes that meet official Code 39 standards) - Quiet zone verification (space before and after bar code to ensure correct decoding). - Page 72 Symbology identifier User defined - User defined symbology identifier. - See "Data transmission settings - symbology identifier - UDSI" to activate or deactivate UDSI transmission. - Use the default value or compose your custom symbology identifier for this symbology (1 - 4 characters). B4 (*) Compose: Please refer to SCM (Software Configuration Manager) in www.ute.com...
- Page 73 ChinaPost - Specific start/stop characters (not transmitted) and checksum (transmitted). ChinaPost Barcode length - Use the L1 as minimum length option if you know the minimum length of the codes in your application!!! - To optimize decoding performance and increase security, select the same length as the minimum length in your application (do not select a shorter length!!).
-
Page 74: Maxcode
Set length L1, L2 and L3 - Set barcode length L1, L2 and L3 according to the barcode length mode used. Compose L1: Compose L2: Compose L3: MaxCode - Two-dimensional alphanumerical symbology used by UPS. - Only available with models equipped with an area imager. Disable (*) Enable Symbology identifier... - Page 75 D2 (*) Compose: Please refer to SCM (Software Configuration Manager) in www.ute.com Code mark - See "Data transmission settings - symbology identifier - code mark" to activate or deactivate code mark transmission. - Use the default value or compose your code mark for this symbology (1 character).
-
Page 76: Micropdf417
MicroPDF417 - Two-dimensional symbology. - Alphanumeric full ASCII symbology - letter case defined. - It is highly recommended to select "stacked codes" in sensor optimization (see Operating settings/read optimization). Disable (*) Enable Symbology identifier User defined - User defined symbology identifier. - See "Data transmission settings - symbology identifier - UDSI"... -
Page 77: Msi Code
* (*) Compose: Please refer to SCM (Software Configuration Manager) in www.ute.com Code 128 emulation - When active and reading a MicroPDF code containing a special flag, the scanner transmits the Code 128 AIM symbology identifier instead of the MicroPDF symbology identifier ( ]C instead of ]L ) Disable (*) Enable MSI Code... - Page 78 - Use the default value or compose your custom symbology identifier for this symbology (1 - 4 characters). B8 (*) Compose: Please refer to SCM (Software Configuration Manager) in www.ute.com Code mark - See "Data transmission settings - symbology identifier - code mark" to activate or deactivate code mark transmission.
- Page 79 Disable Barcode length - Use the L1 as minimum length option if you know the minimum length of the codes in your application!!! - To optimize decoding performance and increase security, select the same length as the minimum length in your application (do not select a shorter length!!).
-
Page 80: Pdf 417
Compose L1: Compose L2: Compose L3: PDF 417 - Set barcode length L1, L2 and L3 according to the barcode length mode used. Enable (*) Disable Symbology identifier User defined - User defined symbology identifier. - See "Data transmission settings - symbology identifier - UDSI" to activate or deactivate UDSI transmission. -
Page 81: Header Transmission
Compose: Please refer to SCM (Software Configuration Manager) in www.ute.com Code mark - See "Data transmission settings - symbology identifier - code mark" to activate or deactivate code mark transmission. - Use the default value or compose your code mark for this symbology (1 character). -
Page 82: Plessey Code
Plessey Code - Numerical symbology. Disable (*) Enable Symbology identifier User defined - User defined symbology identifier. - See "Data transmission settings - symbology identifier - UDSI" to activate or deactivate UDSI transmission. - Use the default value or compose your custom symbology identifier for this symbology (1 - 4 characters). - Page 83 Check digit transmission [leading character] [number system] [data] [check digit] Disable (*) Enable Unconventional stop Disable (*) Enable Barcode length - Use the L1 as minimum length option if you know the minimum length of the codes in your application!!! - To optimize decoding performance and increase security, select the same length as the minimum length in your application (do not select a shorter length!!).
-
Page 84: Qr Code
- L3 = Codes at least the length specified by L1 and no longer than the maximum length specified by L2 are read (L3 is not used). L1 as Minimal length (*) L1, L2, L3 as fixed length L1 as min, L2 as max Set length L1, L2 and L3 - Set barcode length L1, L2 and L3 according to the barcode length mode used. - Page 85 - Offers three levels of error detection. - Activating QR Code activates Model 2. Use the Model 1Control activation if you are using Model 1 (not supported by all scanners). - Negative image QR Code not supported. Disable (*) Enable Model 1 control - Enables the decoding of Model 1 QR codes.
- Page 86 Automatic MicroQR activation - Micro QR is a small QR code with only one pattern. Disable (*) Enable Symbology identifier User defined - User defined symbology identifier. - See "Data transmission settings - symbology identifier - UDSI" to activate or deactivate UDSI transmission.
-
Page 87: Standard 2 Of 5
* (*) Compose: Please refer to SCM (Software Configuration Manager) in www.ute.com Structured append Disable (*) Enable Header transmission Disable (*) Enable Standard 2 of 5 - Numerical symbology. - Default format = Identicon (6 start/stop bars). - Also referred to as "Straight 2 of 5" and "Industrial 2 of 5." Disable (*) - 71 -... - Page 88 Enable Symbology identifier User defined - User defined symbology identifier. - See "Data transmission settings - symbology identifier - UDSI" to activate or deactivate UDSI transmission. - Use the default value or compose your custom symbology identifier for this symbology (1 - 4 characters). B5 (*) Compose: Please refer to SCM (Software Configuration Manager) in www.ute.com...
- Page 89 Computer Identics Check digit Check digit verification Disable (*) Modulo 10 Check digit transmission - You can chose to transmit or not transmitted the check digit. Disable (*) Enable Barcode length - Use the L1 as minimum length option if you know the minimum length of the codes in your application!!! - To optimize decoding performance and increase security, select the same length as the minimum length in your application (do not select a shorter...
- Page 90 (L2 and L3 are not used). - L2 = Only codes that comply with the lengths specified by L1, L2, and L3 will be read. - L3 = Codes at least the length specified by L1 and no longer than the maximum length specified by L2 are read (L3 is not used).
-
Page 91: Telepen
Telepen - Alphanumeric full ASCII symbology - letter case defined. - Default format = ASCII. Disable (*) Enable Symbology identifier User defined - User defined symbology identifier. - See "Data transmission settings - symbology identifier - UDSI" to activate or deactivate UDSI transmission. - Page 92 Format ASCII (*) Numeric Barcode length - Use the L1 as minimum length option if you know the minimum length of the codes in your application!!! - To optimize decoding performance and increase security, select the same length as the minimum length in your application (do not select a shorter length!!).
- Page 93 L1 as min, L2 as max Set length L1, L2 and L3 - Set barcode length L1, L2 and L3 according to the barcode length mode used. Compose L1: Compose L2: Compose L3: - 77 -...
-
Page 94: Chapter 4 Operating Settings
Chapter 4 Operating Settings - Settings that affect the way your product operates (trigger settings, flashing mode, data decoding security settings, beep characteristics, etc.). Pre-defined trigger modes - These are pre-defined trigger settings used to quickly set up your scanner. - If you are using a pre-defined mode, do not set the other Scanning/triggering settings. -
Page 95: Scanning / Triggering
Scanning / Triggering Triggering modes Continuous - At power up the lighting and decoding are on all the time. The trigger is not used. Continuous Level (*) - Lighting and decoding are on when the trigger line is activated (trigger pressed) and off when the trigger line is deactivated (trigger released). - Page 96 - When a bar code is detected, the lighting and decoding automatically turn on and stay on until another period of inactivity (timeout), after the timeout the scanner starts flashing again. Flashing Autostand - Autostand triggering mode switches from Level to Flashing (1D models) or Presentation (2D models).
- Page 97 - The trigger can be used in Presentation mode - when you pull the trigger the scanner functions as if it were in Level mode. - Only available with 2D models. Presentation Presentation threshold - Only available on 2D models. - Use this setting when in Presentation Triggering mode to regulate how sensitive the imager is to movement which automatically wakes up the scanner.
-
Page 98: Aimer Mode
Turn off after good read - When active, the scan engine stops the reading session after a successful decoding. - Turn off after good read is only used in the following trigger modes: - Level - Pulse - Autostand - Standard Aim NOTE: this parameter is NOT used with conti Enable (*) - Page 99 - Pulse - Autostand - Toggle* NOTE*: In Toggle trigger mode, "one pull aim, one pull read" does not work as stated. Instead one pull turns on the aimer only. When the trigger is released decoding begins. If no decode, second pull turns aimer and decoding off. Typical aimer (*) One pull aim and read - Pull and hold trigger - aiming beam (programmable duration) then reading...
- Page 100 - If you wait longer than the duration before the second pull, the cycle starts over with the aiming beam. 500 (*) 1200 Compose (ms) Bad read message Activation Disable (*) Enable Compose NOREAD (*) Compose: - 84 -...
- Page 101 Ignore stand detect - Enable ignore stand detect when you want to use Autostand triggering mode with and you are not using a detectable stand (charge base or Bluetooth base station). Disable (*) Enable Double scan prevention - When enabled pulling the trigger a second time does not start a new reading session unless the timeout has expired.
-
Page 102: Data Decoding Security
Data decoding security - Ensures correct transmission of data for difficult reading conditions and varying levels of barcode quality (poorly printed labels, variable lengths and no check digit, "fragile" symbologies). - Increasing the security level reduces the reading speed !!! Predefined security levels - Predefined security level settings can be modified individually - Use medium and high security levels for poor-quality bar codes or critical... - Page 103 Timeout between identical consecutive codes (ms) - Prevents reading the same bar code more than once. - Value is milliseconds. Compose (ms): Timeout between different consecutive codes (ms) - Prevents unwanted reading of other bar codes on the same label. 0 (*) Compose (ms): Center decoding...
- Page 104 Tolerance - The tolerance level for center decoding allows you to aim the laser close to the bar code to be read rather than be positioned on the bar code. - 0 = No tolerance (laser aimer must be positioned on the bar code to be read), 100 = most permissive (laser aimer can be positioned beside the bar code to be read).
-
Page 105: Beeps / Leds
Beeps / LEDs Note (tone frequency) High (*) Medium Power-up beeps 2 beeps = successful power-up 3 long beeps = EEPROM integrity error (contact your Intermec representative !). Disable (*) Enable Good read beeps Number - "Normal" bar codes: 1 beep (default) = good read - Configuration codes: 2 beeps = good read, 6 beeps = setup error, 3 long beeps = EEPROM integrity error (contact your Intermec representative - 89 -... - Page 106 1 beep (*) 2 beeps None Duration 80 (*) Timing - IBM and OCIA cash registers: do not send this parameter online to the scan engine through RS-232 cable 0-364032-10!!! Send it to the setup sheet and read the configuration code with your normal IBM / OCIA product cable connected.
- Page 107 During transmission (*) Before transmission After transmission Good read LED duration - "Read" LED green = "good read" - Setting a duration of 0 ms = "no good read LED" - Value is in milliseconds. 80 (*) 1000 2500 - 91 -...
- Page 108 5000 Disable/enable all good read signals - This setting can be used to disable all good read signals: Beep, LED and vibrate. Disable Enable (*) Error beep Disable Enable (*) Setup beep and LED Disable Enable (*) - 92 -...
- Page 109 Multicode beeps - By default the scanner does not beep when reading several bar codes when using the Multicode function (see Symbologies). Use this setting to activate beeps when reading bar codes that are part of a Multicode. None (*) Good Read Beep Shorter Beep - 93-...
-
Page 110: Data Transmission Settings
Chapter 5 Data Transmission Settings Symbology identifier [symbology id] [data] Not transmitted(*) AIM format [AIM symbology id] [data] - Activates for all symbologies the 3-character symbology identifier standardized by the AIM Committee. - Example: "] A 0" identifies standard Code 39 without check digit[[[ If the data in a bar code is modified (ISBN, . -
Page 111: Preamble
Code Mark [preamble] [code mark symbology id] [data] [postamble] - Activates code mark symbology identifier transmission for all symbologies. NOTE: To change the default values go to "Symbology/select symbology/ symbology identifier/code mark" and use the compose option. Code Mark Preamble [preamble] [symbology id] [data] [postamble] None(*) Compose:... -
Page 112: Inter-Character / Message Delay
Inter-Character / message delay - Avoids dropping characters if transmitting decoded data too fast for the host system. Inter-Character delay - Do not use for IBM 46xx cash registers or laser/wand emulation!!! - Value is in milliseconds. - This is not used when ISCP is active 0 (*) - 96 -... -
Page 113: Data Editing
Inter-message delay - Value is in milliseconds. 0 (*) Data editing - IMPORTANT [[[[ The data editing function is only available with STCDecode version 1.1.5.0 or later ]]]] - Your product can edit the data it receives before it transmits it to the host system. - Page 114 - The order in which you define the scenarios is important (the product compares incoming data with each scenario in turn and edits the data for the first matching scenario it finds). 1.Activate the scenario(s) you want the product to detect. 2.Define the input data you want to intercept for editing (any combination of input type, input length, input mask).
- Page 115 Compose barcode length: Compose mask: Scenario 2 Disable (*) Enable Select barcode Type: Compose barcode length: Compose mask: Scenario 3 Disable (*) - 99-...
- Page 116 Enable Select barcode Type: Compose barcode length: Compose mask: Scenario 4 Disable (*) Enable Select barcode Type: Compose barcode length: - 100 -...
- Page 117 Compose mask: Scenario 5 Disable (*) Enable Select barcode Type: Compose barcode length: Compose mask: Scenario 6 Disable (*) Enable - 101 -...
- Page 118 Select barcode Type: Compose barcode length: Compose mask: Scenario 7 Disable (*) Enable Select barcode Type: Compose barcode length: Compose mask: - 102 -...
-
Page 119: Appendix I Worldwide Support
Appendix I Worldwide Support Unitech’s professional support team is available to quickly answer questions or technical-related issues. Should an equipment problem occur, please contact the nearest Unitech regional service representative. For complete contact information please visit the Web sites listed below:...
Need help?
Do you have a question about the MS920 and is the answer not in the manual?
Questions and answers