Unitech MS926 User Manual
Wireless(bt) pocket 2d scanner
Hide thumbs
Also See for MS926:
- Quick start manual (2 pages) ,
- User manual (144 pages) ,
- Quick start manual (2 pages)

Subscribe to Our Youtube Channel
Related Manuals for Unitech MS926


Summary of Contents for Unitech MS926
- Page 1 MS926 User’s Manual Wireless(BT) Pocket 2D Scanner - MS926 - User's Manual Version 1.0 © 2016 unitech Electronics Co., Ltd. All rights reserved. unitech is a registered trademark of unitech Electronics Co., Ltd.
- Page 2 MS926 User’s Manual Change Log Date Change Description Version 2016/10/28 first published version © 2016 unitech Electronics Co., Ltd. All rights reserved. unitech is a registered trademark of unitech Electronics Co., Ltd.
-
Page 3: Preface
This device complies with FCC RF radiation exposure limits set forth for an uncontrolled environment. To maintain compliance with FCC RF © 2015 unitech Electronics Co., Ltd. All rights reserved. unitech is a registered trademark of unitech Electronics Co., Ltd. - Page 4 Canada. European Conformity Statement unitech Electronics co., Ltd herewith declares that the unitech product is in compliance with the essential requirements and all other provisions of the © 2015 unitech Electronics Co., Ltd. All rights reserved.
- Page 5 Waste electrical and electronic equipment (WEEE) unitech has set up a policy and process to meet the EU directive 2002/96/EC and update 2003/108/EC concerning electronic waste disposal. For more detailed information of the electronic waste disposal of the products you have purchased from unitech directly or via unitech’s resellers, you shall either...
- Page 6 MS926 User’s Manual Taiwan NCC Warning Statement 低功率電波輻射性電機管理辦法 第十二條:經型式認證合格之低功率射頻電機,非經許可,公司、商號或使用者 均不得擅自變更頻率、加大功率或變更原設計之特性及功能。 第十四條:低功率射頻電機之使用不得影響飛航安全及干擾合法通信;經發現有 干擾現象時,應立即停用,並改善至無干擾時方得繼續使用。 低功率射頻電機需忍受合法通信或工業、科學及醫療用電波輻射性電機設備 之干擾。 注意事項: 1. 使用過度恐傷害視力。 2. 使用30分鐘請休息10分鐘;2歲以下幼兒不看螢幕,2歲以上每天看螢幕不要超過 1小時。 3. 減少電磁波影響,請妥適使用。 © 2015 unitech Electronics Co., Ltd. All rights reserved. unitech is a registered trademark of unitech Electronics Co., Ltd.
-
Page 7: Laser Information
MS926 User’s Manual Laser Information The unitech product is certified in the U.S. to conform to the requirements of DHHS/CDRH 21CFR Subchapter J and to the requirements of IEC 825-1. Class II and Class 2 products are not considered to be hazardous. The unitech product contains internally a Visible Laser Diode (VLD) whose emissions do not exceed the maximum limits as set forth in the above regulations. -
Page 8: Battery Notice
It may not be functional anymore. Please only use the original battery from unitech. Using a third party battery can damage our products. Please note that when such damage occurs, it is not covered by your warranty. - Page 9 If the connector is damaged, please ensure the connector is being fully repaired before use the unit to avoid causing short circuited. © 2015 unitech Electronics Co., Ltd. All rights reserved. unitech is a registered trademark of unitech Electronics Co., Ltd.
- Page 10 Please follow the limitation of suggested temperature conditions to avoid failure, damage or malfunction. *For applicable temperature conditions, please refer to the specification of each product. viii © 2015 unitech Electronics Co., Ltd. All rights reserved. unitech is a registered trademark of unitech Electronics Co., Ltd.
-
Page 11: Adapter Notice
Please remove the power adapter when the battery is fully recharged. The bundled power adapter that comes with your unitech product is not meant to be used outdoors. An adapter exposed to water or rain, or a very humid environment can cause damage to both the adapter and the product. -
Page 12: Worldwide Support
MS926 User’s Manual Worldwide Support unitech’s professional support team is available to quickly answer questions or assist with technical-related issues. Should an equipment problem occur, please contact the nearest unitech regional service representative. For complete contact information please visit the Web sites listed below: Taipei, Taiwan –... -
Page 13: Warranty Policy
The warranty period is varied from each country. Please consult with your supplier or unitech local office for actual length of warranty period to your purchased product. Warranty becomes void if equipment is modified, improperly installed or used, damaged by accident or neglect, or if any parts are improperly installed or replaced by the user. -
Page 14: Table Of Contents
Chapter 3 – Symbology ................23 3.1 All symbologies..................23 3.2 Message Length Description ..............23 3.3 1D......................24 3.4 2D......................60 Chapter 4 – Command Settings............65 © 2015 unitech Electronics Co., Ltd. All rights reserved. unitech is a registered trademark of unitech Electronics Co., Ltd. - Page 15 4.10 Lookup Table Function ..............115 4.11 Manually set up................. 116 Appendix A – Symbology Charts............119 Appendix B – Programming Charts..........124 xiii © 2015 unitech Electronics Co., Ltd. All rights reserved. unitech is a registered trademark of unitech Electronics Co., Ltd.
-
Page 16: Chapter 1 - Overview
MS926 User’s Manual Chapter 1 - Overview 1.1 Package Please make sure the following contents are in the MS926 gift box. If something is missing or damaged, please contact your unitech representative. The standard package contents Quick Reference Micro USB to... -
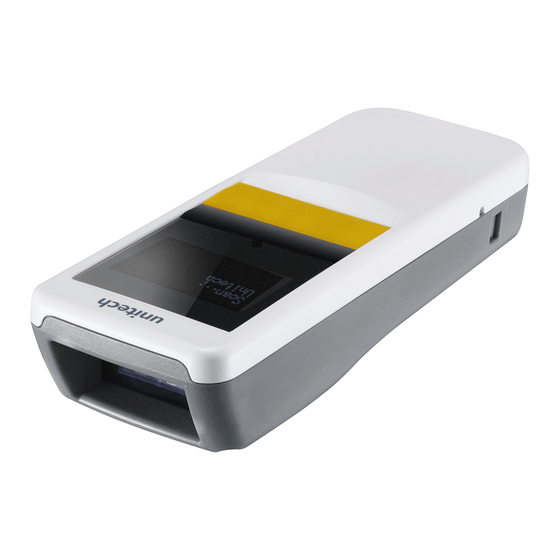
Page 17: Scanner Detail
MS926 User’s Manual 1.2 Scanner Detail Scan & Power Button Power On/Off & Scan barcode Page up / Page down keys (on the side of MS926) Move up / down through list of menu items Charging Status LED (Red LED) Scan Window... -
Page 18: Specifications
MS926 User’s Manual 1.3 Specifications System Display 1" OLED, 128 x 64 Proprietary, Connect to host with Windows, Android and iOS 64 Kbytes SRAM / 2 MB Flash ROM Memory 3 Keys: Page Up, Page Down, Scan with power on/off feature Optical &... - Page 19 MS926 User’s Manual Functionality Symbologies 1D Code UPC-A, UPC-E, EAN-8, EAN-13, CODE 39, CODE 128, GS1 128 , I 2 of 5, NEC 2 of 5, CODE 93, Codabar, GS1DataBar Omn, GS1DataBar Ltd, GS1DataBar Exp, CODE 11, MSI, UPC-E1, S 2 of 5 Indus, S 2 of 5 IATA,...
- Page 20 MS926 User’s Manual Communication Radio Frequency BT V2.1+EDR. Class 2 Protocol Wireless SPP & HID profiles Range Up to 30 Feet (Open space) Interface supported Micro USB Mechanical Scanner Dimension H21.1*W36.9*L95.9mm Scanner Weight Switch life 10 million times Regulation Approvals...
-
Page 21: Getting Started
MS926 User’s Manual 1.4 Getting Started To turn on the scanner, press and hold the Scan & Power Button for about 2 seconds. To turn off the scanner, press and hold the Scan & Power Button for about 5 seconds. -
Page 22: Battery Charging
MS926 User’s Manual 1.5 Battery Charging Insert the Micro USB connector into the port on the scanner and the standard USB connector of the USB cable into a USB port on the host PC. - 7 -... -
Page 23: Led Indicator / Beeper Sequence
MS926 User’s Manual 1.6 LED Indicator / Beeper Sequence LED for Barcode LED for Battery Division Action/Status Beep / Sound reading & status Communication Green & Red Power On Lights One High Beep blink once Three short beeps Long press trigger key... -
Page 24: Display Menu Tree
MS926 User’s Manual 1.7 Display Menu Tree To enter main menu of MS926, press and hold Page Down button and then press Page Up button. You will see the following screen on the MS926 display. Now you can use Page Up/Down button to scroll through the menu and use Scan button to make your selection. - Page 25 MS926 User’s Manual Sub Menu Sub Menu Level Default Options/Result Menu Level 1 2/Options/Result Setting 5. Setup By Label 5.1 Enable Enable 5.2 Disable 6.1 Restore to FAC Save to Selected 6. FAC Default Default? Customer Setting Yes/No 7.1 Show Firmware 7.
- Page 26 MS926 User’s Manual Sub Menu Sub Menu Level Default Options/Result Menu Level 1 2/Options/Result Setting 2.1. Erase Buffer Erase entry if Yes 2. Erase Buffer Yes/ No selected 3. Free MEM 3.1 Show FREE BUFFER Space 4.1 CR 4.2 None 4.
- Page 27 MS926 User’s Manual Sub Menu Sub Menu Level Default Options/Result Menu Level 1 2/Options/Result Setting 6.2 TIME STAMP Disable/HHMMAM/ HHMM/ HH:MM AM/ Disable HH:MM/HHMMSSAM/ HHMMSS/ HH:MM:SS AM/ HH:MM:SS 7. Data Disable 7.1 Disable Disable /Enable Validation CHECKING CHECKING 7.2 1:N Checking...
- Page 28 MS926 User’s Manual Top Menu Menu Result Default Setting 1. BT Pairing 1.1 Pairing 2.1 12 Characters Bluetooth Bluetooth 2.MAC Address MAC Address CONFIG 3.1 Show PAIRED DEV NAME 3. Paired Device Show PAIRED DEV ADDR 4. Remove Pair 4.1 Remove pair 5.1 Signal Strength Detection...
- Page 29 MS926 User’s Manual Default Top Menu Menu Result Result Setting 1.1 Medium/ 1. Beeper Volume Low/ Mute/ Medium High 2.1 Disable/ 2. Vibrator Disable Enable 3.1.1 Beeper & Vibrator Beeper 3.1 Good Read Vibrator / Beeper & None Vibrator 3.2.1 Beeper & Vibrator Beeper 3.2 Connection...
- Page 30 MS926 User’s Manual Default Top Menu Menu Options Options Setting 1. Disable All 1D OFF/ON 2.1 UPC-A Enabled/Disabled Enabled 2.2 UPC-E Enabled/Disabled Enabled 2.3 EAN-8 Enabled/Disabled Enabled 2.4 EAN-13 Enabled/Disabled Enabled 2.5 CODE 39 Enabled/Disabled Enabled 2.6 CODE 128 Enabled/Disabled Enabled 2.7 GS1 128...
- Page 31 MS926 User’s Manual Default Top Menu Menu Options Options Setting 5.3 Aztec Code Enabled/Disabled Enabled 5.4 PDF417 Enabled/Disabled Enabled 5.5 Macro PDF417 Enabled/Disabled Enabled 5.6 Micro PDF417 Enabled/Disabled Disabled 5.7 MaxiCode Enabled/Disabled Disabled 5.8 Codablock A Enabled/Disabled Disabled 5.9 Codablock F...
- Page 32 MS926 User’s Manual Default Top Menu Menu Options Options Setting 6.14 InfoMail British Enabled/Disabled Disabled 6.15 Intelligent Mail Enabled/Disabled Disabled Postnet w/B&B' 6.16 Postnet Postal-4i Enabled/Disabled Disabled 6.17 Postnet Enabled/Disabled Disabled Intelligent Mail 6.18 Postal-4i Enabled/Disabled Disabled Intelligent Mail 6.19 Postal-4i...
- Page 33 MS926 User’s Manual Default Top Menu Menu Options Options Setting 6.31 Planet Postal-4i Intelligent Mail Enabled/Disabled Disabled Postnet 6.32 Planet Postal-4i Intelligent Mail Enabled/Disabled Disabled Postnet w/B&B' 7. Exit Sub Menu Default Top Menu Result Level 1 Setting 1. iOS Soft 1.1 iOS SOFT KEYPAD by DblClick...
-
Page 34: Chapter 2 - Installation
PC. Select Add New Devices. When you see a device list windows, choose MS926-XXXX and then press Next. PC now is establishing BT connection. 4. MS926 will beep when your PC successfully establish a BT connection with MS926. - 19 -... -
Page 35: Bt Spp
BT SPP Establishing BT connection in BT SPP mode. 1. To establish BT connection between MS926 and your PC in BT SPP mode, you must install unitech CDC driver on your PC in advance. ( For CDC driver, please check on the product section on unitech website : http://www.ute.com... -
Page 36: Bt Spp (Slave)
BT SPP (Slave) Establishing BT connection in BT SPP (Slave) mode. 1. To establish a BT connection between MS926 and your PC in BT SPP (Slave) mode, you must install unitech CDC Driver on your PC in advance. ( For CDC driver, please check on the product section on unitech website : http://www.ute.com... -
Page 37: Usb Spp
USB SPP Establishing connection in USB SPP mode. 1. To establish connection between MS926 and your PC in USB SPP mode, you must install unitech CDC Driver on your PC in advance. ( For CDC driver, please check on the product section on unitech website : http://www.ute.com... -
Page 38: Chapter 3 - Symbology
MS926 User’s Manual Chapter 3 – Symbology 3.1 All symbologies If you want to decode all the symbologies allowable for your scanner, scan the All Symbologies On code. If on the other hand, you want to decode only a particular symbology, scan All Symbologies Off followed by the On symbol for that particular sym-bology. - Page 39 MS926 User’s Manual For a value other than the minimum and maximum message length defaults, scan the bar codes included in the explanation of the symbology, then scan the digit value of the message length and Save bar codes on the Programming Chart.
- Page 40 MS926 User’s Manual 3.3.1.2 Codabar Check Characters Codabar check characters are created using different “modulos.” You can program the scanner to read only Codabar bar codes with Modulo 16 check characters. Default = No Check Character. No Check Character indicates that the scanner reads and transmits bar code data with or without a check character.
-
Page 41: Codabar Concatenation
MS926 User’s Manual 3.3.1.3 Codabar Concatenation Codabar supports symbol concatenation. When you enable concatenation, the scanner looks for a Codabar symbol having a “D” start character, adjacent to a symbol having a “D” stop character. In this case the two messages are concatenated into one with the “D”... - Page 42 MS926 User’s Manual 3.3.2 Code 39 Code 39 On* Default All Code 39 Settings Code 39 Off 3.3.2.1 Code 39 Start / Stop Characters Start/Stop characters identify the leading and trailing ends of the bar code. You may either transmit, or not transmit Start/ Stop characters.
-
Page 43: Code 39 Message Length
MS926 User’s Manual 3.3.2.2 Code 39 Check Characters No Check Character indicates that the scanner reads and transmits bar code data with or without a check character. When Check Character is set to Validate, but Don’t Transmit, the unit only reads Code 39 bar codes printed with a check character, but will not transmit the check character with the scanned data. -
Page 44: Code 39 Append
MS926 User’s Manual 3.3.2.4 Code 39 Append This function allows the scanner to append the data from several Code 39 bar codes together before transmitting them to the host computer. When the scanner encounters a Code 39 bar code with the append trigger character(s), it buffers Code 39 bar codes until it reads a Code 39 bar code that does not have the append trigger. - Page 45 MS926 User’s Manual 3.3.2.5 Full ASCIIIf Full ASCII Code 39 decoding is enabled, certain character pairs within the bar code symbol will be interpreted as a single character. For example: $V will be decoded as the ASCII character SYN, and /C will be decoded as the ASCII character #.
-
Page 46: Code 39 Code Page
MS926 User’s Manual 3.3.2.6 Code 39 Code Page Code pages define the mapping of character codes to characters. If the data received does not display with the proper characters, it may be because the bar code being scanned was created using a code page that is different from the one the host program is expecting. -
Page 47: Check Digit
MS926 User’s Manual 3.3.3.1 Check digit No Check Digit indicates that the scanner reads and transmits bar code data with or without a check digit. When Check Digit is set to Validate, but Don’t Transmit, the unit only reads Interleaved 2 of 5 bar codes printed with a check digit, but will not transmit the check digit with the scanned data. -
Page 48: Code 93 Message Length
MS926 User’s Manual 3.3.4 Code 93 Code 93 On* Default All Code 93 Settings Code 93 Off 3.3.4.1 Code 93 Message Length Scan the bar codes below to change the message length. Refer to Message Length Description for additional information. Minimum and Maximum lengths = 0-80. -
Page 49: Code 93 Code Page
MS926 User’s Manual 3.3.4.2 Code 93 Append This function allows the scanner to append the data from several Code 93 bar codes together before transmitting them to the host computer. When this function is enabled, the scanner stores those Code 93 bar codes that start with a space (excluding the start and stop symbols), and does not immediately transmit the data. - Page 50 MS926 User’s Manual 3.3.5 Standard 2 of 5 Industrial (three-bar start/stop) Standard 2 of 5 Industrial On Default All Standard 2 of 5 Industrial Settings Standard 2 of 5 Industrial Off* 3.3.5.1 Standard 2 of 5 Industrial Message Length Scan the bar codes below to change the message length. Refer to...
-
Page 51: Matrix 2 Of
MS926 User’s Manual 3.3.6.1 Standard 2 of 5 IATA Message Length Scan the bar codes below to change the message length. Refer to Message Length Description for additional information. Minimum and Maximum lengths = 1-48. Minimum Default = 4, Maximum Default = 48. -
Page 52: Check Digits Required
MS926 User’s Manual 3.3.8 Code 11 Code 11 On Default All Code 11 Settings Code 11 Off* 3.3.8.1 Check Digits Required This option sets whether 1 or 2 check digits are required with Code 11 bar codes. Default = Two Check Digits. -
Page 53: Isbt 128 Concatenation
MS926 User’s Manual 3.3.9 Code 128 Code 128 On* Default All Code 128 Settings Code 128 Off 3.3.9.1 ISBT 128 Concatenation In 1994 the International Society of Blood Transfusion (ISBT) ratified a standard for communicating critical blood information in a uniform manner. -
Page 54: Code 128 Message Length
MS926 User’s Manual 3.3.9.2 Code 128 Message Length Scan the bar codes below to change the message length. Refer to Message Length Description for additional information. Minimum and Maximum lengths = 0-80. Minimum Default = 0, Maximum Default = 80. -
Page 55: Code 128 Code Page
MS926 User’s Manual 3.3.9.4 Code 128 Code Page Code pages define the mapping of character codes to characters. If the data received does not display with the proper characters, it may be because the bar code being scanned was created using a code page that is different from the one the host program is expecting. - Page 56 MS926 User’s Manual 3.3.10.2 UPC-A Number System The numeric system digit of a U.P.C. symbol is normally transmitted at the beginning of the scanned data, but the unit can be programmed so it will not transmit it. Default = On.
- Page 57 MS926 User’s Manual 3.3.10.4 UPC-A Addenda Required When Required is scanned, the scanner will only read UPC-A bar codes that have addenda. You must then turn on a 2 or 5 digit addenda. Default = Not Required. Not Required* Required 3.3.10.5 UPC-A Addenda Separator...
- Page 58 MS926 User’s Manual 3.3.10.6 UPC-A/EAN-13 with Extended Coupon Code Use the following codes to enable or disable UPC-A and EAN-13 with Extended Coupon Code. When left on the default setting (Off), the scanner treats Coupon Codes and Extended Coupon Codes as single bar codes. If you...
- Page 59 MS926 User’s Manual 3.3.11 UPC-E0 Most U.P.C. bar codes lead with the 0 number system. To read these codes, use the UPC-E0 On selection. If you need to read codes that lead with the 1 number system, use UPC-E1. Default = On.
- Page 60 MS926 User’s Manual 3.3.11.3 UPC-E0 Addenda Separator When this feature is On, there is a space between the data from the bar code and the data from the addenda. When turned Off, there is no space. Default = On. 3.3.11.4 UPC-E0 Check Digit Check Digit specifies whether the check digit should be transmitted at the end of the scanned data or not.
- Page 61 MS926 User’s Manual 3.3.11.6 UPC-E0 Addenda This selection adds 2 or 5 digits to the end of all scanned UPC-E data. Default = Off for both 2 Digit and 5 Digit Addenda. 2 Digit Addenda Off* 2 Digit Addenda On...
- Page 62 MS926 User’s Manual 3.3.13 EAN/JAN-13 EAN/JAN-13 On* Default All EAN/JAN Settings EAN/JAN-13 Off 3.3.13.1 Convert UPC-A to EAN-13 When UPC-A Converted to EAN-13 is selected, UPC-A bar codes are converted to 13 digit EAN-13 codes by adding a zero to the front. When Do not Convert UPC-A is selected, UPC-A codes are read as UPC-A.
- Page 63 MS926 User’s Manual 3.3.13.3 EAN/JAN-13 Addenda This selection adds 2 or 5 digits to the end of all scanned EAN/JAN-13 data. Default = Off for both 2 Digit and 5 Digit Addenda. 2 Digit Addenda Off* 2 Digit Addenda On...
- Page 64 MS926 User’s Manual 3.3.13.5 EAN/JAN-13 Addenda Separator When this feature is On, there is a space between the data from the bar code and the data from the addenda. When turned Off, there is no space. Default = On. Note: If you want to enable or disable EAN13 with Extended Coupon Code, refer to UPC-A/EAN-13 with Extended Coupon Code.
- Page 65 MS926 User’s Manual 3.3.14.2 EAN/JAN-8 Addenda This selection adds 2 or 5 digits to the end of all scanned EAN/JAN-8 data. Default = Off for both 2 Digit and 5 Digit Addenda. 2 Digit Addenda Off* 2 Digit Addenda On...
- Page 66 MS926 User’s Manual 3.3.14.4 EAN/JAN-8 Addenda Separator When this feature is On, there is a space between the data from the bar code and the data from the addenda. When turned Off, there is no space. Default = On. 3.3.15 MSI...
-
Page 67: Msi Check Character
MS926 User’s Manual 3.3.15.1 MSI Check Character Different types of check characters are used with MSI bar codes. You can program the scanner to read MSI bar codes with Type 10 check characters. Default = Validate Type 10, but Don’t Transmit. When Check Character is set... -
Page 68: Msi Message Length
MS926 User’s Manual 3.3.15.2 MSI Message Length Scan the bar codes below to change the message length. Refer to Message Length Description for additional information. Minimum and Maximum lengths = 4-48. Minimum Default = 4, Maximum Default = 48. Minimum Message Length Maximum Message Length 3.3.16 GS1 DataBar Omnidirectional... -
Page 69: Gs1 Databar Expanded
MS926 User’s Manual 3.3.18 GS1 DataBar Expanded GS1 DataBar Expanded On* Default All GS1 DataBar Expanded Settings GS1 DataBar Expanded Off 3.3.18.1 GS1 DataBar Expanded Message Length Scan the bar codes below to change the message length. Refer to Message Length Description for additional information. -
Page 70: Pdf417 Message Length
MS926 User’s Manual 3.3.19.1 PDF417 Message Length Scan the bar codes below to change the message length. Refer to Message Length Description for additional information. Minimum and Maximum lengths = 1-2750. Minimum Default = 1, Maximum Default = 2750. Minimum Message Length Maximum Message Length 3.3.20 QR Code... -
Page 71: Qr Code Page
MS926 User’s Manual 3.3.20.2 QR Code Append This function allows the scanner to append the data from several QR Code bar codes together before transmitting them to the host computer. When the scanner encounters an QR Code bar code with the append trigger character(s), it buffers the number of QR Code bar codes determined by information encoded in those bar codes. -
Page 72: Data Matrix
MS926 User’s Manual 3.3.21 Data Matrix Data Matrix On* Default All Data Matrix Settings Data Matrix Off 3.3.21.1 Data Matrix Message Length Scan the bar codes below to change the message length. Refer to Message Length Description for additional information. Minimum and Maximum lengths = 1-3116. -
Page 73: Data Matrix Code Page
MS926 User’s Manual 3.3.21.2 Data Matrix Code Page Data Matrix Code pages define the mapping of character codes to characters. If the data received does not display with the proper characters, it may be because the bar code being scanned was created using a code page that is different from the one the host program is expecting. - Page 74 MS926 User’s Manual 3.3.23 Chinese Sensible (Han Xin) Code Han Xin On Default All Han Xin Settings Han Xin Off* 3.3.23.1 Han Xin Code Message Length Scan the bar codes below to change the message length. Refer to Message Length Description for additional information.
-
Page 75: Single 2D Postal Codes
MS926 User’s Manual 3.4 2D 3.4.1 Postal Codes - 2D The following lists the possible 2D postal codes, and 2D postal code combinations that are allowed. Only one 2D postal code selection can be active at a time. If you scan a second 2D postal code selection, the first selection is overwritten. -
Page 76: Combination 2D Postal Codes
MS926 User’s Manual Postal-4i On Postnet On Postnet with B and B’ Fields On InfoMail On 3.4.1.2 Combination 2D Postal Codes InfoMail and British Post On Postal-4i and Postnet with B and B’ Fields On Postnet and Postal-4i On Planet Code and Postal-4i On... - Page 77 MS926 User’s Manual Planet Code, Postnet, and Postal-4i On Planet Code and Postnet On Planet Code, Postal-4i, and Intelligent Mail Bar Code On Intelligent Mail Bar Code and Postnet with B and B’ Fields On Planet Code, Postal-4i, and Postnet with B and B’ Fields On...
- Page 78 MS926 User’s Manual Planet Code, Postal-4i, Intelligent Mail Bar Code, and Postnet with B and B’ Fields On Planet Code and Intelligent Mail Bar Code On Planet Code, Postal-4i, Intelligent Mail Bar Code, and Postnet On Planet Code, Postnet, and...
-
Page 79: China Post
MS926 User’s Manual 3.4.1.3 China Post (Hong Kong 2 of 5) China Post (Hong Kong 2 of 5) On Default All China Post (Hong Kong 2 of 5) Settings China Post (Hong Kong 2 of 5) Off* 3.4.1.4 China Post... -
Page 80: Chapter 4 - Command Settings
MS926 User’s Manual Chapter 4 – Command Settings 4.1 System setting 4.1.1 Default Scan below bar code to restore the factory setting Factory Default 4.1.2 Display FW version / Data Format Scan below bar code to show the current F/W & BT version FW version Scan the bar code below to show current data format settings. -
Page 81: Auto Power Off
MS926 User’s Manual 4.1.3 Auto Power Off Scan below bar code to set the time frame for auto power off 1 Minute 3 Minutes 5 Minutes * 10 Minutes 15 Minutes 20 Minutes 30 Minutes Disable 4.1.4 Power Saving Scan below bar code to set the time frame for power saving. -
Page 82: Bt Pairing
MS926 User’s Manual 4.2 BT pairing 4.2.1 Enter Pairing mode Scan below bar code to enter BT pairing mode BT Pairing 4.2.2 Paired device info. Scan below bar code to show the current paired device information Paired Device 4.2.3 Remove the pair... -
Page 83: Output Data Transmit
MS926 User’s Manual 4.3 Output data transmit 4.3.1 Auto mode In this mode, when scanner is out off BT transmit range, the scanned data will be stored in the memory and transmit data automatically when back to in-range. Auto mode* 4.3.1.1 Erase last memory entry... - Page 84 MS926 User’s Manual 4.3.2 Wedge mode In this mode, the data only transmit while the BT is connected Wedge mode 4.3.3 Signal Strength Detection The purpose of signal strength detection is to enhance the data transmission for a better stability. For example, if operating with the weak RF signal, strongly suggest to enable signal strength detection to avoid any data loss.
-
Page 85: Batch Mode
MS926 User’s Manual 4.3.4 Batch mode In this mode, the scanned data will be stored in the memory all the time and transmit data only when BT is connected by scanned the “send batch” bar code Batch mode 4.3.4.1 Send batch... -
Page 86: Bt Config
MS926 User’s Manual 4.4 BT Config 4.4.1 HID keyboard block delay In BT HID mode, scan below bar code to set the block delay time. Default is 10ms. 10 ms * 50 ms 100 ms 500 ms 1 Sec. 3 Sec. - Page 87 MS926 User’s Manual 4.4.2 HID keyboard inter-character delay In BT HID mode, scan below bar code to set inter-character delay time. Default is 1ms. 1 ms * 5 ms 10 ms 20 ms 50 ms 100 ms 4.4.3 HID keyboard Case In BT HID mode, scan below bar code to change the alphabet case.
- Page 88 MS926 User’s Manual 4.4.4 HID keyboard language In BT HID mode, scan below bar code to change keyboard language. Default is US English US English * UK English Swiss Swedish Norwegian Italian German French Danish Partial ALT Japanese (OADG109) Spanish...
-
Page 89: Beep & Vibration & Indicators
MS926 User’s Manual 4.5 Beep & Vibration & Indicators 4.5.1 Beep Scan below bar code to adjust beep volume. Default: Medium volume 4.5.1.1 High volume High Volume 4.5.1.2 Medium volume * Medium Volume* 4.5.1.3 Low volume Low Volume 4.5.1.4 Mute Mute 4.5.2 Vibration... - Page 90 MS926 User’s Manual 4.5.3 Beep & Vibration Setting manually Please follow the steps to set up the Beep & Vibration. Main Menu Beep & Vibrate Indicators Button Beeper & Vibrator * None Beeper Vibrator 4.5.4 Indicators 4.5.4.1 Good Read Indicator Beeper * Beeper &...
- Page 91 MS926 User’s Manual 4.5.4.4 System Setting Indicator Beeper * Beeper & Vibrator Vibrator None 4.5.4.5 System Warning/Error Indicator Beeper * Beeper & Vibrator Vibrator None 4.5.4.6 Power On Indicator Beeper * Beeper & Vibrator Vibrator None 4.5.4.7 Power Off Alarm Beeper * Beeper &...
-
Page 92: Scan Mode / Parameter Selection
MS926 User’s Manual 4.6 Scan mode / Parameter Selection 4.6.1 Manual Trigger Mode When in manual trigger mode, the scanner scans until a bar code is read, or until the trigger is released. Manual Trigger - Normal 4.6.1.1 LED Illumination - Manual Trigger If you wish to set the illumination LED brightness, scan one of the bar codes below. -
Page 93: Serial Trigger Mode
MS926 User’s Manual 4.6.2 Serial Trigger Mode You can activate the scan engine by pressing the trigger. When in serial mode, the scan engine scans until a bar code has been read or until the deactivate command is sent. The scan engine can also be set to turn itself off after a specified time has elapsed. -
Page 94: Presentation Sensitivity
MS926 User’s Manual 4.6.3.1 Idle Illumination - Presentation Mode Scan one of the bar codes below to set the LED illumination for the scanner when it is in an idle state in Presentation Mode. Default = High. Note: If you use one of the lower Idle Illumination settings, and there is not enough ambient light, the scanner may have difficulty detecting when a bar code is presented to it. - Page 95 MS926 User’s Manual 4.6.3.3 Centering Use Centering to narrow the scan engine’s field of view to make sure that when the scanner is hand-held, it reads only those bar codes intended by the user. For instance, if multiple codes are placed closely together, centering will insure that only the desired codes are read.
-
Page 96: Presentation Centering
MS926 User’s Manual 4.6.3.4 Presentation Centering Use Presentation Centering to narrow the scanner’s field of view when it is in the stand to make sure the scanner reads only those bar codes intended by the user. For instance, if multiple codes are placed closely together, Presentation Centering will insure that only the desired codes are read. - Page 97 MS926 User’s Manual Scan Presentation Centering On, then scan one of the following bar codes to change the top, bottom, left, or right of the centering window. Then scan the percent you want to shift the centering window using digits on the inside back cover of this manual.
-
Page 98: Poor Quality Pdf Codes
MS926 User’s Manual 4.6.4 Poor Quality Codes 4.6.4.1 Poor Quality 1D Codes This setting improves the scanner’s ability to read damaged or badly printed linear bar codes. When Poor Quality 1D Reading On is scanned, poor quality linear bar code reading is improved, but the scanner’s snappiness is decreased, making it less aggressive when reading good quality bar codes. -
Page 99: Mobile Phone Read Mode
MS926 User’s Manual 4.6.5 Mobile Phone Read Mode When this mode is selected, your scanner is optimized to read bar codes from mobile phone or other LED displays. However, the speed of scanning printed bar codes may be slightly lower when this mode is enabled. -
Page 100: Reread Delay
MS926 User’s Manual 4.6.7 Reread Delay This sets the time period before the scan engine can read the same bar code a second time. Setting a reread delay protects against accidental rereads of the same bar code. Longer delays are effective in minimizing accidental rereads. - Page 101 MS926 User’s Manual 4.6.9 No Read With No Read turned On, the scan engine notifies you if a code cannot be read. If using an EZConfig-Scanning Tool Scan Data Window, an “NR” appears when a code cannot be read. If No Read is turned Off, the “NR” will not appear.
-
Page 102: Video Reverse
MS926 User’s Manual 4.6.10 Video Reverse Video Reverse is used to allow the scan engine to read bar codes that are inverted. The Video Reverse Off bar code below is an example of this type of bar code. Scan Video Reverse Only to read only inverted bar codes. Scan Video Reverse and Standard Bar Codes to read both types of codes. -
Page 103: Working Orientation
MS926 User’s Manual 4.6.11 Working Orientation Some bar codes are direction-sensitive. For example, KIX codes and OCR can misread when scanned sideways or upside down. Use the working orientation settings if your direction-sensitive codes will not usually be presented upright to the scanner. -
Page 104: Prefix/Suffix Selections
MS926 User’s Manual 4.7 Prefix/Suffix selections 4.7.1 To Add a Prefix or Suffix Step 1. Scan the Add Prefix or Add Suffix symbol. Step 2. Determine the 2 digit Hex value from the Symbology Chart (included in the Symbology Charts) for the symbology to which you want to apply the prefix or suffix. -
Page 105: To Clear One Or All Prefixes Or Suffixes
MS926 User’s Manual 4.7.2 To Clear One or All Prefixes or Suffixes You can clear a single prefix or suffix, or clear all prefixes/suffixes for a symbology. If you have been entering prefixes and suffixes for single symbologies, you can use Clear One Prefix (Suffix) to delete a specific character from a symbology. - Page 106 MS926 User’s Manual 4.7.3 To Add a Carriage Return Suffix to All Symbologies Scan the following bar code if you wish to add a carriage return suffix to all symbologies at once. This action first clears all current suffixes, then programs a carriage return suffix for all symbologies.
- Page 107 MS926 User’s Manual 4.7.4 Utilities To Add a Test Code I.D. Prefix to All Symbologies This selection allows you to turn on transmission of a Code I.D. before the decoded symbology. (See the Symbology Charts) for the single character code that identifies each symbology.
-
Page 108: Data Formatting
MS926 User’s Manual 4.8 Data formatting 4.8.1 Data Format Editor Introduction You may use the Data Format Editor to change the scan engine’s output. For example, you can use the Data Format Editor to insert characters at certain points in bar code data as it is scanned. The selections in the following pages are used only if you wish to alter the output. -
Page 109: Add A Data Format
MS926 User’s Manual 4.8.2 Add a Data Format Step 1. Scan the Enter Data Format symbol. Step 2. Select Primary/Alternate FormatDetermine if this will be your primary data format, or one of 3 alternate formats. This allows you to save a total of 4 different data formats. -
Page 110: Other Programming Selections
MS926 User’s Manual Enter Data Format Discard Save 4.8.3 Other Programming Selections Clear One Data Format This deletes one data format for one symbology. If you are clearing the primary format, scan 0 from the Programming Chart. If you are clearing an alternate format, scan 1,2, or 3, depending on the format you are clearing. -
Page 111: Data Format Editor Commands
MS926 User’s Manual 4.8.4 Data Format Editor Commands When working with the Data Format Editor, a virtual cursor is moved along your input data string. The following commands are used to both move this cursor to different positions, and to select, replace, and insert data into the final output. - Page 112 MS926 User’s Manual F2 Example: Send a number of characters Send the first 10 characters from the bar code above, followed by a carriage return. Command string:F2100D F2 is the “Send a number of characters” command 10 is the number of characters to send...
- Page 113 MS926 User’s Manual F3 Example: Send all characters up to a particular character Using the bar code above, send all characters up to but not including “D,” followed by a carriage return. Command string: F3440D F3 is the “Send all characters up to a particular character” command 44 is the hex value for a 'D”...
- Page 114 MS926 User’s Manual ■ Send all characters up to a string E9 Include in the output message all but the last “nn” characters, starting from the current cursor position. The cursor is moved forward to one position past the last input message character included. Syntax = E9nn where nn stands for the numeric value (00-99) for the number of characters that will not be sent at the end of the message.
- Page 115 MS926 User’s Manual ■ Insert a string BA Send “ss” string of “nn” length in the output message, leaving the cursor in the current position. Syntax = BAnnnns...s where nnnn stands for the length of the string, and s...s stands for the string. The string is made up of hex values for the characters in the string.
- Page 116 MS926 User’s Manual ■ Insert symbology name B3 Insert the name of the bar code’s symbology in the output message, without moving the cursor. Only symbologies with Symbology Charts. Refer to the ASCII Conversion Chart (Code Page 1252), for decimal, hex and character codes.
- Page 117 MS926 User’s Manual ■ Insert key strokes B5 Insert a key stroke or combination of key strokes. Key strokes are dependent on your keyboard. Any key can be inserted, including arrows and functions. Syntax = B5xxssnn where xx is the number of keys pressed (without key modifiers), ss is the key modifier from the table below, and nn is the key number.
-
Page 118: Move Commands
MS926 User’s Manual 4.8.4.2 Move Commands ■ Move the cursor forward a number of characters F5 Move the cursor ahead “nn” characters from current cursor position. Syntax = F5nn where nn is the numeric value (00-99) for the number of characters the cursor should be moved ahead. -
Page 119: Search Commands
MS926 User’s Manual FE is the “Compare characters” command 31 is the hex value for 1 F7 is the “Move the cursor to the beginning” command F2 is the “Send a number of characters” command 06 is the number of characters to send... - Page 120 MS926 User’s Manual ■ Search backward for a character F9 Search the input message backward for “xx” character from the current cursor position, leaving the cursor pointing to the “xx” character. Syntax = F9xx where xx stands for the search character’s hex value for its ASCII code.
- Page 121 MS926 User’s Manual ■ Search backward for a string B1 Search backward for “s” string from the current cursor position, leaving cursor pointing to “s” string. Syntax = B1nnnnS where nnnn is the string length (up to 9999), and S consists of the ASCII hex value of each character in the match string.
-
Page 122: Miscellaneous Commands
MS926 User’s Manual ■ Search backward for a non-matching character E7 Search the input message backward for the first non-“xx” character from the current cursor position, leaving the cursor pointing to the non-“xx” character. Syntax = E7xx where xx stands for the search character’s hex value for its ASCII code. - Page 123 MS926 User’s Manual ■ Stop suppressing characters FC Disables suppress filter and clear all suppressed characters. Syntax = FC. ■ Replace characters Replaces up to 15 characters in the output message, without moving the cursor. Replacement continues until the E5 command is encountered.
- Page 124 MS926 User’s Manual ■ Compare characters FE Compare the character in the current cursor position to the character “xx.” If characters are equal, move the cursor forward one position. Syntax = FExx where xx stands for the comparison character’s hex value for its ASCII code.
- Page 125 MS926 User’s Manual ■ Check for non-numeric character ED Check to make sure there is a non-numeric ASCII character at the current cursor position. The format is aborted if the character is numeric. ED Example: Only output the data if the bar code begins with a letter If you want only data from bar codes that begin with a letter, you can use ED to check for the letter.
-
Page 126: Data Formatter
MS926 User’s Manual Data format Non-Match Error Tone is Off, the code is disabled for reading and no tone is sounded. 4.8.5 Data Formatter When Data Formatter is turned Off, the bar code data is output to the host as read, including prefixes and suffixes. - Page 127 MS926 User’s Manual Data Format Required, Drop Prefix/Suffix Scanned data is modified according to your data format. If a data format is found for a particular symbol, those prefixes and suffixes are not transmitted. Any data that does not match your data format requirements generates an error tone.
- Page 128 MS926 User’s Manual 4.8.6 Primary/Alternate Data Formats You can save up to four data formats, and switch between these formats. Your primary data format is saved under 0. Your other three formats are saved under 1, 2, and 3. To set your device to use one of these formats, scan one of the bar codes below.
-
Page 129: Data Validation
MS926 User’s Manual 4.9 Data Validation To define 1:1/1:N function, please enter, 1) Main Menu /Data & Memory/ Data Validation 2) Select "1:1 Checking" or "1:N Checking" 3) Select CHECKING START POSITION for Data 1 and Data 2 ■ Data 1 is valid data Start Position: 1--255 ■... -
Page 130: Lookup Table Function
4.10 Lookup Table Function This function is to prevent users from entering wrong data. By inputting particular barcode to restrict scan results, MS926 lookup table function will scan only allowed barcode that make the data more accurately. Following are Lookup table function information: ... -
Page 131: Manually Set Up
MS926 User’s Manual 4.11 Manually set up 4.11.1 Date / Time Stamp Setting Please follow the steps to set up the Date &Time stamp. Main Menu Data & Memory Date / Time Stamp (see the following chart for Date / Time stamp Display) - Page 132 MS926 User’s Manual 4.11.2 Hotkeys ■ Hold and press [UP] and then press [SCAN] keys together will enable : 1. In Batch Mode 2. In Auto Mode View/Edit Buffer View/Edit Batch 3. A shortcut key to exit to ...
- Page 133 MS926 User’s Manual 4.11.4 Block Delay to BT SPP and USB SPP Please follow the steps to send block delay to BT SPP and USB SPP. Main Menu Data & Memory Sending BlkDly 10 ms * 50 ms- 100 ms...
-
Page 134: Appendix A - Symbology Charts
MS926 User’s Manual Appendix A – Symbology Charts “m” represents the AIM modifier character. Refer to International Technical Specification, Symbology Identifiers, for AIM modifier character details. Prefix/Suffix entries for specific symbologies override the universal (All Symbologies, 99) entry. Refer to Data Editing and Data Formatting for information about using Code ID and AIM ID. - Page 135 MS926 User’s Manual - 120 -...
- Page 136 MS926 User’s Manual ASCII Conversion Chart (Code Page 1252) In keyboard applications, ASCII Control Characters can be represented in 3 different ways, as shown below. The CTRL+X function is OS and application dependent. The following table lists some commonly used Microsoft functionality.
- Page 137 MS926 User’s Manual ISO 2022/ISO 646 Character Replacements Code pages define the mapping of character codes to characters. If the data received does not display with the proper characters, it may be because the bar code being scanned was created using a code page that is different from the one the host pro-gram is expecting.
- Page 138 MS926 User’s Manual - 123 -...
-
Page 139: Appendix B - Programming Charts
MS926 User’s Manual Appendix B – Programming Charts - 124 -... - Page 140 MS926 User’s Manual Save Discard Reset - 125 -...
Need help?
Do you have a question about the MS926 and is the answer not in the manual?
Questions and answers