Cisco 9971 User Manual
Hide thumbs
Also See for 9971:
- Administration manual (352 pages) ,
- Deployment manual (104 pages) ,
- User manual (23 pages)
Table of Contents
Advertisement
Quick Links
Advertisement
Table of Contents

Related Manuals for Cisco 9971


Summary of Contents for Cisco 9971
-
Page 1: User Manual
Flinders Connecting CISCO 9971 Video Phone User Manual CRICOS No. 00114A... -
Page 2: Table Of Contents
Flinders Connecting Table o f C ontents Phone Connections for Cisco Unified IP Phone 9971 ..........6 Wireless Connection and Bluetooth ................. 7 Buttons and Hardware ....................7 Phone Screen ......................11 Phone with Single Line ..................11 ... - Page 3 Flinders Connecting Preferences ........................ 22 Ringtone ......................... 22 Change Ringtone ....................24 Wallpaper ....................... 25 Brightness ......................25 Adjust Brightness ....................25 Bluetooth (Headset) ....................25 Turn On Bluetooth ....................25 Turn Off Bluetooth ....................25 Font Size ........................
- Page 4 Flinders Connecting Add Personal Directory Entry from Phone ............27 Search for Entry in Personal Directory ............... 27 Dial Number from Personal Directory ..............28 Delete Personal Directory Entry ................. 28 Edit Personal Directory Entry ................28 Fast-Dial Codes with Personal Directory ..............
- Page 5 Flinders Connecting Swap Between Holding and Active Calls ............... 34 Put Call on Hold by Answering New Call ............... 34 Determine If Shared Line Is On Hold ..............35 Remote Hold ......................35 Hold Reversion ....................35 Respond to Hold Reversion Notification .............
-
Page 6: Phone Connections For Cisco Unified Ip Phone 9971
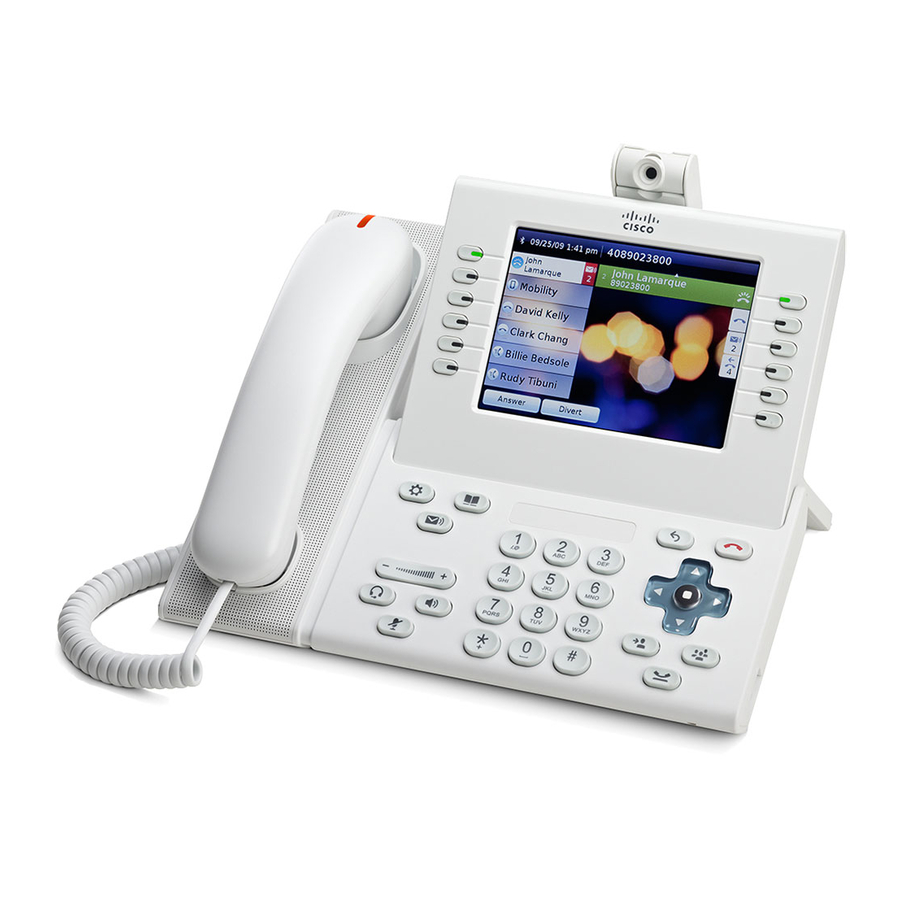
Flinders Connecting Phone Connections for Cisco Unified IP Phone 9971 Connect your phone to the Flinders IP telephony network, using the following diagram. DC adapter port (DC48V) Analog headset connection (optional) USB port AC-to-DC power supply (optional for the network port connection but required for... -
Page 7: Wireless Connection And Bluetooth
Speaker port for output to optional external speakers Accessory connector; for example, for Microphone port for input from optional connecting a Cisco Unified IP Phone external microphone Expansion Module Each USB port supports the connection of up to five supported and non-supported devices. - Page 8 Flinders Connecting Phone screen Shows information about your phone, including directory number, call information (for example, caller ID, icons for an active call or call on hold) and available softkeys. Phone screen items, such as menu options and softkeys, are touch-sensitive.
- Page 9 Flinders Connecting Colour LEDs reflect the call state. LEDs can flash (blink on and off rapidly), pulse (alternately dim and brighten), or appear solid (glow without interruption). • Flashing amber: Ringing call. Press this button to answer the call. • Solid green: May be a connected call or an outgoing call that is not yet connected.
- Page 10 Flinders Connecting Hold button Places a connected call on hold and toggles between an active and held call. Transfer button Transfers a call. Keypad Allows you to dial phone numbers, enter letters, and choose menu items by entering the item number. 10 Speakerphone button Selects the speakerphone as the default audio path and initiates a new call, picks up an incoming call, or ends a call.
-
Page 11: Phone Screen
Flinders Connecting 17 Phone display Can be positioned to your preferred viewing angle. 18 Programmable feature Correspond to phone lines, speed dials, and calling features. buttons Press a button for a phone line to display the active calls for (also called feature that line. -
Page 12: Phone With Multiple Lines
Flinders Connecting Displays the date, time, and information (such as phone Header number) about the selected line. Primary line label Displays the primary line phone information. Session label Displays information (such as call status and duration) about active calls associated with the selected line. Calls are displayed in order of the oldest (at the top) to the newest. - Page 13 Flinders Connecting Header Displays the date and time, and information (such as phone number) about the selected line. (If you are on a call and highlight the header instead of a call, the softkeys that display are the same as those that display when the phone is idle.
-
Page 14: General Phone Information
Flinders Connecting General Phone Information All Calls label Displays if the All Calls feature is enabled. Press the corresponding button to display all calls on all lines. Calls are displayed on the right side of the phone screen from the oldest (at the top) to the newest. -
Page 15: Navigate And Select Items
Flinders Connecting adjust the angle. Navigate and Select Items Task Action Example Scroll to highlight an item. Press the Navigation pad. Highlight a call from the missed call list. Select an item by number. Press the corresponding Press 2 to select the number on the keypad. -
Page 16: Clean Phone Display
Flinders Connecting Clean Phone Display When the phone is in sleep mode, the touchscreen is blank and the Select button is not lit. When the phone is in this condition, you can clean the screen, as long as you know that the phone will remain asleep until after you finish cleaning. If the phone is likely to wake up during cleaning, wake it up or wait until it is awake before following the preceding cleaning instructions. -
Page 17: Line Status In Call History
Flinders Connecting Line Status in Call History Your Call History list can display the status of monitored lines, if the feature is enabled by your system administrator. Each call history item in the Call History lists displays an icon to identify the state of the line. The following states are available: Unknown •... -
Page 18: Filter Call History
Flinders Connecting This screen displays single call information and call duration and updates each second. Filter Call History Step 1 Press Applications Step 2 Use the Navigation Pad and Select button to scroll and select Call History. The default view in Call History is for “All Calls,” which is shown at the top of the screen. -
Page 19: Delete Call Record From Call History
Step 6 Press Delete to delete the record, or press Cancel if desired. Step 7 Press Exit to return to the Applications screen. Video Camera Features The Cisco Unified Video Camera includes the following features. 1 LED: 2 Camera lens:... -
Page 20: Camera Lens Shutter
Flinders Connecting Camera Lens Shutter The camera lens shutter allows you to physically block video transmission from your camera. Close Camera Lens Shutter The following figure shows the location of the camera lens shutter. Procedure Step 1 To close the shutter, rotate the lens clockwise. Step 2 To open the shutter, rotate the lens counterclockwise. -
Page 21: Mount Camera On Monitor
Flinders Connecting Step 4 Look for the installation confirmation message on the phone screen. Step 5 After installation is complete, adjust the View Area and Brightness settings as needed. Mount Camera on Monitor Note: The video phone camera can not be used as a substitute for a standard webcam. -
Page 22: Preview Video
Step 1 Press Applications Step 2 Use the Navigation pad and Select button to scroll and select Accessories. Step 3 Highlight Cisco Unified Video Camera. Step 4 Press Setup. Step 5 Press Turn Off to disable the Auto Transmit feature, or press Back return to the Setup screen. -
Page 23: Adjust Brightness
Video Screen The Cisco Unified IP Phones supports phone calls that contain video (if present). With these phones, you do not need to install the Cisco Unified Video camera to receive the video portion of a call. Hide or Show Video The ITS Service Desk sets up the default softkey (either Show Video or Hide Video) and the default view (video hidden or video displayed). -
Page 24: Ringtone
Flinders Connecting • Press Mute. • Change the state of the video such as by plugging in the camera. • Touch the phone screen. • Press any softkey. Enable Full Screen Video Step 1 Press Full Screen. Step 2 Press Minimize to return to the original view. Mute Video Step 1 Press Mute Video. -
Page 25: Wallpaper
Flinders Connecting Wallpaper You are unable to change the Wallpaper. If your phone is not displaying the standard Flinders University logo on a blue background, please contact the ITS Service Desk on 12345. Brightness You can adjust your phone screen brightness level. Adjust Brightness Step 1 Press Applications Step 2 Use the Navigation Pad and Select to scroll and select Preferences. -
Page 26: Change Call Screen Font Size
Before you can connect a Bluetooth accessory, it must be already added as an accessory to the phone. Address Book Overview The Cisco Unified IP Phone 9971 provide you with access to Flinders, Corporate and Personal Directories. You may see other directories listed in Contacts. For more information, contact the ITS Service Desk on 12345. -
Page 27: Corporate Directory
Flinders Connecting The phone puts the existing call on hold and makes the new call. Corporate Directory The Corporate Directory is accessing the Active Directory contact list. Although this is available and searchable, we recommend you use the Flinders Directory available from the touch screen interface. -
Page 28: Dial Number From Personal Directory
Flinders Connecting Step 3 Select Personal Address Book. Step 4 Select one, all, or none of these criteria to search for an entry: • Last Name • First Name • Nickname Step 5 Enter the search criteria information and press Submit. Dial Number from Personal Directory Step 1 Press Address book Step 2 Sign in to Personal Directory. -
Page 29: Place Call Using Fast-Dial Code
Flinders Connecting Step 2 Use the Navigation pad and Select button to scroll and select Personal Directory. Step 3 Select Personal Address Book. Step 4 Enter the name information and press Submit. Step 5 Press Select and then press FastDial. Step 6 Select a number and press Select. -
Page 30: Call Park
Your phone displays the number where the system parked the call. The parked call is put on hold, and you can press Resume to resume the call on your phone. Step 2 From any other Cisco Unified IP Phone in your network, enter the number where the call is parked to retrieve the call. -
Page 31: Park Call Using Assisted Directed Call Park
Park Call Using Assisted Directed Call Park Step 1 During a call, press Directed Call Park displaying an idle Line Status indicator. Step 2 Retrieve the call from any other Cisco Unified IP Phone in your network as follows: •... -
Page 32: Answer Call Using Group Pickup And Group Pickup Number
Flinders Connecting You can also monitor and pick up ringing calls using Line Status indicators if the ITS Service Desk has set up Line Status indicators on speed-dial buttons for you. Line Status indicators allow you to see if a line associated with a speed-dial button is idle, in-use, in a Do Not Disturb state, or ringing. -
Page 33: Conference
Flinders Connecting Step 2 If the call is on the same line and not visible, as there are many calls, then you must scroll to display the sessions. Step 3 If a programmable feature button is set up by the ITS Service Desk to answer calls, you can press the feature button to answer a ringing call, regardless of the line of the call or the line that is currently visible. -
Page 34: Do Not Disturb
Flinders Connecting Do Not Disturb Do Not Disturb (DND) allows you to turn off either: • The ringer on your phone • The ringer and any visual notification that you have an incoming call When DND is enabled, your incoming calls forward to another number, such as your voicemail, if it is set up and the call is not saved or listed in your Call History. -
Page 35: Determine If Shared Line Is On Hold
Flinders Connecting Step 1 Press the flashing amber Session button or press Session on the touchscreen. Step 2 Navigate to the new call using the Navigation pad and either press Answer or Select. Determine If Shared Line Is On Hold Look for a pulsing red line button and the Hold icon. -
Page 36: Display Queue Statistics
Flinders Connecting Display Queue Statistics Step 1 Press Hunt Group to sign in. Visual confirmation displays briefly. Step 2 Press Hunt Group again to sign out. Line Status Line Status indicators allow you to view the state of a phone line that is associated with a speed-dial button. -
Page 37: Mute
Flinders Connecting Mute Mute allows you to block audio input for your handset, headset, and speakerphone, so that you can hear other parties on the call but they cannot hear you. When the Separate Audio and Video Mute feature is enabled, you mute the audio but continue to transmit a video image when you press Mute during a video call. -
Page 38: Shared Lines
Flinders Connecting Shared Lines Shared lines allow you to use one phone number for multiple phones and either you or your coworker can answer the call. When the line flashes red, your coworker can pick up the call. If you share a line with a coworker: •... -
Page 39: Transfer
Flinders Connecting Step 2 Enter the speed-dial code and press Speed Dial again to complete the call. Transfer Transfer allows you to redirect a connected call from your phone to another number: • You can redirect a single call to another number that you specify. •... -
Page 40: Frequently Asked Questions
Flinders Connecting Frequently Asked Questions Q. Why can't I see all the active calls on my phone? A. When there are more calls than available session buttons on the phone, you can scroll using the Navigation pad to see them. Calls are sorted from oldest to newest, with the oldest call at the top of the list. - Page 41 Q. What does the Preview softkey do? A. If you have a Cisco Unified Video Camera installed on your phone, you can press Preview to see the view from your camera when you are not in a video call. Try using Preview before making video calls to help set up and position your camera effectively.
- Page 42 Flinders Connecting Q. Why does video from my Cisco Unified Video Camera appear too dark (or too light)? A. Lighting conditions (such as windows and ceiling lights) within the camera field of view affect the brightness. Try moving the camera to see if the brightness improves.
Need help?
Do you have a question about the 9971 and is the answer not in the manual?
Questions and answers