Table of Contents
Advertisement
Quick Links
SP814
MOTION DETECTOR
TM
The Motion Detector is a Z-Wave
TM
any Z-Wave
enabled network. Z-Wave
TM
Z-Wave
logo can also be used with it regardless of the manufacturer, and ours
can also be used in other manufacturer's Z-Wave
Motion Detector can control our modules via controller setting. Inclusion of this
Motion Detector on other manufacturer's Wireless Controller menu allows
remote turn-on of connected modules and their connected lighting when the
TM
Detector is triggered. Z-Wave
nodes in the system also act as repeaters if they
support that function.
The Motion Detector is designed with dual detecting mode: Security Mode and
Home Automation Mode. In security mode, the detector can be used as a
security device to detect movements only in protected area by detecting
changes in infra-red radiation levels (e.g. when a person moves within or across
the devices field of vision, a trigger radio signal will be transmitted). In home
automation mode, the detector can be used to detect movements in protected
area as well as darkness in ambient illumination by detecting changes in
percentage of lux level (e.g. once night falls, the percentage of ambient
illumination is lower than preset value, and a person moves within or across the
devices field of vision, a trigger radio signal will be transmitted). Along with
detecting mode, users can decide to mount the detector on a wall for farther
detecting distance but narrower coverage; while for ceiling mounting, shorter
detecting distance can be made but desired coverage can be expected at user's
disposal.
TM
Adding to Z-Wave
Network
In the rear casing, there is a learning key which is used to carry out inclusion,
exclusion
or
association.
Put
inclusion/exclusion mode, press the learning key on the detector for more than
3 seconds. The LED will illuminate green steadily along with 3 times of short
beeps follow by a medium beep, which implies that the detector enters code
learning mode. To complete the inclusion/exclusion process, the Motion
Detector supports one association group with five nodes. This has the effect
that when the Detector triggers, all devices associated with Detector will be
operated.
Note: If code learning fails, the LED will flash orange on and off alternately along
with short beep tones.
enabled device and is fully compatible with
TM
enabled devices displaying the
TM
enabled networks. This
TM
a
Z-Wave
Wireless
Controller
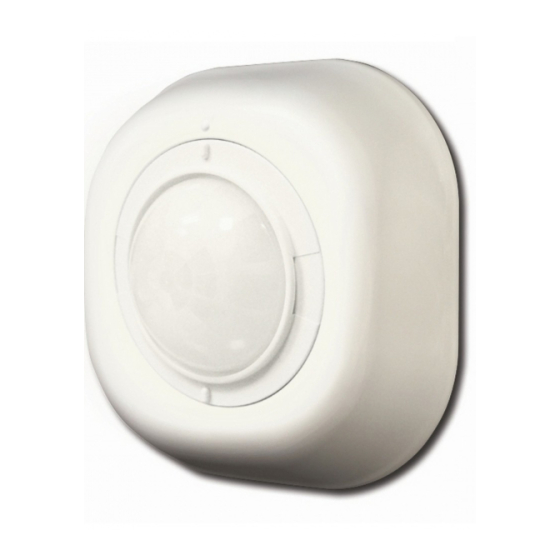
Product Overview
Front View
Lens Cover (Wall-Lens Cover and Ceiling-Lens Cover)
LED Indicator
Light Sensor
Choosing a Mounting Location
The Motion Detector can be mounted either on a wall or under a ceiling. Before
selecting a position for Motion Detector, the following points should be noted:
1. Do not locate the detector facing a window/fan/air-conditioner or direct
sunlight. Motion Detectors are not suitable for use in conservatories or
draughty areas. (FIGURE 1)
Air
Conditioner
into
2. Do not position the detector directly above or facing any source of heat, e.g.
fires, radiators, boiler etc. (FIGURE 2)
1
Inside View
PIR Sensor
Learning Key
Window
Motion
Motion
Detector
Detector
Sun
FIGURE 1
Motion
Detector
Heat
FIGURE 2
Rear View
Motion
Detector
Door
Advertisement
Table of Contents

Subscribe to Our Youtube Channel
Related Manuals for EVERSPRING SP814


Summary of Contents for EVERSPRING SP814
- Page 1 Product Overview SP814 MOTION DETECTOR The Motion Detector is a Z-Wave enabled device and is fully compatible with any Z-Wave enabled network. Z-Wave enabled devices displaying the Z-Wave logo can also be used with it regardless of the manufacturer, and ours can also be used in other manufacturer’s Z-Wave...
- Page 2 3. Where possible, mount the detector so that the logical path of an intruder 3. Decide the detector is to be wall-mounted (FIGURE 6a) or ceiling-mounted would cut across the fan pattern rather than directly towards the detector. (FIGURE 7a). Hold the rear cover in position and mark the two mounting (FIGURE 3) holes.
- Page 3 Settings Once the wall-lens covers has been removed, reload the ceiling-lens cover and turn it clockwise, ensure that the mark on the cover is pointing towards and aligned with the mark on the detector (FIGURE 8e). Coverage Range Adjustments Two types of lens covers are provided for the detector. Wall-lens cover (FIGURE 8a) is to be used when the detector is wall-mounted, whereas ceiling-lens cover (FIGURE 8b) is to be used when the detector is...
- Page 4 Security Mode Sensitivity Level (PIR sensor only) The detector is triggered after it detected an intruder despite in the daytime or In order to provide a best efficiency of the detector, it is recommended to test the nighttime. (FIGURE 9a) For example, a connected lighting turns on to indicate detector with movements from a farthest end of the coverage area at first time of an invasion has occurred in order to frighten intruders away.
- Page 5 On-Off Duration Setting Low Battery Indication: The function of on-off duration setting will be useful if the detector is connected When the battery level on the Detector drops to a certain level, the detector will with a module or lighting. Once these associated appliances are activated (turn emit a Z-Wave low battery command to controller;...
- Page 6 Federal Communication Commission Interference Statement This equipment has been tested and found to comply with the limits for a Class B digital device, pursuant to Part 15 of the FCC Rules. These limits are designed to provide reasonable protection against harmful interference in a residential installation.
Need help?
Do you have a question about the SP814 and is the answer not in the manual?
Questions and answers