
Related Manuals for Digital Projection HIGHlite Laser 4K Series


Summary of Contents for Digital Projection HIGHlite Laser 4K Series
- Page 1 HIGHlite 4K Series High Brightness Digital Video Projector 4INSTALLATION AND QUICK-START GUIDE 4CONNECTION GUIDE 4OPERATING GUIDE 4REFERENCE GUIDE Rev A February 2018 118-083A...
- Page 2 NOTE: this symbol indicates that there is some important information that you should read. Product revision Because we at Digital Projection continually strive to improve our products, we may change specifications and designs, and add new features without prior notice.
- Page 3 *W651Z*********** Digital Projection HIGHlite Laser 4K Series MANUFACTURED 2016.51 Laser Information Notes RISK GROUP 2 CAUTION ATTENTION Possibly hazardous optical radiation emitted Ce produit peut émettre des rayonnements from this product. optiques dangereux. Do not stare at operating lamp. Ne pas fixer la lampe en fonctionnement.
- Page 4 Digital Projection HIGHlite Laser 4K Series Introduction Notes Congratulations on your purchase of this Digital Projection product. Your projector has the following key features: • 4K-UHD projector. • HDBaseT for transmission of uncompressed High Definition Video up to 100 m from the source.
-
Page 5: Table Of Contents
Digital Projection HIGHlite Laser 4K Series CONTENTS CONNECTION GUIDE INSTALLATION AND QUICK-START GUIDE ................19 ......1 SIGNAL INPUTS ................21 WHAT’S IN THE BOX? ..............3 Digital inputs and outputs ..............21 CONNECTING THE POWER SUPPLY ..........4 Using HDMI/DisplayPort switchers with the projector ......22 Voltage selection ................... - Page 6 Digital Projection HIGHlite Laser 4K Series CONTENTS (continued) ................30 Setup menu ..................59 Executing commands Editing projector settings ..............31 ................... 62 ColorMax ..............31 ..................63 Using a slider to set a value Power On/Off ................31 ..................64...
- Page 7 Digital Projection HIGHlite Laser 4K Series CONTENTS (continued) ............90 4K-UHD images displayed full width ........91 4K-UHD images displayed with a height of 2160 pixels ............92 4K-UHD images displayed full height Diagonal screen sizes ................. 93 POSITIONING THE IMAGE ............94 ASPECT RATIOS EXPLAINED ............
- Page 8 Digital Projection HIGHlite Laser 4K Series This page is intentionally left blank.
-
Page 9: Installation And Quick-Start Guide
HIGHlite Laser 4K Series High Brightness Digital Video Projector INSTALLATION AND QUICK-START GUIDE Rev B February 2018... - Page 10 Digital Projection HIGHlite Laser 4K Series IN THIS GUIDE IN THIS GUIDE What’s In The Box? ..................... 3 Connecting The Power Supply ................ 4 Voltage selection ......................Projector Overview ..................... 5 Front and rear views ....................Control Panel ......................6 Remote Control ....................
-
Page 11: What's In The Box
IF IN DOUBT, ASK. AIR OUT Digital Projection HIGHlite Laser 4K Series WHAT’S IN THE BOX? ER OF GRAVITY What’s In The Box? Notes Make sure your box contains everything listed. If any pieces are missing, contact your dealer. AIR IN... -
Page 12: Connecting The Power Supply
Digital Projection HIGHlite Laser 4K Series CONNECTING THE POWER SUPPLY Connecting The Power Supply Notes Use only the power cable provided. Ensure that the power outlet includes a ground connection as Lift the cable lock up, push the mains connector in firmly and this equipment MUST be earthed. -
Page 13: Projector Overview
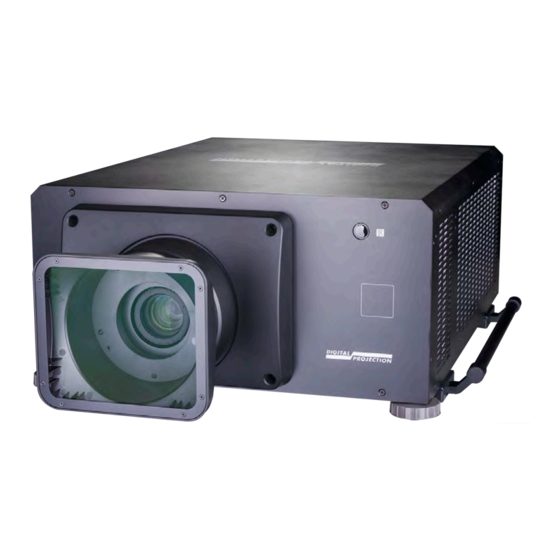
Digital Projection HIGHlite Laser 4K Series PROJECTOR OVERVIEW Projector Overview Notes Front and rear views Do not use the short lens hood with the 4.34 - 6.76 : 1 zoom lens. Connection panel Air outlet For further information about using... -
Page 14: Control Panel
Digital Projection HIGHlite Laser 4K Series CONTROL PANEL Control Panel Notes ON indicator (blue) ERROR STANDBY Behavior Meaning The projector is switched off. The projector is switched ON. Flashing The projector is warming up or cooling down. ERROR indicator (red) -
Page 15: Remote Control
Digital Projection HIGHlite Laser 4K Series REMOTE CONTROL Remote Control Notes This projector does not use the following options on the remote: Power ON / OFF Turns power on and off. HDMI 3 and 4, DVI, VGA, COMP 1, COMP 2, 3D, EYE and SWAP... - Page 16 Digital Projection HIGHlite Laser 4K Series REMOTE CONTROL EXIT INFO Notes FREEZE RE-SYNC For further information about LENS adjustment user presets, see Memory in the adjust focus. FOCUS IN / OUT: Operating Guide. press and hold this button, then use the Navigation arrow SHIFT: buttons to move the lens.
- Page 17 MENU DEFAULT Digital Projection HIGHlite Laser 4K Series REMOTE CONTROL Notes This projector does not use the DISPLAYPORT / R / numeric input 4 following options on the remote: Select DisplayPort input. Use with to turn the Red channel of the display on and off.
-
Page 18: Infrared Reception
Digital Projection HIGHlite Laser 4K Series REMOTE CONTROL Infrared reception Notes 40° The projector has infrared sensors at the front and back. The angle of acceptance is 40°. Make sure that the remote control is within the angle of acceptance when trying to control the projector. -
Page 19: Positioning The Screen And Projector
Digital Projection HIGHlite Laser 4K Series POSITIONING THE SCREEN AND PROJECTOR Positioning The Screen And Projector Notes Install the screen, ensuring that it is in the best position for viewing by your audience. Mount the projector, ensuring that it is at a suitable distance from the screen for the image to fill the screen. Set the adjustable feet so that Always allow the projector the projector is level, and perpendicular to the screen. -
Page 20: Roll And Pitch
Digital Projection HIGHlite Laser 4K Series POSITIONING THE SCREEN AND PROJECTOR Roll and pitch Notes The projector can be operated in numerous positions. It is not recommended to position the projector in portrait mode with inputs facing upward, as shown in the diagram. -
Page 21: Changing The Lens
Digital Projection HIGHlite Laser 4K Series CHANGING THE LENS Changing The Lens Notes The lens hood Before changing the lens, There are two types of lens hood, short and long. always make sure the projector The short lens hood is used with the following lenses:... -
Page 22: Inserting A New Lens
Digital Projection HIGHlite Laser 4K Series CHANGING THE LENS Inserting a new lens Notes Before changing the lens, always make sure the projector Insert the lens into the lens aperture, making sure that the plug on the zoom drive is switched off and fully mechanism lines up with socket on the right of the lens aperture. -
Page 23: Removing The Lens
Digital Projection HIGHlite Laser 4K Series CHANGING THE LENS Removing the lens Notes Before changing the lens, always make sure the projector is switched off and fully disconnected from its power supply. Loosen the four screws securing the lens hood to the body of the projector. -
Page 24: Operating The Projector
Digital Projection HIGHlite Laser 4K Series OPERATING THE PROJECTOR Operating The Projector Notes Switching the projector on Connecting The Power See also Ensure a lens is fitted. Connect the power cable between the mains supply and the projector. (See Connecting the power supply Supply earlier in this guide. -
Page 25: Selecting An Input Signal
Digital Projection HIGHlite Laser 4K Series OPERATING THE PROJECTOR Selecting an input signal Notes Connect one or more image sources to the projector. Select the input you want to display: For full details of how to use the • controls and the menu system, see Press one of the input buttons on the remote control. -
Page 26: Adjusting The Lens
Digital Projection HIGHlite Laser 4K Series OPERATING THE PROJECTOR Adjusting the lens Notes The lens can be adjusted using the Lens menu, or using the lens buttons on the remote control. Lens menu When adjusting focus and zoom, menu provides access to the setting and the command. -
Page 27: Connection Guide
HIGHlite Laser 4K Series High Brightness Digital Video Projector CONNECTION GUIDE Rev B February 2018... - Page 28 Digital Projection HIGHlite Laser 4K Series IN THIS GUIDE IN THIS GUIDE Signal Inputs ....................... 21 Digital inputs and outputs ..................Using HDMI/DisplayPort switchers with the projector .......... Control Connections ..................23 LAN connection examples ..................RS232 connection example ..................
-
Page 29: Signal Inputs
Digital Projection HIGHlite Laser 4K Series SIGNAL INPUTS Signal Inputs Notes Digital inputs and outputs For simultaneous HDBaseT and LAN connectivity, a third-party distribution product can be utilised HDBaseT to combine HDBaseT video stream Receives digital signal from HDBaseT-compliant devices with LAN connectivity. -
Page 30: Using Hdmi/Displayport Switchers With The Projector
Digital Projection HIGHlite Laser 4K Series SIGNAL INPUTS EDID on the HDMI, DisplayPort inputs Notes If you are using a computer graphics card or another source that obeys the EDID protocol, the source will automatically configure itself to suit the projector. -
Page 31: Control Connections
Control Connections Notes HDBaseT/LAN For a list of all commands used to The projector’s features can be controlled via a LAN connection, using Digital Projection’s Projector Controller application or a control the projector via LAN, see terminal-emulation program. the Protocol Guide. -
Page 32: Lan Connection Examples
Digital Projection HIGHlite Laser 4K Series CONTROL CONNECTIONS LAN connection examples Notes The projector’s features can be controlled via a LAN connection, using Digital Projection’s Projector Controller application or a terminal- emulation program. Projector Controller is available for download, free of charge, from the Digital Projection website. -
Page 33: Rs232 Connection Example
Digital Projection HIGHlite Laser 4K Series CONTROL CONNECTIONS RS232 connection example Notes Straight-through cable Computer Projector RS232 Connection Guide Rev B February 2018 page 25... - Page 34 Digital Projection HIGHlite Laser 4K Series This page is intentionally left blank. Connection Guide...
-
Page 35: Operating Guide
HIGHlite Laser 4K Series High Brightness Digital Video Projector OPERATING GUIDE Rev B February 2018... - Page 36 Digital Projection HIGHlite Laser 4K Series CONTENTS CONTENTS 4 Corners .................... 50 Rotation ....................51 USING THE MENUS ................29 Pincushion / Barrel ................52 OPENING THE OSD ..............29 Custom Warp ..................53 Arc ....................... 54 OPENING A MENU ............... 29 EXITING MENUS AND CLOSING THE OSD ........
-
Page 37: Using The Menus
Digital Projection HIGHlite Laser 4K Series USING THE MENUS Using The Menus Notes ERROR STANDBY Opening the OSD POWER Access the various menus using either the projector control panel or Pic Mute EXIT the remote control. On either device, MENU... -
Page 38: Inside A Menu
Digital Projection HIGHlite Laser 4K Series USING THE MENUS Inside a menu Notes Menu Name When you open a menu, the page consists of the following elements: Highlighted Item Value • Title bar at the top The highlighted item has green... -
Page 39: Editing Projector Settings
Digital Projection HIGHlite Laser 4K Series USING THE MENUS Editing projector settings Notes Menu Name If the highlighted menu item contains a list of values to choose from, you can change the value by doing the following: Highlighted Item Current Value... -
Page 40: Using The Projector
Digital Projection HIGHlite Laser 4K Series USING THE PROJECTOR Using The Projector Notes Main Menu Main menu Signal Inputs in the • Input Connection Guide for further Input HDMI 1 Press ENTER/OK to open the list of available inputs. information about the available Test Pattern inputs and connections. -
Page 41: Lens Menu
Digital Projection HIGHlite Laser 4K Series USING THE PROJECTOR Lens menu Notes Lens • Lens Lock Lens Lock When this feature is , all other Lens menu items are disabled. Lens Control • Lens Control Center Lens Opens a sub-menu, see below. -
Page 42: Lens Memory
Digital Projection HIGHlite Laser 4K Series USING THE PROJECTOR Lens menu continued from previous page Notes Lens Memory Lens Memory This menu allows you to load, save and delete up to ten lens presets, containing position, zoom, focus and shift adjustment information. -
Page 43: Image Menu
Digital Projection HIGHlite Laser 4K Series USING THE PROJECTOR Image menu Notes Image • Dynamic Black Dynamic Black Set to to allow for increased contrast in darker scenes by modulating the light source. Light Off Timer Disable • Gamma Light Off Timer... - Page 44 Digital Projection HIGHlite Laser 4K Series USING THE PROJECTOR Notes HDR Screen sizes Screen width (cm) Model Lumens 400 NIT 500 NIT 1000 NIT HLL4K 12,500 384cm 343cm 243cm HDR options should only be used with media players and sources equiped with HDR and HDR content.
-
Page 45: Color Menu
Digital Projection HIGHlite Laser 4K Series USING THE PROJECTOR Color menu Notes Color is not available with Color Space Color Space Auto HDMI 3 or HDMI 4. Color Space Color Mode ColorMax In most cases, the Auto setting determines the correct colorspace to use. If it does not,... -
Page 46: Color Mode
Digital Projection HIGHlite Laser 4K Series USING THE PROJECTOR Color Mode Notes Color The projector can work in the following color modes: ColorMax Manual Color Matching Color Temperature Gains and Lifts Color Space Auto Only one color mode can be... - Page 47 Digital Projection HIGHlite Laser 4K Series USING THE PROJECTOR Color menu continued from previous page Notes Manual Color Matching Manual Color Matching Color Mode Manual Color Auto Test Pattern Matching Open the Manual Color Matching submenu. Green Blue For more details about the...
- Page 48 Digital Projection HIGHlite Laser 4K Series USING THE PROJECTOR Color menu continued from previous page Notes Color matching parameters explained The levels of hue, saturation and gain in the Manual Color Matching menu change the color values in the following ways:...
- Page 49 Digital Projection HIGHlite Laser 4K Series USING THE PROJECTOR Color menu continued from previous page Notes Color Temperature Color Color Mode Color Temperature Color Space Auto Navigate to the Color Temperature setting. Choose a value from 3200K (warmer) Color Mode...
- Page 50 Digital Projection HIGHlite Laser 4K Series USING THE PROJECTOR Color menu continued from previous page Notes Gains and Lifts Gains and Lifts Lifts allow you to adjust black levels of individual colors, while gains adjust the bright part of the scale.
-
Page 51: Geometry Menu
Digital Projection HIGHlite Laser 4K Series USING THE PROJECTOR Geometry menu Notes Geometry This menu allows you to compensate for image distortions caused by an unusual projection Aspect Ratio Source Aspect Ratio Digital Zoom angle or irregular screen surface. Overscan... - Page 52 Digital Projection HIGHlite Laser 4K Series USING THE PROJECTOR Theaterscope setting Notes setting is used in combination with an anamorphic lens to restore 2.35:1 images packed into a 16:9 frame. Such images TheaterScope are projected with black lines at the top and bottom of the 16:9 screen to make up for the difference in aspect ratios.
-
Page 53: Digital Zoom
Digital Projection HIGHlite Laser 4K Series USING THE PROJECTOR .Geometry menu continued from previous page Notes Digital Zoom Digital Zoom Digital zooming enlarges a section of the image, while the area outside the enlarged Digital Zoom is a temporary setting Digital Zoom section is cropped out to preserve the overall image size. -
Page 54: Overscan
Digital Projection HIGHlite Laser 4K Series USING THE PROJECTOR Geometry menu continued from previous page Notes Overscan Geometry Use this setting to compensate for noisy or badly defined image edges. Aspect Ratio Source Crop removes unwanted artifacts from the edges of your image by cropping the edges. -
Page 55: Blanking
Digital Projection HIGHlite Laser 4K Series USING THE PROJECTOR Geometry menu continued from previous page Notes Blanking Blanking Use this feature to: • fit an odd-sized screen; Bottom • cut off timecode dots in the top line of a picture;... -
Page 56: Keystone
Digital Projection HIGHlite Laser 4K Series USING THE PROJECTOR Geometry menu continued from previous page Notes Keystone Keystone Use this setting to compensate for any distortion caused by the projector being in a different horizontal or vertical plane to the screen. - Page 57 Digital Projection HIGHlite Laser 4K Series USING THE PROJECTOR Geometry menu continued from previous page Notes Keystone settings Projector to the left The projector is positioned to the left of the screen. To correct, apply a positive Horizontal Keystone value using the RIGHT arrow button.
-
Page 58: Corners
Digital Projection HIGHlite Laser 4K Series USING THE PROJECTOR Geometry menu continued from previous page Notes 4 Corners 4 Corners For each corner, apply horizontal and / or vertical correction as necessary to restore the Corner corrections provide a simple rectangular shape of the image. -
Page 59: Rotation
Digital Projection HIGHlite Laser 4K Series USING THE PROJECTOR Geometry menu continued from previous page Notes Rotation Rotation Use this feature for example to correct a mounting error causing the image not to be level with the screen. Rotation Reset Rotation example DMD™... -
Page 60: Pincushion / Barrel
Digital Projection HIGHlite Laser 4K Series USING THE PROJECTOR Geometry menu continued from previous page Notes Pincushion / Barrel Pincushion / Barrel Pincushion or barrel distortions are the result of poor or incorrect tensioning of the screen or using a surface that is not flat. - Page 61 Digital Projection HIGHlite Laser 4K Series USING THE PROJECTOR Geometry menu continued from previous page Notes This feature is similar to Pincushion / Barrel but allows you to apply curvature to each Please note that a positive Bottom edge of the image independently so you can have any combination of corrections.
-
Page 62: Custom Warp
Digital Projection HIGHlite Laser 4K Series USING THE PROJECTOR Geometry menu continued from previous page Notes Custom Warp Custom Warp This feature permits selection of predefined User warp maps. User custom warp maps User 1 require the Projector Controller PC application to create the custom warp. -
Page 63: Edge Blend Menu
Digital Projection HIGHlite Laser 4K Series USING THE PROJECTOR Edge Blend menu Notes Edge Blend Use this menu to blend together images from an array of two or more projectors. Edge Blend The feature feathers the light output of the projector within the edges that overlap with... -
Page 64: Blend Width
Digital Projection HIGHlite Laser 4K Series USING THE PROJECTOR Edge Blend menu continued from previous page Notes Blend Width Blend Width Use the LEFT RIGHT arrow buttons to set the width of the blended regions: Bottom Left Right Bottom Left... -
Page 65: Black Level Uplift
Digital Projection HIGHlite Laser 4K Series USING THE PROJECTOR Edge Blend menu continued from previous page Notes Black Level Uplift Black Level Uplift Select Area Black in the blended regions appears less dark than in the rest of the image. To... -
Page 66: Laser Menu
Digital Projection HIGHlite Laser 4K Series USING THE PROJECTOR Laser menu Notes Laser Power Mode Normal • Power Mode Power Level — — — — • will automatically set the laser power to 80%. • will set the power to 100%. -
Page 67: Setup Menu
Digital Projection HIGHlite Laser 4K Series USING THE PROJECTOR Setup menu Notes Setup Orientation Auto-front • Orientation automatically detects the Auto-front High Altitude Auto Choose from Front Tabletop Front Ceiling Rear Tabletop Rear Ceiling projector’s position and sets Table or... - Page 68 Digital Projection HIGHlite Laser 4K Series USING THE PROJECTOR Setup menu continued from previous page Notes • Trigger1 Trigger 2 Setup Choose from Screen 16:10 16:9 1.88 2.35 TheaterScope Source If you turn the remote control off, to determine what will cause each trigger output to activate.
- Page 69 Digital Projection HIGHlite Laser 4K Series USING THE PROJECTOR Setup menu continued from previous page Notes • Standby Period Used with Instant Startup. If Instant Startup in ON and the projector is powered down then the projector will go to Standby after the selected “Standby Period”...
-
Page 70: Colormax
Digital Projection HIGHlite Laser 4K Series USING THE PROJECTOR Setup menu continued from previous page Notes ColorMax ColorMax ColorMax permits seven point color matching of red, green, blue, yellow, Measured Data cyan, magenta and white. Target Data – User 1... -
Page 71: Power On/Off
Digital Projection HIGHlite Laser 4K Series USING THE PROJECTOR Setup menu continued from previous page Notes Power On/Off Power On/Off Management • Auto Power Off Auto Power Off Set this to On if you want the projector to go into STANDBY mode when no input Auto Power On source is detected for 20 minutes. -
Page 72: Clock Adjust
Digital Projection HIGHlite Laser 4K Series USING THE PROJECTOR Setup menu continued from previous page Notes Notes Clock Adjust Clock Adjust Use this menu to set date (in dd:MM:yyyy format), time (in HH:mm format) and time zone. Date (dd:MM:yyyy) 30:11:2017... -
Page 73: Osd Settings
Digital Projection HIGHlite Laser 4K Series USING THE PROJECTOR Setup menu continued from previous page Notes OSD Settings OSD Settings • Language sets the OSD language. Language English • Menu Position determines where the OSD should appear on the screen when... -
Page 74: Network Menu
Digital Projection HIGHlite Laser 4K Series USING THE PROJECTOR Network menu Notes Network • DHCP Subnet Mask Gateway DHCP DHCP if the IP address is to be assigned by a DHCP server, or if it is to 192 . 168 . 000 . 100 be set here. -
Page 75: Pip Menu
Digital Projection HIGHlite Laser 4K Series USING THE PROJECTOR PIP menu Notes • Turn PIP on and off. Source HDMI1 • Source Position Top-Left Select an input source for the PIP image. Any combinations are possible between main and PIP input source, as long as one of... -
Page 76: Information Menu
Digital Projection HIGHlite Laser 4K Series USING THE PROJECTOR Information menu Notes Information This menu gives information about software and hardware configuration, input source Model Name HIGHlite Laser 4K 12000 and laser operating times It also allows you to restore the factory default settings. -
Page 77: System Status
Digital Projection HIGHlite Laser 4K Series USING THE PROJECTOR Information menu continued from previous page Notes System Status System Status Atmospheric Pressure 98988 Pa (116 m) AC Voltage 160V – 264V Ceiling Mode Tilt Angle 4 deg Portrait Angle 0 deg... -
Page 78: Factory Reset
Digital Projection HIGHlite Laser 4K Series USING THE PROJECTOR Information menu continued from previous page Notes Factory reset does not reset the Factory Reset Information Network settings, or High Altitude To restore the factory default settings: mode. Model Name E-Vision Laser 8500... -
Page 79: Served Web Pages
Digital Projection HIGHlite Laser 4K Series SERVED WEB PAGES Served Web Pages Notes The served web pages allow you to control the projector remotely via LAN. The default IP address is 192.168.0.100. Rev B February 2018 Operating Guide page 71... - Page 80 Digital Projection HIGHlite Laser 4K Series SERVED WEB PAGES Notes Rev B February 2018 Operating Guide page 72...
- Page 81 Digital Projection HIGHlite Laser 4K Series SERVED WEB PAGES Notes Rev B February 2018 Operating Guide page 73...
- Page 82 Digital Projection HIGHlite Laser 4K Series SERVED WEB PAGES Notes Rev B February 2018 Operating Guide page 74...
- Page 83 Digital Projection HIGHlite Laser 4K Series SERVED WEB PAGES Notes Rev B February 2018 Operating Guide page 75...
- Page 84 Digital Projection HIGHlite Laser 4K Series SERVED WEB PAGES Notes Rev B February 2018 Operating Guide page 76...
- Page 85 Digital Projection HIGHlite Laser 4K Series SERVED WEB PAGES Notes Rev B February 2018 Operating Guide page 77...
- Page 86 Digital Projection HIGHlite Laser 4K Series SERVED WEB PAGES Notes Rev B February 2018 Operating Guide page 78...
- Page 87 Digital Projection HIGHlite Laser 4K Series SERVED WEB PAGES Notes Rev B February 2018 Operating Guide page 79...
- Page 88 Digital Projection HIGHlite Laser 4K Series This page is intentionally left blank. Operating Guide...
-
Page 89: Reference Guide
HIGHlite Laser 4K Series High Brightness Digital Video Projector REFERENCE GUIDE Rev B February 2018... - Page 90 Digital Projection HIGHlite Laser 4K Series IN THIS GUIDE IN THIS GUIDE Choosing A Lens ....................83 LAN ..........................Basic calculation ....................... RS232 .......................... Basic calculation example ..................Trigger 1 & Trigger 2 ....................Full lens calculation ....................IR input .........................
-
Page 91: Choosing A Lens
Digital Projection HIGHlite Laser 4K Series CHOOSING A LENS Choosing A Lens Notes A number of lenses are available. Which lens you choose depends on the screen size, image aspect ratio, throw distance and light output. For information about individual lens... -
Page 92: Basic Calculation
Digital Projection HIGHlite Laser 4K Series CHOOSING A LENS Basic calculation Notes Identify the required lens by calculating the throw ratio. A throw ratio is the ratio of the throw distance to the screen width: The basic calculation on this page... -
Page 93: Basic Calculation Example
Digital Projection HIGHlite Laser 4K Series CHOOSING A LENS Basic calculation example Notes INFORMATION YOU NEED FOR THIS CALCULATION Calculate the throw ratio using the formula. The basic calculation on this page does not take into consideration Your screen is 4.5 m wide and you wish to place the projector DMD™... -
Page 94: Full Lens Calculation
Digital Projection HIGHlite Laser 4K Series CHOOSING A LENS Full lens calculation Notes Introducing TRC The choice of lens will affect the image size and will address discrepancies between the DMD™ resolution and the source. TRC can only be applied if greater When an image fills the height of the DMD™... -
Page 95: Calculating Trc
Digital Projection HIGHlite Laser 4K Series CHOOSING A LENS Calculating TRC Notes To calculate TRC, use the following formula: 1.78 (DMD™ aspect ratio) TRC can only be applied if greater TRC = than 1. If TRC is 1 or less, disregard... -
Page 96: Calculating The Throw Ratio With Trc
Digital Projection HIGHlite Laser 4K Series CHOOSING A LENS Calculating the throw ratio with TRC Notes For TRC > 1, amend the basic throw ratio formula as follows: Throw distance TRC can only be applied if greater Throw ratio = than 1. -
Page 97: Full Lens Calculation Example
Digital Projection HIGHlite Laser 4K Series CHOOSING A LENS Full lens calculation example Notes INFORMATION YOU NEED FOR THESE CALCULATIONS Your screen is 4.5 m wide; you wish to place the projector approximately 11 m from the screen. The source is 4:3. -
Page 98: Screen Requirements
Digital Projection HIGHlite Laser 4K Series SCREEN REQUIREMENTS Screen Requirements Notes Fitting the image to the display If the source image supplied to the projector is smaller than the 4K-UHD resolution, the image will not fill the display. The following examples show how a number of common formats may be displayed, depending on your DMD™... -
Page 99: 4K-Uhd Images Displayed With A Height Of 2160 Pixels
Digital Projection HIGHlite Laser 4K Series SCREEN REQUIREMENTS 4K-UHD images displayed with a height of 2160 pixels Notes 4:3 = 1.33:1 = 2873 pixels 16:10 = 1.6:1 = 3456 pixels 1.66:1 (Vista) = 3585 pixels full width = 3840 pixels... -
Page 100: 4K-Uhd Images Displayed Full Height
Digital Projection HIGHlite Laser 4K Series SCREEN REQUIREMENTS 4K-UHD images displayed full height Notes UXGA = 4:3 = 1.33:1 = 2873 pixels WUXGA = 16:10 = 1.6:1 = 3456 pixels Reference Guide Rev B February 2018 page 92... -
Page 101: Diagonal Screen Sizes
Digital Projection HIGHlite Laser 4K Series SCREEN REQUIREMENTS Diagonal screen sizes Notes Screen sizes are sometimes specified by their diagonal size (D). When dealing W = width with large screens and projection distances at different aspect ratios, it is more convenient to measure screen width (W) and height (H). -
Page 102: Positioning The Image
Digital Projection HIGHlite Laser 4K Series POSITIONING THE IMAGE Positioning The Image Notes The normal position for the projector is at the centre of the screen. However, you can set the projector above or below the centre, or to one side, and adjust the image using the Lens shift feature (known as rising and falling front) to maintain a geometrically correct image. - Page 103 Digital Projection HIGHlite Laser 4K Series POSITIONING THE IMAGE Notes Any single adjustment outside the ranges specified on the following page may result in an unacceptable level of distortion, particularly at the corners of the image, due to the image passing through the periphery of the lens optics.
-
Page 104: Aspect Ratios Explained
Digital Projection HIGHlite Laser 4K Series ASPECT RATIOS EXPLAINED Aspect Ratios Explained Notes The appearance of a projected image on the screen depends on a combination of the following: • The display resolution is 4K-UHD with a 3840 x 2160 resolution, corresponding to an aspect ratio of 16:9 •... -
Page 105: Aspect Ratio Examples
Digital Projection HIGHlite Laser 4K Series ASPECT RATIOS EXPLAINED Aspect ratio examples Notes Source: 4:3 Aspect Ratio: Source / 4:3 Aspect Ratio: 16:10 Source: 16:9 Aspect Ratio: Source / 16:9 Aspect Ratio: 16:10 Source: 16:10 (native) Unused screen areas Aspect Ratio: Source / 16:10... - Page 106 Digital Projection HIGHlite Laser 4K Series ASPECT RATIOS EXPLAINED Aspect ratio example: TheaterScope Notes Notes TheaterScope setting is used in combination with an anamorphic lens to restore 2.35:1 images packed into a 16:9 frame. Such images are projected with black lines at the top and bottom of the 16:9 screen to make up for the difference in aspect ratios.
-
Page 107: Appendix A: Lens Part Numbers
Digital Projection HIGHlite Laser 4K Series APPENDIX A: LENS PART NUMBERS Appendix A: Lens Part Numbers Notes Throw ratios Part number Throw distance range Lens extension The throw ratios given here apply 0.77 : 1 fixed lens 110-808 1.3 - 15 m (4.3 - 49.2 ft) 170.9 mm... -
Page 108: Appendix B: Supported Signal Input Modes
Digital Projection HIGHlite Laser 4K Series APPENDIX B: SUPPORTED SIGNAL INPUT MODES Appendix B: Supported Signal Input Modes Notes 2D formats HDMI / HD-BaseT 640x480 59.94 640x480 74.99 640x480 800x600 60.32 800x600 800x600 85.06 848x480 47.95 848x480 59.94 1024*768 1024*768... - Page 109 Digital Projection HIGHlite Laser 4K Series APPENDIX B: SUPPORTED SIGNAL INPUT MODES Notes HDMI / HD-BaseT 1440 x 900 1280 x 768 (continued) 1280 x 800 1280 x 960 Apple Mac 640x480 66.59 832x624 74.54 SDTV 480i 59.94 1440x480i 1440x576i...
-
Page 110: Sdi Format
Digital Projection HIGHlite Laser 4K Series APPENDIX B: SUPPORTED SIGNAL INPUT MODES Notes HDMI / HD-BaseT HDTV 1080p 59.94 (continued) 1080p 2K (2048x1080) 24/25/30/50/60 48/50/60/50/60 4K-UHD 24/25/30 48/50/60 Remarks: 4K-UHD 50/60 X (8 bits) 50/60 *2, *3 *1 HDBaseT supports 4K... - Page 111 Digital Projection HIGHlite Laser 4K Series APPENDIX B: SUPPORTED SIGNAL INPUT MODES 1080P59 3G Level A SMPTE 424M 3Gbps YCbCr 4:2:2 1080P60 3G Level A SMPTE 424M 3Gbps YCbCr 4:2:2 1080P50 3G Level B SMPTE 424M 3Gbps YCbCr 4:2:2 1080P59...
-
Page 112: Appendix C: Wiring Details
Digital Projection HIGHlite Laser 4K Series APPENDIX C: WIRING DETAILS Appendix C: Wiring Details Notes Signal inputs and outputs HDMI 1 and 2 19 way type A connector TMDS Data 2+ TMDS Data 2 Shield HDMI: pin view of panel connector... -
Page 113: Displayport
Digital Projection HIGHlite Laser 4K Series APPENDIX C: WIRING DETAILS DisplayPort Notes DisplayPort 1.2 Pin 1 ML_Lane 0 (p) Lane 0 (positive) Pin 2 Ground Pin 3 ML_Lane 0 (n) Lane 0 (negative) DisplayPort: pin view of panel connector Pin 4... -
Page 114: 3G-Sdi In, 3G-Sdi Out
Digital Projection HIGHlite Laser 4K Series APPENDIX C: WIRING DETAILS 3G-SDI In, 3G-SDI Out Notes 75 ohm BNC 3G-SDI signals are very high 3G-SDI connector speed digital signals which require better quality coaxial cable than conventional analogue video. The data rate is 3 Gigabits per second. -
Page 115: Control Connections
Digital Projection HIGHlite Laser 4K Series APPENDIX C: WIRING DETAILS Control connections Notes Only one remote connection (RS232 or LAN) should be used at any one RJ45 socket time. (Shared with HDBaseT) HDBaseT/LAN port RS232 9 way D-type connector 1 unused... -
Page 116: Trigger 1 & Trigger 2
Digital Projection HIGHlite Laser 4K Series APPENDIX C: WIRING DETAILS Trigger 1 & Trigger 2 Notes Sleeve 3.5 mm mini jack Signal Sleeve Ground Output: 12V, 200 mA max IR input Sleeve 3.5 mm mini jack Signal Ring Not connected... -
Page 117: Appendix D: Glossary Of Terms
Digital Projection HIGHlite Laser 4K Series APPENDIX D: GLOSSARY OF TERMS Appendix D: Glossary Of Terms Notes 1080p HDTV resolution which corresponds to 1920 x 1080 pixels (a widescreen aspect ratio of 16:9). 3D active glasses Wireless battery-powered glasses with LCD shutters. Synchronization information is communicated to the glasses by means of an infrared (IR) or radio frequency (RF) emitter which is connected to the Sync Out terminal on the projector. -
Page 118: Rev B February
Digital Projection HIGHlite Laser 4K Series APPENDIX D: GLOSSARY OF TERMS Blanking (projection) Notes The ability to intentionally turn off, that is, set to black, areas around the edges of the projected image. It is sometimes referred to as “curtains”... - Page 119 Digital Projection HIGHlite Laser 4K Series APPENDIX D: GLOSSARY OF TERMS Color gamut Notes The spectrum of color available to be displayed. Color temperature The position along the black body curve on the chromaticity diagram, normally quoted in Kelvin. It takes into account the preset values for color balance in the service set-up to take up the variations in the prism.
- Page 120 Digital Projection HIGHlite Laser 4K Series APPENDIX D: GLOSSARY OF TERMS Dark time Notes frames 3D active glasses, to avoid ghosting The time inserted between when using caused by switching time between left and right eye. DDC (Display Data Channel) A communications link between the source and projector.
- Page 121 Digital Projection HIGHlite Laser 4K Series APPENDIX D: GLOSSARY OF TERMS EDID (Extended Display Identification Data) Notes Information stored in the projector that can be read by the source. EDID is used on the HDMI, DVI and VGA inputs, allowing the source to automatically configure to the optimum display settings.
- Page 122 Digital Projection HIGHlite Laser 4K Series APPENDIX D: GLOSSARY OF TERMS Ghosting Notes An artifact in 3D image viewing. Ghosting occurs when an image intended for one eye is partially seen by the other eye. Ghosting can be removed by optimizing the dark time and sync delay.
- Page 123 Digital Projection HIGHlite Laser 4K Series APPENDIX D: GLOSSARY OF TERMS Interleaving Notes The alternation between left and right eye images when displaying 3D. LED (Light Emitting Diode) An electronic component that emits light. Letterboxing Black margins at the top and bottom of the image. Letterboxing appears when a wider image is packed into a narrower...
- Page 124 Digital Projection HIGHlite Laser 4K Series APPENDIX D: GLOSSARY OF TERMS PAL (Phase Alternate Line) Notes interlaced fields The television system used in the UK, Australia and other countries - 625 lines transmitted at 50 per second. Pillarboxing Black margins at the left and right of the image. Pillarboxing appears when a narrower image is packed into a wider...
- Page 125 Digital Projection HIGHlite Laser 4K Series APPENDIX D: GLOSSARY OF TERMS Resolution Notes pixels The number of in an image, usually represented by the number of pixels per line and the number of lines (for example, 1920 x 1200). RGB (Red, Green and Blue)
- Page 126 Digital Projection HIGHlite Laser 4K Series APPENDIX D: GLOSSARY OF TERMS TheaterScope Notes aspect ratio anamorphic lens to display 2.35:1 images packed into a 16:9 frame. used in conjunction with a special Throw distance The distance between the screen and the projector.
- Page 127 Digital Projection HIGHlite Laser 4K Series APPENDIX D: GLOSSARY OF TERMS Vista Notes aspect ratio of 1.66:1. WUXGA A display resolution of 1920 x 1200 pixels with a 16:10 screen aspect ratio. (Stands for Widescreen Ultra Extended Graphics Array.) This is the...
-
Page 128: Contact Information
Shi Ao International Center (+65) 6284-1238 (+44) 161 947 3300 powerinfo@digitalprojection.com Chaoyang District (+44) 161 684 7674 www.digitalprojection.com www.digitalprojectionasia.com Beijing 100029, PR CHINA enquiries@digitalprojection.co.uk (+86) 10 84888566 service@digitalprojection.co.uk (+86) 10 84888566-805 www.digitalprojection.co.uk techsupport@dp-china.com.cn www.dp-china.com.cn HIGHlite Laser 4K Series User Manual Rev A...
Need help?
Do you have a question about the HIGHlite Laser 4K Series and is the answer not in the manual?
Questions and answers