
Subscribe to Our Youtube Channel
Related Manuals for Digital Projection HIGHlite 6000


Summary of Contents for Digital Projection HIGHlite 6000
- Page 1 HIGHlite 6000 High Brightness Digital Video Projector 16:9 widescreen display Rev A October 2010 111-339A...
- Page 2 Digital Projection User Manual HIGHlite 6000...
-
Page 3: Declaration Of Conformity
Digital Projection User Manual HIGHlite 6000 Declaration of Conformity Directives covered by this Declaration 2004/108/EC Electromagnetic Compatibility Directive. 2006/95/EC Low Voltage Equipment Directive. Products covered by this Declaration Large screen video projector type The CE mark was first applied in: September 2010 HIGHlite 6000 Basis on which Conformity is being declared The products identified above comply with the protection requirements of the above EU directives, and the... - Page 4 Digital Projection User Manual HIGHlite 6000...
-
Page 5: Important Information
Product revision · Because we at Digital Projection continually strive to improve our products, we may change specifications and designs, and add new features without prior notice. Projectors built prior to this revision of the User Manual may therefore not include all the features described. - Page 6 There are no user-serviceable parts inside the lamp module. The whole module should be replaced. Only lamps supplied by Digital Projection and intended for this projector should be used. Fitting any other lamp could damage both projector and lamp, and will invalidate the warranty.
- Page 7 Operation and configuration precautions Software update should NOT be carried out except by, or with the supervision of, Digital Projection Service personnel. Rev A October 2010 Page vii...
- Page 8 Electronic Equipment. Our products are designed with reuse, recycling and recovery of all components in mind. To this end, at end of life, your projector may be returned to Digital Projection Ltd or its agent so that the environmental impact can be minimised.
- Page 9 Digital Projection User Manual Important Information HIGHlite 6000 Digital Projection Contact details Notes Digital Projection Limited, Greenside Way, Middleton, Manchester M24 1XX, UK. Registered in England No. 2207264, Registered Office: as above +44 (0) 161 947 3300 +44 (0) 161 684 7674 Email enquiries@digitalprojection.co.uk, service@digitalprojection.co.uk Web Site www.digitalprojection.co.uk Digital Projection Inc.
-
Page 10: Table Of Contents
HIGHlite 6000 User Manual Contents Declaration of Conformity ........................iii Important Information Symbols used in this guide ........................v ..............................v Warnings ............................v Trademarks Product revision ............................v Manual revision ............................v General precautions ..........................vi Installation precautions ........................vii Operation and configuration precautions ..................vii Compliance with international standards .................. - Page 11 Table of Contents Digital Projection User Manual HIGHlite 6000 Connecting the projector ........................ 2.7 ..........................2.7 Signal Inputs ......................2.7 Input connection examples ........................2.8 Control connections ........................2.8 RS232 connection ..........................2.8 RJ45 connection ........................... 2.9 Power connection 3.Getting Started Positioning the screen and projector ....................
- Page 12 Digital Projection User Manual Table of Contents HIGHlite 6000 5. Userware Introduction ............................5.2 Info page ............................5.3 .............................. 5.3 Image page ............................5.4 ......................5.4 Brightness / Contrast sliders...........................5.4 Test pattern....Lens page ............................5.5 ..........................5.5 Lens Controls MCGD page ............................
- Page 13 Table of Contents Digital Projection User Manual HIGHlite 6000 6. Maintenance Changing the lamp module ......................6.2 Cleaning the fans ..........................6.3 7. Appendix Troubleshooting ..........................7.2 ............................7.4 Error codes Specifications ............................7.5 ............................ 7.5 Part numbers ............................. 7.5 Optical ............................
- Page 14 1. Introduction Contents What’s in the box? ..........................1.2 Key features of the projector ......................1.3 Getting to know the projector ......................1.4 ............................1.4 Front view ............................1.4 Rear view Rev A October 2010 Page 1.1...
-
Page 15: What's In The Box?
1. Introduction Digital Projection User Manual HIGHlite 6000 What’s in the box? Notes · Make sure your box contains everything listed. If any pieces are missing, contact your dealer. You should save the original box and packing materials, in case you ever need ·... -
Page 16: Key Features Of The Projector
User Manual 1. Introduction HIGHllite 6000 Key features of the projector Notes Congratulations on your purchase of the Digital Projection HIGHlite 6000 projector. Digital Projection International (DPI), Texas Instruments’ first DLP® partner and the original innovator of the 3chip DLP® projector, proudly introduces the new HIGHlite 6000 series, a high brightness 1080p platform with the imaging fidelity of Texas Instruments’ DLP® technology. The 3-chip HIGHlite series adds a remarkably affordable, highlumen line of 1920 x 1080 displays to DPI’s already extensive... -
Page 17: Getting To Know The Projector
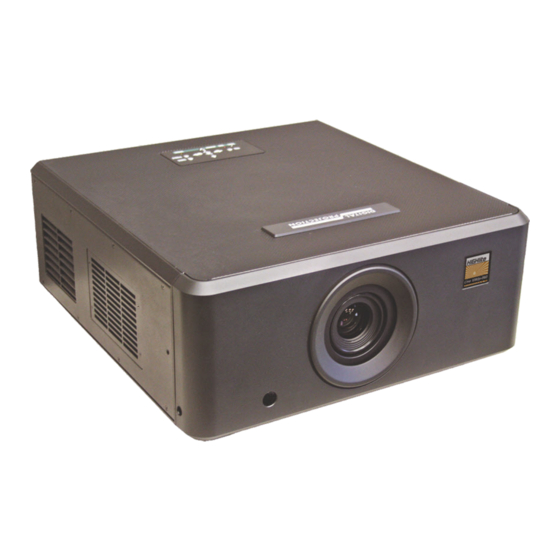
1. Introduction Digital Projection User Manual HIGHlite 6000 Getting to know the projector Notes Projector control Front view panel For more detailed information about lenses or lens shift, see section 2. Installation Front Infrared window Air outlet Lens (remote control) -
Page 18: Screen Requirements
2. Installation Contents Screen requirements ......................... 2.2 ....................2.2 Positioning the screen and projector ......................... 2.2 Optimum viewing position ......................2.3 Screen size vs throw distance ..................2.3 Calculating screen width and throw distance Fitting and Removing a Lens .................... Shifting the Image........................ -
Page 19: Installation
2. Installation Digital Projection User Manual HIGHlite 6000 Positioning the screen and projector Notes Optimum viewing position The projector should be For optimum viewing, the screen should be a flat surface perpendicular to the floor. installed as close to the The bottom of the screen should be 1.2m (4 feet) above the floor and the front row power outlet as possible. of the audience should not have to look up more than 30° to see the top of the screen. -
Page 20: Screen Size Vs Throw Distance
Digital Projection User Manual 2. Installation HIGHlite 6000 Screen size vs throw distance Notes Throw distance is the distance measured from the front of the projector to the screen. This is an important calculation in any projector installation as it determines whether or not you have enough room to install your projector with the desired screen size, and if your image will be the right size for your screen. -
Page 21: Fitting And Removing A Lens
2. Installation Digital Projection User Manual HIGHlite 6000 Fitting and Removing a Lens Notes Remove the front cover by removing the 2 screws at either side of the front cover, and sliding the front cover down to remove. Insert the lens ensuring you push firmly fully into the projector then rotate the lens clockwise until the lens locks onto the catch at the top of the lens mount. -
Page 22: Shifting The Image
2. Installation Digital Projection User Manual HIGHlite 6000 Shifting the image Notes Ideally, the projector should be positioned perpendicular to the screen. The normal position for the projector is at the centre of the screen. However, you can set the projector above or below the centre, or to one side, and adjust the image using the Lens shift controls on the remote control to maintain a geometrically correct image. -
Page 23: Mounting The Projector
Digital Projection User Manual 2. Installation HIGHlite 6000 Mounting the projector Notes The four adjustable feet under the chassis allow the projector to be lowered onto a BEFORE INSTALLING THE flat surface without any danger of hands being trapped between the bottom frame PROJECTOR, READ ALL THE and the surface. WARNINGS BELOW AND... -
Page 24: Rear Projection
2. Installation Digital Projection User Manual HIGHlite 6000 Rear projection Notes To use rear projection, please contact your dealer to electronically invert the image. In rearscreen applications where space behind the projector is limited, a mirror may be used to fold the optical path. The position of the projector and mirror must be accurately set. -
Page 25: Connecting The Projector
Digital Projection User Manual 2. Installation HIGHlite 6000 Connecting the projector Notes Signal Inputs The following inputs are available: HDMI 1 HDMI 2 HDMI 1 & 2 HDCPcompliant digital video inputs from HDMI or DVI sources. Only HDMI 1 enabled by default. To switch to HDMI 2 please contact your dealer. -
Page 26: Control Connections
Appendix. RS232 connection All of the projector’s features can be controlled via a serial connection. The RS232 connection can also be used to download the firmware updates, issued from time to time by Digital Projection. Projector Computer RJ45 LAN connection All of the projector’s features can be controlled via an ethernet connection. -
Page 27: Power Connection
2. Installation Digital Projection User Manual HIGHlite 6000 Power connection Notes Lift the cable lock up, push the mains connector in firmly, then push the lock down to secure the cable. Use only the power cable provided. Ensure that the power outlet includes a Ground connection, as this equipment MUST be earthed. Handle the power cable carefully and avoid sharp bends. -
Page 28: Getting Started
3. Getting Started Contents Positioning the screen and projector .................... 3.2 Switching the projector on ....................... 3.2 Inserting batteries into the remote control ................... 3.2 Selecting an input signal or test pattern ..................3.3 ..............................3.3 Input ............................3.3 Test pattern Adjusting the lens .......................... -
Page 29: Positioning The Screen And Projector
3. Getting Started Digital Projection User Manual HIGHlite 6000 Positioning the screen and projector Notes · Install the screen, ensuring that it is in the best position for viewing by your audience. For more information about positioning the screen and Mount the projector, ensuring that it is at a suitable distance from the screen for ·... -
Page 30: Selecting An Input Signal Or Test Pattern
Digital Projection User Manual 3. Getting Started HIGHlite 6000 Selecting an input signal or test pattern Notes Input For more information about · Connect an HDMI video source to the projector. The signal should be connecting input signals, see Signal Inputs, in section 2. of automatically detected by the projector, and should be displayed within a two or the User Manual: Installation. -
Page 31: Adjusting The Projected Image
3. Getting Started Digital Projection User Manual HIGHlite 6000 Adjusting the projected image Notes Lens Shift · Press on the remote control until the function required is shown. Each press of the lens button will cycle through the lens functions in the following order: 1. -
Page 32: Overview
4. Controlling the projector Contents Overview ............................... 4.3 ........................4.3 Controlling the projector The control panel ..........................4.4 ........................4.4 LED status indicators The remote control ..........................4.5 ............................. 4.5 Layout ............................4.5 Timeout Using the control keys ........................4.6 .............................. -
Page 33: Controlling The Projector
Digital Projection User Manual 4. Controlling the projector HIGHlite 6000 Overview Notes Controlling the projector · The projector is controlled in the following ways. · the remote control (Power and Lens Functions Only) · the projector control panel (Power Only) ·... -
Page 34: Led Status Indicators
4. Controlling the projector Digital Projection User Manual HIGHlite 6000 The control panel Notes The projector control panel is designed to be read from the front or rear of the projector, for ease of use. The arrow keys have no function on this model. -
Page 35: The Remote Control
Digital Projection User Manual 4. Controlling the projector HIGHlite 6000 The remote control Notes Layout Transmit indicator In most situations, you can simply point the remote control at the screen which will reflect the IR signal from the remote back toward the receiver on the projector. -
Page 36: Using The Control Keys
4. Controlling the projector Digital Projection User Manual HIGHlite 6000 Using the control keys Notes Power Press POWER ON on the remote control to switch the projector ON. The power indicator on the control panel will flash blue for approximately 3 seconds, whilst the lamp comes up to full brightness. When the projector is ready for use, the power indicator will show a steady blue. -
Page 37: Userware
5. Userware Contents Introduction ............................5.2 Info page ............................5.3 .............................. 5.3 Image page ............................5.4 ......................5.4 Brightness / Contrast sliders...........................5.4 Test pattern....Lens page ............................5.5 ..........................5.5 Lens Controls MCGD page ............................5.6 ....................5.6 The MCGD measurement procedure .......................... -
Page 38: Introduction
To use the Why-I Userware the j ava Runtime Environment Because the HIGHlite 6000 is not equipped with an on screen display, most of the software must be installed on features are only available from external control applications such as this. -
Page 39: Info Page
Digital Projection Digital Projection User Manual User Manual 5. Userware 5. Userware TITAN 1080p 3D, Dual 3D. Ultra Contrast HIGlite 6000 Info page Notes The Info page is the first to display when the computer connects to the projector. · To return to the Info page at any time, click on Info. · Click PWR to switch the projector On. The button will turn green. -
Page 40: Brightness / Contrast Sliders
Digital Projection User Manual User Manual TITAN 1080p 3D, Dual 3D. Ultra Contrast HIGHlite 6000 Image page The Info page gives access to Brightness, Contrast and Test Patterns · To return to the Image page at any time, click on Image. -
Page 41: Lens Page
Digital Projection Digital Projection User Manual User Manual 5. Userware 5. Userware TITAN 1080p 3D, Dual 3D. Ultra Contrast HIGHlite 6000 Lens page Notes · To see the Lens page, click on Lens. Lens controls Lens controls Click on the buttons to Move, Focus and Zoom the lens. -
Page 42: Mcgd Page
Digital Projection Digital Projection User Manual User Manual TITAN 1080p 3D, Dual 3D. Ultra Contrast HIGHlite 6000 MCGD page Notes MCGD Measured Colour Gamut Data can be used to correct for a number of environmental variables, for example: Read the notes on MCGD,... -
Page 43: Mcgd Values
User Manual User Manual 5. Userware 5. Userware TITAN 1080p 3D, Dual 3D. Ultra Contrast HIGHlite 6000 MCGD page continued Notes To see the MCGD page, click on MCGD . On first entering the MCGD screen, the MCGD values will show those currently loaded into the projector. -
Page 44: Tcgd Page
Digital Projection Digital Projection User Manual User Manual TITAN 1080p 3D, Dual 3D. Ultra Contrast HIGHlite 6000 TCGD page Notes TCGD - Target Colour Gamut Data - can be used to match the display to a pre- defined colour gamut, for example: Read the notes on MCGD,... -
Page 45: Select
User Manual User Manual 5. Userware 5. Userware TITAN 1080p 3D, Dual 3D. Ultra Contrast HIGHlite 6000 TCGD page continued Notes Select Click on Select to activate the color gamut selected on the drop down list. Read the notes on MCGD,... -
Page 46: Discover Page
User Manual User Manual 5. Userware 5. Userware TITAN 1080p 3D, Dual 3D. Ultra Contrast HIGHlite 6000 Discover page Notes · To see the Discover page, click on Discover. If any projectors are found on the network, then its LAN IP address will be listed in the panel and marked Online. -
Page 47: Connect
Digital Projection Digital Projection User Manual User Manual TITAN 1080p 3D, Dual 3D. Ultra Contrast HIGHlite 6000 Notes Connect Double Click on the IP Address of the projector you want to connect to. Any projector already connected will be automatically disconnected. -
Page 48: Maintenance
6. Maintenance Contents Changing the lamp module ......................6.2 Cleaning the fans ..........................6.3 Rev A October 2010 Page 6.1... -
Page 49: Changing The Lamp Module
6. Maintenance Digital Projection User Manual HIGHlite 6000 Changing the lamp module Notes · Turn the power OFF and allow the lamp to cool for 5 minutes. Always allow the lamp to cool for 5 minutes before: · Unscrew the captive finger screw securing the lamp door, and remove the door. - disconnecting the power... -
Page 50: Cleaning The Fans
Digital Projection User Manual 6. Maintenance HIGHlite 6000 Cleaning the fans Notes · Turn the power OFF and wait until the fans stop. · Use a vacuum cleaner to clean the inlet and outlet fans, as shown below. Always switch the projector OFF before cleaning the fans. -
Page 51: Appendix
7. Appendix Contents Troubleshooting ..........................7.2 ............................7.4 Error codes Specifications ............................7.5 ............................ 7.5 Part numbers ............................. 7.5 Optical ............................7.6 Electrical ............................7.6 Physical Dimensions ............................7.7 Video formats supported ........................7.8 Input connections ..........................7.10 ........................... 7.10 HDMI 1 &... - Page 52 7. Appendix Digital Projection User Manual HIGHlite 6000 Troubleshooting problem possible solutions The red ISSUE indicator is illuminated Check the Error codes detailed on the next page. continuously or flashing. The projector will not power up. Check that the mains plug is plugged in and that the mains supply is switched on.
- Page 53 See section 4. Controlling the projector, The remote control In the event that this troubleshooting guide has not solved the problem, then contact your Digital Projection dealer or service centre. Rev A October 2010 Page 7.3...
-
Page 54: Error Codes
7. Appendix Digital Projection User Manual HIGHlite 6000 Error codes Notes If the projector detects an error, the red Issue indicator will flash, as shown in the chart below. For example, if the lamp door is left open, the red indicator will flash twice followed by a pause, then the sequence will repeat until the error condition is corrected. Page 7.4 Rev A October 2010... -
Page 55: Specifications
Digital Projection User Manual 7. Appendix HIGHlite 6000 Specifications Part numbers Projector 110-914 0.77:1 fixed lens 110022 HC only 1.16:1 fixed lens 110-023 HC only 1.45–1.74:1 zoom lens 110-017 HC 110-803 HB 1.74–2.17:1 zoom lens 110-018 HC 110-804 HB 2.17–2.90:1 zoom lens 110-019 HC 110-805 HB 2.90–4.34:1 zoom lens... -
Page 56: Electrical
7. Appendix Digital Projection User Manual HIGHlite 6000 Lens shift (zoom lenses only) Vertical ± 0.6 H (120%) Horizontal ± 0.15 W (30%) Electrical Inputs HDMI x 2 Pixel clock (digital) up to 165MHz Control inputs 1 x RS232 serial: 38400 baud, 8 bits, 1 stop bit, no parity... -
Page 57: Dimensions
Digital Projection User Manual 7. Appendix HIGHlite 6000 Dimensions Rev A October 2010 Page 7.7... -
Page 58: Video Formats Supported
7. Appendix Digital Projection User Manual HIGHlite 6000 Video formats supported Sign Frame Resolution References al Type Rate 640x480 59.94 VESA DMT 640x480 74.99 VESA DMT 640x480 VESA DMT 800x600 60.32 VESA DMT 800x600 VESA DMT 800x600 85.06 VESA DMT 848x480 47.95... - Page 59 Digital Projection User Manual 7. Appendix HIGHlite 6000 Signal Frame Resolution References Type Rate 1680x1050 59.94 VESA CVT Apple Mac 640x480 66.59 VESA DMT 832x624 74.54 VESA DMT NTSC NTSC (M, 4.43) 59.94 ITU-R BT.1700, SMPTE 170M PAL (B,G,H,I) ITU-R BT.1700 PAL (N) ITU-R BT.1700...
-
Page 60: Input Connections
7. Appendix Digital Projection User Manual HIGHlite 6000 Input connections Notes HDMI 1 & 2 inputs 19 way type A connector pin view of panel connector TMDS Data 2+ TMDS Data 2 Shield TMDS Data 2- TMDS Data 1+ TMDS Data 1 Shield... -
Page 61: Control Connections
7. Appendix Digital Projection User Manual HIGHlite 6000 Control connections Notes Serial control input The projector is a DCE, so use: unused a straight cable to connect to a · Received Data (RX) computer, or pin view of female connector... -
Page 62: Remote Communications Protocol
Digital Projection User Manual 7. Appendix HIGHlite 6000 Remote communications protocol Notes Introduction Details of how to connect to The projector can be controlled by using an external control system or a PC via an the projector, using the serial... -
Page 63: Operation Commands
Digital Projection User Manual 7. Appendix HIGHlite 6000 Operation Commands Operation commands are used to simulate menu operations and determine the settings of the projector, and use the following format: op <operation> <command> [CR] The <command> string can take one of the following formats: <command>... - Page 64 7. Appendix Digital Projection User Manual HIGHlite 6000 Operation <command> Values Notes Lens Focus Near Lens Focus Far Lens Zoom In Lens Zoom Out Lens Shift Down Lens Shift Up Lens Shift Right Lens Shift Left Lens Stop Movement Page 7.14...
Need help?
Do you have a question about the HIGHlite 6000 and is the answer not in the manual?
Questions and answers