Advertisement
Quick Links
Advertisement

Related Manuals for OZtrail CT-1008


Summary of Contents for OZtrail CT-1008
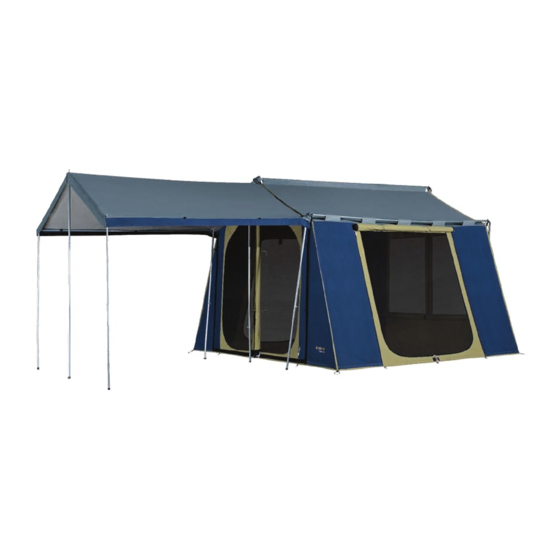
- Page 1 O W N E R S M A N U A L 8 x 10 Cabin Tent MODEL # CT-1008 www.oztrail.com.au...
- Page 2 Read the label on any seam sealing product before using. STRUCTURAL INTEGRITY. Although OZtrail tents and screen houses are constructed to rigid specifications, periods of wind and rain soaking the ground may loosen the pegs and cause the poles to sink into the ground. This will weaken the rigidity of the overall structure and may allow water pockets to form in the roof if the pole assembly is not taut, the weight of which may cause broken poles and torn fabric.
-
Page 3: Warranty
6. Your tent is valuable and should be insured against loss or damage. WA RR AN TY OZtrail tents are warranted for a period of one year from date of purchase. The manufacturer agrees during the warranty period to repair any manufacturing defects in the product or, at its option, replace the product with another product or an equivalent product without cost to the owner for material or labour. -
Page 4: Replacement Parts
R E P L A C E M EN T PA R T S Please note , weights measurements are approximate only. Due to our Policy of continual product development, specifications and features may vary from time to time. - Page 5 1 X Peg Bag 18 X Pegs 6 X Guy Ropes NB: Always mention the Model Number in all correspondence regarding your tent. PART NO. DESCRIPTION CT-1008-RP06 Ridge pole CT-1008-COUP06 Corner upright poles CT-1008-CEUP06 Centre upright poles CT-1008-CUAP06 Corner upright awning poles...
-
Page 6: Assembly Instructions
ASSEMBLY INSTRUCTIONS : IMPORTANT: This tent is to be pitched once before going camping to ensure that all parts are present and to become familiar with the assembly of the tent. Ste p 1 - L ay out th e tent Select a sheltered camp site protected from the wind that will not allow water to pond under the tent floor. - Page 7 Webbing Loops Peg Loops Side Ridge Pole Loops Ridge Pole Sleeve Fi gur e 1 Fi gu r e 2...
- Page 8 Ste p 5 – Erec t t h e Fro nt aw n i n g Begin by selecting the three horizontal ridge awning poles (6) to attach to the three front elbow poles (7) under the awning. Insert the tip of the right angle spigot into the hole on the front of the elbow pole(7) and adjust the pole length to match the length of the awning.
- Page 9 DISASSEMBLY INSTRUCTIONS Release guy ropes. Unzip doors and windows and collapse the tent, removing and disassembling the poles. Place the poles in the pole carry bag and tie shut. Remove pegs. Do not remove pegs from the ground by pulling on peg loops. This may cause the peg loops to tear out of the seam.
- Page 10 Leaving the doors and windows open will reduce moisture condensation. S ea m l e ak a ge - all OZtrail tents are manufactured by expert machinists. However, seepage may occur in the seams through the needle holes created in the sewing process. This is normal and can be corrected by applying a generous amount of seam sealer or wax on the inside of the seams.
- Page 11 CAMPER’S CHECKLIST AND HELPFUL HINTS S a f e t y a n d h ealt h aid s Ki tchen eq uip men t “ Insect repellents “ Food and water “ Sun cream “ Gas stove “ First aid kit and manual “...
- Page 12 NOTES: DESIGNED AND IMPORTED BY OZTRAIL LEISURE PRODUCTS ABN. 77 010 916 006 P.O. Box 1 SUMNER PARK QLD 4074 AUSTRALIA i n f o @ o z t r a il . c o m . a u...
Need help?
Do you have a question about the CT-1008 and is the answer not in the manual?
Questions and answers