Table of Contents
Advertisement
Quick Links
Advertisement
Table of Contents

Subscribe to Our Youtube Channel
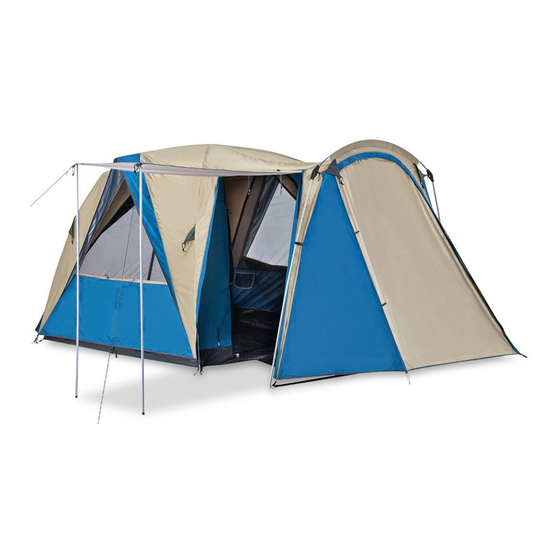
Summary of Contents for OZtrail Breezeway 4V Plus
-
Page 2: Table Of Contents
• Tri-Brace™ cross pole frame provides quick set up, greater strength and improved water shedding ......4 Assembly Instructions • OZtrail’s new Portico Breezeway™ frame offers near Disassembly Instructions vertical walls and spacious interior ......7 and Folding Instructions •... -
Page 3: Products And Parts
2 x Grey fibreglass main poles, of the product. If you have any questions, your bent ferrules, yellow sticker OZtrail dealer will be happy to help you. 1 x Grey fibreglass Breezeway™ roof pole, red sticker ... -
Page 4: Assembly Instructions
Assembly Instructions Step 4 Assemble the poles Step 1 Choose the site Assemble all poles making sure each pole Select a sheltered camp site protected from the junction is securely connected. Place the wind that will not allow water to pond under assembled poles side by side for easy the tent Floor. - Page 5 Assembly Instructions cont. Figure 4 Figure 6 Step 7 Installing the vestibule pole Select the “grey fibreglass vestibule pole, blue sticker” and slide through the pole sleeve that runs over the top of the vestibule. Insert the ends of the “grey fibreglass vestibule pole, blue sticker”...
- Page 6 Assembly Instructions cont. Step 8 Guy rope and peg out Ensure all guy ropes of the fly and tent are utilised. Make a loop (about 30 – 50cm long) with a slider on the end of the rope and peg out as far as possible from the tent, as indicated in Figure 8.
-
Page 7: Disassembly Instructions
Disassembly Instructions Step 1 Step 8 On the fly close windows, awnings and doors. Once the tent bundle is rolled up, tie the straps Release guy ropes and Posibrace™ Velcro™ tab around it and place into the tent carry bag points that attach the fly to the poles and unhook with peg bag, instruction booklet and other all base hooks. -
Page 8: Warranty
Shock cord is designed to help you of the purchase. You may also contact OZtrail keep your tent poles organised and to Leisure Products, by phone: 07 3193 1110, or in allow quick assembly of the poles. -
Page 9: Prolonging The Life Of Your Tent/Shelter
Fading of colour is an early • When removing pegs, do not use the warning sign. OZtrail products are not webbing or corner of the tent as your designed as permanent dwellings or handle. -
Page 10: Important Safety And Care Information
Please read before setting up your tent/shelter CAMP SAFE - SAFETY HABITS TO PREVENT INJURY CAUSED BY FIRE Fabrics used in the construction of OZtrail tents/ • Do not pitch the tent/shelter near a camp shelter are treated for fire retardant properties. - Page 11 Important Safety and Care Information cont. To prevent injury caused by your camping environment • Do not pitch your tent/shelter on an area that could get flooded • Do not pitch your tent/shelter near cliffs in case of collapse or rock fall •...
-
Page 12: Replacing The Shock-Cord
Poles and Shock Cord you will be ensuring that elasticity. you get the best performance and life out of your OZtrail Tent. Step Two: Threading the Pole Sections Tie a large knot in the end of the Shock Cord length. This knot needs to be large enough... - Page 13 Tent Pole and Shock Cord Replacement cont. Once your new pole is cut to length you can HELPFUL HINT follow the ‘Replacing Shock-Cord’ directions to Towards the end of the Pole Length it may get get your Pole Length complete. quite hard to thread the Pole Sections as the Shock Cord is stretching.
-
Page 14: Understanding Waterproofness
To prevent this, do not pitch the Know your tent tent over hollows and make sure water drains away from the tent. OZtrail tents are manufactured from waterproof and water repellent fabrics. However, with the STRUCTURAL INTEGRITY addition of seams, zips and other desirable... -
Page 15: Zips
Zips REDUCING THE RISK OF JAMMING CRIMPING A ZIP-SLIDER FABRIC IN THE ZIP The most common reason why zips burst open is that the zip slider does not close the coil • When using the zip, hold the pull-tab tightly enough. Wear and tear may cause the between your thumb and forefinger with gap marked A to open up. - Page 16 See our website for the full OZtrail range or facebook.com/OZtrailAustralia. Designed & Imported by: OZtrail Leisure Products • 71 Charles Ulm Place Eagle Farm QLD 4009 AUSTRALIA • Made in Bangladesh...


Need help?
Do you have a question about the Breezeway 4V Plus and is the answer not in the manual?
Questions and answers