Advertisement
Quick Links
Advertisement

Related Manuals for OZtrail CTC-1008-D


Summary of Contents for OZtrail CTC-1008-D
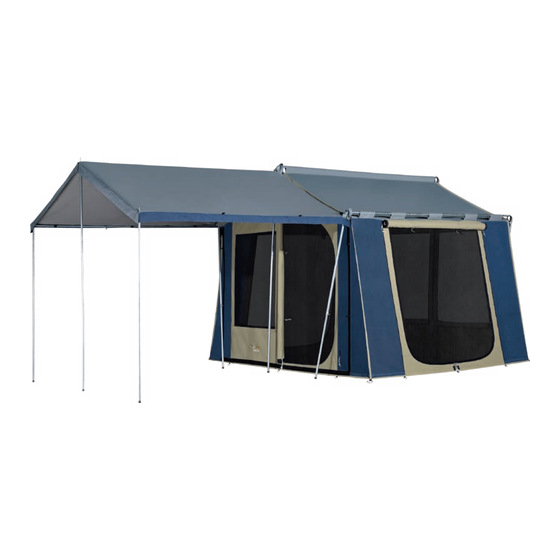
- Page 1 OWNERS MANUAL CABIN 10 x 8 TENT CTC-1008-D www.oztrail.com...
-
Page 2: Important Safety And Care Information
IMPORTANT SAFETY AND CARE INFORMATION PLEASE READ BEFORE SETTING UP YOUR TENT/SHELTER going away. If problems are discovered in the brand new product, they will be dealt with under our warranty. • This product is designed as a portable and temporary structure; it is not designed to be a permanent structure or dwelling. - Page 3 To prevent injury caused by fire - • Do not pitch the tent/shelter near a camp fire or any other flame source • Do not use candles, matches or any other flame source in or near the tent • Only use recommended water repellent compounds on the tent/shelter fly To prevent injury caused by electricity - •...
- Page 4 Check that all parts are present and that you familiarise yourself with the assembly and disassembly of the product. If you have any problems, your OZtrail dealer will be able to sort it out for you. You should have the following parts: -...
- Page 5 PRODUCT AND PARTS Part Description Cont. 1 x Pole Bag 1 x Peg Bag 18 x Pegs 6 x Guy Ropes...
- Page 6 ASSEMBLY INSTRUCTIONS STEP 1: Select a sheltered camp site protected from the wind that will not allow water to pond under the tent floor. Clear a level area of all stones, twigs, etc. Open doors and windows to allow air inside when standing tent up. WARNING Failing to open doors and windows will put excessive stress on the fabric as the tent is raised and may cause damage.
- Page 7 ASSEMBLY INSTRUCTIONS STEP 5: ERECT THE FRONT AWNING the pole length to match the length of the awning. Select the centre upright awning pole (203) and with a ridge upright (203) (ensure the adjustment screw for the diagonal ridge awning poles are facing down). from pole base.
- Page 8 FIGURES AND ILLUSTRATIONS Figure 1 Webbing Peg Loops Loops Side Ridge Pole Loops Ridge Pole Sleeve...
- Page 9 FIGURES AND ILLUSTRATIONS Figure 2...
- Page 10 DISASSEMBLY INSTRUCTIONS STEP 1: Release guy ropes. STEP 2: Unzip doors and windows and collapse the tent, removing and disassembling the STEP 3: Remove pegs. Do not remove pegs from the ground by pulling on peg loops. This may cause the peg loops to tear out of the seam. STEP 4: Spread the tent out flat with all loose fabric within the edges of the tent base.
-
Page 11: Folding Instructions
FOLDING INSTRUCTIONS Figure 3 Fold tent into a The width of Rectangular shape the tent should not exceed the length of the pole bag Front of tent ROL L (door unzipped) -
Page 12: Prolonging The Life Of Your Tent/Shelter
PROLONGING THE LIFE OF YOUR TENT/SHELTER early warning sign. These tents/shelters are not designed as permanent dwellings or structures. •During rain always lower awnings to avoid water ponding and collapsing the awning. seam. •Never store a wet and/or soiled tent/shelter; as mildew and corrosion can form within sponge with mild detergent to clean it off. -
Page 13: Understanding Waterproofness
UNDERSTANDING WATERPROOFNESS What is not covered by warranty! OZtrail tents use waterproof and water repellent fabrics. However, with tent will not be as waterproof as a car, house or other solid structures. The following are common examples of how water can enter a tent: - Zips could force water under the rain flaps and through the zips. - Page 14 REPLACING SHOCK-CORD IN TENT POLES the end of the fibreglass pole inside the ferrule. Shock-cord can be purchased by the metre from Camping Stores or with Pole Repair Kits. Tent Pole Ferrule Knot tied in Shock-Cord Shock-Cord End Ferrule Pole Sections...
- Page 15 Zips Reducing the risk of jamming fabric in the zip ~ • When using the zip, hold the pull-tab between your thumb and forefinger with your thumb facing you. •As you are closing the zip clear the way in front and under the zip slider using the back of your hand, and cup the zip slider underneath with your remaining 3 fingers.
- Page 16 WARRANTY OZtrail warrants this product against defects for a period of two years from the date of purchase. OZtrail will repair or replace the product, at its discretion, should a warrantable defect arise within the warranty period. If the exact model is unavailable a model of equivalent nature will be substituted at our discretion.
Need help?
Do you have a question about the CTC-1008-D and is the answer not in the manual?
Questions and answers