
Related Manuals for Uponor Comfort-E


Summary of Contents for Uponor Comfort-E
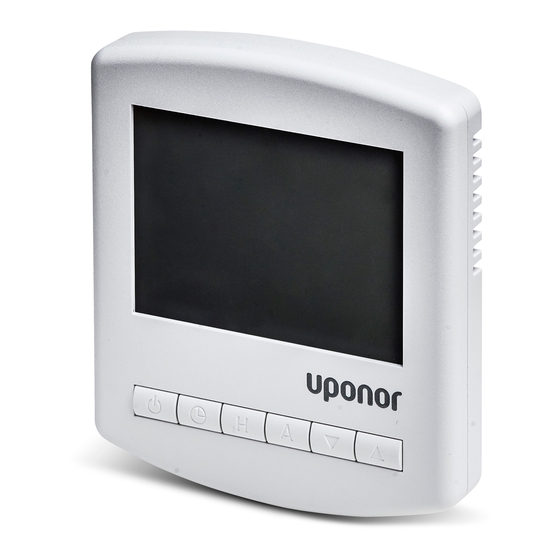
- Page 1 Uponor Comfort-E Thermostat Dig. Prog Set T-86 I N S TA L L AT I O N A N D O P E R AT I O N M A N U A L 08 | 2017...
-
Page 2: Table Of Contents
Contents Copyright and disclaimer ........3 Preface ..............4 Safety instructions ............4 Correct disposal of this product .......4 Introduction ............5 Installation ............6 Installation Procedure ..........6 Operation ..............7 LCD Display ..............7 Turn Thermostat On/Off ..........7 Set the Clock ............7 Temperature Display ..........8 Set the Comfort Levels ..........8 Lock the Thermostat ..........9 Temperature Control ..........10 Temperature Hold ...........10... -
Page 3: Copyright And Disclaimer
Modification or use of any of the contents of the time without prior notice or obligation. The manual manual for any other purpose is a violation of Uponor’s is provided “as is” without warranties of any kind, copyright, trademark and other proprietary rights. -
Page 4: Preface
We cannot accept any responsibility for damage or breakdown that can result from ignoring these instructions. Power arning The Uponor system uses 50 Hz, 230 V AC power. In case of emergency, immediately disconnect the power. Technical constraints aution To avoid interference, keep installation/data cables away from power cables of more than 50 V. -
Page 5: Introduction
Introduction A programmable room thermostat is both a programmer The way to set and use your programmable room and a room thermostat. thermostat is to find the lowest temperature settings that you are comfortable with at the different times you A programmer allows you to set “On”... -
Page 6: Installation
Installation Installation Procedure 3. Connect the thermostat. For more information, see section “7.3 Wiring Diagram” on page 18. Mount the thermostat at eye level. Don’t Do not install near to a direct heat source as this will affect functionality. Do not push hard on the LCD screen as this may cause irreparable damage. -
Page 7: Operation
Operation LCD Display Pos Description Current Temperature - Indicates the current sensor temperature. Program Cycle Indicator - Displayed during programming only to show which period is being altered. Keypad Lock Indicator - Displayed when the keypad is locked. Units of Temperature - Degrees Celsius or Fahrenheit. -
Page 8: Set The Clock
Set the Clock emperature Room Temperature Hours Minutes To set the clock, follow these steps. loor temperature 1. With the thermostat turned ON, press the twice. 2. Use to set the hours. Floor Temperature 3. Press to confirm settings. 4. Use to set the minutes. -
Page 9: Set The Comfort Levels
The schedule divides the day in four comfort levels. The D. Press H to accept. levels are defined by the time you wake up, leave the Note: Uponor recommend reducing the setpoint house, return to the house and go to sleep. temperature by 4 °C. -
Page 10: Lock The Thermostat
4. Set the sleep time and temperature. Lock the Thermostat A. Use to adjust sleep time. The thermostat has a keypad lock facility. B. Press H to accept. To activate the lock, follow this step. C. Use to adjust temperature. 1. -
Page 11: Temperature Hold
Temperature Hold Holiday Mode The temperature hold function allows you to manually The holiday function reduces the set temperature in override the current operating program and set a your home to the frost protection temperature setting. different temperature for a desired period. For more information, see Feature 03 in section “5.11 Optional Features”... -
Page 12: 5.10 Frost Protection
5.10 Frost Protection 5.11 Optional Features To activate frost proctection mode, follow this step: The following settings are optional. In most cases they do NOT need to be adjusted. 1. Press once. To cancel frost protection mode, press once again. djust ptional eatures... - Page 13 ptional eatures vervieW ptional eatures xplained Feature 01 – Temperature Format: This function allows Feature Description Setting you to select between °C and °F. Temperature 00 = °C Feature 02 – Switching Differential: This function Format 01 = °F allows you to increase the switching differential of the (°C default) thermostat.
- Page 14 Feature 10 – Optimum Start: Optimum start will delay the start up of the heating system to the latest possible moment to avoid unnecessary heating and ensure the building is warm at the programmed time. The thermostat uses the rate of change information to calculate how long the heating needs to raise the building temperature 1°C (with a rate of change of 20, the thermostat has calculated the heating needs...
-
Page 15: Troubleshooting
Troubleshooting Error Codes Re-calibrate the Thermostat If you need to re-calibrate the thermostat, follow these steps. Error Number 1. Press and hold to turn the thermostat OFF. 2. Press and hold BOTH and together until the temperature appears on the screen. 3. -
Page 16: Factory Reset
Factory Reset The thermostat has a reset function to restore all settings to their factory defaults. To perform a factory reset, follow these steps. 1. Press and hold to turn the thermostat OFF. 2. Press and hold and together until the LCD powers up. -
Page 17: Fi 7 Technical Data
Technical data Technical specification Thermostat Model Uponor Comfort-E Thermostat Dig. Prog Set T-86 Input 230 VAC, 50/60 Hz Output 230 VAC 230 VAC 16A MAX IP Rating IP20 Dimensions (mm) U P O N O R C O M F O R T- E T H E R M O S TAT D I G . P R O G S E T T- 8 6 · I N S TA L L AT I O N A N D O P E R AT I O N M A N U A L... -
Page 18: Wiring Diagram
Wiring Diagram 230 V AC 50/60 Hz Mains supply 230 V 230VAC Floor Remote Sensor Air Sensor RT2 N LOAD Floor Sensor Matting or Wire Remote Air Sensor (Optional) U P O N O R C O M F O R T- E T H E R M O S TAT D I G . P R O G S E T T- 8 6 · I N S TA L L AT I O N A N D O P E R AT I O N M A N U A L... - Page 19 U P O N O R C O M F O R T- E T H E R M O S TAT D I G . P R O G S E T T- 8 6 · I N S TA L L AT I O N A N D O P E R AT I O N M A N U A L...
- Page 20 Uponor Corporation www.uponor.com Uponor reserves the right to make changes, without prior notification, to the specification of incorporated components in line with its policy of continuous improvement and development.
Need help?
Do you have a question about the Comfort-E and is the answer not in the manual?
Questions and answers