
Subscribe to Our Youtube Channel
Related Manuals for Mecmesin AFTI


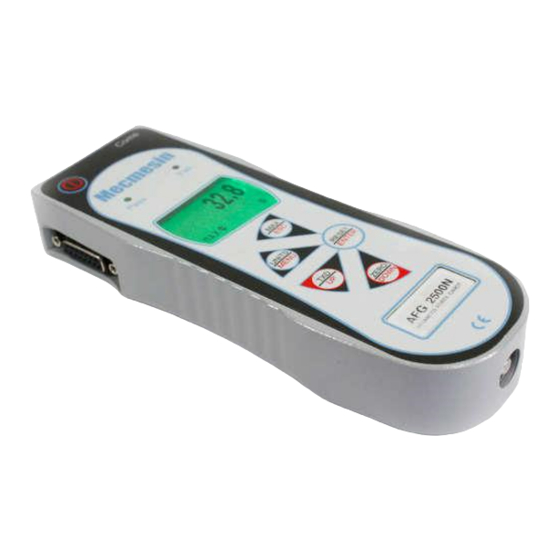
Summary of Contents for Mecmesin AFTI
- Page 1 Number 022-614 AFG/AFTI Mk 4 Service and Repair Manual Issue Number: 09 Page 1 of 47 PDF copy stored in approved Paper copy printed from approved PDF source location by: (click on signature for validation) Name Signature Date...
-
Page 2: Table Of Contents
Battery lid/insulator replacement ..............27 Firmware version – Identification..............28 Firmware release notes .................. 28 PCB Conversion - AFTI to or AFG or Tornado or Orbis ........34 Latency ......................35 Display contrast setting................... 36 AFG & AFTI Analogue Output................ 37 Fault finding. -
Page 3: Change History
Number 022-614 AFG/AFTI Mk 4 Service and Repair Manual Issue Number: 09 Page 3 of 47 Change History Iss. Date Effective Author Document / clarification Mechanical Change S.No. Change 04-09-07 Service Initial issue (020) 17-04-09 Prefix 022 & V1.07 05-11-09 V1.09, software release, Contrast... -
Page 4: Product Variants
Number 022-614 AFG/AFTI Mk 4 Service and Repair Manual Issue Number: 09 Page 4 of 47 Product variants 850-412 Description Capacity Output 850-412 AFG 2.5N 2.5N Digital 850-412-BA AFG MK4 2.5N + CAL ANALOGUE 2.5N Analogue 850-413 Description Capacity Output... -
Page 5: Warnings And Cautions
The version of software is displayed on the gauge start-up screen (bottom left-hand corner). Mecmesin Limited recommends that instruments have the latest version of software installed. AFG/AFTI software can be upgraded to the latest version (see section 18 for software history) using the following: 020-332: AFG4/ORBIS2/TORNADO2 Gauge Serial Programming Work Instruction. -
Page 6: Inspection Procedure
3) Attach a long extension rod, checking the load cell stud thread is not damaged. The long extension rod should protrude perpendicularly from the load cell (check with jig ref. no: 115-001 Mecmesin internal fixture). 4) Turn the instrument on. The audible alarm should sound and the visual alarm LED’s should light whilst the on key is depressed... - Page 7 Number 022-614 AFG/AFTI Mk 4 Service and Repair Manual Issue Number: 09 Page 7 of 47 appear. This can be used as an indication of overload and the current condition of the loadcell. Press the ESC key twice to revert to normal display.
-
Page 8: Notes About 300-157-V03
Number 022-614 AFG/AFTI Mk 4 Service and Repair Manual Issue Number: 09 Page 8 of 47 the gauge display is to be disregarded as the reading may not be accurate. At zero load there should be a zero mV output from the load cell. -
Page 9: Pcb Replacement (300-157-V02/3)
AFG/AFTI Mk 4 Service and Repair Manual Issue Number: 09 Page 9 of 47 PCB replacement (300-157-V02/3) Rear view of AFG/AFTI Remove 2-off M3x6 csk slot machine screws (420-296) retaining the battery cover. Remove 5-off batteries. Remove “Guarantee void” label. - Page 10 Number 022-614 AFG/AFTI Mk 4 Service and Repair Manual Issue Number: 09 Page 10 of 47 Remove 1-off M3x6 pozi csk stainless steel screw (420-357) and 2-off M3x20 pozi csk zinc screws (420-378) retaining the front panel. Lift off front panel...
- Page 11 Number 022-614 AFG/AFTI Mk 4 Service and Repair Manual Issue Number: 09 Page 11 of 47 Peel back the ESD warning label and remove 2-off M3x6 csk stainless steel screws (420-357) fixing hex spacers to case 10. Remove 3-off M3x6 pan head taptite screws fixing PCB to casing 11.
-
Page 12: Sounder Replacement (328-005)
Number 022-614 AFG/AFTI Mk 4 Service and Repair Manual Issue Number: 09 Page 12 of 47 Sounder replacement (328-005) 12. Remove PCB as per instructions 1 to 11 in section 6. 13. De-solder the sounder from the PCB and replace, observing the correct polarity. -
Page 13: Display Replacement (301-028-V01)
Number 022-614 AFG/AFTI Mk 4 Service and Repair Manual Issue Number: 09 Page 13 of 47 10. Display replacement (301-028-V01) 16. Remove Front Panel as per instructions 1 to 7 in section 6. 17. Open the LCD ribbon cable retaining clips located at end of the... -
Page 14: Configuration Of Display 301-028 V1.06 - V1.10
The buzzer should sound o The left hand LED should illuminate green o The right hand LED should briefly illuminate orange, and then change to red. o A MECMESIN AFG introduction screen should display briefly before changing to the “home” display... - Page 15 Number 022-614 AFG/AFTI Mk 4 Service and Repair Manual Issue Number: 09 Page 15 of 47 How to configure PCB to correct a display which starts up inverted Introduction Screen Home Display 22. Ensure both DIP switches on SW1 are set to the off position DIP switches set to off 23.
- Page 16 Number 022-614 AFG/AFTI Mk 4 Service and Repair Manual Issue Number: 09 Page 16 of 47 24. Press Units/Menu key again to display page 2 of menu 25. Press TXD/UP key once until arrow points to “CALIBRATION” 26. Press Reset/Enter key to enter Calibration mode 27.
- Page 17 Number 022-614 AFG/AFTI Mk 4 Service and Repair Manual Issue Number: 09 Page 17 of 47 28. Press Reset/Enter key to enter first number. 29. Press TXD/UP key one (1) times until 100 is displayed. 30. Press Reset/Enter key to enter the second number 31.
- Page 18 Number 022-614 AFG/AFTI Mk 4 Service and Repair Manual Issue Number: 09 Page 18 of 47 32. Press Reset/Enter key to enter the third number 33. Press TXD/UP key nine (9) times until 9 is displayed. 34. Press Reset/Enter key to enter the forth number The LCD should then display page 2 of the Calibration menu correctly.
-
Page 19: Configuration Of Display 301-028-V01 (V1.12)
Number 022-614 AFG/AFTI Mk 4 Service and Repair Manual Issue Number: 09 Page 19 of 47 12. Configuration of Display 301-028-V01 (V1.12) If the AFG PCB (300-157-V02/3) is fitted with the latest display type and has been programmed with the latest software (V1.12), then the gauge should operate as required. - Page 20 Number 022-614 AFG/AFTI Mk 4 Service and Repair Manual Issue Number: 09 Page 20 of 47 Display Configuration Procedure 43. If the screen is blank, follow the procedure below to identify and configure for the display fitted 44. Ensure that the gauge is switched 45.
- Page 21 Number 022-614 AFG/AFTI Mk 4 Service and Repair Manual Issue Number: 09 Page 21 of 47 48. If the ZERO key is pressed, the buzzer should sound (indicating that the next screen type has been selected), and the screen should change to the next option each time ZERO is pressed.
-
Page 22: Charging Socket Replacement (329-355)
Number 022-614 AFG/AFTI Mk 4 Service and Repair Manual Issue Number: 09 Page 22 of 47 13. Charging socket replacement (329-355) 52. Remove PCB as per instructions 1 to 11 in section 6. 53. De-solder the damaged charging socket and replace with new. Take care over correct alignment and quality of soldered joints. -
Page 23: Keypad Membrane/Front Cover Plate Replacement
Number 022-614 AFG/AFTI Mk 4 Service and Repair Manual Issue Number: 09 Page 23 of 47 14. Keypad Membrane/Front Cover Plate replacement For “Service” purposes the keypad is replaced as a complete assembly. Procedures for preparing this assembly are detailed in AFG Mk 4 Assembly Work Instruction (020-555). -
Page 24: Load Cell Removal
Number 022-614 AFG/AFTI Mk 4 Service and Repair Manual Issue Number: 09 Page 24 of 47 15. Load cell removal 58. Remove front panel assembly as per instructions 1 to 7 in section 6. 59. BEFORE REMOVING LOADCELL make careful note of the way it is fitted –... -
Page 25: Load Cell Stud Fitting
Number 022-614 AFG/AFTI Mk 4 Service and Repair Manual Issue Number: 09 Page 25 of 47 Futek load cell wiring: Pin1: +ve Excitation - Green Pin2: +ve Signal - White Pin3: -ve Signal - Red Pin 4: - ve Excitation – Black... - Page 26 Number 022-614 AFG/AFTI Mk 4 Service and Repair Manual Issue Number: 09 Page 26 of 47 65. Holding the load cell by the central beam, screw the stud into the load cell (from same side as connecting wire). As thread becomes available, screw on the nut.
-
Page 27: Load Cell Refitting
Number 022-614 AFG/AFTI Mk 4 Service and Repair Manual Issue Number: 09 Page 27 of 47 17. Load cell refitting 69. Put the load cell into the case and lightly screw down. Attach a long extension rod and, ensuring the rod passes though the middle of the hole in the casing, fully tighten the load cell screws to the appropriate torque –... -
Page 28: Firmware Version - Identification
Number 022-614 AFG/AFTI Mk 4 Service and Repair Manual Issue Number: 09 Page 28 of 47 74. Stick battery cover insulator (410-586) to inside of battery cover (404-161- F11) as in photographs such that it is centred from all four sides of battery compartment with the cover the correct way round 19. - Page 29 Number 022-614 AFG/AFTI Mk 4 Service and Repair Manual Issue Number: 09 Page 29 of 47 ------------------------- AFTI 09-0130-02, 09-0029-07, 09-0030-07, 09-0031-07, 09-0032-07, 09-0033-07. AFG 1000N 09-0104-07, 09-0105-07, 09-0106-07, 09-0107-07, 09-0108-07 AFG 500N 09-0177-06 AFG 250N 09-0111-07, 09-0113-07, 09-0114-07 AFG 50N...
- Page 30 Number 022-614 AFG/AFTI Mk 4 Service and Repair Manual Issue Number: 09 Page 30 of 47 When a Smart is connected and overloaded the overload counter does not get incremented. FS#116 - 'Footswitch 2 Not Available' Message Flickering When a Smart is connected and the Footswitch 2 menu page is entered, the ‘Footswitch 2 Not available’...
- Page 31 Number 022-614 AFG/AFTI Mk 4 Service and Repair Manual Issue Number: 09 Page 31 of 47 2) Remove load sign change feature in calibration routine. (Flyspray ID76) - The calibration routine contains a feature that allows the load sign to be changed if the load cell has been wired incorrectly.
- Page 32 - Memory counter stored in eeprom after memory cleared 3) Digmatic - Timeout reduced 4) AFTI Selection - AFTI can be selected without gauge having to be set up as AFG first Implemented in version 1.01 from serial number 08-0118-03 (Three page menu version)
- Page 33 Number 022-614 AFG/AFTI Mk 4 Service and Repair Manual Issue Number: 09 Page 33 of 47 6) Overload Symbol - Displaying (and clearing) the overload symbol in the timer interrupt routine removed as corruption to display could occur when 30 second timeout ended. 'OL' symbol now displayed/cleared...
-
Page 34: Pcb Conversion - Afti To Or Afg Or Tornado Or Orbis
Issue Number: 09 Page 34 of 47 21. PCB Conversion - AFTI to or AFG or Tornado or Orbis If a gauge PCB has already been set-up and calibrated as one of the above and you wish to install the PCB into a different type of gauge: At the calibration screen enter 9999 select which gauge type you require and complete the calibration/adjustment sequence. -
Page 35: Latency
Number 022-614 AFG/AFTI Mk 4 Service and Repair Manual Issue Number: 09 Page 35 of 47 22. Latency What is the maximum transfer rate from an AFG Mk4? What is the latency between the data being recorded and transmitted? The rate settings make no difference to the data transmission rates in the new software. -
Page 36: Display Contrast Setting
Number 022-614 AFG/AFTI Mk 4 Service and Repair Manual Issue Number: 09 Page 36 of 47 23. Display contrast setting. The user configurable contrast setting option was removed from the menu in version 1.00. In version 1.07 onwards, altering the contrast can be accessed by entering '7777' in the password (calibration) page. -
Page 37: Afg & Afti Analogue Output
Non calibrated analogue output range and offset of the external load cell will be dependant on mV/V and offset of load cell sensor will not be affected by the AFG/AFTI it is attached to. The AFG/AFTI Analogue output functions as follows: When no 'smart' sensor is connected: ·... - Page 38 Number 022-614 AFG/AFTI Mk 4 Service and Repair Manual Issue Number: 09 Page 38 of 47 The switching of Pin 9 functionality is automatically triggered by the presence/absence of a 'smart' connector.
-
Page 39: Fault Finding
Number 022-614 AFG/AFTI Mk 4 Service and Repair Manual Issue Number: 09 Page 39 of 47 25. Fault finding. Gauge Fault Remedy Check batteries for corrosion, clean terminals, 1. Gauge will not switch on. replace batteries. Check without batteries, with charger plugged in. - Page 40 Number 022-614 AFG/AFTI Mk 4 Service and Repair Manual Issue Number: 09 Page 40 of 47 Check gauge user configurable settings, max 5. Display does not alter with applied load. reading set, average over time, etc. Factory default gauge settings.
-
Page 41: Spare Parts List
Number 022-614 AFG/AFTI Mk 4 Service and Repair Manual Issue Number: 09 Page 41 of 47 A batch of PCB’s had an incorrect 306-508 10. Overload register does not record overloads / EEPROM fitted. The IC could not be written to Contrast settings not held with the protection switches enabled. -
Page 42: Assemblies And Parts From China
Number 022-614 AFG/AFTI Mk 4 Service and Repair Manual Issue Number: 09 Page 42 of 47 400-175- LOAD CELL 2½N (½LB) 400-034- LOAD CELL 5N (1LB) 400-006-S01 LOAD CELL 10N (2.2LB) 400-007-S01 LOAD CELL 25N (5LB) 400-008-S01 LOAD CELL 50N (10LB) - Page 43 Number 022-614 AFG/AFTI Mk 4 Service and Repair Manual Issue Number: 09 Page 43 of 47 900-296 – 900-301 kits consist of: DESCRIPTION 4way header 0.1 PI G’plat 329-187 400-xxx-S01 Load cell – to capacity required 406-408 Load cell stud 10/32 UNF...
-
Page 44: Exploded Parts Diagram
Number 022-614 AFG/AFTI Mk 4 Service and Repair Manual Issue Number: 09 Page 44 of 47 404-161-F11 – AFG Mk4 Battery cover and paint 408-427-F11 – AFG Mk4 1000N 2500N Case and paint) 900-293 China AFG common parts 900-293 kit consists of all the ‘common’ parts to make up the AFGs. - Page 45 Number 022-614 AFG/AFTI Mk 4 Service and Repair Manual Issue Number: 09 Page 45 of 47...
-
Page 46: Changes To 300-157-V03
Number 022-614 AFG/AFTI Mk 4 Service and Repair Manual Issue Number: 09 Page 46 of 47 Changes to 300-157-V03 Part No. Description 300-157-V03 AFG PCB Analogue cal. 311-012 402 Ohm resistor 10ppm 315-505 200 Ohm pot trimmer 13 turn 100ppm... - Page 47 Number 022-614 AFG/AFTI Mk 4 Service and Repair Manual Issue Number: 09 Page 47 of 47 2. Replace R63 with 1k Ohm resistor 10ppm (311-104) and R64 with 402 Ohm resistor 10ppm (311-012).
Need help?
Do you have a question about the AFTI and is the answer not in the manual?
Questions and answers