Table of Contents
Advertisement
Advertisement
Table of Contents

Subscribe to Our Youtube Channel
Related Manuals for FLIR K2


Summary of Contents for FLIR K2
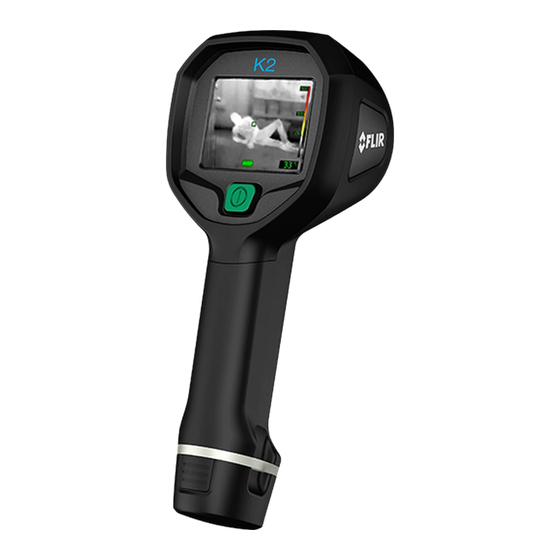
- Page 1 User’s manual FLIR Kx series...
- Page 4 Important note Before operating the device, you must read, understand, and follow all instructions, warnings, cautions, and legal disclaimers. Důležitá poznámka Před použitím zařízení si přečtěte veškeré pokyny, upozornění, varování a vyvázání se ze záruky, ujistěte se, že jim rozumíte, a řiďte se jimi.
- Page 5 User’s manual FLIR Kx series #T559972; r. AG/39882/39882; en-US...
-
Page 7: Table Of Contents
Operation ..................17 10.1 Charging the battery ..............17 10.1.1 Charging the battery using the FLIR power supply ....17 10.1.2 Charging the battery using the FLIR stand-alone battery charger................ 17 10.1.3 Charging the battery using a USB cable ......18 10.2... - Page 8 11.2 Note about technical data ............27 11.3 Note about authoritative versions..........27 11.4 FLIR K2 .................. 28 Mechanical drawings ................. 32 CE Declaration of conformity .............. 37 Cleaning the camera ................39 14.1 Camera housing, cables, and other items........39 14.1.1 Liquids.................
-
Page 9: Legal Disclaimer
FLIR Systems will, at its option, repair or replace any such defective product ZL201130442354.9; ZL201230471744.3; ZL201230620731.8. free of charge if, upon inspection, it proves to be defective in material or work- manship and provided that it is returned to FLIR Systems within the said one- year period. 1.8 EULA Terms FLIR Systems has no other obligation or liability for defects than those set forth •... -
Page 10: Safety Information
Applicability: Cameras with one or more batteries. Do not attach the batteries directly to a car’s cigarette lighter socket, unless FLIR Systems supplies a spe- cific adapter to connect the batteries to a cigarette lighter socket. Damage to the batteries can occur. - Page 11 Safety information CAUTION Applicability: Cameras with one or more batteries. Do not make holes in the battery with objects. Damage to the battery can occur. CAUTION Applicability: Cameras with one or more batteries. Do not hit the battery with a hammer. Damage to the battery can occur. CAUTION Applicability: Cameras with one or more batteries.
- Page 12 This includes the compartments for data storage, batteries, and connectors. CAUTION Do not change the standard fire-fighting procedures when you use a FLIR K series camera. The FLIR K series camera is not a replacement technology. #T559972; r. AG/39882/39882; en-US...
- Page 13 Safety information CAUTION Do not use the FLIR K series camera without the correct training. If the persons that operate the camera do not have the correct training, an incorrect analysis of the infrared images can occur. Thus, incorrect decisions during the firefighting can be made.
-
Page 14: Notice To User
3.5 Important note about this manual FLIR Systems issues generic manuals that cover several cameras within a model line. This means that this manual may contain descriptions and explanations that do not apply to your particular camera model. -
Page 15: Note About Authoritative Versions
Notice to user 3.6 Note about authoritative versions The authoritative version of this publication is English. In the event of divergences due to translation errors, the English text has precedence. Any late changes are first implemented in English. #T559972; r. AG/39882/39882; en-US... -
Page 16: Customer Help
Customer help 4.1 General For customer help, visit: http://support.flir.com 4.2 Submitting a question To submit a question to the customer help team, you must be a registered user. It only takes a few minutes to register online. If you only want to search the knowledgebase for existing questions and answers, you do not need to be a registered user. -
Page 17: Downloads
• The communication protocol, or method, between the camera and your device (for ex- ample, SD card reader, HDMI, Ethernet, USB, or FireWire) • Device type (PC/Mac/iPhone/iPad/Android device, etc.) • Version of any programs from FLIR Systems • Full name, publication number, and revision number of the manual 4.3 Downloads... -
Page 18: Important Information About Flir Kx Series Service
• FLIR Systems reserves the right to charge the full cost for the decontamination and dis- infection of contaminated cameras that are shipped to our service department. -
Page 19: Introduction
• Easy-to-use. The FLIR Kx series is easily used in a gloved professional hand. An intui- tive and simple user interface allows you to focus on the job. The FLIR Kx series can be controlled by just one large button on top of the unit. -
Page 20: Quick Start Guide
• Charge the battery using a USB cable connected to a computer. Note Charging the camera using a USB cable connected to a computer takes considerably longer than using the FLIR power supply or the FLIR stand-alone bat- tery charger. -
Page 21: Camera Parts
Camera parts 8.1 View from the front 8.1.1 Figure 8.1.2 Explanation 1. Digital camera lens. 2. Infrared lens. 3. Tripod mount. 4. Attachment point for lanyard strap. #T559972; r. AG/39882/39882; en-US... -
Page 22: View From The Rear
Camera parts 8.2 View from the rear 8.2.1 Figure 8.2.2 Explanation 1. Camera screen. 2. On/off button. This button has three functions: • Push the on/off button to turn on the camera. • Push and hold the on/off button for more than 3 seconds but less than 10 seconds to put the camera into standby mode. -
Page 23: Lanyard Strap
Camera parts 8.3 Lanyard strap #T559972; r. AG/39882/39882; en-US... -
Page 24: Screen Elements
Screen elements 9.1 Figure 9.2 Explanation 1. Low-sensitivity range indicator. 2. Overheating indicator. The indicator provides a visual warning to the user that the ther- mal imager is about to shut down due to internal overheating. 3. Temperature scale. 4. Digital readout of the temperature at the position of the spotmeter. 5. -
Page 25: Operation
USB connector, see section 10.3 Accessing the connector bay, page 18. Note The charging time for a fully depleted battery is 2 hours. 10.1.2 Charging the battery using the FLIR stand-alone battery charger. Follow this procedure: 1. Connect the stand-alone battery charger to a wall outlet. -
Page 26: Charging The Battery Using A Usb Cable
• To charge the camera, the computer must be turned on. • Charging the camera using a USB cable connected to a computer takes considerably longer than using the FLIR power supply or the FLIR stand-alone battery charger. 10.2 Turning on and turning off the camera •... -
Page 27: Changing Temperature Unit
Operation 3. Turn the ring about 90° counter-clockwise. 4. Pull out the plastic insert. CAUTION The plastic insert has an O-ring seal. Do not damage the O-ring seal. 10.4 Changing temperature unit 10.4.1 General The camera displays temperatures in ℃ or ℉. You change the temperature unit with a switch, located in the connector bay. -
Page 28: Changing Settings (In Flir Tools)
10.5 Changing settings (in FLIR Tools) 10.5.1 General By connecting the camera to FLIR Tools, you get access to a variety of settings in the camera. A download card for FLIR Tools is included in the transport case. Connect the camera to the computer using the USB cable. -
Page 29: The User Interface Tab
By incorporating your fire department’s logo, and a unique identity number in the image, you can keep track of your cameras. 10.5.4 Camera modes 10.5.4.1 General The FLIR Kx series features seven different camera modes: 1. Basic mode. 2. Black and white firefighting mode. #T559972; r. AG/39882/39882; en-US... - Page 30 Operation 3. Fire mode. 4. Search and rescue mode. 5. Heat detection mode. 6. Cold detection mode. 7. Building analysis mode. Each mode is optimized for a certain type of firefighting application. The modes also differ in the following ways: •...
- Page 31 Operation 10.5.4.2.2 Black and white firefighting mode Figure 10.2 Black and white firefighting mode. The black and white firefighting mode is a standardized firefighting mode based on the Ba- sic mode. It is a multipurpose mode for the initial fire intervention that includes life rescuing operations and control of the fire.
- Page 32 Operation • Colorization of heat: +250 to +500°C (+ 482 to +932°F). • High-sensitivity range: –20 to +150°C (–4 to +302°F). • Low-sensitivity range: 0 to +500°C (+32 to +932°F). 10.5.4.2.4 Search and rescue mode Figure 10.4 Search and rescue mode. The search and rescue mode is optimized for maintaining high contrast in the infrared im- age while searching for people in landscapes, buildings, or traffic accident scenes.
- Page 33 Operation • High-sensitivity range: –20 to +150°C (–4 to +302°F). 10.5.4.2.6 Cold detection mode Figure 10.6 Cold detection mode. The cold detection mode is optimized for searching coldspots—typically to find drafts and air flows. • High-sensitivity range only. • Colorization of cold: the 20% lowest temperatures in the scene. •...
-
Page 34: Updating The Camera
10.6 Updating the camera 10.6.1 General To take advantage of the latest FLIR camera firmware, it is important that you keep your camera updated. You update your camera using FLIR Tools, see section 10.5 Changing settings (in FLIR Tools), page 20. -
Page 35: Technical Data
11.2 Note about technical data FLIR Systems reserves the right to change specifications at any time without prior notice. Please check http://support.flir.com for latest changes. -
Page 36: Flir K2
• Easy-to-use: Easily used in a gloved professional hand. An intuitive and simple user interface allows you to focus on the job. The FLIR K2 can be controlled by just one large button on top of the unit. Typical applications: •... - Page 37 Spotmeter Automatic hot detection Heat detection mode (the hottest 20% of the of scene is colorized) Isotherm USB Micro-B Compatibility Compatible with FLIR software FLIR Tools Data communication interfaces Interfaces Update from PC devices Power system Battery type Li ion Battery voltage 3.6 V...
- Page 38 Technical data Power system Start-up time from sleep mode 10 seconds 30 seconds Start-up time Environmental data Operating temperature range • –10°C to +55°C (+14°F to +131°F): infinity • +85°C (+185°F): 15 minutes • +150°C (+302°F): 10 minutes • +260°C (+500°F): 3 minutes Storage temperature range –40°C to +70°C (–40°F to +158°F) Humidity (operating and storage)
- Page 39 Technical data Shipping information Packaging, size • 1-pack: 323 × 325 × 110 mm (12.7 × 12.8 × 4.3 in.) • 5-pack: 578 × 336 × 351 mm (22.93 × 13.10 × 13.68 in.) EAN-13 4743254002050 UPC-12 845188011345 Country of origin Estonia Supplies &...
-
Page 40: Mechanical Drawings
Mechanical drawings #T559972; r. AG/39882/39882; en-US... -
Page 45: Ce Declaration Of Conformity
CE Declaration of conformity #T559972; r. AG/39882/39882; en-US... -
Page 47: Cleaning The Camera
Cleaning the camera 14.1 Camera housing, cables, and other items 14.1.1 Liquids Use one of these liquids: • Warm water • A weak detergent solution 14.1.2 Equipment A soft cloth 14.1.3 Procedure Follow this procedure: 1. Soak the cloth in the liquid. 2. -
Page 48: About Flir Systems
• Prox Dynamics (2016) Figure 15.1 Patent documents from the early 1960s FLIR Systems has three manufacturing plants in the United States (Portland, OR, Boston, MA, Santa Barbara, CA) and one in Sweden (Stockholm). Since 2007 there is also a... -
Page 49: More Than Just An Infrared Camera
15.1 More than just an infrared camera At FLIR Systems we recognize that our job is to go beyond just producing the best infrared camera systems. We are committed to enabling all users of our infrared camera systems to work more productively by providing them with the most powerful camera–software... -
Page 50: Sharing Our Knowledge
Although our cameras are designed to be very user-friendly, there is a lot more to thermog- raphy than just knowing how to handle a camera. Therefore, FLIR Systems has founded the Infrared Training Center (ITC), a separate business unit, that provides certified training courses. -
Page 51: History Of Infrared Technology
History of infrared technology Before the year 1800, the existence of the infrared portion of the electromagnetic spectrum wasn't even suspected. The original significance of the infrared spectrum, or simply ‘the in- frared’ as it is often called, as a form of heat radiation is perhaps less obvious today than it was at the time of its discovery by Herschel in 1800. - Page 52 History of infrared technology Moving the thermometer into the dark region beyond the red end of the spectrum, Her- schel confirmed that the heating continued to increase. The maximum point, when he found it, lay well beyond the red end – in what is known today as the ‘infrared wavelengths’. When Herschel revealed his discovery, he referred to this new portion of the electromag- netic spectrum as the ‘thermometrical spectrum’.
- Page 53 History of infrared technology Figure 16.4 Samuel P. Langley (1834–1906) The improvement of infrared-detector sensitivity progressed slowly. Another major break- through, made by Langley in 1880, was the invention of the bolometer. This consisted of a thin blackened strip of platinum connected in one arm of a Wheatstone bridge circuit upon which the infrared radiation was focused and to which a sensitive galvanometer re- sponded.
- Page 54 A note on the technical production of this publication This publication was produced using XML — the eXtensible Markup Language. For more information about XML, please visit http://www.w3.org/XML/ A note on the typeface used in this publication This publication was typeset using Linotype Helvetica™ World. Helvetica™ was designed by Max Miedinger (1910–1980) LOEF (List Of Effective Files) T501132.xml;...
- Page 56 Disclaimer Specifications subject to change without further notice. Models and accessories subject to regional market considerations. License procedures may apply. Products described herein may be subject to US Export Regulations. Please refer to exportquestions@flir.com with any questions. Publ. No.: T559972...
Need help?
Do you have a question about the K2 and is the answer not in the manual?
Questions and answers