Table of Contents
Advertisement
Quick Links
230V/400V
ARC WELDERS
71090-71151
IMPORTANT: Please read these instructions carefully to ensure the safe and effective use of this product and save
these instructions for future reference. This manual has been compiled by Draper Tools and is an integrated part of the
product with which it is enclosed and should be kept with it for future references.
This manual describes the purpose for which the product has been designed and contains all the necessary information
to ensure its correct and safe use. We recommend that this manual is read before any operation or, before performing
any kind of adjustment to the product and prior to any maintenance tasks. By following all the general safety
instructions contained in this manual, it will ensure both product and operator safety, together with longer life of the
product itself.
AlI photographs and drawings in this manual are supplied by Draper Tools to help illustrate the operation of the product.
Whilst every effort has been made to ensure accuracy of information contained in this manual, the Draper Tools policy
of continuous improvement determines the right to make modifications without prior warning.
Advertisement
Table of Contents

Related Manuals for Draper AW164AT


Summary of Contents for Draper AW164AT
- Page 1 IMPORTANT: Please read these instructions carefully to ensure the safe and effective use of this product and save these instructions for future reference. This manual has been compiled by Draper Tools and is an integrated part of the product with which it is enclosed and should be kept with it for future references.
-
Page 2: Title Page
Commercial copying, redistribution, hiring or lending is prohibited. No part of this publication may be stored in a retrieval system or transmitted in any other form or means without written permission from Draper Tools Limited. In all cases this copyright notice must remain intact. -
Page 3: Table Of Contents
2. CONTENTS 2.1 CONTENTS ................Page content Page TITLE PAGE INTRODUCTION ....................2 REVISION HISTORY ..................2 UNDERSTANDING THIS MANUAL ..............2 COPYRIGHT NOTICE ..................2 CONTENTS CONTENTS ......................3 GUARANTEE GUARANTEE...................... 4 INTRODUCTION SCOPE........................ 5 SPECIFICATION....................5 HANDLING & STORAGE..................5 HEALTH &... -
Page 4: Guarantee
3. GUARANTEE 3.1 GUARANTEE Draper tools have been carefully tested and inspected before shipment and are guaranteed to be free from defective materials and workmanship. Should the tool develop a fault, please return the complete tool to your nearest distributor or contact Draper Tools Limited, Chandler's Ford, Eastleigh, Hampshire, SO53 1YF. -
Page 5: Introduction
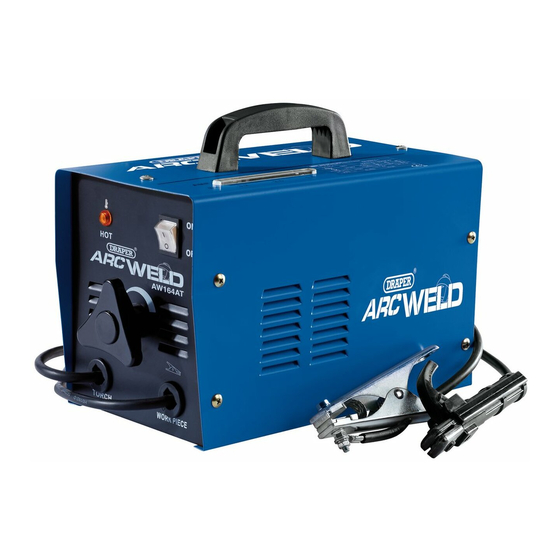
AC welding machine suited to light repair and fabrication work. 4.2 SPECIFICATION Stock no............. 71090 ..........71151 Part no..........AW164AT........AW260AT Rated voltage ..........230V~50Hz......230V/400V~50Hz Absorbed power ..........8.0kVA ........... 14.2kVA Duty cycle ..........10%@160A ......... 10%@250A Welding current range ........60-160A ........100-250A Coupling device .......... -
Page 6: Health & Safety Information
5. HEALTH & SAFETY INFORMATION 5.1 GENERAL SAFETY INSTRUCTIONS WARNING: When using electric tools basic safety precautions should always be followed to reduce the risk of fire, electric shock and personal injury including the following. Read all these instructions before attempting to operate this product and save these instructions. Electric shock can kill: –... - Page 7 5. HEALTH & SAFETY INFORMATION – The welding arc can cause serious burns. Avoid contact with skin. – Sparks and molten metal are cast out during welding. Take precautions to prevent fire igniting and wear protective clothing. – Sparks and molten metal can pass through gaps. Be aware that fire can start out of sight. Flammables in a locked cabinet may not be safe.
- Page 8 5. HEALTH & SAFETY INFORMATION Gas cylinders: – Gas cylinders should be located or secured so that they cannot be knocked over. – Shield gas containers can explode if damaged. Take care when handling. – Ensure gas cylinders are shut-off when not in use and between operations. –...
-
Page 9: Connection To The Power Supply
5. HEALTH & SAFETY INFORMATION 5.2 CONNECTION TO THE POWER SUPPLY Make sure the power supply information on the machine's rating plate is compatible with the power supply you intend to connect it to. This machine comes supplied without a plug. It is designed for connection to a 16amp power supply rated at 230V AC or 400V AC (71151 only). -
Page 10: Identification
6. IDENTIFICATION Power cable. Ventilation grille. On/off foot switch. Direct fit earth clamp. Welding current adjustment. Electrode holder. Current adjustment indicator. Handle. Thermal cutout signal. Transport wheels. Connections for welding cables. (some machines have directly connected cables). -
Page 11: Unpacking & Checking
Carefully remove the product from the packaging and examine it for any sign of damage caused during shipping. Lay the contents out and check them. If any part is damaged or missing, do not attempt to use the tool and contact the Draper Helpline immediately (see back page for details). -
Page 12: Preparing The Welders
8. PREPARING THE WELDERS NOTE: Remove the plug from the socket before carrying out adjustment, servicing or maintenance. Check that the electrical supply delivers the voltage and frequency corresponding to the welding machine and that it is fitted with a delayed fuse suited to the maximum delivered rated current. - Page 13 Symbol indicating the possibility to use the welding machine in environments potentially subject to electric discharges. Indicates the machine is an ARC/MMA process machine. Indicates this machine produces an AC welding current. FIG.1 Stock No.71090 Part No.AW164AT EN 60974-1 60A/20.4V-160A/24.4V ~50Hz =46V 24.4...
-
Page 14: Operation Instructions
9. OPERATING INSTRUCTIONS NOTE: Once you have put the welding machine into operation, switch it on and carry out the required adjustments. 9.1 ADJUSTING THE WELDING CURRENT Select the welding current depending on the electrode, the joint and the welding position. Indicatively, the currents to be used with the different electrode diameters are listed in Fig.2. -
Page 15: Troubleshooting
10. TROUBLESHOOTING EXAMPLE TERM CAUSE - Incorrect arc distance. - Welding current too low. Insufficient penetration - Wire speed to low. - Welding line not central to butt. - Wire size too large for application. Overlap - Torch speed too slow. - Contamination in the metal (eg rust). -
Page 16: Maintenance
11. MAINTENANCE 11.1 MAINTENANCE & PARTS REPLACEMENT Regular inspection and cleaning reduces the necessity for maintenance operations and will keep your welder in good working condition. The welder must be correctly ventilated during tool operation. For this reason avoid blocking the air inlets. After use disconnect the tool from the power supply and vacuum the ventilation slots. -
Page 17: Explanation Of Symbols
12. EXPLANATION OF SYMBOLS 12.1 EXPLANATION OF SYMBOLS WEEE Do not dispose of Waste Electrical & Attention. Electronic Equipment in with domestic rubbish Danger of electric shock. Class 1 appliance (Must be earthed). Danger of fire. Danger of explosion. Danger of welding fumes. Danger of ultraviolet radiation. -
Page 18: Disposal
13. DISPOSAL 13.1 DISPOSAL - At the end of the machine’s working life, or when it can no longer be repaired, ensure that it is disposed of according to national regulations. - Contact your local authority for details of collection schemes in your area. In all circumstances: •... -
Page 19: Glossary
14. GLOSSARY 14.1 GLOSSARY ALPHABETICAL LIST OF WORDS RELATING TO THIS MANUAL Duty cycle The duty cycle is the percentage of 10 minutes that the machine can weld for at a set amperage (10%=1min up to 100%=10mins). The higher the amperage, the lower the welding time. Polarity The relative orientation of electric poles. - Page 20 NOTES...
- Page 21 NOTES...
- Page 22 NOTES...
- Page 23 NOTES...
- Page 24 ©Published by Draper Tools Limited. No part of this publication may be reproduced, stored in a retrieval system or transmitted in any form or by any means, electronic, mechanical photocopying, recording or otherwise without prior permission in writing from Draper Tools Ltd.
Need help?
Do you have a question about the AW164AT and is the answer not in the manual?
Questions and answers