Table of Contents
Advertisement
Quick Links
INSTRUCTIONS FOR
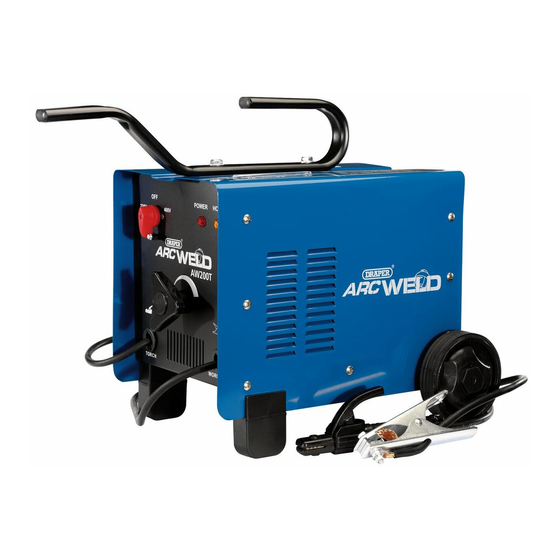
200A 230/400V
Turbo Arc Welder
Stock No.83403
Part No.AW200T
IMPORTANT: PLEASE READ THESE INSTRUCTIONS CAREFULLY TO ENSURE THE SAFE AND
EFFECTIVE USE OF THIS PRODUCT.
GENERAL INFORMATION
These instructions accompanying the product are the original instructions. This document is part of the product, keep it
for the life of the product passing it on to any subsequent holder of the product. Read all these instructions before
assembling, operating or maintaining this product.
This manual has been compiled by Draper Tools describing the purpose for which the product has been designed, and
contains all the necessary information to ensure its correct and safe use. By following all the general safety instructions
contained in this manual, it will ensure both product and operator safety, together with longer life of the product itself.
AlI photographs and drawings in this manual are supplied by Draper Tools to help illustrate the operation of the product.
Whilst every effort has been made to ensure the accuracy of information contained in this manual, the Draper Tools policy
of continuous improvement determines the right to make modifications without prior warning.
Advertisement
Table of Contents

Related Manuals for Draper AW200T


Summary of Contents for Draper AW200T
-
Page 1: General Information
AlI photographs and drawings in this manual are supplied by Draper Tools to help illustrate the operation of the product. -
Page 2: Title Page
Commercial copying, redistribution, hiring or lending is prohibited. No part of this publication may be stored in a retrieval system or transmitted in any other form or means without written permission from Draper Tools Limited. In all cases this copyright notice must remain intact. -
Page 3: Table Of Contents
CONTENTS CONTENTS 2.1 CONTENTS Page content Page TITLE PAGE INTRODUCTION ....................2 REVISION HISTORY....................2 UNDERSTANDING THIS MANUAL ...............2 COPYRIGHT NOTICE....................2 CONTENTS CONTENTS ......................3 GUARANTEE GUARANTEE ......................4 INTRODUCTION SCOPE ........................5 SPECIFICATION ......................5 HANDLING & STORAGE ..................5 HEALTH & SAFETY INFORMATION GENERAL SAFETY INSTRUCTIONS FOR POWER TOOL USE .........6 GENERAL ARC-WELDER SAFETY WARNINGS ............8 ADDITIONAL SAFETY INSTRUCTIONS FOR ARC-WELDERS .........9 CONNECTION TO THE POWER SUPPLY..............10... -
Page 4: Guarantee
This guarantee applies in lieu of any other guarantee expressed or implied and variations of its terms are not authorised. Your Draper guarantee is not effective unless you can produce upon request a dated receipt or invoice to verify your proof of purchase within the 12 month period. -
Page 5: Introduction
4.1 SCOPE AC welding machine suited to light repair and fabrication work. 4.2 SPECIFICATION Stock no ..........................83403 Part no .......................... AW200T Rated voltage ......................230/400V~ Rated frequency ........................ 50Hz Rated max. supply current ....................16A No load voltage ......................45 – 48 V Welding current ...................... -
Page 6: Health & Safety Information
HEALTH & SAFETY INFORMATION 5.1 GENERAL SAFETY INSTRUCTIONS FOR POWER TOOL USE When using any type of power tool there are steps that should be taken to make sure that you, as the user, remain safe. Common sense and a respect for the tool will help reduce the risk of injury. Read the instruction manual fully. - Page 7 HEALTH & SAFETY INFORMATION Wear personal protective equipment (PPE). Dust, noise, vibration and swarf can all be dangerous if not suitably protected against. If the work involving the power tool creates dust or fumes; wear a dust mask. Vibration to the hand, caused by operating some tools for longer periods must be protected against.
-
Page 8: General Arc-Welder Safety Warnings
HEALTH & SAFETY INFORMATION Have this tool repaired by a qualified person. This tool is designed to confirm to the relevant international and local standards and as such should be maintained and repaired by someone qualified; using only original parts supplied by the manufacturer: This will ensure the tool remains safe to use. -
Page 9: Additional Safety Instructions For Arc-Welders
HEALTH & SAFETY INFORMATION – Do not allow bare skin to come into contact with hot metal parts, such as the torch, electrode holder grippers, electrode stubs, or freshly welded pieces. – Metal-working gives off sparks and splinters. Wear safety goggles with protective side eye guards. -
Page 10: Connection To The Power Supply
HEALTH & SAFETY INFORMATION 5.4 CONNECTION TO THE POWER SUPPLY This machine should be connected to a 16amp power supply either using the appropriate blue 16amp plug or directly into the fused mains supply. Both of these operations should be carried out by a qualified electrician. †... -
Page 11: Technical Description
TECHNICAL DESCRIPTION 6.1 IDENTIFICATION Pull/carry handle. Welding current indicator. On/off/voltage selector switch. Thermal overload indicator. Current adjustment control. Electrode holder. Direct fit earth clamp. Wheels. Feet. Power on indication light. -
Page 12: Unpacking & Checking
Lay the contents out and check them against the parts shown below. If any part is damaged or missing; please contact the Draper Helpline (the telephone number appears on the Title page) and do not attempt to use the arc welder. -
Page 13: Assembling The Arc Welder
ASSEMBLING THE ARC WELDER 8.1 FITTING THE CARRY/PULL HANDLE FIG. 1 – FIG. 1 – Place the handle on top of the unit, as indicated and fasten in place using the 2 bolts supplied. 8.2 FITTING THE WHEELS – FIGS. 2 – 4 –... -
Page 14: Fitting The Feet
ASSEMBLING THE ARC WELDER 8.3 FITTING THE FEET – FIG. 5 – Position the feet on the underside of the machine, as shown in fig.5. – The two feet contain a slot that enables them to be slid onto the bottom of each of the side panels of the machine. -
Page 15: Setting The Arc Welder
SETTING THE ARC WELDER 9.1 RATING PLATE INFORMATION A rating plate is affixed to the welding machine. Fig.1. shows an example of this plate. Constructor name and machine part No. Delivered alternate current frequency. Serial number European reference standard for the construction and safety of welding equipment. WELDING CIRCUIT PERFORMANCE Minimum and maximum open circuit voltage (open welding circuit). -
Page 16: Preparing The Welding Circuit
SETTING THE ARC WELDER NOTE: Remove the plug from the socket before FIG. 1 carrying out adjustment, servicing or maintenance. Check that the electrical supply delivers the voltage Ø and frequency corresponding to the welding machine and that it is fitted with a delayed fuse 30 –... -
Page 17: Recommendations For Use
SETTING THE ARC WELDER 9.5 RECOMMENDATIONS FOR USE Only use an extension lead when absolutely necessary and providing it has an equal or larger section to the power cable and is fitted with a grounding conductor. Do not block the welder air intakes. Do not store the welder in containers or on shelving that does not guarantee suitable ventilation. -
Page 18: Maintenance
10. MAINTENANCE 10.1 MAINTENANCE & PARTS REPLACEMENT Regular inspection and cleaning reduces the necessity for maintenance operations and will keep your welder in good working condition. The welder must be correctly ventilated during tool operation. For this reason avoid blocking the air inlets. -
Page 19: Explanation Of Symbols
11. EXPLANATION OF SYMBOLS 11.1 EXPLANATION OF SYMBOLS Attention. Warning! Read the instruction manual Danger of electric shock. Danger of fire. WEEE Do not dispose of Waste Electrical & Electronic Equipment in with domestic rubbish Danger of explosion. Class 1 appliance (Must be earthed). -
Page 20: Disposal
12. DISPOSAL 12.1 DISPOSAL – At the end of the machine’s working life, or when it can no longer be repaired, ensure that it is disposed of according to national regulations. – Contact your local authority for details of collection schemes in your area. In all circumstances: •... - Page 21 NOTES...
- Page 22 NOTES...
- Page 23 NOTES...
- Page 24 - Sales Desk: (023) 8049 4333 - General Enquiries: (023) 8026 6355 - Service/Warranty Repair Agent For aftersales servicing or warranty repairs, please contact the Draper Tools Helpline for details of an agent in your local area. YOUR DRAPER STOCKIST KCCH1115...
Need help?
Do you have a question about the AW200T and is the answer not in the manual?
Questions and answers