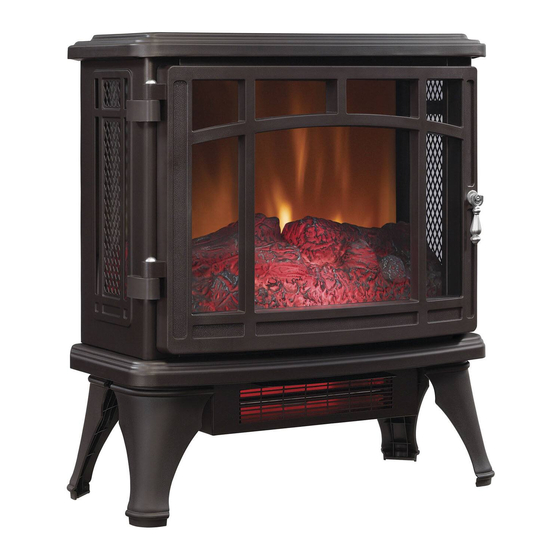
Duraflame DFI-8511-01 Manual
Hide thumbs
Also See for DFI-8511-01:
- Assembly and operating instructions (2 pages) ,
- Troubleshooting manual (1 page)
Advertisement
Table of Contents
- 1 Important Instructions
- 2 Getting Started
- 3 Product Specifications
- 4 Installation Instructions
- 5 Care and Maintenance
- 6 Operation Instructions
- 7 Bulb Replacement
- 8 Troubleshooting Guide
- 9 Replacement Parts
- 10 Fcc/IC Information
- 11 Battery Replacement
- 12 Year Limited Warranty
- 13 Customer Service
- Download this manual
See also:
Troubleshooting Manual
MODEL/ MODELE/ MODELO:
DFI-8511-01, DFI-8511-02, DFI-8511-03, DFI-8511-04,
DFI-8511-08, DFI-8511-09, DFI-8511-10
Español P.11
Français P.20
www.tsicustomerservice.com
1-800-318-9373
Twin-Star International, Inc; Delray Beach, FL 33445
Made in China • Printed in China • Fabricado en China • Impreso en China • Fabriqué en China • Imprimé en Chine
A485
www.tsicustomerservice.com
1
Advertisement
Table of Contents

Related Manuals for Duraflame DFI-8511-01


Summary of Contents for Duraflame DFI-8511-01
- Page 1 MODEL/ MODELE/ MODELO: DFI-8511-01, DFI-8511-02, DFI-8511-03, DFI-8511-04, DFI-8511-08, DFI-8511-09, DFI-8511-10 Español P.11 Français P.20 www.tsicustomerservice.com 1-800-318-9373 Twin-Star International, Inc; Delray Beach, FL 33445 Made in China • Printed in China • Fabricado en China • Impreso en China • Fabriqué en China • Imprimé en Chine A485 www.tsicustomerservice.com...
-
Page 2: Important Instructions
IMPORTANT INSTRUCTIONS When using electrical appliances, basic precautions should always be followed to reduce the risk of fire, electrical shock, and injury to persons including the following: 1. Read all instructions before using this appliance. 2. This appliance is hot when in use. To avoid burns, do not let bare skin touch hot surfaces. If provided, use handles when moving this appliance. -
Page 3: Getting Started
Model Number HIGH TEMPERATURE, RISK OF FIRE, KEEP ELECTRICAL CORDS, DRAPERY, MODEL / MODÈLE / MODELO FURNISHINGS AND OTHER COMBUSTIBLES AT LEAST 3 FEET(0.9M) FROM DFI-8511-01 THE FRONT OF THE HEATER AND AWAY FROM THE SIDE AND THE REAR. VOLTS WATTS/VATIOS... -
Page 4: Installation Instructions
INSTALLATION INSTRUCTIONS Tools Required for Assembly Phillips Head Screwdriver Leg Assembly Bracket 1. Align the 2 mounting tabs into 2. Slide the legs outward to lock in 3. Fasten the legs to the base using the the bracket (Fig 1) place. -
Page 5: Operation Instructions
OPERATION INSTRUCTIONS Remote Contorl Control Panel Location The Stove can be operated by either the remote control or the control panel. Control Panel HEATER POWER FLAME •Use the + and - buttons to adjust •Press the HEATER button to cycle •Use the power button to the flame brightness. -
Page 6: Bulb Replacement
BULB REPLACEMENT Tools Required for Assembly Phillips Head Screwdriver Clear, 40-watt, E12 socket base light bulb (candelabra base, B bulb). Unplug the stove. Remove the screws holding the stove back panel in place. Remove the back panel to access the light bulb. REMOVE Pinch the spring clip to loosen the spindle, and gently turn and pull the rubber gromet out of the... -
Page 7: Troubleshooting Guide
TROUBLESHOOTING GUIDE Problem Root Cause Corrective Action 1. No power 1a. Power cord was not plugged into 1a. Check that unit is plugged directly into a standard 120 volt outlet. the outlet. 1b. Contact Customer Service for a replacement main PCBA. 1b. -
Page 8: Replacement Parts
REPLACEMENT PARTS Part Part Name Part Number Control PCBA Y14-S143-P32 Y17-S143-LEG heater/ Blower Assembly Y17-S143-P01 Blub Y17-S143-BLUB Main PCBA Y17-S143-P15 Spinner Y17-S143-P11 Emberbed Y17-S143-P02 Flame Generator Drive Motor P10-Q-S Note, the scale and size of your parts may be different depending on your exact model A485 www.tsicustomerservice.com... -
Page 9: Fcc/Ic Information
FCC/IC INFORMATION Warning: Changes or modifications to this unit not expressly approved by the party responsible for compliance could void user’s authority to operate the equipment. NOTE: This equipment has been tested and found to comply with the limits for Class B digital device, pursuant to part 15 of the FCC Rules. -
Page 10: Year Limited Warranty
1-YEAR LIMITED WARRANTY The manufacturer warrants that your new Electric Stove is free from manufacturing and material defects for a period of one year from date of puchase, subject to the following conditions and limitations. 1. Install and operate this appliance in accordance with the installation and operating instructions furnished with the product at all times.
Need help?
Do you have a question about the DFI-8511-01 and is the answer not in the manual?
Questions and answers
Where can I purchase a Remote Control replacement?
You can buy a replacement remote control for the Duraflame DFI-8511-01 on Amazon.
This answer is automatically generated
where can i purchase new legs. ours were lost when we moved, they were removed and put in a small box and it was lost. need help
@charles brady
DFI-8511-01 Is it possible to get replacement remote for this model.
Is it possible to get a replacement remote