Advertisement
Advertisement
Table of Contents

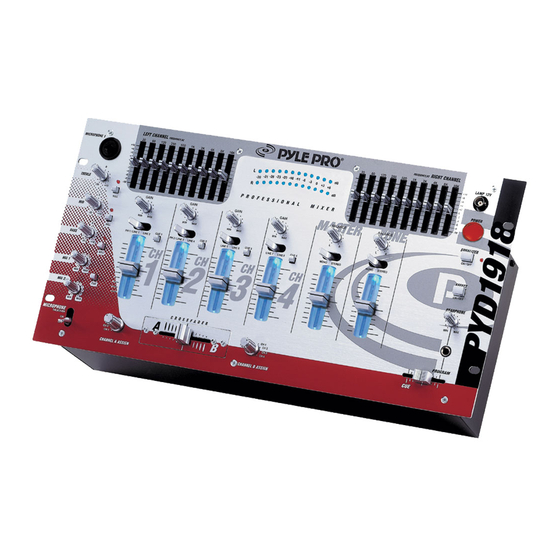
Summary of Contents for Pyle Pro PYD-1918
- Page 1 PYD-1918/PYD1928 PYD-1938/PYD-1948 PYD-1958 4 channel professional...
- Page 2 Set up and used properly, you can expect years of trouble-free service from this product. Owner’s Manual Table of Contents Input/Output Features Features and Controls: PYD-1918 Features and Controls: PYD-1928 Features and Controls: PYD-1938 Features and Controls: PYD-1948...
- Page 3 Features and Controls: PYD1918 Mixer MIC 1 Combo Input Jack For connecting a balanced or unbalanced low impedance microphone with XLR- type or 1/4” plug MIC 2 Input Jack (on input panel) For connecting a balanced or unbalanced low impedance microphone with 1/4”plug MIC Frequency Kill Switches Allows you to kill the selected frequency range...
- Page 4 Features and Controls: PYD1928 Mixer MIC 1 Combo Input Jack For connecting a balanced or unbalanced low impedance microphone with XLR- type or 1/4” plug MIC 2 Input Jack (on input panel) For connecting a balanced or unbalanced low impedance microphone with 1/4”...
- Page 5 Features and Controls: PYD1938 Mixer MIC 1 Combo Input Jack For connecting a balanced or unbalanced low impedance microphone with XLR- type or 1/4” plug MIC 2 Input Jack (on input panel) For connecting a balanced or unbalanced low impedance microphone with 1/4”...
- Page 6 Features and Controls: PYD1948 Mixer MIC 1 Combo Input Jack For connecting a balanced or unbalanced low impedance microphone with XLR- type or 1/4” plug MIC 2 Input Jack (on input panel) For connecting a balanced or unbalanced low impedance microphone with 1/4”...
- Page 7 Features and Controls: PYD1958 Mixer MIC 1 Combo Input Jack For connecting a balanced or unbalanced low impedance microphone with XLR- type or 1/4”plug MIC 2 Input Jack (on input panel) For connecting a balanced or unbalanced low impedance microphone with 1/4”plug MIC Frequency Kill Switches Allows you to kill the selected frequency range...
-
Page 8: Connecting Microphones
Presetting the Controls Before Use Since sudden high output levels from your Pyle Pro mixer can damage not only audio devices connected to the mixer output but your hearing as well (especially if you are using headphones), please adjust the mixer’s controls BEFORE connecting AC power or turning on the unit. Set up the mixer controls like this before you start: CONTROL Power On/Off... - Page 9 Connecting High Level Output Audio Sources Connect up to 8 such sources (tuner, cassette deck, CD Player, camcorder or VCR) to the input jacks for Line 1 (if not being used as Phono 1 input), Line 2, Line 3 (if not being used as Phono 2 input), Line 4, Line 5 and Line 6.
- Page 10 Using the Channel Input Gain Controls Adjusting the Gain controls for each channel permits you to fine tune the level of each of the audio inputs, since input levels usually vary. Rotate the Gain controls clockwise to increase levels. After you preset the gain levels for each input, it is recommended that you do not adjust them further, as you can cause sound level imbalances during a mix.
-
Page 11: Using Headphones
Using Headphones Plug a pair of stereo headphones (not supplied) with a 1/4” jack into the Phones input. Using headphones not only affords you the opportunity to listen privately, but also enables you to monitor (”cue”) the incoming audio sources so you can locate an exact passage or section before mixing it in. -
Page 12: Mixing The Inputs
Using the Mixer Controls Turning on the Mixer 1. Turn on the output amplifier and temporarily set its volume to the minimum setting. 2. On the mixer, turn ON the power switch. The adjacent power LED will illuminate. 3. Turn on the audio input sources you wish to mix, and set them to play (or talk continuously into the microphone). -
Page 13: Using The Microphone
Adding Equalization to the Mix You can further tailor the sound processed through the mixer to match your acoustic surroundings or suit your personal preferences by using the ten frequency sliders for each channel. To engage the equalization module, press the Equalization On/Off Switch. The LED next to the switch will be illuminated, indicated the EQ mode has been engaged. -
Page 14: Using The Sound Effects
Using the Mono/Stereo Mode Switch When the MASTER MONO/STEREO switch is in the MONO position, the mixer combines the right and left channels and sends them to the OUTPUT R and L jacks. These combined outputs can be used by a monoaural amplifier, such as a PA amp. In the STEREO position, right and left channels remain separate. -
Page 15: Troubleshooting
4. To playback the recorded sample ONCE, turn the SAMPLER MODE switch to SINGLE, and press START/STOP. The LED will go on, indicating that a sample is playing. Pressing START/STOP during playback will stop the playback. Each time you press the START/STOP control, the unit will replay the recorded sample from the beginning and play it through the end of the recorded sound. -
Page 16: Specifications
Specifications PYD1918/1928/1938/1948/1958 Input Sensitivity/Impedance Mic 1-2 1.5 mV/600 Ohms, bal/unbal Phono 1-2 3.0 mV/50K Ohms Line 1-8 150.0 mV/27K Ohms Output Level 2.0 V/10-kOhms Zone 2.0 V/10-kOhms Record 150mV/10-kOhms Frequency Response 20Hz – 20kHz +/- 3 dB S/N Ratio (at 1 kHz) >60 dB/1.5mV input Phono >70 dB/3.0mV input...


Need help?
Do you have a question about the PYD-1918 and is the answer not in the manual?
Questions and answers