Table of Contents
Advertisement
Quick Links
Advertisement
Table of Contents

Subscribe to Our Youtube Channel
Related Manuals for Igloohome Smart Mortise


Summary of Contents for Igloohome Smart Mortise
- Page 1 Installers & User guide Smart Mortise. Version 0.1...
- Page 2 As our igloohome app is frequently updated, there may be changes to this manual. Please refer to our website igloohome.co/support for the latest version of the manual.
-
Page 3: Table Of Contents
Table of Contents What’s Included Specifications Requirements Lock Anatomy Installation Type Preparing the Door Installation Instructions Pairing Features Unlocking Locking Lock Tutorial Lock Behaviour Troubleshoot... -
Page 4: What's Included
What’s Included Front Assembly Back Assembly Back Plate Drill Sheet Strike Plate AA Batteries x4 Key Cards x2 Key Stickers x2 Screws Emergency Keys Mortise Shaft + Pin Mortise Assembly... -
Page 5: Specifications
Specifications Model igloohome Smart Mortise Lock Material AI, ABS Batteries 4 x AA Alkaline (Non - Rechargeable) (DO NOT USE: Eveready/ Super Heavy Duty) Unlock Mechanism Bluetooth, PIN code, Key cards, Key Stickers, Open/Close Button, Handle, Thumbturn, Physical Keys Front... -
Page 6: Requirements
Requirements Door Thickness Clearance 70mm 40mm-60mm >190mm (with handle) -
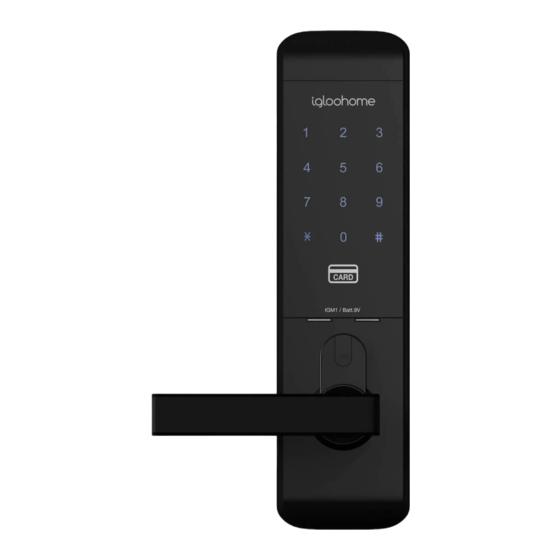
Page 7: Lock Anatomy
Lock Anatomy Outer Body Battery Cover Touch Screen Keypad Key Card Reader Reset Button 9V Jumpstart Open/Close IGM1 Batt.9V Button Emergency Thumbturn Keyhole Handle Mortise Assembly Dead bolt Latch bolt Cable... -
Page 8: Installation Type
Installation Type Screws Quantity: 4 each • 06mm For doors with thickness 40 - 45mm • 20mm • 30mm For doors with thickness 45 - 50mm • 40mm For doors with thickness 50 - 60mm • 12mm Door Type Right Installation Left Installation... -
Page 9: Preparing The Door
Gap between door and door frame: <3mm Door and door frame material : Wood * Not for: metal gates, glass doors or sliding doors. If you are unsure if your door is suitable, send us web links to your door pictures to support@igloohome.co... - Page 10 How to use the Drill Sheet Drilling (Door) Fold here Make sure this before drilling is aligned to the holes for side centre of door edge Door edge Chiselling Depth Width: 2 - 3mm Door edge * Mark the center of the holes and then drill for accuracy.
-
Page 11: Installation Instructions
Installation Instructions Determine the position of the door handle and pull until it clicks Front Assembly Back of Front Assembly IGM1 Batt.9V att. Releasing of Catch In case you have positioned the door handle wrongly, release the handle catch that can be found behind the front / back lock assembly. - Page 12 Install Mortise Flat side of the latch faces in Inside Screws 12mm Install Outer Body...
- Page 13 Install Inner Body Mortise Cable Outer Body Cable * Chip is attached to the back assembly Screws 06mm 20mm 30mm 40mm Install Strike on the door frame. Ensure to chisel appropriately to the correct measurements. Case Strike Screws 12mm Installation Confirmation 1.
-
Page 14: Pairing
Internet connection account on app New users 1. Upon Login > Add a new igloohome lock > Select your Product 1.1 Pairing Option 1 Upon Scan QR Code > Scan (completed) > Tap on lock > Press Next to complete pairing >... - Page 15 Pairing Current users 1. Ensure that you have an existing home listing through Menu > Configuration > Add Home - Proceed if your home is listed. 2. Go to Menu > Configuration > Add Lock > Select your Product > 2.1 Pairing Option 1 Upon Scan QR Code >...
-
Page 16: Features
(between 5 to 120 seconds). The owner sets this function. Key Card Unlocking The igloohome Smart Mortise is able to register up to 16 key cards. Alarms / Notifications Fire Detection Alarm Obstruction Alarm... - Page 17 Entry via PIN codes and Bluetooth attempts at entering a PIN code, the Key will be logged in the app. igloohome Smart Mortise will sound an alarm and be unresponsive for 5 Bluetooth key access logs are minutes. Physical key and Bluetooth...
-
Page 18: Unlocking
Unlocking To unlock the door igloohome App Bluetooth Basic Unlock Bluetooth Easy Unlock PIN Code / Decoy PIN Code Home Main Door Key Card / Key Sticker IGM1 Batt.9V Open/Close Button Physical Key Thumbturn Basic Issue access Logs Handle Legend... -
Page 19: Locking
Locking To lock the door Sensor/Timer Re-Lock ‘#’ Key Key Card Unlock IGM1 Batt.9V Open/Close Button Physical Key Thumbturn Legend ‘#’ Key Open/Close Button Press and hold ‘#’ Press Open/Close Button at the back of the lock Sensor Re-Lock Physical Key Refer to Lock Tutorial - Step 8 Use the physical key to lock the door Thumbturn... -
Page 20: Lock Tutorial
Lock Tutorial - on Mortise Keypad - on igloohome App Default factory PIN code In the factory mode (before pairing), the PIN to unlock is * 1234567890 # Setting Master PIN code Before proceeding, turn on your Bluetooth and ensure that you are within Bluetooth range of the lock. - Page 21 Lock Tutorial - on Mortise Keypad - on igloohome App Editing & Deleting PIN codes To Edit: Home > Select Lock Name > > Select PIN > To Delete: Home > Select Lock Name > > Select PIN > * Before editing a PIN code, please make sure that it is used once.
- Page 22 Lock Tutorial - on Mortise Keypad - on igloohome App Enabling & Disabling Sensor Re-lock* To Enable * 2 2 # <Master PIN> # To Disable * 2 3 # <Master PIN> # * By default, Sensor Re-lock is activated Enabling &...
- Page 23 > Access Type : Bluetooth Key > Enter Access Details > Create Key To receive a Bluetooth Key, Download the igloohome app from iTunes or Google Play store and register/login to your account (a) To receive key via QR code, go to Home > Visits >...
-
Page 24: Lock Behaviour
Lock Behaviour Sensor Re-lock Timer Re-lock Behaviour Activated Activated Mortise will lock upon door closure. Should the door be kept open after Timer is up, door will not lock until door is closed. Should the door be kept closed after unlocking, door will lock after Timer is up. -
Page 25: Troubleshoot
• Use Alkaline batteries only on your mobile device • Do not use: Heavy Duty, Eveready, GP, or • Restart igloohome app on your mobile device rechargeable batteries • Switch to a new set of batteries * Using high quality batteries will improve the... - Page 26 For enquiries go to: igloohome.co/support...
Need help?
Do you have a question about the Smart Mortise and is the answer not in the manual?
Questions and answers