
Related Manuals for Blaupunkt MADRID 120BT


Summary of Contents for Blaupunkt MADRID 120BT
- Page 1 OWNER’S MANUAL Mobile Audio System MADRID 120BT PLL Synthesizer Stereo Radio CD/MP3/WMA Player Full Detachable Panel USB/ TF Interface 3.5mm Jack Input Bluetooth function Electronic Shockproof (ESP) Function...
-
Page 2: Table Of Contents
CONTENTS RDS (Radio Data System ) Installation ........... 3 operation ….…………………..……..11 Take out screw before installation ..3 CD/ MP3/ WMA operation ..... 12 DIN Front-Mount (Method A) ....3 Switching to disc mode ......12 Installing the unit ....... 3 Selecting tracks/file ....... -
Page 3: Installation
INSTALLATION Notes: Choose the mounting location where TAKE OUT SCREW BEFORE INSTALLATION Before install the unit, please remove the the unit will not interfere with the two screws. normal driving function of the driver. Before finally installing the unit, connect Take out screw before installation. -
Page 4: Removing The Unit
INSTALLATION back of the unit in place. Use the supplied they will go (with the notches facing up) hardware (Hex Nut (M5mm) and Spring into the appropriate slots at the middle Washer) to attach one end of the strap to left and right sides of the unit. -
Page 5: Din Rear-Mount (Method B)
front panel. INSTALLATION To fasten the unit to the factory radio 4. Lift the top of the outer trim ring then pull mounting brackets. it out to remove it. Align the screw holes on the bracket with the screw holes on the unit, and then 5. -
Page 6: Using The Detachable Front Panel
USING THE DETACHABLE FRONT PANEL REMOVING THE FRONT PANEL Press the release button ( ) on the Precautions when handling front panel and pull off the front panel. Do not drop the front panel. Do not put pressure on the display or control buttons when removing or installing the front panel. -
Page 7: Wiring Connection
WIRING CONNECTION ISO CONNECTION... -
Page 8: Operation
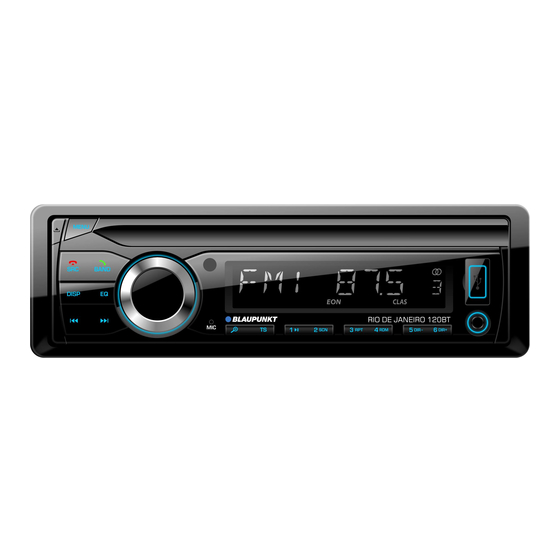
OPERATION LOCATION OF KEYS 14. “4 RDM” button 1. “DISP” button. 15. “3 RPT ” button. 2. “SRC(source)”/ button. 16. “2 SCN ” button. 3. “ ” (panel release) button. 17. “1 ” button. 4. “MENU” button. 18. “TS” button. 5. -
Page 9: Turn On/Off The Unit
OPERATION TURN ON/OFF THE UNIT current listening program remains Turn on the unit by pressing button(21). unchanged. When system is on. Press and hold button (21) for 2 seconds to turn off the unit. TA volume This function allows you to define the MUTE minimum volume... -
Page 10: Xbass
Europe/USA/LAT area. OPERATION EQ (Equalisation) AUXILIARY INPUT Press EQ button shortly to select the preset The unit can be connected to a portable EQ mode as below: FLAT-CLASSICS-POP-ROCK-EQ OFF audio player through the AUX IN jack (11). Pressing SRC button to switch to AUX mode when inserted an audio source to the XBASS unit. -
Page 11: Automatic Memory Storing& Program
automatically. Press for 2 seconds until function. “MANUAL” appears on the display, the Whenever AF is on, symbol “AF” manual tuning mode is selected. In this appears on the display. Program name is displayed on receiving OPERATION a RDS station. mode you can turn up/down a step “AF”... -
Page 12: Cd/Mp3/Wma Operation
side uppermost into disc segment is turned on. compartment until you feel some TA interruption function resistance. The disc is drawn into the The current traffic announcement is driver automatically. disc playback cancelled by turn the TA function to begins. STOP (in TA item of RDS menu, when If a disc is already inserted in the driver: the TA station is not received it only has... -
Page 13: Usb Play Operation
button (12). USB PLAY OPERATION In the front panel of the unit, there is an SELECTING FILES BY BUTTON USB interface (10). You can connect an is assigned as selection (19) USB driver through this interface (10). button in MP3/WMA operation. When you connect an USB driver through When pressed, it is activated the the interface, the unit will search the MP3/... -
Page 14: Disc Notes
(Windows Media Audio) decoding modes Notes CD-Rs (recordable as below. CDs)/CD-RWs (rewritable CDs): 1. Be sure to use discs with following Bit Rate Supports Standard (kbps) Mode marks only for the unit to play: MPEG1 Audio 32,48,64,96, Stereo Layer 3 128,192,256, (44.1kHz) ReWritable... -
Page 15: Bluetooth Operation
Checking phone book / received / BLUETOOTH OPERATION dialed / missed call (for Android and PRE-PAIR BLUETOOTH Iphone mobile) OPERATION Press SRC key it will show “PHONE” on (i) When use Bluetooth, please make sure the display. press button it will show BOOK... - Page 16 display. Press and hold key for 2 seconds it will redial the last phone number. 2) Making an outgoing call from the phone book / received / dialed / missed call (for Android and Iphone mobile) Please reference “Checking phone book / received / dialed / missed call”...
-
Page 17: Remote Control
REMOTE CONTROL HANDSET FUNCTION KEY & CONTROL Power ON/OFF Button. 2. VOL+: Volume up button. 3. BAND: To select FM1/FM2/FM3/AM1/AM2 band in RADIO mode. In RADIO mode: Press it shortly for seek down function. Press and hold it for manual turn down. In CD/MP3/WMA mode: Press it shortly for skip previous one track/file. - Page 18 STATION & RECALL PRESET STATION In CD/MP3/WMA mode: turn on/off random function. 10. 5 DIR-: In RADIO mode: Number 5. See page 11 MANUALLY STORE STATION & RECALL PRESET STATION. In MP3/WMA mode: Press it back to previous folder. 11. SRC: It is SRC/ key.
-
Page 19: Specification
SPECIFICATION GENERAL Power Supply Requirements : DC 12 Volts, Negative Ground Chassis Dimensions : 178 (W) x 160 (D) x 50 (H) Tone Controls Bass (at 100 Hz) : ±10 dB Treble (at 10 kHz) : ±10 dB Maximum Output Power : 4x40 watts Current Drain : 10 Ampere (max.) (For Normal Power Version) -
Page 20: Trouble Shooting
TROUBLE SHOOTING Before going through the checklist, check wiring connection. If any of the problems persist after checklist has been made, consult your nearest service dealer. Symptom Cause Solution The car ignition switch is power supply No power. not on. connected to the car accessory circuits, but the engine is not moving, switch the ignition key... - Page 21 work. due to noise. its place. The radio does The antenna cable is not Insert the antenna cable firmly. not Work. The connected. radio station The signals are too weak. Select a station manually. automatic selection does not work.
-
Page 22: Fcc Statement
FCC Statement This equipment has been tested and found to comply with the limits for a Class B digital device, pursuant to Part 15 of the FCC Rules. These limits are designed to provide reasonable protection against harmful interference in a residential installation. This equipment generates uses and can radiate radio frequency energy and, if not installed and used in accordance with the instructions, may cause harmful interference to radio communications.
Need help?
Do you have a question about the MADRID 120BT and is the answer not in the manual?
Questions and answers
No se conectar el bluetooth de un celular al stereo madrid 120
To connect Bluetooth from a phone to the Blaupunkt Madrid 120BT stereo:
1. Turn on the Blaupunkt Madrid 120BT stereo.
2. Enable Bluetooth on your phone.
3. Search for available Bluetooth devices on your phone.
4. Select "Blaupunkt Madrid 120BT" from the list of available devices.
5. If prompted, enter the pairing code (refer to the manual if needed).
6. Once paired, you can make calls and play music through the stereo.
This answer is automatically generated