
Subscribe to Our Youtube Channel
Related Manuals for Owon B33T


Summary of Contents for Owon B33T
-
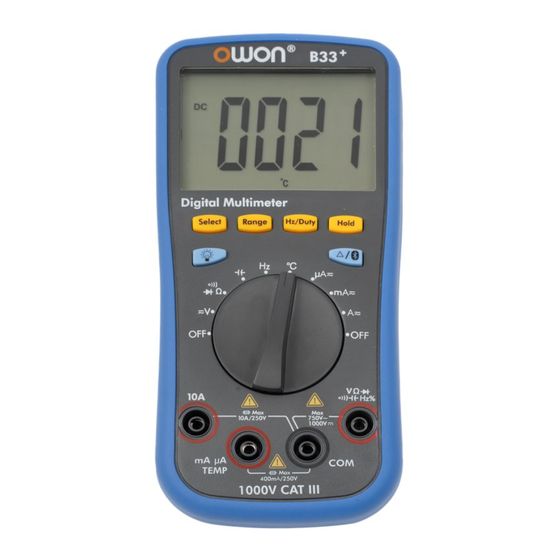
Page 1: Digital Multimeter
Digital Multimeter User Manual B33(T)(+) D33(T) Note: "T" indicates true RMS (optional) "+" indicates Multimeter Offline Record function (optional) www.owon.com.cn... - Page 2 LILLIPUT Company. Fujian LILLIPUT Optoelectronics Technology Co., Ltd. No. 19, Heming Road Lantian Industrial Zone, Zhangzhou 363005 P.R. China Tel: +86-596-2130430 Fax: +86-596-2109272 Web: www.owon.com.cn E-mail: info@owon.com.cn...
- Page 3 1 year from the date of purchase of the product by the original purchaser from the OWON Company. This warranty only applies to the original purchaser and is not transferable to the third party, and does not apply to fuses, disposable batteries or to any product which has been misused, altered, neglected or damaged by accident or abnormal conditions of operation or handling.
-
Page 4: Table Of Contents
Table of Contents 1.Safety Information ....................1 Safety Considerations ......................1 Measurement Category ....................... 3 Safety Terms and Symbols ....................4 2.General Characteristics ..................... 5 3.Quick Start ........................ 6 General Inspection ......................6 Install the Batteries ......................6 Adjusting the Tilt Stand ....................... 7 Power On ........................... - Page 5 6.Bluetooth Function – only for the model with Bluetooth .......... 18 Android App ........................18 How to Connect with Android Device ....................18 User Interface in Android App ........................ 20 Operations in Android App ........................20 Multimeter Offline Record – the "+" model only ................... 22 7.Technical Specifications ..................
-
Page 6: Safety Information
1.Safety Information 1. Safety Information Safety Considerations Before any operations, please read the following safety precautions to avoid any possible bodily injury and prevent damage to this product or any other products connected. To avoid any contingent danger, use this product only as specified. EC Declaration of Conformity: Meets intent of Directive 2004/108/EC for Electromagnetic Compatibility. - Page 7 1.Safety Information When servicing the multimeter, use only the specified replacement parts. Use caution when working above 60 V DC, 30 V AC RMS, or 42.4 V peak. Such voltages pose a shock hazard. When using the test leads, keep your fingers behind the finger guards on the test ...
-
Page 8: Measurement Category
1.Safety Information Measurement Category The multimeter has a safety rating of 1000 V, CAT III. Measurement category definition Measurement CAT I applies to measurements performed on circuits not directly connected to the AC mains. Examples are measurements on circuits not derived from the AC mains and specially protected (internal) mains- derived circuits. -
Page 9: Safety Terms And Symbols
1.Safety Information Safety Terms and Symbols Safety Terms Terms in this Manual. The following terms may appear in this manual: Warning: Warning indicates the conditions or practices that could result in personal injury or death. Caution: Caution indicates the conditions or practices that could result in damage to this product or other property. -
Page 10: General Characteristics
2.General Characteristics 2. General Characteristics Features and benefits: Data transferring via Bluetooth, interacting with Android mobile device to read measurements, analyze via special chart mode, remote control, voice-out feature; voice warning supported, which enhances measurement safety (only for the model with Bluetooth);... -
Page 11: Quick Start
Manual. You can check whether there is any loss of accessories with reference to this description. If it is found that there is any accessory lost or damaged, please get in touch with the distributor of OWON responsible for this service or the OWON's local offices. -
Page 12: Adjusting The Tilt Stand
3.Quick Start (2) Lift the tilt stand and loosen the screws with a suitable Phillips screwdriver and remove the battery cover. (3) Observe the battery polarity indicated inside the battery compartment, Insert the batteries. (4) Place the battery cover back in its original position and tighten the screws. Caution: To avoid instruments being damage from battery leakage, always remove the batteries and store them separately if the multimeter is not going to be used for a long period. -
Page 13: Selecting The Range
3.Quick Start Selecting the Range Auto ranging is set as default when the meter is powered on, is displayed. When auto ranging is enabled, press to enter the manual range mode. In manual range, each additional press of sets the multimeter to the next higher range, unless it is already in the highest range, at which point the range switches to the lowest range. -
Page 14: Rotary Switch
3.Quick Start Description Details ① Display screen Page 10 ② Keypad Page 9 ③ Rotary switch Page 9 ④ Input terminals Page 11 Rotary switch Position Description Details Power off Page 7 DC or AC voltage measurement Page 13 Continuity test Page 14 Diode test Page 14... -
Page 15: Display Screen
3.Quick Start Backlight Page 7 Page 17 Relative Measurements Bluetooth Page 18 (only for the model with Bluetooth) Display screen Figure 3-2 Display screen Symbol Description Details Bluetooth enabled Page 18 Auto range Page 8 Data hold enabled Page 17 Relative enabled Page 17 Diode test selected... -
Page 16: Measurement Units
3.Quick Start Measurement display ("OL" is short for overload, indicates the reading exceeds the display range) Measuring units Page 11 Measurement units Sign Description Mega 1E+06 (1000000) kilo 1E+03 (1000) milli 1E–03 (0.001) µ micro 1E–06 (0.000001) nano 1E–09 (0.000000001) Sign Description Measurement type... - Page 17 3.Quick Start Rotary switch position Input terminals Overload protection 750 VAC/1000 VDC 250 VDC or Equivalent voltage RMS 250 VAC or Equivalent voltage RMS 0.5 A/250 V, fast-acting fuse 10 A/250 V, fast-acting fuse...
-
Page 18: Making Measurements
4.Making Measurements 4. Making Measurements Measuring AC or DC Voltage Warning: Do not measure any voltage of over 1000 Vdc or 750 Vac rms to avoid instrument damage or electric shock. Do not apply more than 1000 Vdc or 750 Vac rms between the common terminal and the earth ground to avoid instrument damage or electric shock. -
Page 19: Testing Diodes
4.Making Measurements Testing Diodes Caution: To avoid possible damage to your multimeter or to the equipment under test, disconnect the circuit power and discharge all high-voltage capacitors before testing diodes. (1) Rotate the rotary switch to . Press once to enter diode testing mode, will be displayed. -
Page 20: Measuring Frequency
4.Making Measurements (2) Connect the black test lead to the terminal and the red test lead to the terminal. (3) Probe the test points and read the display. Measuring Frequency Frequency ranges are 4.999 Hz, 49.99 Hz, 499.9 Hz, 4.999 kHz, 49.99 kHz, 499.9 kHz, and 4.999 MHz. - Page 21 4.Making Measurements (1) Turn off the power of the measured circuit. Discharge all high- voltage capacitors. (2) Connect the black test lead to the terminal. For currents below 400 mA, connect the red test lead to the terminal; for currents within 400 mA – 10 A, connect the red test lead to the terminal.
-
Page 22: Multimeter Features
5.Multimeter Features 5. Multimeter Features Data Hold Mode (1) Press to freeze the display during measurement, will be shown on the display. (2) Press again to exit this mode. Making Relative Measurements When making relative measurements, reading is the difference between a stored reference value and the input signal. -
Page 23: Bluetooth Function - Only For The Model With Bluetooth
Bluetooth 4.0 Android APP Note: The help content below may be not completely consistent with the application software, only for reference. Visit www.owon.com.cn to get the latest version of this user manual. Android App How to Connect with Android Device (1) Install the free application software for Android on your Android smart device. - Page 24 6.Bluetooth Function – only for the model with Bluetooth (3) Turn on the multimeter, press and hold until appear on the display. (4) Click the icon on the top left of the screen to launch device connection. (5) If the Bluetooth function is not activated, a dialog box will ask whether to turn on Bluetooth.
-
Page 25: User Interface In Android App
6.Bluetooth Function – only for the model with Bluetooth User Interface in Android App Double View Double View Click to disconnect Press&hold to edit name Click to enter Single View Next Single Graph Exit/About page view &Table Single View Single View Offline Record Click to disconnect Voice out... - Page 26 You may change to different voices by installing different TTS engines. TTS engines can be downloaded by scanning QR Codes or v www.owon.com.cn isit Upgrade Online: Click , and click "About", the following interface is shown. Click "Upgrade" as below.
-
Page 27: Multimeter Offline Record - The "+" Model Only
6.Bluetooth Function – only for the model with Bluetooth Data Graph&Table Data Graph&Table Trending graph Data table Show menu Zoom Controls Setting menu: Softkey Description Open local file Read the saved file (.CSV) Save data Save the displayed data into .CSV file Share Share the measurements via the installed sharing apps Clear data... - Page 28 6.Bluetooth Function – only for the model with Bluetooth (1) Connect the Android device with the multimeter, see "How to Connect with Android Device" on P18. (2) In APP single view, tap on the icon on the top right, select from the pop-up menu.
- Page 29 6.Bluetooth Function – only for the model with Bluetooth (6) In APP single view, tap on the icon on the top right, select from the pop-up menu. The file name start with "Offline", the following part can be customized. (7) Tap on , APP will read the measuring data and save as a CSV file into the Android device.
-
Page 30: Technical Specifications
7.Technical Specifications 7. Technical Specifications All these specifications apply to the multimeter unless otherwise explanation. Note: "T" in the model indicates true RMS (optional). Standard conditions: The environment temperature is 18℃ to 28℃, the relative humidity is less than 80%. Resolu- Function Measurement Range... -
Page 31: Continuity Test
7.Technical Specifications Characteristics Instruction Display 3999 The model without "T" (40 - 400) Hz Frequency Response (Hz) The model with "T" (40 - 1000) Hz 3 times/second Sample rate for digital data √ B33(T)(+) Bluetooth D33(T) Without √ Auto ranging The model with "T"... -
Page 32: Appendix
8.Appendix 8. Appendix Appendix A: Enclosure Standard Accessories: Test lead K-type thermocouple Quick Guide Options: Thin-tipped test lead Alligator clip Appendix B: General Care and Cleaning Warning: To avoid electrical shock or damage to the multimeter, ensure that the insides of the casing stay dry at all times. Cleaning To clean the instrument exterior, perform the following steps: Wipe the dust from the instrument surface with a soft cloth. -
Page 33: Appendix C: Fuse Replacement
8.Appendix Appendix C: Fuse Replacement Use the following procedure to replace the fuse. 1. Ensure that the rotary switch is at the position. Remove test leads and any connectors from the input terminals. 2. Lift the tilt stand and loosen the screws with a suitable Phillips screwdriver and remove the battery cover.
Need help?
Do you have a question about the B33T and is the answer not in the manual?
Questions and answers