Sign In
Upload
Download
Table of Contents
Contents
Add to my manuals
Delete from my manuals
Share
URL of this page:
HTML Link:
Bookmark this page
Add
Manual will be automatically added to "My Manuals"
Print this page
×
Bookmark added
×
Added to my manuals
Manuals
Brands
Owon Manuals
Multimeter
HDS1022M-I
User manual
Owon HDS1022M-I User Manual
Handheld digital storage oscilloscope & multimeter
Hide thumbs
1
2
3
Table Of Contents
4
5
6
7
8
9
10
11
12
13
14
15
16
17
18
19
20
21
22
23
24
25
26
27
28
29
30
31
32
33
34
35
36
37
38
39
40
41
42
43
44
45
46
47
48
49
50
51
52
53
54
55
56
57
58
59
60
61
62
63
64
65
66
67
68
69
70
71
72
73
74
75
76
77
78
79
80
81
82
83
84
85
86
87
88
89
90
91
92
93
page
of
93
Go
/
93
Contents
Table of Contents
Troubleshooting
Bookmarks
Table of Contents
Table of Contents
Declaration of Conformity
Package Contents
Safety Information
Safety Symbols and Terms
Safety Symbols
Safety Terms
General Safety Information
General Characteristics
Performing the General Inspection
Check Whether There Is any Damage on It Due to Transportation
Make a Check on Accessories
Make a Check on the Complete Instrument
Input Connections
The Connection of 1 Khz/5 V Square-Wave Test Signal
Front Panel and Keys Overview
Using the Oscilloscope
About this Chapter
Powering up the Oscilloscope
Oscilloscope Operation Window
Menu Description
Manually Setting the Vertical System, Horizontal System and Trigger Position
Setting the Vertical System
Setting the Horizontal System and Trigger Position
Recall Factory Settings
Input Connections
Displaying an Unknown Signal with Auto Set
Automatic Measurements
Freezing the Screen
Using Average for Smoothing Waveforms
Using Persistence to Display Waveforms
Using Peak Detection to Display Glitches
Selecting AC-Coupling
Reversing the Polarity of the Displayed Waveform
Using Waveform Mathematics Functions
Use USB Mass Storage Device to Save Waveform Data
Using the Multimeter
About this Chapter
Making Meter Connections
Multimeter Operation Window
Making Multimeter Measurements
Measuring Resistance Values
Measuring Diode
On-Off Test
Measuring Capacitance
Measuring DC Voltage
Measuring AC Voltage
Measuring DC Current
Measuring AC Current
Freezing the Readings
Taking a Relative Measurement
Selecting Automatic/Manualrange Adjustment
Advanced Function of Oscilloscope
About this Chapter
Setting the Vertical CH1 and CH2
Setting the Channel Coupling
Open and Close Settings on Channel
Setting the Probe Attenuation
Setting of Inverted Waveform
Make the Math Function Menu Setting
Setting the Trigger System
Triggering Control
Edge Trigger
Video Trigger
Alternate Trigger
Setting the Acquiring Mode
Display Setting
Display Style
Persistence
XY Mode
Cymometer
Waveform Saving Setups
Waveform Saving Setups in Normal Mode
Waveform Saving Setups in FFT Mode
Function Setting Menu
Making Automatic Measurements
Setting the Cursor Measurements
Setting the Cursor Measurement in Normal Mode
Setting the Cursor Measurement in FFT Mode
Autoscale
Record
Using FFT
System State Menu
Real Time Clock
Setting of Time Base Mode
Data Transmission
Trouble Shooting
Appendix
Appendix A: Specifications
Oscilloscope
Meter
General Specifications
Appendix B: Maintenance and Cleaning
Maintenance
Storage of Oscilloscope
Replacing the Lithium Battery Unit
Advertisement
Quick Links
1
Table of Contents
Download this manual
HDS-N Dual Channel Series
Handheld Digital Storage
Oscilloscope & Multimeter
User Manual
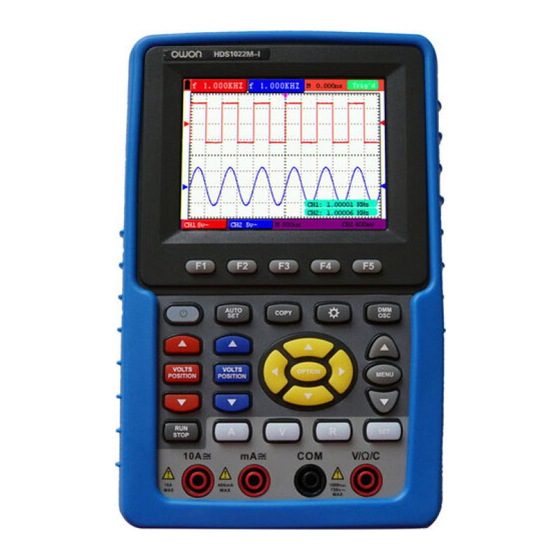
HDS1022M-I
HDS1022M-N
HDS2062M-N
HDS3102M-N
HDS4202M-N
Note: "I" indicates that the two channels are isolated electrically.
www.owon.com.cn
Table of
Contents
Previous
Page
Next
Page
1
2
3
4
5
Advertisement
Table of Contents
Need help?
Do you have a question about the HDS1022M-I and is the answer not in the manual?
Ask a question
Questions and answers
Related Manuals for Owon HDS1022M-I
Multimeter Owon HDS-N series User Manual
Hds-n series handheld digital storage oscilloscope & multimeter (88 pages)
Multimeter Owon HDS2062M-N User Manual
Handheld digital storage oscilloscope & multimeter (74 pages)
Multimeter Owon Lilliput HDS1022M-N Specifications
Hds-n and hds series 2 in 1 t&m instrument combine digital oscilloscope and multi-meter. (8 pages)
Multimeter Owon HDS series User Manual
Hds series handheld digital storage oscilloscope & multimeter (72 pages)
Multimeter Owon HDS4202M-N User Manual
Handheld digital storage oscilloscope & multimeter (93 pages)
Multimeter Owon HDS2061M-N User Manual
Handheld digital storage oscilloscope & multimeter (93 pages)
Multimeter Owon HDS3101M-N User Manual
Handheld digital storage oscilloscope & multimeter (93 pages)
Multimeter Owon XDM1241 User Manual
(43 pages)
Multimeter Owon B35 User Manual
Digital multimeter (32 pages)
Multimeter Owon XDM2041 Series User Manual
(46 pages)
Multimeter Owon XDM1041 Quick Manual
(18 pages)
Multimeter Owon B35 User Manual
Digital multimeter (43 pages)
Multimeter Owon XDM1000 Series User Manual
(40 pages)
Multimeter Owon XDM1000 Series User Manual
(45 pages)
Multimeter Owon OW16 Series User Manual
(51 pages)
Multimeter Owon B35 Manual
(29 pages)
This manual is also suitable for:
Hds-n dual channel series
Hds1022m-n
Hds2062m-n
Hds3102m-n
Hds4202m-n
Hds2061m-n
...
Show all
Hds3101m-n
Table of Contents
Print
Rename the bookmark
Delete bookmark?
Delete from my manuals?
Login
Sign In
OR
Sign in with Facebook
Sign in with Google
Upload manual
Upload from disk
Upload from URL


Need help?
Do you have a question about the HDS1022M-I and is the answer not in the manual?
Questions and answers