Owon HDS2062M-N User Manual
Handheld digital storage oscilloscope & multimeter
Hide thumbs
Also See for HDS2062M-N:
- User manual (88 pages) ,
- Specifications (8 pages) ,
- User manual (93 pages)

Related Manuals for Owon HDS2062M-N


Summary of Contents for Owon HDS2062M-N
- Page 1 OWON HDS2062M-N Handheld Digital Storage Oscilloscope & Multimeter User’s Manual WWW.OWON.COM.CN...
- Page 2 WARRANTY Lilliput warrants that this OWON brand product will be free from defects in materials and workmanship for a period of three years (one year limited warranty applies to the accessories) from the date of shipment. Lilliput warrants that software will operate substantially in accordance with its functional specifications for 90 days and that it has been properly recorded on non-defective media.
-
Page 3: Table Of Contents
HDS2062M-N Handheld DSO & DMM Contents Table of Contents Chapter Page 1. DECLARATION OF CONFORMITY················································· 1 1.1 Declaration of Conformity ·······································································································1 1.2 Package Contents (see the picture below) ···············································································1 2. SAFETY INFORMATION···································································· 2 2.1 Safety Symbols and Terms ·······································································································2 2.1.1 Safety Symbols···············································································································2 2.1.2 Safety Terms.··················································································································2... - Page 4 HDS2062M-N Handheld DSO & DMM Contents 5.17 Using Waveform Mathematics Functions···········································································22 5.18 Use USB flash disk to save waveform data ·········································································23 6. USING THE MULTIMETER······························································ 24 6.1 About this Chapter··················································································································24 6.2 Making Meter Connections····································································································24 6.3 Multimeter Operation Window ·····························································································24 6.4 Making Multimeter Measurements ·······················································································25 6.4.1 Measuring Resistance Values ····················································································25...
- Page 5 HDS2062M-N Handheld DSO & DMM Contents 7.12 Autoscale ····························································································································54 7.13 System State Menu ············································································································57 7.14 Setting of Time Base Mode·······························································································57 7.15 Data Transmission·············································································································59 8. TROUBLE SHOOTING····································································· 60 9. APPENDIX··························································································· 62 9.1 Appendix a Specifications·······································································································62 9.1.1 Oscilloscope··················································································································62 9.1.2 Meter······························································································································64 9.1.3 General Specifications·································································································65 9.2 Appendix B: Maintenance and Cleaning ··············································································66...
- Page 6 1-Declaration of Conformity 1. Declaration of Conformity 1.1 Declaration of Conformity HDS2062M-N Handheld Digital Storage Oscilloscope & Multimeter Manufacturer: Fujian Lilliput Optoelectronic Technology Co., Ltd. Statement of Conformity Base on the result using appropriate standards, the product is in conformity with...
-
Page 7: Declaration Of Conformity
HDS2062M-N Handheld DSO & DMM 1-Declaration of Conformity 1.2 Package Contents (see the picture below) Description Standard Optional HDS2062M-N Scope Meter and Battery ● AC-DC adapter ● Oscilloscope Probe x 2 (grey) ● Multimeter test lead x 2 (black and red) ●... -
Page 8: Safety Information
HDS2062M-N Handheld DSO & DMM 2-Safety information 2. Safety Information In order to ensure the correct using and the best efficient service, please carefully read this user’s manual. 2.1 Safety Symbols and Terms 2.1.1 Safety Symbols These symbols may appear in this manual or on the instrument. -
Page 9: General Safety Information
● Use only insulated voltage probes, test leads and adapter supplied with the test tool, or indicated by OWON as suitable for the Oscilloscope & Multimeter. ● Before use, inspect voltage probes, test leads and accessories for mechanical damage and replace when damaged. - Page 10 HDS2062M-N Handheld DSO & DMM 2-Safety information Pay attention to the nominal values of all terminals: To avoid fire or electric shock, please keep a watchful eye on all nominal values and marks specified for this product. Before any connection performed on this product, carefully read the user’s manual of the product for further information...
-
Page 11: Performing The General Inspection
If the instrument is damaged in its appearance or it fails in normal operation or performance test, consult the OWON dealer responsible for such a business or the local office of OWON. If the instrument is damaged due to transportation, keep the packing in a proper place and consult the transportation department and the OWON dealer responsible for such business, who will provide an instrument replacement or maintenance. -
Page 12: Input Connections
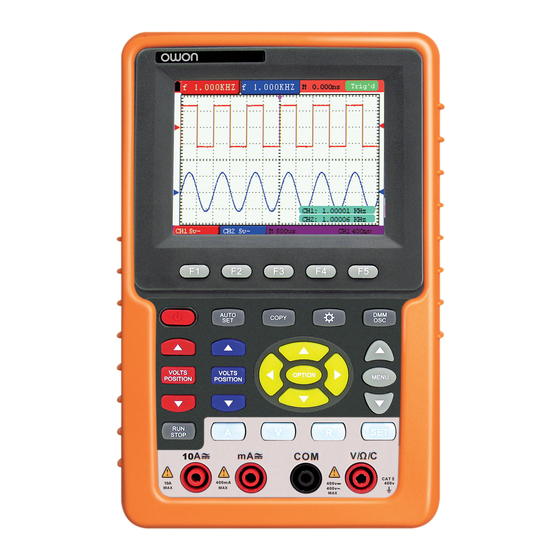
HDS2062M-N Handheld DSO & DMM 4-Input Connections 4. Input Connections 4.1 Input Connections See the following figure 2: Figure 2 Description: 1. The power adapter is supplied for AC power supply and battery recharging. 2. Multimeter test lead. 3. Multimeter input jacks, including four circular banana jacks. The first jack measuring the current 2 A-10A,the second jack on the current Measurement, the third COM ground input , and the fourth measuring voltage , resistance , Capacitance input. - Page 13 HDS2062M-N Handheld DSO & DMM 4-Input Connections Figure 3 Description: 1. AC adapter Port 2. RS-232C Port. 3. USB Port. 4. USB Mass Storage Port. 5. Power switch. 6. F1~F5: Switch or Adjust options for each menu. 7. AUTO SET: Under DSO mode, Automatically selects the horizontal scales, vertical scale, and...
- Page 14 HDS2062M-N Handheld DSO & DMM 4-Input Connections 8. COPY: Press to save the waveform data into the USB Mass Storage Device. 9. ▲ (Red): Adjust horizontal scale in Channel 1. 10. VOLTS POSITION (Red): Switch between voltage and horizontal scale in Channel 1.
-
Page 15: Using The Oscilloscope
HDS2062M-N Handheld DSO & DMM 5-Using the Oscilloscope 5. Using the Oscilloscope 5.1 About this Chapter This chapter provides a step-by-step introduction to the scope functions. The introduction does not cover all of the capabilities of the scope functions but gives basic examples to show how to use the menus and perform basic operations. - Page 16 HDS2062M-N Handheld DSO & DMM 5-Using the Oscilloscope Auto measurement window 1, in which “f ”means frequency, “T” means cycle, “V” means the average value, “Vp” the peak-peak value and “Vk” the root-mean-square value. Auto measurement window 2. The pointer indicates the horizontal triggering position.
-
Page 17: Menu Description
HDS2062M-N Handheld DSO & DMM 5-Using the Oscilloscope position of CH1. No display of this pointer indicates that the channel has not been opened. 20. Waveform display area. Red waveform represent CH1, blue waveform represent CH2. 5.4 Menu Description The following example shows how to use the tool’s menus to select a function, as shown in the following figure. - Page 18 HDS2062M-N Handheld DSO & DMM 5-Using the Oscilloscope When trigger mode during edge trigger and video trigger: 1. Press once the OPTION key; the following is displayed at the bottom left side of the screen, as shown in the figure below.
- Page 19 HDS2062M-N Handheld DSO & DMM 5-Using the Oscilloscope figure 7 4.Press ◄(yellow) or ►(yellow) to adjust time base horizontal position, press▲(yellow) or ▼ (yellow) to adjust trigger position. 5.Press OPTION again to back operation 1 When trigger mode during alternate trigger: 6.Press OPTION and left bottom display as:...
- Page 20 HDS2062M-N Handheld DSO & DMM 5-Using the Oscilloscope Press ◄ (yellow) or ► (yellow) to adjust time base horizontal position and press▲(yellow) or ▼(yellow) to adjust trigger horizontal position in Channel 2. Press OPTION again and left bottom display as: —...
-
Page 21: Recall Factory Settings
HDS2062M-N Handheld DSO & DMM 5-Using the Oscilloscope 5.6 Recall factory settings If you want to reset the Oscilloscope to the factory settings, do the following: 1. Press MENU key and the function menu appears on the right side of the screen 2. -
Page 22: Displaying An Unknown Signal With Auto Set
HDS2062M-N Handheld DSO & DMM 5-Using the Oscilloscope 5.8 Displaying an Unknown Signal with Auto Set The Auto-Set feature lets the Oscilloscope display and measure unknown signals automatically. This function optimizes the position, range, time base, and triggering and assures a stable display of virtually any waveform. -
Page 23: Freezing The Screen
HDS2062M-N Handheld DSO & DMM 5-Using the Oscilloscope See the following figure 11: Figure 11: Automatic Scope Measurements 5.11 Freezing the Screen You can freeze the screen (all readings and waveforms) Press the RUN/STOP key to freeze the screen and STOP appears at top right side of the screen. -
Page 24: Using Average For Smoothing Waveforms
HDS2062M-N Handheld DSO & DMM 5-Using the Oscilloscope 5.12 Using Average for Smoothing Waveforms Using the Average acquisition mode, you can smooth out the displayed waveform by averaging multiple data samples. The number of averaging is selectable from 4, 16, 64, and 128. -
Page 25: Using Peak Detection To Display Glitches
HDS2062M-N Handheld DSO & DMM 5-Using the Oscilloscope Look at the display, a screen like the following figure 14 can be shown. Figure 14: Persistence to Observe Dynamic Signals 5.14 Using Peak Detection to Display Glitches You can use this function to display events (glitches or other asynchronous waveforms) of 50 ns or wider. -
Page 26: Selecting Ac-Coupling
HDS2062M-N Handheld DSO & DMM 5-Using the Oscilloscope Figure 15: Peak Detection Term interpretation Collecting mode: The oscilloscope transforms the collected analog data into a digital form after they are gathered in the following three different modes, that is, sampling, peak value detection and averaging values. -
Page 27: Reversing The Polarity Of The Displayed Waveform
HDS2062M-N Handheld DSO & DMM 5-Using the Oscilloscope ac-coupling when you wish to observe a small ac signal that rides on a dc signal. To select ac-coupling, do the following: Press MENU key and the function menu appear at the right side of the screen. -
Page 28: Using Waveform Mathematics Functions
HDS2062M-N Handheld DSO & DMM 5-Using the Oscilloscope Figure 17: Inverted On 5.17 Using Waveform Mathematics Functions When adding (CH1 + CH2), subtracting (CH1 – CH2, CH2 – CH1), multiplying (CH1 * CH2) or dividing (CH1 / CH2) the input waveforms of CHI and CH2, the Oscilloscope will display the mathematical result waveform M and the input waveforms of CH1 and CH2 on the screen. -
Page 29: Use Usb Flash Disk To Save Waveform Data
HDS2062M-N Handheld DSO & DMM 5-Using the Oscilloscope Figure 18: Waveform Mathematics 5.18 Use USB flash disk to save waveform data Insert U disk into USB port, then press “COPY” key and you can save the waveform data into the U disk. -
Page 30: Using The Multimeter
HDS2062M-N Handheld DSO & DMM 6-Using the Multimeter 6. Using the Multimeter 6.1 About this Chapter This chapter provides a step-by-step introduction to the multi-meter functions of the test tool hereafter. The introduction gives basic examples to show how to use the menus and perform basic operations. -
Page 31: Making Multimeter Measurements
HDS2062M-N Handheld DSO & DMM 6-Using the Multimeter Measurement mode indicators: DCV: Direct voltage measurement ACV: Alternating voltage measurement DCA: Direct current measurement ACA: Alternating current measurement R: Resistance measurement : Diode measurement : On/Off measurement C: Capacitance measurement The relative magnitude measurement indicator. -
Page 32: Measuring Diode
HDS2062M-N Handheld DSO & DMM 6-Using the Multimeter Insert the black lead into the COM banana jack input and the red lead into the V/Ω/C banana jack input. Connect the red and black test leads to the resistor. The resistor value readings are shown on the screen in Ohm. -
Page 33: On-Off Test
HDS2062M-N Handheld DSO & DMM 6-Using the Multimeter Figure 21: Diode Measurement 6.4.3 On-off Test To perform an On-off test, do the following: Press the R key and R appears on the top of the screen. Press the SET key till the following is shown on the screen. -
Page 34: Measuring Dc Voltage
HDS2062M-N Handheld DSO & DMM 6-Using the Multimeter Press the R key and R appears on the top of the screen Press the SET key till C appears at the top of the screen. Insert the black leads to COM jack, and red leads to V/Ω/C jack. -
Page 35: Measuring Ac Voltage
HDS2062M-N Handheld DSO & DMM 6-Using the Multimeter Figure 24: DC Voltage Measurement 6.4.6 Measuring AC Voltage To measure the AC voltage, do the following: Press the V key and DCV appears at the top of the screen. Press the SET key and ACV appears at the top of the screen. -
Page 36: Measuring Dc Current
HDS2062M-N Handheld DSO & DMM 6-Using the Multimeter 6.4.7 Measuring DC Current To measure a DC current which is less than 400 mA , do the following: Press the A key and DCA appears at the top of the screen. The unit on the main reading screen is mA. -
Page 37: Measuring Ac Current
HDS2062M-N Handheld DSO & DMM 6-Using the Multimeter figure 27: DC Current Measurement for 10A 6.4.8 Measuring AC Current To measure an AC current which is less than 400 mA, do the following: Press the A key and DCA appears at the top of the screen. The unit on the main reading screen is mA. -
Page 38: Freezing The Readings
HDS2062M-N Handheld DSO & DMM 6-Using the Multimeter To measure an AC current which is larger than 400 mA, do the following: Press the SET key once and ACA is visible at the top of the screen. Press F5 to select 10A measure, the unit of main reading window is A. -
Page 39: Taking A Relative Measurement
HDS2062M-N Handheld DSO & DMM 6-Using the Multimeter figure 30: Freezing the Readings 6.6 Taking a Relative Measurement A currently measured result relative to the defined reference value is displayed in a relative measurement. The following example shows how to take a relative measurement. At first, it is required to acquire a reference value. -
Page 40: Selecting Automatic/Manualrange Adjustment
HDS2062M-N Handheld DSO & DMM 6-Using the Multimeter 6.7 Selecting Automatic/ManualRange Adjustment The defaulted range mode of the instrument is automatic range. To switch to the manual range, perform the following steps: Press F1 key and MANUAL is displayed on the top left side of the screen to enter the manual range mode. -
Page 41: Advanced Function Of Oscilloscope
HDS2062M-N Handheld DSO & DMM 7-Advanced Function of Oscilloscope 7. Advanced Function of Oscilloscope 7.1 About this Chapter This chapter will detail the oscilloscope function of the test tool. 7.2 Setting the Vertical CH1 and CH2 Each channel has its own independent vertical menu and each item can be set respectively based on the specific channel. -
Page 42: Setting The Channel Coupling
HDS2062M-N Handheld DSO & DMM 7-Advanced Function of Oscilloscope The following Table describes the Vertical Channel menu: Function Description Setting menu The dc component in the input signal is blocked.. Coupling The ac and dc components of the input signal are allowed. -
Page 43: Open And Close Settings On Channel
HDS2062M-N Handheld DSO & DMM 7-Advanced Function of Oscilloscope Figure 35: DC Coupling 7.2.2 Open and Close Settings on Channel With CH1 taken for example. Press F2 Channel key first, and then OFF to make a Close setting on CH1. -
Page 44: Make The Math Function Menu Setting
HDS2062M-N Handheld DSO & DMM 7-Advanced Function of Oscilloscope 7.3 Make the Math Function Menu Setting The WAVE MATH functions in showing the result of adding, subtracting, multiplying or dividing calculation on CH1 and CH2 channel waveforms. Also, the result of arithmetic operation can be measured with grid or cursor. -
Page 45: Setting The Trigger System
HDS2062M-N Handheld DSO & DMM 7-Advanced Function of Oscilloscope Figure 36: Waveform Mathematics 7.4 Setting the Trigger System The Trigger defines the time when the acquisition of data and display of waveform. If it is set correctly, the trigger can turn an unstable display into a significant waveform. -
Page 46: Triggering Control
HDS2062M-N Handheld DSO & DMM 7-Advanced Function of Oscilloscope 7.5 Triggering Control There are three triggering modes including Edge triggering, Video triggering and Alternating triggering. Each trigger mode is set by different function menu. Edge triggering: The edge trigger type triggers on the incoming signal edge. Use the edge trigger for all signals except for video related ones. -
Page 47: Video Triggering
HDS2062M-N Handheld DSO & DMM 7-Advanced Function of Oscilloscope The Edge triggering menu is described in the following table. Function Settings Description menu Slope Rising Triggering on the rise edge of the signal. Falling Triggering on the fall edge of the signal. - Page 48 HDS2062M-N Handheld DSO & DMM 7-Advanced Function of Oscilloscope Figure 38: Video Field Trigger Figure 39: Video Line trigger Figure 40: Video Modulation Trigger The Video triggering menu is described in the following table. 42...
-
Page 49: Alternate Trigger
HDS2062M-N Handheld DSO & DMM 7-Advanced Function of Oscilloscope Function menu Settings Description Polarity Normal Applicable to the video signal of which the black level is low. Inverted Applicable to the video signal of which the black level is high. - Page 50 HDS2062M-N Handheld DSO & DMM 7-Advanced Function of Oscilloscope Function menu Settings Description CH SEL Setting trigger type and others info for Channel 1 Setting trigger type and others info for Channel 2 Type Edge Set vertical channel trigger as edge trigger...
-
Page 51: Selecting The Acquisition Mode
HDS2062M-N Handheld DSO & DMM 7-Advanced Function of Oscilloscope Auto (acquires signal continuously), Normal (acquires signal when trigger conditions are met) and Single (manually triggers the signal). Automatic trigger mode: The oscilloscope can acquire the waveform without any triggering condition detected in this mode, in which it will be triggered compulsively when waiting for a specified period of time without any triggering condition ignited. -
Page 52: Display Style
HDS2062M-N Handheld DSO & DMM 7-Advanced Function of Oscilloscope Format Display the relative relationship between vertical voltage and horizontal time. Display CH1 on the horizontal axis and CH2 on the vertical axis. Carry Bitmap The data transmitted in communication are bitmaps. -
Page 53: Persistence
HDS2062M-N Handheld DSO & DMM 7-Advanced Function of Oscilloscope 7.7.2 Persistence With Persistence function selected, the displayed saved original data gradually decay in color and the new data are bright in color; with infinite persistence mode selected, the oscilloscope keeps all past traces of the displayed waveform. -
Page 54: Waveform Saving Setups
HDS2062M-N Handheld DSO & DMM 7-Advanced Function of Oscilloscope See the following figure 44: Figure 7.8 Waveform Saving Setups The oscilloscope can save 4 waveforms, which can be displayed on the screen with the present waveform. The recalled waveform saved in the memory cannot be adjusted. -
Page 55: Function Setting Menu
HDS2062M-N Handheld DSO & DMM 7-Advanced Function of Oscilloscope displayed on the screen in green color. The display color is green, and the zero point of waveform, voltage and time is purple Now, you can see a screen that looks like the following figure 45. -
Page 56: Making Automatic Measurements
HDS2062M-N Handheld DSO & DMM 7-Advanced Function of Oscilloscope 3. After removing all cables, press F2 (Auto calibration) again. The Auto-calibration automatically starts and a message appears, showing that the calibration is ongoing. To interrupt calibration, press any key during the calibration. -
Page 57: Setting The Cursor Measurements
HDS2062M-N Handheld DSO & DMM 7-Advanced Function of Oscilloscope Figure 46: Automatic Measurements 7.11 Setting the Cursor Measurements This oscilloscope allows you to make manual cursor measurements on time and voltage. The signal sources include Channel 1(CH1), Channel 2 (CH2). - Page 58 HDS2062M-N Handheld DSO & DMM 7-Advanced Function of Oscilloscope shown at the bottom of the screen. Press F1 key to select the measurement type Voltage. Two purple crossing dashed lines V1 and V2 are shown on the screen. Press the F2 key to select the measured channel CH1.
- Page 59 HDS2062M-N Handheld DSO & DMM 7-Advanced Function of Oscilloscope Figure 48 To use the cursor for a time measurement on CH1, do the following: Press the MENU key and the function menus are displayed at the right of the screen.
-
Page 60: Autoscale
HDS2062M-N Handheld DSO & DMM 7-Advanced Function of Oscilloscope Figure 50: Use the Cursor for a Time Measurement 7.12 Autoscale The function is applied to follow-up signals automatically even if the signals change at any time. Autoscale enables the instrument to set up trigger mode, voltage division and time scale automatically according to the type, amplitude and frequency of the signals. - Page 61 HDS2062M-N Handheld DSO & DMM 7-Advanced Function of Oscilloscope 4. Press AUTOSET Pressing AUTOSET to enter into Autoscale function flicker on the top left corner. (flicker every 0.5 second) If the Autoscale function is off, pressing AUTOSET is just to enter into AUTOSET function.
- Page 62 HDS2062M-N Handheld DSO & DMM 7-Advanced Function of Oscilloscope 53: only under vertical mode multi-period waveform Figure 54: only under horizontal mode multi-period waveform Figure Note: 1. At the mode of Autoscale, the oscilloscope can self-estimate “Trigger mode” (Edge, Video, and Alternate) and “Type” (Edge, Video). If now, you press “Trigger mode”...
-
Page 63: System State Menu
HDS2062M-N Handheld DSO & DMM 7-Advanced Function of Oscilloscope refers to 50us as video one as standard. 7.13 System State Menu The system state menu is used to display information about the present horizontal system, vertical system, trigger system and others. The operation steps are shown as below. - Page 64 HDS2062M-N Handheld DSO & DMM 7-Advanced Function of Oscilloscope Press MENU ▲ or MENU ▼ key to select time base mode, display three options at the bottom. Press F2 key to select window setting. (yellow) Press OPTION key, pop up TIME BASE, at this time, then press ◄...
-
Page 65: Data Transmission
Press F4 key; select the Bitmap or Vectors for data transmission. Use a data line to connect the oscilloscope and the PC. Open the OWON software that had been installed completely. Setting the parameter under the use’s manual, and then starts data transmission. -
Page 66: Trouble Shooting
Firstly, charge the battery and supply the oscilloscope with power through the battery charger. However, don’t switch on the oscilloscope till waiting for 15 minutes. If the oscilloscope still cannot start, please contact OWON for service. 2. The oscilloscope stops working only after operating for several seconds Probably the battery is dead;... - Page 67 HDS2062M-N Handheld DSO & DMM 8-Trouble Shooting Try to change the trigger coupling into the HF rejection and LF rejection to filter the HF or LF noise trigger by the interference. 6. There is no display on the screen when you push down RUN/STOP key under the oscilloscope mode.
-
Page 68: Appendix
HDS2062M-N Handheld DSO & DMM 9-Appendix 9. Appendix 9.1 Appendix a Specifications 9.1.1 Oscilloscope Only if other instructions are provided, are all technical specifications applicable to the probe with the 10X attenuation switch setting and the HDS series digital type oscilloscope. In order to be up to these specifications, the oscilloscope should meet the following requirement. - Page 69 HDS2062M-N Handheld DSO & DMM 9-Appendix Vertical Analog digital converter(A/D) With the resolution of 8 bits, make sampling on both channels synchronously. Sensitivity range (V/div) 5mV/div~5V/div(at the input BNC) ±2V(5 ~ 200mV/div), ±50V(500 Displacement range mV/div mV/div V /div) Analog bandwidth...
-
Page 70: Meter
HDS2062M-N Handheld DSO & DMM 9-Appendix Probe 1X position 10X position Bandwidth Up to 6 MHz (DC) Up to full bandwidth (DC) Attenuation rate 1: 1 10: 1 Compensation range 20pf~40pf Input resistance 1MΩ±2% 10MΩ±2% Input impendence 85pf~115pf 14.5pf~17.5pf Input voltage... -
Page 71: General Specifications
HDS2062M-N Handheld DSO & DMM 9-Appendix Alternating Current (AC) Range Accuracy Resolution 40.00mA ±1.5%±3 digit 10uA 400.0mA ±2%±1 digit 100uA ±5%±3 10mA digit Resistance Range Accuracy Resolution 400.0 Ω ±1%±3 digit 0.1Ω 4.000KΩ ±1%±1 digit 1Ω 40.00KΩ 10Ω 400.0KΩ 100Ω... -
Page 72: Appendix B: Maintenance And Cleaning
HDS2062M-N Handheld DSO & DMM 9-Appendix 7.4V built-in Li-ion battery. Battery type: Working environment Temperature Operation Used battery 0 to 50 °C (32 to 122 °F) Power adapter 0 to 40 °C (32 to 104 °F) Storage -20 to +60 °C (-4 to 140 °F) -
Page 73: Replacing The Lithium Battery Unit
HDS2062M-N Handheld DSO & DMM 9-Appendix Charging the oscilloscope The lithium battery is possibly not charged when delivery. To make the battery with enough electric quantity, it must be charged for 4 hours (the test tool must be turned off during charging). - Page 74 HDS2062M-N Handheld DSO & DMM 9-Appendix Fig58. the connection of Square-wave test signal Fig59. the output terminal of 1KHz 5V square-wave test signal...
Need help?
Do you have a question about the HDS2062M-N and is the answer not in the manual?
Questions and answers