Table of Contents
Advertisement
Quick Links
Advertisement
Table of Contents

Related Manuals for Audionet WATT


Summary of Contents for Audionet WATT
- Page 1 WATT Integrated Stereo Amplifier User’s Manual...
-
Page 3: Table Of Contents
5.4 Preamplifier Output 5.5 Headphones socket 5.6 Audionet Link 5.7 Control connection Usage 6.1 Powering up 6.2 Switching on and off 6.3 Using Audionet Link 6.4 Control elements on the front panel 6.5 Volume control 6.6 Display 6.7 Input selection 6.8 Muting... - Page 4 Audionet Metal Remote Control 7.1 Key assignment WATT 7.2 Changing the batteries 7.3 Settings for Audionet WATT Setup menu 8.1 Overview setup menu 8.2 Select Input 8.3 Global Setup 8.3.1 Headphones 8.3.2 Display 8.3.3 Balance Left/Right 8.3.4 AutoStart 8.3.5 AutoOff 8.3.6...
-
Page 5: Preface
Even if you're an experienced aficionado of ultra-highend components, please start listening to your new Audionet WATT by reading this manual carefully be- fore you plug it in. This will ensure you'll enjoy all functions of this unit without... -
Page 6: Included Items
• Always use the provided cloth bag to prevent scratches on the casing. • Please allow the WATT to adapt to the climatic conditions in your listening room before you switch the unit on for the first time after the transport. -
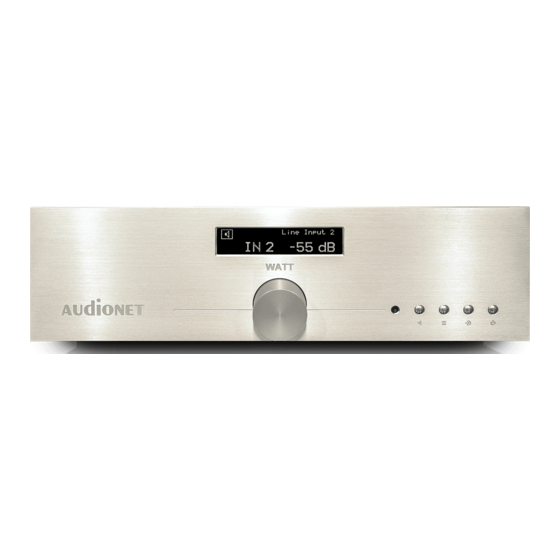
Page 7: Overview Front Panel
Overview front panel... -
Page 8: Overview Back Panel
Overview back panel PHASE... -
Page 9: Installation And Power Supply
WATT and/or any other units con- nected. 4.1 Placement Important • It is recommended to place the WATT in a high quality rack or onto a stable table. • Do not expose the unit to direct sunlight. • Do not cover the ventilation slots. -
Page 10: Mains Connection
• The electrical specifications of your home country must meet the electrical specifications printed onto the back panel. • The WATT is a Class I unit and must be earthed. Please ensure a stable earth connection. The phase ('hot' pin) is marked on the back panel (PHASE) •... -
Page 11: Orientation Of Mains Plug
4.3 Orientation of mains plug The correct polarization of mains is important for the reasons of audio clarity and stability. Please connect the mains cord so that the hot pin of the wall outlet is connected to the pin of the mains input marked with 'PHASE'... -
Page 12: Inputs And Outputs
WATT and/or any other connected unit. 5.1 Inputs The WATT is equipped with four Cinch (RCA) inputs IN 2, IN 3 and IN 4 for connecting signal sources at line level. The input jacks for the left channels and the right channels are located in separate groups on the back panel. -
Page 13: Speaker Terminals
• If the WATT is upgraded with the optional phono module, input IN 4 must only be used to connect a turntable. • If the WATT is equipped with the optional phono module, it has to be regis- tered in the system in order to be configurable. For further information see section 'Phono Card' on page 36. -
Page 14: Preamplifier Output
Audionet Link. You only need to connect the Audionet Link outputs OUT 1 or OUT 2 your WATT by a simple optical 'Toslink' cable to the Audionet Link input of the unit(s) you would like to control. -
Page 15: Control Connection
5.7 Control connection The serial connector RS232 is an additional control port to your WATT e.g. for home automation systems (Crestron or similar). The documentation to the interface protocol is available on request. Please send us an email to the address... -
Page 16: Usage
(refer to sections 'Installation and power supply' on page 8 and 'Inputs and outputs' on page 12). The WATT is a stand-by unit. Please insert the mains cord into the mains input on the back panel. The display shows a welcome message for a brief moment. -
Page 17: Using Audionet Link
GOING TO SLEEP... stand-by mode. Note • Of course, you may switch on/off the WATT with the Audionet Metal Re- mote Controls. For detailed information please refer to section 'Audionet Metal Remote Control' on page 22. 6.3 Using Audionet Link... -
Page 18: Control Elements On The Front Panel
6.4 Control elements on the front panel The front panel has four keys and a rotary controller to control the WATT (refer to section 'Overview front panel' on page 7). You are able to handle all functions with these elements as well as all setup options to adjust the unit to your prefer- ences (read section 'Setup menu' on page 27). -
Page 19: Display
The volume level of the WATT runs in a range from -80 dB (very quiet) to +10 dB (very loud) in steps of 1 dB relative to the level of the input signal. Note • The volume controller on the front panel is also used to change an option in the setup menu (refer to section 'Setup menu' on page 27) as well as to select an input channel (refer to section 'Input selection' on page 20). -
Page 20: Input Selection
Phono right The WATT features a soft input selection. When changing inputs, the volume is stepped down to -80 dB, followed by turning off the outputs. Now the input section activates the new input channel. Afterwards the outputs are turned on... -
Page 21: Muting
Audionet Metal Remote Control to mute or un-mute your WATT. The WATT uses 'soft' muting, i.e. volume is stepped down gently to -80 dB. The display informs of a muted unit by showing the text . This text is even... -
Page 22: Audionet Metal Remote Control
Audionet Metal Remote Control The Audionet Metal Remote Control (included) and Audionet RC 2 control all important functions of the everyday use of your WATT. This chapter explains all commands in detail. PLANCK WATT POWER < ä < „... -
Page 23: Key Assignment Watt
This key has the same function as the key on the front panel. If the unit is in stand-by mode, press the WATT key to turn it on. If the WATT is already operating, a push on the WATT key does power the unit down to stand-by mode. -
Page 24: Settings For Audionet Watt
7.3 Settings for Audionet WATT Important • The Audionet Metal Remote Control is configured to control the WATT by factory default. You do not have to perform any additional configurations. The following section explains the correct setup for the WATT for the sake of completeness. - Page 25 The DIP switch for selecting the system address and configuring a preamplifier of the Audionet Metal Remote Control RC 2 is the upper slider. It is located here: Set the DIP switch labelled 'SYS ADDRESS' in position '19' or '16' according to...
- Page 26 DIP switch if not ordered explicitly otherwise. • Older Audionet preamplifier models use the system address '16'. • The Audionet Metal Remote Control RC 2 uses both slider switches of the DIP switch. The upper one of the two is responsible for configuring the pre-...
-
Page 27: Setup Menu
Setup menu To adjust the WATT to your preferences, please use the setup menu. Navigate through the setup menu using the key and the volume controller on the front panel: Press the key shortly to enter the setup menu. Whilst in the menu, a short key stroke enters a subsidiary menu, opens the currently marked menu item or confirms and saves the current menu option. -
Page 28: Overview Setup Menu
Note • If you do not make any adjustments for longer than 12 seconds, the WATT will automatically leave the setup menu and return to normal operating mode. • Whilst in the setup menu, the display brightness is set to 100% for better readability. -
Page 29: Select Input
Audionet Link active Headphones and Link setup Use the volume controller on the front panel to switch the headphones output and the Audionet Link output OUT 2 on or off. The symbols in the display indicate, whether the speakers or the head- phones output is active. -
Page 30: Display
In case you de-activate the headphones output by selecting the option Head- , the power amplifier phones disabled, Audionet Link active is switched on automatically via Audionet Link, so you do play music through your speakers again. 8.3.2 Display Brightness adjustment Title ►... -
Page 31: Balance Left/Right
It switches off automatically several seconds after the last user entry. • The WATT activates the 'display saver' automatically after 10 minutes with- out any user entry. • If the 'display saver' is active, the display only shows the number of the se-... -
Page 32: Autostart
Note • WATT indicates a balance shift in normal operating mode by the correspond- ing icon in the display. Thus you are able to recognise, whether the balance was shifted at any time. The triangle in the icon points to the direction of the balance shift (refer to section 'Display' on page 19). -
Page 33: Autooff
The AutoOff function is disabled. You have to use the key on disabled the front panel or the WATT key on the Audionet Metal Remote Control to power the WATT down to Stand-By mode. The AutoOff function is active. After 20 minutes of inactivity, i.e. - Page 34 5. Connect your DVD player to your home cinema preamplifier as usual. Use the WATT to listen to high quality 2-chanel sources. If you would like to use your home cinema system, activate the By-Pass mode of the WATT and use your...
- Page 35 By-Pass mode. The volume control of the WATT is by-passed as long as the By-Pass mode is active. The WATT passes the input signal to the outputs and amplifiers at its full level.
-
Page 36: Phono Card
WATT key on the Audionet Metal Remote Control, this mode will be saved, i.e. if you switch on the WATT, the unit will switch to the last saved input channel selection and thus into By-Pass Mode. -
Page 37: Serial Port
• Because the serial port is configured active, the power consumption of the WATT in stand-by mode will be higher. • Disable the serial port if you do not wish to control the WATT via this inter- face (e.g. by a home automation system). -
Page 38: Channel Name
8.3.9 Channel Name Title ► ◄ EDIT CHANNEL NAME Line Input 2 à IN 2 ▲ Assigned channel name Input number You can assign a fully user-definable name with a length of up to 12 characters to each of the input channels. The display shows the number of the currently se- lected input channel and the assigned channel name. -
Page 39: Reset Factory Defaults
8.4 Reset factory defaults In order to reset the WATT to its factory defaults, open the setup menu and select the menu item . Confirm you selection by Factory Default Reset pressing the key. ► ◄ RESET FACTORY DEFAULTS Turn clockwise to... -
Page 40: Device Info
8.5 Device Info ► ◄ Device Info Device: WATT ID:N Firmware: 01.00.0009 Select the menu item to get information regarding the device Device Info name and the version of its firmware. -
Page 41: Protection System
DC Voltage fective source unit (Temporary) breakdown of mains power Power Failure Even after powering down the WATT, the error message will still be visible in the display. Press the key on the front panel to enter stand-by mode. Important... -
Page 42: Security Advice
WATT or the other connected units. • Use a dry cloth for cleaning! We do wish you many exciting listening experiences with your new Audionet device. If you still have any questions, do not hesitate to ask your Audionet dealer or contact us directly. -
Page 43: Technical Data
7 kΩ Outputs 2 pair Furutech 4 mm-jacks, Rhodium 1 pair RCA, gold-plated, Teflon insulated (Pre Out) 2 Audionet Link, optical (TosLink) 1 headphones socket (6.3 mm, stereo) Mains 220..240 V or 110..120 V, 50..60 Hz Power consumption < 1 W Stand by, typ. 900 W... - Page 44 Non-disengageable DC servo, no capacitors in the signal path. By-Pass function (e.g. for integration into home cin- ema systems). Audionet Link output for remote control of other Audionet components. Switchable headphones output. Audionet Metal Remote Control in matching color (included).
- Page 46 Idektron GmbH & Co KG Engineered and produced by: Idektron GmbH & Co. KG, Alboinstrasse 36-42, 12103 Berlin, Germany en.audionet.de contact@audionet.de...
Need help?
Do you have a question about the WATT and is the answer not in the manual?
Questions and answers
Gents, is the WATT headphone amplification competitive with a highend external headphone amp?.(specifically for Audeze LCD5 & Grado PS 2000 )