Rotem Platinum Plus User Manual
Hide thumbs
Also See for Platinum Plus:
- User manual (95 pages) ,
- Installation manual (51 pages) ,
- User manual (37 pages)
Table of Contents
Advertisement
Quick Links
Advertisement
Table of Contents

Related Manuals for Rotem Platinum Plus


Summary of Contents for Rotem Platinum Plus
- Page 1 User’s Manual Page 1 of 61 Reversion No.: 1.0...
- Page 2 These are to operate critical systems even in case of a ROTEM system failure. Neglecting to provide such a back up will be regarded as the user’s willingness to accept the risk of loss, injury and financial damage.
-
Page 3: Table Of Contents
Table of Contents Features.......................7 User's Profile ....................8 Abbreviations ...................8 User Interface ...................8 3.1. Basic Operating Instructions................... 8 3.1.1 Display ........................ 8 3.2 Keypad ........................12 3.3 Hot Keys ........................14 4) Using the Controller ...................20 I) Control........................... 20 Temp & Timer Setting ..................20 Temperature &... - Page 4 5.10 History View......................61 Table of Figures Fig. 1: Standard display sample ...................9 Fig. 2: Platinum Plus's front panel ................12 Fig. 3: Monitor switch display example screenshot...........14 Fig. 4: Software version screenshot ................15 Fig. 5: Curve Status screenshot..................16 Fig. 6: Curtain Position screenshot ................16 Fig.
- Page 5 Fig. 40: Management menu screenshot ...............34 Fig. 41: Bird Inventory screenshot................34 Fig. 42: Feed Inventory screenshot................35 Fig. 43: Feed Inventory Set screenshot................35 Fig. 44: Time & Date screenshot .................36 Fig. 45: Growth Day & Flock screenshot ..............36 Fig. 46: Alarm setting screenshot – part 1 ..............37 Fig.
- Page 6 Table of Tables Table 1: Menu Standard table ..................11 Table 2: Available hot keys ..................15 Page 6 of 61 Reversion No.: 1.0...
-
Page 7: Features
Features Platinum Plus's features: User Friendly Large 20 line X 40 Character Lighted Graphic Display 20 Key Keypad Extensive Historical and Management Information Collection Communications Programming Plug (Data Shuttle) Exceptional Lightning Protection Up to 40 Heavy Duty Relays Recommended for 1 HP, 220 Volt Devices... -
Page 8: User's Profile
1) User's Profile This manual is meant to be used by either a poultry farmer or its' authorized personnel who own a poultry pen. 2) Abbreviations Abbreviation Meaning Description Natural Each curtain operates independently. Go to table 1.5 (see Table 1). If all conditions are fulfilled, it turns to Natural mode. -
Page 9: Fig. 1: Standard Display Sample
Fig. 1: Standard display sample The main screen consists of seven main parts (see explanations for Fig. 1 below according to the numbers mentioned). Every message that appears in this screen is connected. Otherwise, it won't appear. 1. Shows the individual sensor readings. Those marked with dark squares form the current average temperature. - Page 10 3. Shows the output list. The filled black boxes indicate active outputs. The Platinum Plus also informs the position of inlets and curtains, as well as the number of operating heaters or fans. Available output list: • Alarm: Can be either active or not. Note that this always appears last.
- Page 11 1. Control 2. Manage 3. Eggs 4. Scale 5. History 6. Test 7. Service 8. Install 1.1 Temp & 2.1 Bird 3.1 Egg from 4.1 Scale 6.1 Switches & 8.1 Setup timer setting Inventory Control Layout Temperature Relays Temperature Calibration 2.2 Feed 3.2 Egg 4.2 Global...
-
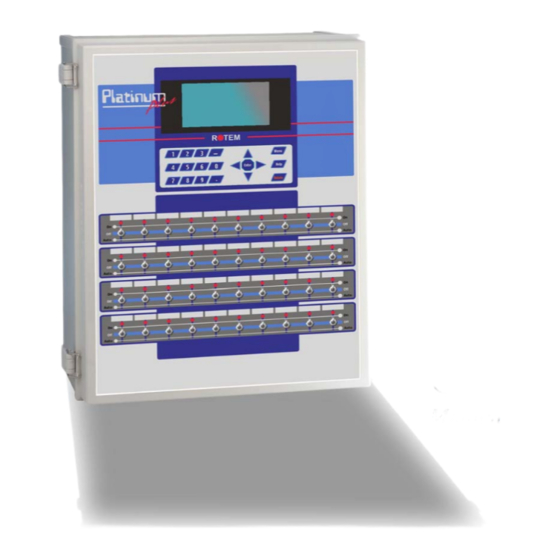
Page 12: Keypad
3.2 Keypad Fig. 2: Platinum Plus's front panel Page 12 of 61 Reversion No.: 1.0... - Page 13 10) The 'Enter' key completes the either the entry or the menu selection. Only after selecting this key does the Platinum Plus recognize the numeric values. 11) The 'Menu' key displays the main menu from the standard screen and exits the menu whenever this LED is selected once again in the main menu screen.
-
Page 14: Hot Keys
Fig. 3: Monitor switch display example screenshot 3.3 Hot Keys All available hot keys are summarized in Table 2. Action Keys to press Explanation Software version Press 'Help' Shows the controller’s software version (see Fig. 4). The second row shows the communication version. -
Page 15: Fig. 4: Software Version Screenshot
Action Keys to press Explanation last bird measured, are displayed (see Fig. 9). Light Status Press '7' Shows the current light status. Moreover, it specifies the light according to the relay; target and current intensity (see Fig. 10 – 12). Feed line status Press '8' Displays current feed line... -
Page 16: Fig. 5: Curve Status Screenshot
Fig. 5: Curve Status screenshot Fig. 6: Curtain Position screenshot Fig. 7: Temperature & humidity status screenshot Page 16 of 61 Reversion No.: 1.0... -
Page 17: Fig. 8: Egg Room Status Screenshot
Fig. 8: Egg Room Status screenshot Fig. 9: Scales update screenshot Fig. 10: Light Status screenshot – part 1 Page 17 of 61 Reversion No.: 1.0... -
Page 18: Fig. 12: Light Status Screenshot - Part 2
Fig. 11: Light Status screenshot – part 2 Fig. 12: Feed Line Status screenshot – part 1 Fig. 13: Feed Line Status screenshot – part 2 Page 18 of 61 Reversion No.: 1.0... -
Page 19: Fig. 15: Feed Line Status Screenshot - Part 3
Fig. 14: Feed Line Status screenshot – part 3 Fig. 15: System Lock screenshot Page 19 of 61 Reversion No.: 1.0... -
Page 20: Using The Controller
Using the Controller Note the following before beginning: a. Don't forget to press 'ENTER' after every button you click. Otherwise, the information will not be saved in the system. b. Every time you have to provide information consisting of moving the cursor to another column, use the 'ENTER' button. -
Page 21: Fig. 18: Temp & Timer Setting Screenshot
Go to 'Help'>'Set' and set the following parameters (see Fig. 19): • Minimum tunnel fans on: The minimum number of tunnel fans to operate. • Tunnel exit delay (minutes): The time Platinum Plus waits after fulfilling tunnel exit conditions. • Non brood area diff. from heat: Set point to non-brood heaters. -
Page 22: Temperature & Humidity
Fig. 18: Temp & Timer setting Set screenshot 1.2 Temperature & Humidity The option (see Fig. 20) allows the user to set the alarm in both low and high limits according to the day ('Day' column), temperature ('temp.' column), and humidity ('Humidity' column). -
Page 23: Fig. 21: Temperature & Humidity Set Screenshot
Fig. 20: Temperature & Humidity Set screenshot Fig. 21: Graphic example using Set parameters Page 23 of 61 Reversion No.: 1.0... -
Page 24: Minimum Vent Timer
Fig. 22: Reminder screenshot 1.3 Minimum Vent Timer This option allows the user to set the timer of minimum vent (see Fig. 24). The screen contains the following columns: • Day: Insert day number. • Fans (sec): Set the time measured in seconds defining when the fans operate or do not operate. -
Page 25: Cool Pad
Fig. 24: Timer setting screenshot 1.5 Cool Pad This selection provides a cooling table to set up the cooling pads (see Fig. 26). Setting different amounts of water by bird age is possible. Note that this option operates on tunnel mode only. Note that the chosen row is the one that consists of the most intensive operation that can be worked. -
Page 26: Light
Note that all times are in 24 hour military format. The entry of day 1 ensures continuous light. The controller assumes no light dimmer is installed. The Platinum Plus can optionally control intensity settings with a slave light dimmer, including sunrise and sunset effects. Note that setting time for operation and break by setting the day ('Day' column) and time ('Time' column). -
Page 27: Water & Feed
• Min analog voltage: Set the minimum voltage to begin lighting • Max Analog voltage: Set the maximum voltage to end lighting • Skip light on days: Set which days to skip lighting. Can be one of the following possibilities: None Even Fig. -
Page 28: Feeder Line Up/Down
• Time: set time to begin the feeding process. • Water: is set automatically. • Feeder: is set automatically. Go to 'Help'>'Set' and set the following parameters (see Fig. 31): • Water & feed cycle: can be one of the following options: Every day 2 days cycle 3 days cycle... -
Page 29: Fig. 32: Feeder Line Up/Down Set - 'No' Chosen Screenshot
Go to 'Help'>'Set' and set the following parameters (see Fig. 32, 34): • Relative to feed table: Select whether to set the feed lines related to each other. Can be either 'yes' or 'no'. If 'No' is chosen: the columns are explained below (see Fig. 33): •... -
Page 30: Extra Systems
Fig. 33: Feeder Line Up/Down Set – 'Yes' chosen screenshot Fig. 34: Feeder Line Up/Down – 'Yes' chosen screenshot 1.9 Extra Systems This selection serves as a set of 4 independent supplementary controls (see Fig. 36). For example, setting System 1 to Fail Safe is possible. The system parameters are explained below. -
Page 31: Static Pressure
• MinVent using (Inlet-0/T.curt-1): Choose between Inlet mode and Tunnel curtain mode. • Emergency S. Press. Delay (sec.): Length of time the Platinum Plus waits before taking emergency action when static pressure remains above the high pressure alarm setting. Note that chronologically it is important to open and go to the next setting. -
Page 32: Control Mode
Fig. 36: Static Pressure screenshot Fig. 37: Static Pressure Set screenshot 1.11 Control Mode This selection enables to define general modes (see Fig. 39). Moreover, it allows setting a curve of the days (see table 1.6). Every column is explained below. •... -
Page 33: Fig. 39: Control Mode Screenshot
• Tunnel: select between 'Allowed' and 'Not allowed'. Fig. 38: Control Mode screenshot Page 33 of 61 Reversion No.: 1.0... -
Page 34: Ii) Management
II) Management This menu serves as a daily data management diary. Press the 'MENU' key on board, and select 'MANAGE' using Cursor keys (see Fig. 40). Fig. 39: Management menu screenshot Bird Inventory This option serves as a bird inventory management diary (see Fig. 41). The screen is divided to three main columns;... -
Page 35: Time & Date
• F. Bin-2: Insert amount of feed in Bin – 2. Go to 'Help'>'Set' and set the following parameters (see Fig. 43): • Active feed bin: Choose the active feed bin being used. Can be one of the following possibilities: both, F. bin1 or F. bin2. •... -
Page 36: Growth Day & Flock
Fig. 43: Time & Date screenshot Growth Day & Flock This option allows the user to manage the date related to the flock (see Fig. 45); can be either an existing one or a new one. The rows are explained below. •... - Page 37 • Alarm snooze (minutes, 0-disable): Set for how long to disable the alarm snooze. • Sensor alarms: Set limits to sensor alarms. • Alarm Test: Set limits to the alarms. • Feeder overtime alarms: Set limits to feeder alarms. If enabling the advance alarm is chosen, the following alarm types are shown in addition to the parameters explained above: •...
-
Page 38: Alarm Reset
Fig. 47: Alarm setting set screenshot Alarm Reset The screen is divided to two main parts; Alarm reset part and Active alarms part. This option is used in the following cases (see Fig. 49): • 'No': Nothing is done. • 'Siren Only': Turning off the relay, alarm and the automatic dialer. •... -
Page 39: Password
Fig. 48: Alarm Reset screenshot Password This selection enables the owner to set a 4 digit password (see Fig. 50) either for reading or for both reading and writing purposes. Fig. 49: Password screenshot 2.8 Emergency Setting This selection applies to optional emergency cards (see Fig. 51). Those cards are battery backed, and operate as standard switch and relay cards during normal operation. - Page 40 • Min. vent on time day 21 (sec): Set the on time for minimum ventilation for three week birds. • Min. vent off time day 21 (sec): Set the off time for minimum ventilation cycle timer during emergency for growth day 21. •...
- Page 41 Fig. 52: Emergency Setting Set screenshot Page 41 of 61 Reversion No.: 1.0...
-
Page 42: Iii) Eggs
III) Eggs This choice serves as an Egg data diary. Press the 'MENU' key on board, and select 'EGGS' using Cursor keys (see Fig. 54). Fig. 53: Eggs menu screenshot 3.1 Egg Room Control This selection enables the user to control the limits of both 'on' and 'off' egg room (see Fig. -
Page 43: Egg Collection
Fig. 55: Egg Room Control Set screenshot 3.2 Egg Collection This option allows the user to define a collection diary (see Fig. 57). The screen is divided to two main columns; 'Last week' and 'Current week'. Set the dated of the current week according to their matching day of the week. -
Page 44: Egg Collection History
Fig. 57: Egg Collection sample day screenshot Fig. 58: Egg Collection Set screenshot 3.3 Egg Collection History This selection enables the user to look at the history summary of all the egg collections (see Fig. 60 - 62). Note that the data in this screen can not be changed and is based on 'Egg Collection' menu (table 3.2). - Page 45 • Week Start Day: the week day can be any day defined by the user • Start Date: set the desired date Fig. 59: Egg Collection History screenshot – part 1 Fig. 60: Egg Collection History screenshot – part 2 Fig.
-
Page 46: Eggs Inventory
Fig. 62: Egg Collection History Set screenshot 3.4 Eggs Inventory This selection serves as an inventory diary (see Fig. 64). The information in this menu serves as a summary and therefore can not be changed. The screen is divided to two main parts;... - Page 47 Fig. 64: History – Egg from Temp screenshot 3.6 History – Egg from Hum. This option serves as a diary of the egg room control humidity (see Fig. 66). Since it is important the eggs will be kept in the right humidity levels, the screen displays the following columns: day number ('Day' column), minimum measured humidity ('Minimum'), average calculated humidity ('Average') and maximum measured humidity ('Maximum').
-
Page 48: Iv) Scale
IV) Scale This menu serves as a scale diary. Press the 'MENU' key on board, and select 'SCALE' using Cursor keys (see Fig. 67). Fig. 66: Scale menu screenshot 4.1 Scale Layout This option enables to program bird scale attached (see Fig. 68). Select the weighting device attached to each channel of the scale option card. - Page 49 • Weighting sensitivity (%): Maximum percent of A/D readings difference allowed during weighting process. • Uniformity range (5-30%): The percentage of all weightings that is +/- a value from the average. • Curve selector (mixed – 0, 1, 2): • Weighing on feed days: can be one of the following: •...
-
Page 50: Bird Scale Setting
4.3 Bird Scale Setting This selection enables the user to set information regarding the bird scale. It is dependant on the choice done in menu 4.2 (see Table 1) in 'Bird scale mode' parameter; If 'Sexed' mode is chosen the following parameters are seen (see Fig. 71): •... -
Page 51: Bird Curve
Fig. 72: Bird Scale Setting Set screenshot 4.4 Bird Curve This option calculates today's expected weight (see Fig. 74). The Platinum Plus has up to 3 curves of anticipated weight of pullet and breeder flocks by bird age. In order to use this operation, insert expected weights in bird curve for male/female birds. -
Page 52: History
History This choice enables the user to view a summary of bird scale regarding the flock (see Fig. 75 - 76); this screen is based on table 4.2 (see Table 1): If 'Sexed' is chosen the following columns are displayed (see Fig. 75): •... -
Page 53: Test
Test This choice shows the machine's count for each attached scale (see Fig. 77). This test is done while placing a weight. Main parameters are explained below. • Status: The status line indicates whether Load cell connection is GOOD or BAD. -
Page 54: V) History
V) History This menu serves as a history diary of the main operations. Press the 'MENU' key on board, and select 'HISTORY' using Cursor keys (see Fig. 79).Note that the information in this menu can only be reviewed but not edited. Fig. -
Page 55: Mortality
Fig. 80: Humidity screenshot Mortality This option serves as a history menu to maintain daily summaries of mortality cull and total dead (see Fig. 82 - 83). The percentage of dead birds shows an update count of bird inventory. Note that information is shown separately according to Total, Male and Female by using the left/right cursor keys. -
Page 56: Heaters
Fig. 83: Heaters screenshot Radiant Heaters This selection displays the Platinum Plus's sum calculations related to the daily total run times of each radiant heater (see Fig. 85). Note that each heater (up to 8) consists of a low and high column. -
Page 57: Feed
Fig. 85: Water screenshot Feed This menu (see Fig. 87) records daily feed consumption ('Total Daily (%)' column) and shows the daily differential change from the previous day ('Feed-1 daily (%)' column), and the daily differential from 2 days ago ('Feed-2 daily (%)' column). Either a feed monitor digital inputs or a feed silo weighting system installed for the feed system should be connected. - Page 58 Fig. 87: Alarms screenshot All available alarms are summarized below; • Temp sens 1-9 Shorted • Temp sens 1-9 opened • Sensor 1-9 defined err • Temp sens not defined • High temperature • Low temperature • Low static pressure •...
-
Page 59: Table Of Events
• This menu lists up to 999 significant events according to bird age and time (see Fig. 89). Note that system messages that tend to reoccur should be handled by Rotem's technical support. Fig. 88: Table of Events screenshot Available events: •... - Page 60 • Heater # on: Appears when one of the 12 heaters enters. • New flock: Appears when new flock is being updated. • System message #: For Rotem's technicians only. • Alarm card fail: Appears when the alarm card fails •...
-
Page 61: History View
• High heater # on: Appears when high heater number is on. • Low rad # on: Appears when low radiant heater number is on. • High rad # off: Appears when high radiant heater number is off. • High rad # on: Appears when high radiant heater number is on. •...
Need help?
Do you have a question about the Platinum Plus and is the answer not in the manual?
Questions and answers