Table of Contents
Advertisement
Advertisement
Table of Contents

Related Manuals for Seaward PrimeTest 125 EL


Summary of Contents for Seaward PrimeTest 125 EL
-
Page 2: Operating Instructions
PrimeTest 125 EL Operating Instructions Operating Instructions Represented in Australia by: EMONA Instruments Pty Ltd 78 Parramatta Rd Camperdown NSW 2050 Tel: (02) 9519 3933 www.emona.com.au, www.protag.com.au testinst@emona.com.au Part Number 372A580 Revision 4 © 2017 Seaward Electronic Ltd... - Page 3 Due to a policy of continuous development SEAWARD Electronic Limited reserves the right to alter the equipment specification and description outlined in this publication without prior notice and no part of this publication shall be deemed to be...
- Page 4 PrimeTest 125 EL Operating Instructions...
-
Page 5: Table Of Contents
PrimeTest 125 EL Operating Instructions Contents Important Information ........5 Introduction ............7 Performing Tests ..........9 3.1 Testing a Class I Appliance ..........9 3.2 Testing a Class I Appliance with Leakage ....... 11 3.3 Testing a Class II Appliance ..........13 3.4 Testing a Class II Appliance with Leakage ...... -
Page 6: Important Information
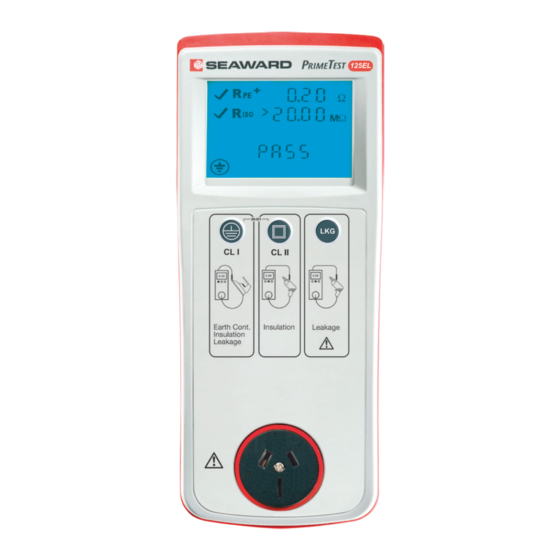
These operating instructions are intended for the use of adequately trained personnel. The following symbols are used in these operating instructions and on the PrimeTest 125 EL. Caution, risk of electric shock. Indicates instructions must be followed to avoid danger to persons. - Page 7 PrimeTest 125 EL Operating Instructions Figure 1. PrimeTest 125 EL Front View Figure 2. PrimeTest 125 EL End View...
-
Page 8: Introduction
PrimeTest 125 EL Operating Instructions Introduction The PrimeTest 125 EL is a hand held battery powered unit suitable for carrying out electrical safety checks on: Class I appliances Class II appliances IEC mains leads Extension leads Overview With reference to Figures 1 and 2. - Page 9 PrimeTest 125 EL Operating Instructions Power ON/OFF = press and hold the CL I and CL II test buttons simultaneously, PrimeTest 125 EL will power on/off when buttons are released. Note: The unit will automatically switch OFF after approximately 3 minutes if no keys...
-
Page 10: Performing Tests
If the Appliance under test has an ON/OFF switch, make sure it is in the ON position. Press the CL I test button to start a Class I test sequence. The PrimeTest 125 EL will now test the continuity of the protective earth. - Page 11 PrimeTest 125 EL will display LO LOAD. If the LO LOAd enunciator is displayed, the load presented by the appliance may be too small for the PrimeTest 125 EL to detect. In this case, press the CL I test button to continue.
-
Page 12: Testing A Class I Appliance With Leakage
Visually inspect the appliance as per requirements of AS/NZS3760. If the appliance passes a visual inspection proceed with the electrical tests. Plug the mains lead into the PrimeTest 125 EL and a mains supply socket. When plugging the mains lead into the PrimeTest 125 EL ensure that the polarity orientation of the connector is correct. - Page 13 If the LO LOAd enunciator is displayed, the load presented by the appliance may be too small for the PrimeTest 125 EL to detect. In this case, press the Leakage button to continue. Note: If the High Load enunciator is displayed,...
-
Page 14: Testing A Class Ii Appliance
PrimeTest 125 EL will display LO LOAD. If the LO LOAd enunciator remains on the display, the load presented by the appliance may be too small for the PrimeTest 125 EL to detect. In this case, press the CL II test button to continue. -
Page 15: Testing A Class Ii Appliance With Leakage
Visually inspect the appliance as per requirements of AS/NZS3760. If the appliance passes a visual inspection, proceed with the electrical tests. Plug the mains lead into the PrimeTest 125 EL and a mains supply socket. When plugging the mains lead into the PrimeTest 125 EL ensure that the polarity orientation of the connector is correct. - Page 16 If the LO LOAd enunciator is displayed, the load presented by the appliance may be too small for the PrimeTest 125 EL to detect. In this case, press the Leakage button to continue. Note: If the High Load enunciator is displayed,...
-
Page 17: Testing A Mains Cord
PrimeTest 125 EL. Press the CL I test sequence button. The PrimeTest 125 EL will first test the continuity of the protective earth. If the measured value is greater than 1 ohm a cross... -
Page 18: Testing An Extension Lead
Plug the mains plug of the extension lead into the front panel mains socket on the PrimeTest 125 EL. The extension lead can now be tested in the same manner as an IEC as described above. -
Page 19: Test An Epod (Powerboard)
Procedure A: 1. Plug powerboard lead into mains outlet socket on the PrimeTest 125 EL. 2. Plug IEC Lead into the IEC socket on the top of the PrimeTest 125 EL. 3. Plug the IEC Lead plug into the first socket of the EPOD. -
Page 20: Test An Epod/Extension Lead With Mov And/Or Rcds
PrimeTest 125 EL Operating Instructions 4. Press the CL I and LKGE buttons simultaneously. The PrimeTest 125 EL an earth test. 5. Repeat step 4 on every socket until the last socket. 6. At the last socket, press the CL I button to do a complete test. - Page 21 PrimeTest 125 EL Operating Instructions Procedure A: 1. Plug the mains lead into the PrimeTest 125 EL and a mains supply socket. 2. Plug powerboard lead into mains outlet socket on the PrimeTest 125 EL. 3. Plug IEC Lead into the IEC socket on the top of the PrimeTest 125 EL.
- Page 22 PrimeTest 125 EL Operating Instructions 9. The PrimeTest 125 EL will give warning beeps. Press the LKGE button to carry out a leakage and polarity test on the last socket. This completes the sequence for the powerboard test. Note: Construction site EPODs usually have 2 banks of outlet sockets.
-
Page 23: Troubleshooting
A The appliance under test is greater than 10A, proceeding with the Leakage test may blow the fuse in the PrimeTest 125 EL. It is suggested that the sequence is aborted and a sequence which include an Insulation test be performed. -
Page 24: Specification
0.05 – 19.99 ohms Accuracy* ± (5% + 2 digits) Test current 200mA minimum Test voltage 9V nominal *When used with Seaward test lead, Part Number 161A024 Insulation resistance Display Range 0.01 -19.99 Mohms Measuring Range 0.10 – 19.99 Mohms Accuracy ±... -
Page 25: Maintenance
Any contamination of the battery contacts or compartment should be cleaned with a dry cloth. Note: The PrimeTest 125 EL contains no user serviceable parts. If an Error warning should appear on the display please contact Emona Instruments... -
Page 26: Battery Check
PrimeTest 125 EL Operating Instructions Battery Check The PrimeTest 125 EL is powered from a 6 AA cells which are checked before a test is performed. When the battery voltage is low the enunciator is illuminated. The unit will continue to perform within... -
Page 27: Fuse
Fuse The unit is protected by a fuse. If the fuse should blow then the mains tests will not be allowed to start and the PrimeTest 125 EL will indicate that the mains connection is incorrect. Fuse Replacement Before opening the PrimeTest 125 EL ensure that all test leads are disconnected. -
Page 28: Service And Calibration
PrimeTest 125 EL Operating Instructions Service and Calibration maintain specified accuracy measurement results, the instrument must be recalibrated at regular intervals by either the manufacturer, Emona Instruments. We recommend a recalibration period of one year. For help or advice on Service and Calibration... - Page 29 PrimeTest 125 EL Operating Instructions LOAD MESSAGES Message Reason Solution Lo Load Appliance switch is not engaged (switch Engage the switch (turn it on) in off position) Lo Load Appliance switch is engaged but requires Insulation test ineffective. Consider doing a power to latch leakage test.
- Page 30 PrimeTest 125 EL Operating Instructions TEST SEQUENCE Test Setting Description Earth Insulation Leakage Test Polarity Continuity Test Test Class I Earthed Appliance ±200mA 500V CLII Class II Double Insulated 500V Appalance CLI-Lead Power LEAD-IEC or Extension ±200mA 500V Board CLI-Leakage Class I Power-up Test ±200mA...
- Page 31 PrimeTest 125 EL Operating Instructions TEST SEQUENCE Test Type Press Button(s) Attachment Required Examples & Comments Appliance lead (black) connected to 3 pin – Most kitchen appliances exposed metal parts. (toaster, microwave..) CLII Appliance lead (black) connected to Most hand held tools (2 or 3 pin exposed metal parts.
Need help?
Do you have a question about the PrimeTest 125 EL and is the answer not in the manual?
Questions and answers