
Subscribe to Our Youtube Channel
Related Manuals for KAESER SM 7.5


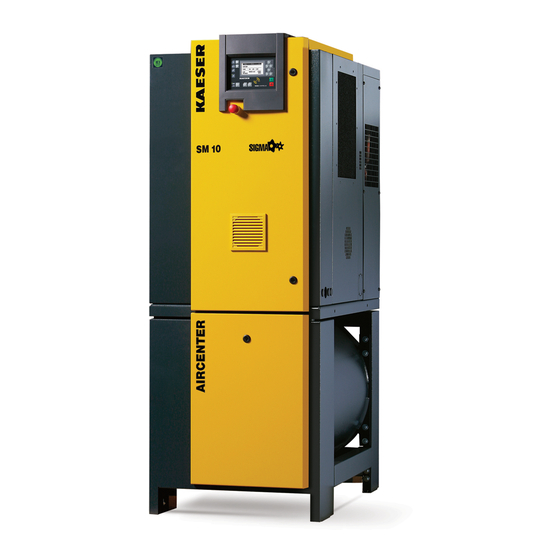
Summary of Contents for KAESER SM 7.5
- Page 1 Operator Manual Screw Compressor Tri-Voltage, SIGMA CONTROL 2 9_5875 33 USE Manufacturer: KAESER KOMPRESSOREN SE 96410 Coburg • PO Box 2143 • GERMANY • Tel. +49-(0)9561-6400 • Fax +49-(0)9561-640130 http://www.kaeser.com...
- Page 2 Original instructions /KKW/SSM 2.13 en Z1 SBA-SCHRAUBEN-TRI-VOLTAGE-SC /KKW/SSC 2.05 Z1 20151229 083400...
-
Page 3: Table Of Contents
Pressure ........................... Delivery ..........................Cooling Oil Recommendation ..................2.9.1 Basic Information ....................2.9.2 KAESER Lubricants .................... 2.10 Cooling oil charge ......................2.11 Motors and power ......................2.11.1 Compressor motor ....................2.12 Noise emission ......................... 2.13 Power Supply ........................2.14 Power supply specifications ..................... - Page 4 Contents 4.4.1 Machine operating modes .................. 4.4.2 Control modes ....................Operating panel SIGMA CONTROL 2 ................Floating relay contacts ..................... Options ..........................4.7.1 Machine mountings ..................... 4.7.2 Prepared for external heat recovery ..............Installation and Operating Conditions Ensuring safety ........................ Installation conditions .......................
- Page 5 10.19 Documenting maintenance and service work ..............Spares, Operating Materials, Service 11.1 Note the nameplate ......................11.2 Ordering consumable parts and operating fluids/materials ..........11.3 KAESER AIR SERVICE ....................11.4 Service Addresses ......................11.5 Spare Parts for Service and Repair ................. Decommissioning, Storage and Transport 12.1 Decommissioning ......................
- Page 6 Contents Operator Manual Screw Compressor SM Tri-Voltage, SIGMA CONTROL 2 9_5875 33 USE...
- Page 7 List of Illustrations Fig. 1 Maximum relative humidity of intake air ..................Fig. 2 Three-phase star (wye system); 4 wire; center point solidly grounded ........Fig. 3 Three-phase star (wye system); 3 wire; grounded center point solidly grounded ...... Fig. 4 Location of safety signs ......................
- Page 8 List of Illustrations Operator Manual Screw Compressor SM Tri-Voltage, SIGMA CONTROL 2 9_5875 33 USE...
- Page 9 List of Tables Tab. 1 Danger levels and their definition (personal injury) ..............Tab. 2 Danger levels and their definition (damage to property) ............Tab. 3 Nameplate ..........................Tab. 4 Options ............................Tab. 5 Machine weight .......................... Tab. 6 Temperature ..........................Tab.
- Page 10 List of Tables Operator Manual Screw Compressor viii SM Tri-Voltage, SIGMA CONTROL 2 9_5875 33 USE...
-
Page 11: Regarding This Document Using This Document
Copyright This service manual is copyright protected. Queries regarding use or duplication of the documenta‐ tion should be referred to KAESER. Correct use of information will be fully supported. Symbols and labels ➤ Please note the symbols and labels used in this document. -
Page 12: Potential Damage Warnings
Regarding this Document Symbols and labels The type and source of the imminent danger is shown here! The possible consequences of ignoring a warning are shown here. If you ignore the warning notice, the "DANGER" signal word indicates a lethal or severe in‐ jury will occur. - Page 13 Regarding this Document Symbols and labels Material Here you will find details on special tools, operating materials or spare parts. Precondition Here you will find conditional requirements necessary to carry out the task. The conditions relevant to safety shown here will help you to avoid dangerous situations. Option H1 ➤...
-
Page 14: Technical Data Nameplate
Technical Data Nameplate 2 Technical Data Nameplate The machine's nameplate provides the model designation and important technical information. The nameplate is located on the outside of the machine: ■ above the cooler, ■ on the rear of the machine. ➤ Enter here the nameplate data as a reference: Characteristic Value Screw Compressor... -
Page 15: Weight
Technical Data Weight Weight The weight given is the maximum. Actual weights of individual machines are dependent on equip‐ ment fitted. SM 7.5 SM 10 SM 15 Weight [lb] Tab. 5 Machine weight Temperature SM 7.5 SM 10 SM 15 Minimum cut-in tempera‐... -
Page 16: Ventilation
Fig. 1 Maximum relative humidity of intake air Intake air temperature [°F] Maximum relative humidity of intake air [%] Ventilation The values given are minimum guide values. SM 7.5 SM 10 SM 15 Inlet aperture see fig‐ ure 11 [ft... -
Page 17: Delivery
Although the KAESER synthetic is not highly flammable, it will burn. While KAESER synthetic com‐ pressor cooling oil is less flammable than equal viscosity mineral oils, it cannot be classified as a fire-resistant fluid. -
Page 18: Cooling Oil Charge
M-Series SIGMA compressor cooling oils are semi-synthetic lubricants. ■ M-Series SIGMA compressor cooling oils are the highest quality petroleum lubricants. M–460 is specially blended to provide reliable performance in KAESER screw compressors. S-SERIES ■ S-Series SIGMA compressor cooling oils are synthetic lubricants. -
Page 19: Motors And Power
Technical Data 2.11 Motors and power 2.11 Motors and power 2.11.1 Compressor motor SM 7.5 SM 10 SM 15 Rated power [hp] Enclosure protection TEFC TEFC TEFC Tab. 13 Compressor motor Rated speed [rpm]: Maximum working over‐ SM 7.5 SM 10... -
Page 20: Power Supply Specifications
Three-phase star (wye system); 4 wire; center point solidly grounded Fig. 3 Three-phase star (wye system); 3 wire; grounded center point solidly grounded Further information Please contact an authorized KAESER service representative for options. The electrical diagram 13.4 contains further specifications for electrical connection. 2.14 Power supply specifications The following multi-strand copper core wires are given according to 2014 NEC 310.15, Ta‐... -
Page 21: Available Heat Capacity
Technical Data 2.15 Available heat capacity Rated power supply 460V / 3-ph / 60Hz SM 7.5 SM 10 SM 15 Pre-fuse [A] Supply 4xAWG14 4xAWG12 4xAWG10 Consumption [A] Tab. 18 Supply details 460V / 3ph / 60Hz 2.15 Option W1... -
Page 22: Safety And Responsibility Basic Instructions
Safety and Responsibility Basic instructions 3 Safety and Responsibility Basic instructions The machine is manufactured to the latest engineering standards and acknowledged safety regula‐ tions. Nevertheless, dangers can arise through its operation: ■ danger to life and limb of the operator or third parties, ■... -
Page 23: Qualified Personnel
Safety and Responsibility Dangers 3.4.2 Qualified personnel These are people who, by virtue of their training, knowledge and experience as well as their knowl‐ edge of relevant regulations can assess the work to be done and recognize the possible dangers involved. - Page 24 Safety and Responsibility Dangers Electricity Touching voltage carrying components can result in electric shocks, burns or death. ➤ Allow only qualified and authorized electricians or trained personnel under the supervision of a qualified and authorized electrician to carry out work on electrical equipment according to elec‐ trical engineering regulations.
- Page 25 Unsuitable spare parts compromise the safety of the machine. ➤ Use only spare parts approved by the manufacturer for use in this machine. ➤ Use only genuine KAESER replacement parts on pressure bearing parts. Conversion or modification of the machine Modifications, additions to and conversions of the machine or the controller can result in unpredict‐...
-
Page 26: Safe Machine Operation
Safety and Responsibility Dangers Extending or modifying the compressor station If dimensioned appropriately, safety relief valves reliably prevent an impermissible rise in pressure. New dangers may arise if you modify or extend the compressed air station. ➤ When extending or modifying the compressed air system: Check the blow-off capacity of safety relief valves on air receivers and compressed air lines before installing a new machine. - Page 27 ➤ Do not open the cabinet while the machine is switched on. ➤ Do not open or dismantle any valves. ➤ Use only spare parts approved by KAESER for use in this machine. ➤ Carry out regular inspections: for visible damages,...
-
Page 28: Organizational Measures
Safety and Responsibility Safety devices De-commissioning, storage and disposal Improper handling of old operating fluids and components represent a danger for the environment. ➤ Drain off fluids and dispose of them according to environmental regulations. These include, for example, compressor oil and cooling water. ➤... -
Page 29: Working Life Of Safety Functions
■ Door interlock switch 1. The components of the safety functions must be replaced by an authorized KAESER service representative after a working life of 20 years. 2. Have an authorized KAESER service representative check the reliability of the safety func‐... - Page 30 Serious injury or death can result from loosening or opening component that is un‐ der pressure and heavily spring loaded! ➤ Do not open or dismantle the valve. ➤ Contact authorized KAESER service representative. Serious injury or death can result from loosening or opening component under pressure! ➤...
-
Page 31: Emergency Situations
Safety and Responsibility Emergency situations Item Symbol Meaning Risk of electric shock! To maintain overcurrent short-circuit, and ground-fault protection, the manufactur‐ er's instructions for setting the interrupter must be followed to reduce the risk of fire or electric shock. Tab. 21 Safety signs Emergency situations 3.9.1... -
Page 32: Warranty
■ incorrect repair. Correct maintenance and repair includes the use of original spare parts and operating materials. ➤ Obtain confirmation from KAESER that your specific operating conditions are suitable. 3.11 Environmental protection The operation of this machine may cause dangers for the environment. -
Page 33: Design And Function
Design and Function Enclosure 4 Design and Function Enclosure Fig. 5 Enclosure overview Control cabinet door Sight glass: Oil level indicator Latch Sight glass: V-belt tension Panel (removable) When closed, the enclosure serves various functions: ■ Sound insulation ■ Protection against contact with components ■... -
Page 34: Machine Function
Design and Function Machine function Machine function Fig. 6 Machine layout Inlet valve Control cabinet Minimum pressure/check valve Oil separator tank Compressor motor Air filter Oil filter Oil/air cooler Airend Ambient air is cleaned as it is drawn in through the filter The air is then compressed in the airend The airend is driven by an electric motor Cooling oil is injected into the airend. -
Page 35: Operating Modes And Control Modes
Design and Function Operating modes and control modes ■ Safety relief valve: The safety relief valve protects the system against excessive pressure. It is factory set. ■ Safety pressure monitor (Machine with refrigerated dryer): The safety pressure monitor protects the refrigerant circuit against excessive pressure. It can‐ not be set. -
Page 36: Control Modes
Design and Function Operating modes and control modes 4.4.2 Control modes Using the selected control mode, the controller switches the machine between its various opera‐ tional states in order to maintain the gauge working pressure between the set minimum and maxi‐ mum values, regardless of the drawn compressed air volume. -
Page 37: Operating Panel Sigma Control
Design and Function Operating panel SIGMA CONTROL 2 VARIO idling The VARIO mode is based on the DUAL control mode. The difference to DUAL is that the time is automatically lengthened or shortened to compensate for higher or lower machine starting frequencies. -
Page 38: Fig. 8 Indicators - Overview
Design and Function Operating panel SIGMA CONTROL 2 Position Name Function «Right» Jumps to the right. Moves the cursor position to the next right field. «Left» Jumps to the left. Moves the cursor position to the next left field. «Up» Scrolls up the menu options. -
Page 39: Fig. 9 Rfid Sensor Field
Placing a suitable transponder in front of the RFID sensor field of the controller will automatically activate the communication between transponder and SIGMA CONTROL 2 . A suitable transponder is the KAESER RFID EQUIPMENT CARD. Two of them have been provi‐ ded with the machine. -
Page 40: Floating Relay Contacts
Design and Function Floating relay contacts Floating relay contacts Floating relay contacts are provided for the transfer of signals and messages. Information on location, loading capacity and type of message or signal is found in the electrical diagram. If the floating relay contacts are connected to an external voltage source, voltage may be present even when the machine is isolated from the power supply. - Page 41 Options If the cooling oil temperature is too low, condensate can form and damage the machine. ➤ Consult an authorized KAESER service representative on components and layout to en‐ sure proper functioning of the cooling and heat recovery systems. Operator Manual...
-
Page 42: Installation And Operating Conditions
The distances quoted are recommended distances and ensure unhindered access to all ma‐ chine parts. ➤ Please consult KAESER if you cannot comply with these recommendations. Precondition The floor must be level, firm, and capable of bearing the weight of the machine. -
Page 43: Ensuring The Machine Room Ventilation
It evacuates the exhaust heat of the machine and thus ensures the required operating condi‐ tions. ➤ Consult with KAESER if you cannot ensure the conditions for an adequate ventilation of the machine room. 1. Ensure that the flow volume of fresh air is at least the same as the volume taken by the ma‐... -
Page 44: Exhaust Duct Design
These conditions are detrimental to correct air treatment. Air quality suffers. To en‐ sure the desired air quality when charging a vented air system, we recommend the installation of an air main charging system. ➤ Consult an authorized KAESER service representative for advice on this subject. Operator Manual Screw Compressor... -
Page 45: Installation
Installation Ensuring safety 6 Installation Ensuring safety Follow the instructions below for safe installation. Warning instructions are located before a potentially dangerous task. Disregard of warning instructions can cause serious injuries! Complying with safety notes Disregard of safety notes can cause unforeseeable dangers! ➤... -
Page 46: Reporting Transport Damage
➤ Install only corrosion-resistant pipes. ➤ Use fluoroelastomers as sealing material for seals. ➤ Note the electro-chemical voltage sequence. ➤ Consult with KAESER for suitable materials for the compressed air network. Precondition The compressed air system is vented completely to atmospheric pressure. -
Page 47: Making The Power Supply Connection
Safety monitoring of the machine's internal pressure is unaffected. An authorized KAESER service representative will be glad to provide support on planning and executing an individual solution. 1. Install the pressure transducer at the selected location in the compressed air network. -
Page 48: Changing Main Voltage Connections
Changing the drive motor connection ➤ Open the control cabinet and connect the motor in accordance with the electrical diagram. Adjusting the overload protection cutout ➤ Check the overload protection relay setting. SM 7.5 SM 10 SM 15 208V, 3-ph, 60Hz [A]... -
Page 49: Options
An unsuitable heat exchanger or incorrect installation may influence the cooling oil circuit within the compressor. Damage to the machine will follow. ➤ Consult KAESER on a suitable heat exchanger and have an authorized KAESER service rep‐ resentative do the installation. -
Page 50: Initial Start-Up Ensuring Safety
Initial Start-up Ensuring safety 7 Initial Start-up Ensuring safety Here you will find instructions for a safe commissioning of the machine. Warning instructions are located before a potentially dangerous task. Disregard of warning instructions can cause serious injuries! Complying with safety notes Disregard of safety notes can cause unforeseeable dangers! ➤... -
Page 51: Instructions To Be Observed Before Commissioning Or Re-Commissioning
➤ Change the oil filter. ➤ Change the oil separator cartridge. ➤ Change the cooling oil. ➤ Have the motor bearings checked by an authorized KAESER service repre‐ sentative. 36 months ➤ Have the overall technical condition checked by an authorized KAESER service representative. -
Page 52: Setting The Overload Protection Relay
➤ Check the overload protection relay setting. The overload protection relay shuts the machine down despite being correctly set? ➤ Contact an authorized KAESER service representative. Pouring cooling oil into the airend Before starting the compressor for the very first time and before re-starting after a shutdown period of more than 3 months it is necessary to manually add a quantity of cooling oil into the airend. -
Page 53: Activating And Deactivating The Modulating Control
Initial Start-up Activating and deactivating the MODULATING control Fig. 13 Inlet valve filling port Screw plug Inlet valve 1. Unscrew the filler plug from the inlet valve. 2. Pour the stipulated amount of cooling oil into the airend and replace the filler plug. 3. -
Page 54: Starting The Machine For The First Time
➤ Open or close the control valve, depending on the required control mode. The regulating valve is factory set. The setting should not be changed without consultation with an authorized KAESER service representative. Starting the machine for the first time Precondition No personnel are working on the machine. -
Page 55: Setting The Set Point Pressure
The machine switches off automatically. The controller displays an alarm message. 2. Close the panel and acknowledge the alarm. The machine does not switch off automatically?. ➤ Have the interlock switch checked by an authorized KAESER service representative agent. 7.10 Setting the display language The controller can display text messages in several languages. - Page 56 Initial Start-up 7.10 Setting the display language You can set the language for texts on the display. This setting will be retained even when the ma‐ chine is switched off. 1. In operating mode, switch to the main menu with the «Return» key. 2.
-
Page 57: Operation
Operation Switching on and off 8 Operation Switching on and off Always switch the machine on with the «ON» key and off with the «OFF» key. A power supply disconnecting device should be installed by the user. Fig. 16 Switching on and off Machine ON LED «LOAD/IDLE»... -
Page 58: Switching Off In An Emergency And Switching On Again
Operation Switching off in an emergency and switching on again Controller voltage LED extinguishes. The machine is switched off and disconnected from the Result power supply. In rare cases, if you need to shut the machine down immediately and cannot wait until the automatic shut-down process is finished: ➤... -
Page 59: Using The Timer For Switching On And Off
Operation Using the timer for switching on and off Fig. 18 Switching on and off from a remote control center «Remote control» key Remote control LED 1. Attach an easily seen notice to the machine that warns of remote operation. Remote control: Risk of injury caused by unexpected starting! ➤... -
Page 60: Interpreting Operation Messages
Operation Interpreting operation messages Fig. 19 Using the timer for switching on and off «Timer» key Timer LED 1. Attach an easily seen notice to the machine that warns of time-controlled operation: Timer control: Risk of injury caused by unexpected starting! ➤... -
Page 61: Fig. 20 Acknowledging Messages
Operation Acknowledging alarm and warning messages Fig. 20 Acknowledging messages Warning (yellow) Alarm (red) Key «Acknowledge» Alarm message alarm LED flashes. An alarm shuts the machine down automatically. The red The system displays the appropriate message. Precondition The fault has been rectified. ➤... -
Page 62: Fault Recognition And Rectification
1. Do not attempt fault rectification measures other than those given in this manual! 2. In all other cases: Have the fault rectified by an authorized KAESER SERVICE representative. Further information Detailed information for the various messages can be found in the user manual SIGMA CONTROL 2 . -
Page 63: Tab. 34 Other Faults And Actions
Drain off oil until the correct lev‐ ter. tank too high. el is reached. Inlet valve defective. Call authorized KAESER Serv‐ ice representative. Compressor switches between Air receiver too small. Increase size of air receiver. LOAD and IDLE more than Airflow into the compressed air Increase air pipe diameters. -
Page 64: 10 Maintenance
Maintenance 10.1 Ensuring safety 10 Maintenance 10.1 Ensuring safety Follow the instructions below to ensure safe machine maintenance. Warning instructions are located before a potentially dangerous task. Disregard of warning instructions can cause serious injuries! Complying with safety notes Disregard of safety notes can cause unforeseeable dangers! ➤... -
Page 65: Following The Maintenance Plan
Details of dangers and their avoidance are found in chapter 3.5. 10.2 Following the maintenance plan 10.2.1 Logging maintenance work The maintenance intervals given are those recommended for KAESER original components with average operating conditions. ➤ In adverse conditions, perform maintenance work at shorter intervals. Adverse conditions are, e.g.: ■... -
Page 66: Cooling Oil Changing Interval
Maintenance 10.2 Following the maintenance plan ➤ Take note of the controller's service messages and carry out tasks punctually, taking ambient and operating conditions into account. Interval Maintenance task see chapter Weekly Check the cooling oil level. 10.13 Cooler: 10.3 Check the filter mat Control cabinet: 10.4... -
Page 67: Regular Service Tasks
10.3 Cooler: Cleaning or Renewing the Filter Mats An authorized KAESER service representative will support you in determining appropriate in‐ tervals and provide information on the possibilities of oil analysis. ➤ Please observe national regulations regarding the use of cooling oil in oil-injected screw com‐... -
Page 68: Control Cabinet: Clean Or Renew The Filter Mat
Maintenance 10.4 Control cabinet: Clean or renew the filter mat Material Filter mats: Warm water and household detergent Spare parts (as required) Precondition The machine is switched off. Fig. 21 Filter mat for the air and oil cooler Filter mat No tools are needed to remove the filter mat. -
Page 69: Cooler Maintenance
Clogged coolers are indicative of unfavorable ambient conditions. Such ambient conditions clog the cooling air ducts in the machine's interior and the engines resulting in increased wear and tear. ➤ Have the authorized KAESER service representative clean the cooling air ducts. Material Brush and vacuum cleaner... -
Page 70: Maintaining The External Heat Recovery System
Check the heat exchanger regularly for leaks and contamination. Frequency of checking is depend‐ ant on the characteristics of the heat transfer medium. ➤ Have the external heat recovery system checked annually by an authorized KAESER service representative. Operator Manual... -
Page 71: Air Filter Maintenance
4. Clip the air filter housing onto the inlet valve. 10.8 Compressor motor maintenance The drive motor bearings are permanently greased. Re-greasing is not necessary. ➤ Have the motor bearings checked by an authorized KAESER service representative. Operator Manual Screw Compressor 9_5875 33 USE... -
Page 72: Drive Belt Maintenance
Maintenance 10.9 Drive belt maintenance 10.9 Drive belt maintenance Material Spare parts (if required) Precondition The power supply isolating device is switched off, the device is locked off, the absence of any voltage has been verified. The machine has cooled down. Touching the moving drive belt may result in severe bruising or even loss of limb or extremi‐... -
Page 73: Testing The Safety Relief Valve
Maintenance 10.10 Testing the safety relief valve Changing the belt 1. Loosen the locking nut 2. Turn adjusting nut to loosen the tension on the belt until it can be removed from the pulley. 3. Install the new belt and use the adjusting nut to adjust tension until the marker pin reaches the lower end of the elongated hole. -
Page 74: Checking The Overheating Safety Shutdown Function
➤ Check the safety shutdown function as described in the SIGMA CONTROL 2 operating man‐ ual. The machine does not shut down? ➤ Have the safety shutdown function checked by an authorized KAESER service represen‐ tative. 10.12 Testing the EMERGENCY STOP push button Fig. -
Page 75: Venting The Machine (De-Pressurizing)
Maintenance 10.14 Venting the machine (de-pressurizing) In frequency-controlled compressors (SFC) the oil level indicator is only accurate when the machine is running at or near maximum speed. The lower the pressure at the compressed air outlet, the higher the speed. Precondition The machine has been running at least 5 minutes under LOAD. -
Page 76: Fig. 28 Venting The Machine
➤ If manual venting does not bring the oil separator tank pressure gauge to zero: Contact an authorized KAESER service representative. Manually venting the air cooler After shutting down the compressor and venting the oil separator tank, the machine is still un‐... -
Page 77: Replenishing The Cooling Oil
Maintenance 10.15 Replenishing the cooling oil 2. Slowly open the shut-off valve to release pressure. 3. Disconnect the male hose fitting and close the shut-off valve 10.15 Replenishing the cooling oil The machine must be isolated from the compressed air network and completely vented be‐ fore undertaking any work on the pressure system. -
Page 78: Topping Off With Cooling Oil And Trial Run
➤ If manual venting does not bring the oil separator tank pressure gauge to zero: Contact an authorized KAESER service representative. Manually venting the air cooler After shutting down the compressor and venting the oil separator tank, the machine is still un‐... -
Page 79: Changing The Cooling Oil
Maintenance 10.16 Changing the cooling oil 4. Top off to bring the oil to the correct level. 5. Replace the filler plug's sealing ring if necessary and screw the plug into the filler neck. Starting the machine and carrying out a trial run 1. -
Page 80: Fig. 30 Changing The Cooling Oil, Oil Separator Tank
Maintenance 10.16 Changing the cooling oil Fig. 30 Changing the cooling oil, oil separator tank Hose coupling (air cooler venting) Shut-off valve (open) Pressure gauge Shut-off valve (closed) Hose coupling (oil separator tank venting) Maintenance hose Oil filler port with plug Hose coupling (oil drainage) Cooling oil level indicator Shut-off valve (venting line) -
Page 81: Fig. 31 Changing The Cooling Oil, Heat Recovery System
Maintenance 10.16 Changing the cooling oil Draining the oil from the separator tank Contact KAESER Service if condensate is detected in the cooling oil. It is necessary to adapt the airend discharge temperature to individual ambient conditions. Precondition The power supply disconnecting device is switched off, the device is locked off, the absence of any voltage has been verified. -
Page 82: Changing The Oil Filter
Maintenance 10.17 Changing the oil filter Filling with cooling oil Compressed air! Compressed air and devices under pressure can injure or cause death if the contained energy is released suddenly. ➤ Vent all pressurized components and enclosures. 2. Slowly unscrew the filler plug (see illustration 30). -
Page 83: Changing The Oil Separator Cartridge
Maintenance 10.18 Changing the oil separator cartridge Fig. 32 Changing the oil filter Oil filter Direction to unscrew Changing the oil filter Compressed air! Compressed air and devices under pressure can injure or cause death if the contained energy is released suddenly. ➤... -
Page 84: Fig. 33 Changing The Oil Separator Cartridge
Maintenance 10.18 Changing the oil separator cartridge The life of the oil separator cartridge is influenced by: ■ contamination in the air drawn into the compressor, ■ Adherence to the changing intervals for: ─ Cooling oil ─ Oil filter ─ Air filter The machine must be isolated from the compressed air network and completely vented be‐... - Page 85 Maintenance 10.18 Changing the oil separator cartridge 2. Unscrew the fitting and carefully put the parts to one side, then pull out the copper pipe at item 3. Unscrew the nut and turn the air pipe to one side. 4. Remove the cover fixing screws and carefully remove the cover 5.
-
Page 86: Documenting Maintenance And Service Work
Maintenance 10.19 Documenting maintenance and service work 10.19 Documenting maintenance and service work Equipment number: ➤ Enter maintenance and service work carried out in the checklist below. Date Maintenance task carried out Operating hours Signature Tab. 40 Logged maintenance tasks Operator Manual Screw Compressor SM Tri-Voltage, SIGMA CONTROL 2... -
Page 87: 11 Spares, Operating Materials, Service
11.2 Ordering consumable parts and operating fluids/materials KAESER consumable parts and operating materials are original KAESER products. They are spe‐ cifically selected for use in KAESER machines. Unsuitable or poor quality consumable parts and operating fluids/materials may damage the ma‐... -
Page 88: Service Addresses
11.4 Service Addresses Addresses of KAESER representatives are given at the end of this manual. 11.5 Spare Parts for Service and Repair With the help of this parts list you can plan your material requirement according to operating condi‐... - Page 89 Spares, Operating Materials, Service 11.5 Spare Parts for Service and Repair Operator Manual Screw Compressor 9_5875 33 USE SM Tri-Voltage, SIGMA CONTROL 2...
- Page 90 Spares, Operating Materials, Service 11.5 Spare Parts for Service and Repair Operator Manual Screw Compressor SM Tri-Voltage, SIGMA CONTROL 2 9_5875 33 USE...
- Page 91 Spares, Operating Materials, Service 11.5 Spare Parts for Service and Repair Operator Manual Screw Compressor 9_5875 33 USE SM Tri-Voltage, SIGMA CONTROL 2...
-
Page 92: 12 Decommissioning, Storage And Transport
A wooden crate is required for overland transport to protect the machine from mechanical damage. Other measures must be taken for the transport of machines by sea or air. Please contact an au‐ thorized KAESER service representative for more information. Material... -
Page 93: Transport
Weight and center of gravity determine the most suitable method of transportation. The center of gravity is shown in the drawings in chapter 13.3. ➤ Please consult with KAESER if you intend to transport the machine in freezing tempera‐ tures. -
Page 94: Disposal
Attached components such as cyclone separators, condensate drains, or filters ■ Rain protection covers ➤ Please consult with KAESER if you have questions regarding the appropriate lifting gear. Precondition The lifting gear complies with local safety regulations. No pressure should bear on the sides of the machine cabinet. -
Page 95: Battery Disposal
Decommissioning, Storage and Transport 12.5 Disposal 12.5.1 Battery disposal Batteries contain substances that are harmful to living beings and the environment. For this reason, batteries must not be disposed of with unsorted residential waste. They must be disposed of in ac‐ cordance with local environmental regulations. -
Page 96: 13 Annex
Annex 13.1 Pipeline and instrument flow diagram (P+I diagram) 13 Annex 13.1 Pipeline and instrument flow diagram (P+I diagram) Operator Manual Screw Compressor SM Tri-Voltage, SIGMA CONTROL 2 9_5875 33 USE... - Page 97 Annex 13.1 Pipeline and instrument flow diagram (P+I diagram) Operator Manual Screw Compressor 9_5875 33 USE SM Tri-Voltage, SIGMA CONTROL 2...
- Page 98 Annex 13.1 Pipeline and instrument flow diagram (P+I diagram) Operator Manual Screw Compressor SM Tri-Voltage, SIGMA CONTROL 2 9_5875 33 USE...
- Page 99 Annex 13.1 Pipeline and instrument flow diagram (P+I diagram) Operator Manual Screw Compressor 9_5875 33 USE SM Tri-Voltage, SIGMA CONTROL 2...
- Page 100 Annex 13.1 Pipeline and instrument flow diagram (P+I diagram) Operator Manual Screw Compressor SM Tri-Voltage, SIGMA CONTROL 2 9_5875 33 USE...
- Page 101 Annex 13.1 Pipeline and instrument flow diagram (P+I diagram) Operator Manual Screw Compressor 9_5875 33 USE SM Tri-Voltage, SIGMA CONTROL 2...
-
Page 102: Pipe And Instrument Flow Diagram (P+I Diagram): Modulating Control Mode
Annex 13.2 Pipe and Instrument Flow Diagram (P+I diagram): MODULATING control mode 13.2 Option C1 Pipe and Instrument Flow Diagram (P+I diagram): MODULATING control mode Operator Manual Screw Compressor SM Tri-Voltage, SIGMA CONTROL 2 9_5875 33 USE... - Page 103 Annex 13.2 Pipe and Instrument Flow Diagram (P+I diagram): MODULATING control mode Operator Manual Screw Compressor 9_5875 33 USE SM Tri-Voltage, SIGMA CONTROL 2...
- Page 104 Annex 13.2 Pipe and Instrument Flow Diagram (P+I diagram): MODULATING control mode Operator Manual Screw Compressor SM Tri-Voltage, SIGMA CONTROL 2 9_5875 33 USE...
- Page 105 Annex 13.2 Pipe and Instrument Flow Diagram (P+I diagram): MODULATING control mode Operator Manual Screw Compressor 9_5875 33 USE SM Tri-Voltage, SIGMA CONTROL 2...
- Page 106 Annex 13.2 Pipe and Instrument Flow Diagram (P+I diagram): MODULATING control mode Operator Manual Screw Compressor SM Tri-Voltage, SIGMA CONTROL 2 9_5875 33 USE...
- Page 107 Annex 13.2 Pipe and Instrument Flow Diagram (P+I diagram): MODULATING control mode Operator Manual Screw Compressor 9_5875 33 USE SM Tri-Voltage, SIGMA CONTROL 2...
-
Page 108: Dimensional Drawing
Annex 13.3 Dimensional drawing 13.3 Dimensional drawing Operator Manual Screw Compressor SM Tri-Voltage, SIGMA CONTROL 2 9_5875 33 USE... - Page 109 Annex 13.3 Dimensional drawing Operator Manual Screw Compressor 9_5875 33 USE SM Tri-Voltage, SIGMA CONTROL 2...
- Page 110 Annex 13.3 Dimensional drawing Operator Manual Screw Compressor SM Tri-Voltage, SIGMA CONTROL 2 9_5875 33 USE...
-
Page 111: Electrical Diagram
Annex 13.4 Electrical Diagram 13.4 Electrical Diagram Operator Manual Screw Compressor 9_5875 33 USE SM Tri-Voltage, SIGMA CONTROL 2... - Page 112 Annex 13.4 Electrical Diagram Operator Manual Screw Compressor SM Tri-Voltage, SIGMA CONTROL 2 9_5875 33 USE...
- Page 113 Annex 13.4 Electrical Diagram Operator Manual Screw Compressor 9_5875 33 USE SM Tri-Voltage, SIGMA CONTROL 2...
- Page 114 Annex 13.4 Electrical Diagram Operator Manual Screw Compressor SM Tri-Voltage, SIGMA CONTROL 2 9_5875 33 USE...
- Page 115 Annex 13.4 Electrical Diagram Operator Manual Screw Compressor 9_5875 33 USE SM Tri-Voltage, SIGMA CONTROL 2...
- Page 116 Annex 13.4 Electrical Diagram Operator Manual Screw Compressor SM Tri-Voltage, SIGMA CONTROL 2 9_5875 33 USE...
- Page 117 Annex 13.4 Electrical Diagram Operator Manual Screw Compressor 9_5875 33 USE SM Tri-Voltage, SIGMA CONTROL 2...
- Page 118 Annex 13.4 Electrical Diagram Operator Manual Screw Compressor SM Tri-Voltage, SIGMA CONTROL 2 9_5875 33 USE...
- Page 119 Annex 13.4 Electrical Diagram Operator Manual Screw Compressor 9_5875 33 USE SM Tri-Voltage, SIGMA CONTROL 2...
- Page 120 Annex 13.4 Electrical Diagram Operator Manual Screw Compressor SM Tri-Voltage, SIGMA CONTROL 2 9_5875 33 USE...
- Page 121 Annex 13.4 Electrical Diagram Operator Manual Screw Compressor 9_5875 33 USE SM Tri-Voltage, SIGMA CONTROL 2...
- Page 122 Annex 13.4 Electrical Diagram Operator Manual Screw Compressor SM Tri-Voltage, SIGMA CONTROL 2 9_5875 33 USE...
- Page 123 Annex 13.4 Electrical Diagram Operator Manual Screw Compressor 9_5875 33 USE SM Tri-Voltage, SIGMA CONTROL 2...
- Page 124 Annex 13.4 Electrical Diagram Operator Manual Screw Compressor SM Tri-Voltage, SIGMA CONTROL 2 9_5875 33 USE...
- Page 125 Annex 13.4 Electrical Diagram Operator Manual Screw Compressor 9_5875 33 USE SM Tri-Voltage, SIGMA CONTROL 2...
- Page 126 Annex 13.4 Electrical Diagram Operator Manual Screw Compressor SM Tri-Voltage, SIGMA CONTROL 2 9_5875 33 USE...
- Page 127 Annex 13.4 Electrical Diagram Operator Manual Screw Compressor 9_5875 33 USE SM Tri-Voltage, SIGMA CONTROL 2...
- Page 128 Annex 13.4 Electrical Diagram Operator Manual Screw Compressor SM Tri-Voltage, SIGMA CONTROL 2 9_5875 33 USE...
Need help?
Do you have a question about the SM 7.5 and is the answer not in the manual?
Questions and answers