
Related Manuals for Yardworks 054-5752-2


Summary of Contents for Yardworks 054-5752-2
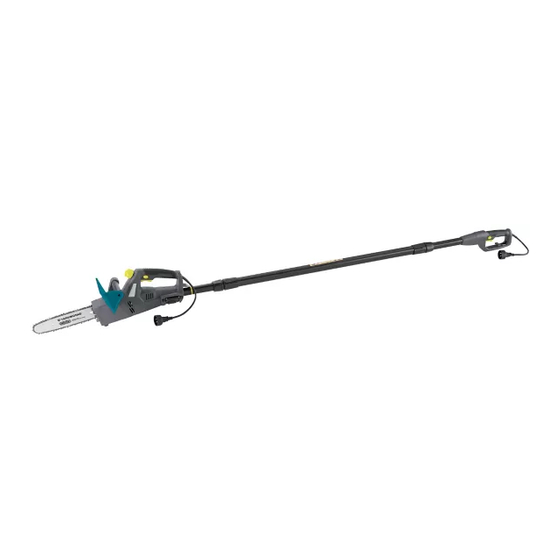
- Page 1 Electric Convertible Pole Saw/Chainsaw model number 054-5752-2 | contact us: 1.866.523.5218 IMPORTANT: Instruction Read and follow all safety rules and operating Manual instructions before using this product.
- Page 2 054-5752-2 | contact us: 1.866.523.5218 SPECIfICATIONS KNOW YOUR POlE SAW SYMBOlS SAfETY INfORMATION ExPlOdEd VIEW PARTS lIST ASSEMBlY OPERATION MAINTENANCE ElECTRICAl TROUBlESHOOTING WARRANTY Type: Pole Saw/Chainsaw Motor: 120 V AC, 60 Hz, 6 A Horsepower: 1 HP Wattage:...
- Page 3 054-5752-2 | contact us: 1.866.523.5218 Oil Cap Cord lock Pole Saw Handle Chainsaw Extension Pole Scabbard WARNING: If any parts are damaged or missing, do not operate this product until the parts are replaced. Using a product with damaged or missing parts could result in serious personal injury.
- Page 4 054-5752-2 | contact us: 1.866.523.5218 Some of the following symbols may be used on this product. Please study them and learn their meaning. Proper interpretation of these symbols will allow you to operate the product better and more safely.
- Page 5 054-5752-2 | contact us: 1.866.523.5218 Save all warnings and instructions for future reference. The term “power tool” in the warnings refers to your mains-operated (corded) power tool or battery-operated (cordless) power tool. WORK AREA SAFETY • Keep work area clean and well lit. Cluttered or dark areas invite accidents.
- Page 6 054-5752-2 | contact us: 1.866.523.5218 • Avoid accidental starting. Ensure the switch is in the off position before connecting to power source and/or battery pack and when picking up or carrying the tool. Carrying power tools with your finger on the switch or energizing power tools that have the switch on invites accidents.
- Page 7 054-5752-2 | contact us: 1.866.523.5218 or body with the saw chain. • Always hold the chainsaw with your right hand on the rear handle and your left hand on the front handle. Holding the chainsaw with a reversed hand configuration increases the risk of personal injury and should never be done.
- Page 8 054-5752-2 | contact us: 1.866.523.5218 • Contact of the guide-bar tip with any object should be avoided. • Tip contact may cause the guide bar to move suddenly upward and backward, which may cause serious injury. • Always use two hands when operating the chainsaw.
- Page 9 054-5752-2 | contact us: 1.866.523.5218 CAUSES AND OPERATOR PREVENTION OF KICKBACK (See Fig. 1 – 2) Rotational kickback Kickback danger zone KICKBACK ROTATIONAL DANGER ZONE KICKBACK Fig. 1 Fig. 2 Kickback may occur when the nose or tip of the guide bar touches an object, or when the wood closes in and pinches the saw chain in the cut.
- Page 10 054-5752-2 | contact us: 1.866.523.5218 • Push and Pull — This reaction force is always opposite to the direction the chain is moving where contact is made with the wood. Thus, the operator must be ready to control the PUll when cutting on the bottom edge of the bar, and the PUSH when cutting along the top edge.
- Page 11 054-5752-2 | contact us: 1.866.523.5218...
- Page 12 054-5752-2 | contact us: 1.866.523.5218 Item description drawing Oil cap 311011733 Guard 311021733 Chainsaw assembly 311031733 Tension assembly 311041733 Slide cover assembly 311051733 Washer 33301420A Sprocket 33900420 C-Clip 32900420 Cord holder 34135402 Scabbard 34114155 Chain 31101155 311001733 Handle assembly...
- Page 13 054-5752-2 | contact us: 1.866.523.5218 UNPACKAGING • Carefully remove the product and any accessories from the box. Make sure that all items listed in the packing list are included. • Inspect the product carefully to make sure no breakage or damage occurred during shipping.
- Page 14 054-5752-2 | contact us: 1.866.523.5218 CONNECTING THE POLES (SEE FIG. 4) Before using the pole saw, assembly is required. When removed from the box, the three poles are connected by an electrical cord, as shown. • Unscrew the collar from the threaded base on the centre pole, and push back over the cord to the lower pole.
- Page 15 054-5752-2 | contact us: 1.866.523.5218 CONNECTING THE POLES TO CHAINSAW (SEE FIG. 5) • lift up the cam lock (1). • lift up the cover (2). • Insert the chainsaw pole into the chainsaw. do not use force when inserting the pole. It should slide into position where it is marked with a yellow line (3).
- Page 16 054-5752-2 | contact us: 1.866.523.5218 APPLICATIONS You can use this product as a pole saw for the purposes listed below: • limbing • Pruning You can also use this product as a chainsaw for the purposes listed below: • Basic limbing, felling, and woodcutting • Removing buttress roots...
- Page 17 054-5752-2 | contact us: 1.866.523.5218 CONNECTING TO THE POWER SUPPLY Use as a Chainsaw (See fig. 8) • Plug power cord into the extension cord. Use as a Pole Saw (See fig. 9) • Secure the chainsaw power cord with cord lock.
- Page 18 054-5752-2 | contact us: 1.866.523.5218 STARTING AND STOPPING (SEE FIG. 10) To start the motor: • Connect the saw to the power supply. • Place your thumb on the lock-off button, press and hold the lock-off button. • fully depress the trigger switch and release the lock-off button.
- Page 19 054-5752-2 | contact us: 1.866.523.5218 ADJUSTING THE POLE EXTENSION • disconnect the pole saw from the power supply. • Align top and bottom sections. • Using a screwdriver, press on the locking tab. • Slide the top section over the bottom one.
- Page 20 054-5752-2 | contact us: 1.866.523.5218 PREPARATION FOR CUTTING (SEE FIG. 12 – 13) • Wear non-slip gloves for maximum grip and protection. • Maintain a proper grip on the unit whenever the motor is running. Use your right hand to firmly grip the rear handle while your left hand has a firm grip on the pole shaft.
- Page 21 054-5752-2 | contact us: 1.866.523.5218 • Release the trigger as soon as the cut is completed. failure to follow proper cutting procedures will result in the bar and chain binding and becoming pinched or trapped in the limb. If this should happen: • Stop the motor and remove the battery from the pole saw.
- Page 22 054-5752-2 | contact us: 1.866.523.5218 LIMBING AND PRUNING (SEE FIG. 14 – 15) This unit is designed for trimming small branches and limbs up to 6” (15.2 cm) in diameter. for best results, observe the following precautions. • Plan the cut carefully. Be aware of the direction in which the branch will fall.
- Page 23 054-5752-2 | contact us: 1.866.523.5218 GENERAL MAINTENANCE Avoid using solvents when cleaning plastic parts. Most plastics are susceptible to damage from various types of commercial solvents and may be damaged by their use. Use a clean cloth to remove dirt, dust, oil, grease, etc.
- Page 24 054-5752-2 | contact us: 1.866.523.5218 CHAIN TENSION (SEE FIG. 16 – 17) • Stop the motor and disconnect from power supply before setting the chain tension. Make sure the guide bar nut is loose enough to finger tighten. Turn the chain tensioning screw (see fig.
- Page 25 054-5752-2 | contact us: 1.866.523.5218 REPLACING THE BAR AND CHAIN (SEE FIG. 18 – 21) • Remove the lock knob and chain cover. • The bar contains a bar stud slot that fits over the bar stud. The bar also contains a chain tensioning pin hole that fits over the chain tensioning pin.
- Page 26 054-5752-2 | contact us: 1.866.523.5218 • The chain is correctly tensioned when there is no slack on the underside of the bar, the chain is snug, and it can be turned by hand without binding. Chain Sprocket Rotation Remove Cap...
- Page 27 054-5752-2 | contact us: 1.866.523.5218 CHAIN MAINTENANCE (SEE FIG. 23) for smooth and fast cutting, the chain needs to be maintained properly. The following conditions indicate that the chain requires sharpening: • Wood chips are small and powdery. • The chain must be forced through the wood during cutting.
- Page 28 054-5752-2 | contact us: 1.866.523.5218 HOW TO SHARPEN THE CUTTERS (SEE FIG. 24 – 27) Be careful to file all cutters to the specified angles and to the same length, as fast cutting can be obtained only when all cutters are uniform.
- Page 29 054-5752-2 | contact us: 1.866.523.5218 QUICK REFERENCE OF CHAIN & BAR ASSEMBLY (SCREW TENSION) LOCKING KNOB 1. Release chain tension by turning the 2. Unscrew t he locking knob. 3. Remove t he cover. tensioning screw, located behind the chain bar, counter clockwise.
- Page 30 054-5752-2 | contact us: 1.866.523.5218 DOUBLE INSULATED The pole saw is double insulated to provide a double thickness of insulation between you and the tool’s electrical system. All exposed metal parts are isolated from the internal metal motor components with protective insulation.
- Page 31 054-5752-2 | contact us: 1.866.523.5218 GUIDELINES FOR USING EXTENSION CORDS USE THE PROPER ExTENSION CORd. Make sure your extension cord is in good condition. When using an extension cord, be sure to use one of heavy enough gauge to carry the current your product will draw.
- Page 32 054-5752-2 | contact us: 1.866.523.5218 PROBlEM POSSIBlE CAUSE SOlUTION Check chain tension for Tension the chain. Refer to Chain Bar and chain overtightened condition Tension earlier in this manual. running hot and smoking. Bar lube reservoir empty Check the bar lube reservoir.
- Page 33 (120) days from the date of retail purchase. Yardworks Canada will not be liable for incidental or consequential loss or damage.
Need help?
Do you have a question about the 054-5752-2 and is the answer not in the manual?
Questions and answers
I have a Electric chainsaw model 054-5752-2, my chainsaw keeps on coming off , I had it apart , I lost a part but not sure what it is!