Table of Contents
Advertisement
Advertisement
Table of Contents

Subscribe to Our Youtube Channel
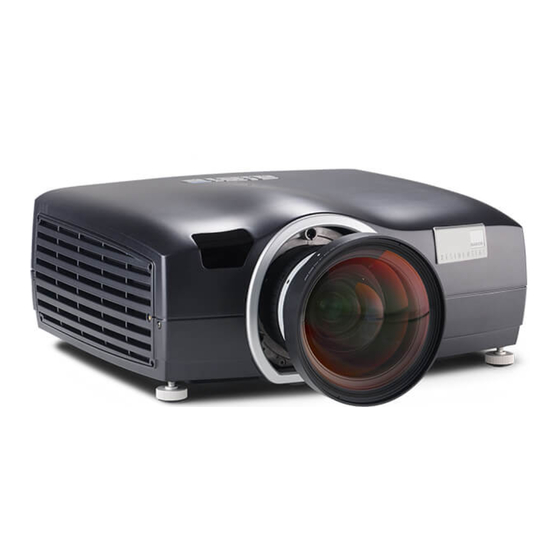
Related Manuals for Barco Orion 1080


Summary of Contents for Barco Orion 1080
- Page 1 ORION User & Safety Manual...
- Page 3 1 Contents of this User Manual Introduction Overview Training Symbols used in this documentation Safety and compliance General safety considerations Information/Warning - Potential Mercury Vapor Health Issues FCC compliance Disposal information 2.4.1 Statement WEEE (Waste Electrical and Electronic Equipment) 2.4.2 Disposal of batteries in the product 2.4.3 Turkey RoHS compliance...
- Page 4 4.13 Connecting control interfaces 4.14 Source format integrity – EDID 4.15 Image sizes Overview Keypad and indicator Wireless remote control Connectors 5.3.1 Signal connectors 5.3.2 Control connectors Menu system 5.4.1 Top menu 3D main menu 5.5.1 3D > Dual head setup sub menu Picture main menu 5.6.1 Picture >...
- Page 5 6.7.2 Setting the background color 6.7.3 Setting OSD menu timeout 6.7.4 Selecting the startup logo Picture by Picture (PbP) PIN code 6.10 Disabling the wireless remote control (IR) receivers 6.11 Software upgrades Optimizing the image Calibration data 7.1.1 Updating RealColor™ calibration data 7.1.2 RealColor™...
- Page 7 Orion Cinemascope (2560x1080) 1.2 Training Training is available at the Barco University, with course levels ranging from basic projector use to advanced set-up and configuration across multiple applications. Go to www.barco.com for more information. 1.3 Symbols used in this documentation WARNING: Potential danger to people or equipment when using the product in certain ways.
-
Page 9: Safety And Compliance
2 Safety and compliance 2.1 General safety considerations • Use only the cables and cords supplied with the projector or original replacement cables. Using other cables or cords may lead to malfunction and permanent damage to the unit. • Always use 3-prong (grounded) power cord to ensure proper grounding of the unit. Never use 2-prong power cords, as this is dangerous and could lead to electrical shock. -
Page 10: Fcc Compliance
If operation of this equipment does cause interference with radio communications services, which can be deter- mined by turning the equipment off and on, you are encouraged to contact the installer used, or consult a Barco Support representative who will try to correct the interference by one or more of the following measures: •... -
Page 11: Disposal Information
For more information about recycling of this product, please contact your local city office or your municipal waste disposal service. For details, please visit the Barco website at: http://www.barco.com/en/AboutBarco/weee. 2.4.2... - Page 12 2.6 Light beam Hazard Distance (HD) Light beam Hazard Distance (HD) is the distance from the source at which the intensity or the energy per surface unit becomes lower than the applicable safety limit. The light beam can be considered dangerous if the operator is within the HD.
- Page 13 2.7 HD in function of the lens Throw Ratio 2.7.1 Hazard Distance Throw Ratio (TR) is the ratio of the distance to the screen (throw) to the screen width. Hazard Distance in function of modifying optics: ORION Throw Ratio...
-
Page 15: What Is In The Box
B: Side cover/Air-inlet C: Ceiling mount cover/Air outlet Check that all components are in place and undamaged when unpacking the unit. Contact Barco immediately if items are missing or damaged. Save original packaging materials for use with future shipping or transport. -
Page 17: System Considerations
4 Installation 4.1 System considerations Chapter 5, Overview, provides more information on the various features of the projector. Safety first: Projectors and other equipment that are not mounted properly represent a potential danger to people and may result in injury or death! Installation should only be performed by trained and experienced personnel in order to achieve the desired results. - Page 18 15 cm. 4.2.1 Ventilation accessories A set of optional accessories is available for this projector, covering anything from cables and lenses to air flow parts and lens control. For more information visit www.barco.com or contact your preferred Barco representative.
-
Page 19: Locking The Projector
4.3 Ceiling and rig mounting Use the three mounting holes on the projector underside to securely fix the projector to a ceiling or rig mount. Use M6 screws that extend maximum 9 mm into the projector body. Figure 4-2. Ceiling/rig mounting holes 4.4 Locking the projector The projector can be physically locked using a Kensington lock. -
Page 20: Selecting A Lens
4.6 Selecting a lens The projector is delivered without a lens, enabling you to select a lens according to your desired image size and projection distance. The projector uses a bayonet mount system to precisely fix the lens in place. The lenses are manual, meaning zoom, focus and iris adjustments are done by hand manually. - Page 21 Note that the lens positioning when using lens shift may affect the accessibility of the lens button. If so, reposition the lens to gain access. 4.6.3 Lens range The table shows a selection of lenses available. Visit www.barco.com for the most up to date lens specifications. ITEM TYPE THROW RATIO...
-
Page 22: Lens Shift
To use the RS-232 or LAN control interfaces, please refer to the relevant SIS (Simplified Instruction Set) commands available for download on www.barco.com 4.9 Lens planarity (Scheimpflug adjustment) This adjustment is rarely needed, do not apply it unless it is required. - Page 23 4.10 Zoom, focus and iris These lens functions are manual (not motorized). • Adjust zoom to achieve the desired image size (if the lens has a zoom-function). • Then adjust focus to achieve a sharp image. If the image is not sharp all over the surface, please check the surface flatness and whether the lens axis is perpendicular to the projection surface.
-
Page 24: Making The Connections
Choice of control interface depends on the installation requirements. Attach the interfaces of choice and make sure all connectors are fully inserted and retained. Visit www.barco.com to download the relevant SIS (Simplified Instruction Set) commands or for more information. Power up the projector and the source 4.14 Source format integrity –... - Page 25 4.00 7.00 7.50 3.50 6.00 6.25 3.00 5.00 2.50 5.00 4.00 2.00 3.75 3.00 1.50 2.50 2.00 1.00 1.25 1.00 0.50 0.00 Projection distance Lens types and specifications may change without prior notice. For correct lens information please visit www.barco.com...
- Page 26 8,75 4.50 7.00 4.00 7.50 6.00 3.50 6.25 5.00 3.00 5.00 2.50 4.00 2.00 3.75 3.00 1.50 2.50 2.00 1.00 1.00 1.25 0.50 0.00 Projection distance Lens types and specifications may change without prior notice. For current information visit www.barco.com...
- Page 27 5 Overview Remote Control Receiver Interchangeable Projection Lens Projection Lens Release Button Figure 5-8. Projector front Remote Control Receiver Hot Air Exhaust Signal and Control Connector Panel Mains Power Connector Figure 5-9. Projector rear Keypad Figure 5-10. Projector top...
- Page 28 Accessory Mounting Features Ceiling/Rig Mounting Features Figure 5-11. Mounting features Lamp Door Air Inlet Figure 5-12. Projector left and right hand side...
-
Page 29: Keypad And Indicator
5.1 Keypad and indicator Figure 5-13. Projector top key pad VALUE POWER Power on or power off (standby) MENU Activate or deactivate on-screen menu system UP, DOWN, LEFT, RIGHT Select source when not in Shift or Menu mode Shift lens when not in Menu and after SHIFT/OK pressed Navigate when in Menu system SHIFT/OK Shift lens when not in menu system... -
Page 30: Wireless Remote Control
5.2 Wireless remote control INFO POWER SHIFT Batteries can be replaced by end-user. BACK MENU To replace the 2 standard AAA-batteries for this remote control, slide the lid at the back of the control downwards. Lift it off and remove the batteries. Replace with new SOURCE batteries and slide the lid back in place. -
Page 31: Control Connectors
5.3 Connectors Figure 5-15. Connector panel (see technical data for details) 5.3.1 Signal connectors CONNECTOR CONNECTOR FUNCTION NAME TYPE HDBaseT RJ45 Video over twisted pair DVI-I*) dual link Digital video (dual-link) HDMI HDMI type A Digital video DP (DisplayPort) Digital video (2) 9 pin mini D-sub Analog RGBHV video 3G-SDI... -
Page 32: Menu System
5.4 Menu system The various projector-settings can be controlled via the on-screen menu system. The menu system is accessed by the keypad on the projector or using the wireless remote control. Press the MENU key to enter or leave the menu system. Navigate the options using the arrow-keys. Select option with the OK key. -
Page 33: D Main Menu
5.5 3D main menu The 3D menu contains settings for turning 3D on and off, in addition to defining various aspects of setup using Dual Head and specifying the types of glasses to be used. 3D : Offers the possibility to switch the 3D function off and to choose between the following alternatives for setup: off, side by side (<60Hz only), frame sequential and dual head (<60Hz only) dual head setup:... - Page 34 5.5.1 3D > Dual head setup sub menu source 1: Choice of source. Alternatives are SDI1, SDI2, DVI, HDMI, VGA, HDBaseT, DisplayPort1, DisplayPort 2. For possible setup combinations, see Figure 5-18. Dual head setup possibilities. source 2: Choice of source. Alternatives are SDI1, SDI2, DVI, HDMI, VGA, HDBaseT, DisplayPort1, DisplayPort 2.
-
Page 35: Picture Main Menu
DICOM, SRP, custom, advanced (only available if enabled from service menu). If the profile is marked by an asterisk (*), this indicates that the original settings have been changed. RealColor: Barco’s proprietary color management suite. See RealColor sub menu. gamma: 10 predefined gamma curves: Film 2.2: Exponential 2.2 curve... - Page 36 5.6.1 Picture > RealColor sub menu BrilliantColor™: Texas Instruments DLP™ color processing. Bright: Max brightness, boosted color profile for highest perceived brightness. In this mode all segments and spokes of the color wheel are in use. Color: Max brightness, balanced color profile for better color performance. In this mode all segments and spokes of the color wheel are in use.
- Page 37 5.6.2 Picture > Advanced sub menu horizontal position: Shifts the image sideways (VGA only) vertical position: Shifts the image up or down (VGA only) phase: Adjust for stable image. A jittery image may appear with certain VGA sources. You may also press the AUTO button on the keypad or remote control to optimize.
-
Page 38: Installation Main Menu
5.7 Installation main menu image orientation: Rotate image in desktop front, desktop rear, ceiling front, ceiling rear. source scan: Search all input connectors for an active signal or stay on one connector. IR front Enable or disable front IR-receiver. IR rear Enable or disable rear IR-receiver. - Page 39 5.7.1 Installation > EDID sub menu VGA: Define the detailed timing descriptor in the EDID data for VGA connector. Select between auto, WUXGA, 1080@60 Hz, SX+, SXGA, 1366x768, 720@60 Hz, 720@50 Hz, XGA, SVGA, VGA. DVI: Define the detailed timing descriptor in the EDID data for DVI connector. Select between auto, WQXGA @ 60Hz, WUXGA@120Hz, WUXGA @ 60Hz,1080@20Hz, 1080@60 Hz, SX+, SXGA, 1366x768, 720@60 Hz, 720@50 Hz, XGA, SVGA, VGA.
- Page 40 SYNC 1, SYNC 2 If you use one of the sync connectors as 2D or 3D sync input, this may block the use of the same connec- tor as output. For more information on possible user scenarios, visit www.barco.com...
-
Page 41: Settings Main Menu
5.8 Settings main menu PIN code: Protect the projector from usage with a PIN. If enabled the projector will ask for the PIN at every start up. network : Set IP address, Subnet mask and default gateway TCP/UDP port number. DHCP is supported and is enabled by default, but can be disabled. - Page 42 5.8.1 Settings > Pin Code sub menu PIN code enable: The PIN code is disabled by default. If you want to enable/disable the PIN code you have to enter the current PIN (Default PIN: 1234). f PIN is entered incorrectly 3 times, it will ask for a PUK code, which is provided in printed form in the box.
- Page 43 5.8.2 Settings > Network sub menu change LAN settings: In this sub-menu you can switch the DHCP enabled function on or off. If off you can set a fixed IP-address. LAN DHCP: DHCP is supported and is enabled by default, but can be disabled under change LAN settings LAN IP address: Info field stating the current LAN IP address.
- Page 44 5.8.3 Settings > Factory Reset sub menu picture: Restores picture settings to factory default. Restores 3D settings to factory default. communication: Restores communication settings to factory default. RealColor Restores RealColor settings to factory default. other: Restores other settings of your choice to factory default. 5.8.4 Settings >...
-
Page 45: Languages Main Menu
5.9 Languages main menu Select the desired menu language. • Supported languages: English, French, German, Spanish, Norwegian, Swedish, Russian, Korean, Japanese, Chinese Traditional, Chinese Simplified, Portuguese, Italian. • Default: English... -
Page 46: Status Main Menu
5.10 Status main menu source information: Simple and advanced source information. synchronization information: Displays the current synchronization information. Includes 2D framelock, 3D source sync and 3D display sync. part number: Projector part number. serial number: Projector serial number. manufactured (y): Year of manufacturing. - Page 47 5.10.1 Status > Source Information sub menu advanced: Access to sub menu for more settings depending on source used. See 4.10.2 Status > Source Information > Advanced sub menu source 1: Info on which source is in use. format: Displays resolution and frequency for the source in use. source 2: Info on which source is in use.
- Page 48 5.10.2 Status > Source Information > Advanced sub menu resolution: Info on current source resolution. total image size: Info on current horizontal and vertical image size. sync frequency : Info on current horizontal and vertical sync frequency for the projector. pixelclock: Week of manufacturing.
- Page 49 5.10.3 Status > Source Synchronisation sub menu Indicates which 3D mode is used. 2D frame lock: Indicates what the projector locks to in 2D frequency: Shows the current frequency of the locking signal status: Indicates the locking status phase: Indicates phase between the source and the locking signal 3D source sync: Indicates where the source L/R sync is connected source has in-band sync:...
-
Page 51: Image Alignment
6 Functionality 6.1 Powering On and Off 6.1.1 Manual power control Switch the projector between On and Standby using the POWER switch on the keypad or the wireless remote control. The keypad STATUS indicator is blue when the projector is up and running, flashing yellow when cooling down and yellow when in standby. -
Page 52: System Status
6.3 Language The menu system default language is English. The available languages are: • English • French • German • Spanish • Russian • Norwegian • Swedish • Korean • Japanese • Chinese Simplified • Chinese Traditional • Portuguese • Italian To change the language of the menu system, click top menu and select your desired language. -
Page 53: Lamp Power
Using the wireless remote control, press the desired dedicated source select button • Using the RS232 or LAN control interfaces, please see the relevant SIS (Simplified Instruction Set) commands available to download on www.barco.com • 6.7 On screen display (OSD) messages When detecting sources and using the various features of the projector, OSD messages will appear on the screen. -
Page 54: Selecting The Startup Logo
6.7.4 Selecting the startup logo When the projector is starting up, the manufacturer logo is displayed in the entire image. Setting the logo to BLACK will disable the manufacturers default logo. Go to menu entry SETTINGS > SPLASH to change this setting. 6.8 Picture by Picture (PbP) You may choose to view two sources simultaneously as a picture by picture. -
Page 55: Software Upgrades
To upgrade your projector software follow the method and sequence described below: You will need a USB memory stick set up with a FAT-file system to perform this upgrade Access the upgrade software from www.barco.com Download and save the firmware.zip-file to your PC desktop Download and save the firmware_<version>.tar file to the root of a memory stick... -
Page 57: Optimizing The Image
All color calibration is done using Barco’s RealColor™ solution. 7.1 Calibration data All Barco projectors are measured and calibrated with high precision equipment at the factory for the best out-of-box experience. Over the lifetime of the lamps the characteristics of the projector might change slightly. - Page 58 7.1.2 RealColor™ modes Before any color correction is applied to the image, RealColor™ must be enabled. Go to menu PICTURE > REALCOLOR > COLOR CORRECTION to enable RealColor™. RealColor™ can operate in 3 modes: • Color temperature/white point correction only. •...
-
Page 59: Setting A White Point Or Color Temperature
7.2 Setting a white point or color temperature After enabling RealColor™ set the color temperature in the menu PICTURE > REALCOLOR > TEMPERA- TURE. Values between 3200K and 9300K can be selected. These color temperatures are tracking the “black body curve”- the black curved line in the center of CIE Chart in Figure 7-1. The default is the D65 illuminant at 6500K. - Page 60 7.3 Gamma The projector features a set of 6 built in gamma curves: Film 2.2, Film 2.4, Film 2.6, Film 2.8, Video 1, Video 2, Computer 1, Computer 2, Dynamic and DICOM 180. The different gamma curves are displayed below. The names of the curves are descriptive for their recommended use.
- Page 61 Figure 7-4. Film 2.8 gamma Figure 7-5. Video 1 gamma Figure 7-6. Video 2 gamma...
- Page 62 Figure 7-7. Computer 1 gamma Figure 7-8. Computer 2 gamma Figure 7-9. Dynamic gamma...
- Page 63 Figure 7-10. DICOM 180 Lux* (example HB color wheel: other shapes with other alternatives) * Several DICOM settings (10, 60, 180, 250, 400 Lux - The higher Lux number (ambient light), the steeper the curve.
- Page 65 8 Technical specifications Visit www.barco.com for the latest specifications.
-
Page 67: Lamp Change
9 Lamp change The lamp holder has an electronic lamp timer that tracks the life time of the lamp. The LED indicator on the key- pad will turn RED when the lamp life is expired. The lamp must be changed when the lifetime has expired. Failure to do so increases the risk of malfunction. -
Page 70: Production Address
Model certification name: © 2014 Barco nv. All rights reserved. All brands and trade names are the property of their respective owners. Specifications subject to change without prior notice. All values are typical and may vary. Please visit our website for latest specifications and product offerings.
Need help?
Do you have a question about the Orion 1080 and is the answer not in the manual?
Questions and answers