Table of Contents
Advertisement
Quick Links
XT-10P IP Intercom User Manual
About this manual
Thank you for choosing Xontel XT-10P IP Video Intercom. This manual is intended for
end users, who need to use and configure the XT-10P IP Intercom. It provides an
overview of the most essential functions and features of the product.
We highly appreciate your feedback about our products.
1
Advertisement
Table of Contents

Related Manuals for XONTEL XT-10P


Summary of Contents for XONTEL XT-10P
-
Page 1: About This Manual
Thank you for choosing Xontel XT-10P IP Video Intercom. This manual is intended for end users, who need to use and configure the XT-10P IP Intercom. It provides an overview of the most essential functions and features of the product. - Page 2 Content 1. Product overview ....................4 1.1 Product Description ..................4 1.2 Power connection .................... 4 2. Daily use ......................... 5 2.1 Making a call ....................5 2.2 Receiving a call ....................5 2.3 Unlock by RF Card ..................5 3.
- Page 3 3.6 LED settings ....................12 3.7 Relay ......................13 3.8 Input ......................14 3.9 Live Stream ....................15 3.10 RTSP ......................16 3.11 ONVIF ......................16 3.12 Motion ......................17 3.13 Card settings ....................18 3.13.1 Import / Export Card Data ..............18 3.13.2 Obtain and Add Card .................
-
Page 4: Product Overview
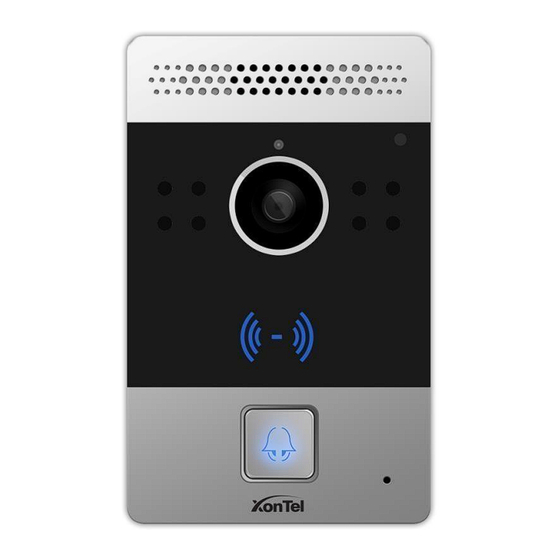
Xontel XT-10P is a SIP-compliant, hands-free one button video outdoor phone. It can be connected with your Xontel IP Phone for remote unlock control and monitor. Users can operate the indoor phone to communicate with visitors via voice and video, and use RF card to unlock the door. It’s applicable in villas, office and so on. -
Page 5: Daily Use
LED turns green, it means the call has been answered. 2.2 Receiving a call User can use IP phone or indoor monitor to call XT-10P and XT-10P will answer it automatically by default. If user disable auto answer, pressing button to answer incoming call. -
Page 6: Configuration
The Xontel XT-10P uses DHCP IP address by default. If IP address is unknown, press and hold call button for a short period of time (about 5s) after LED light turns blue, XT-10P will announce its IP continuously. Press once again to stop. -
Page 7: Phone Basic Settings
Network Information To display the device’s Networking status(LAN Port),such as Port Type(which could be DHCP/Static/PPPoE), Link Status, IP Address, Subnet Mask, Gateway, Primary DNS server, Secondary DNS server, Primary NTP server and Secondary NTP server (NTP server is used to synchronize time from internet automatically) Account Information To display device’s Account information and... -
Page 8: Call Feature
3.2.2 Call Feature Go to Phone->Voice, to configure call feature settings. Sections Description Others Return Code When Refuse: Allows user to assign specific code as return code to SIP server when an incoming call is rejected. Auto Answer Delay: To configure delay time before an incoming call is automatically answered. -
Page 9: Call Log
3.2.4 Call Log Go to Phone->Call Log, to check XT-10P call history. -
Page 10: Door Log
Received calls, Missed calls and Forwarded calls. Users can check the call history in detail. Tick the number to delete or delete all logs. 3.2.5 Door Log Go to Phone->Door Log, to check XT-10P door unlock history. Sections Description Door Log To display unlock history. -
Page 11: Network Settings
3.4 Call settings Go to Intercom->Basic, to configure basic call settings. 3.4.1 No Answer Call Enable it, if there is no answer from push button number over 60s (default value), XT-10P will call predefined 'No Answer Call' number. 3.4.2 Push Button (1) Push Button: To configure the destination number or IP you want to contact with. -
Page 12: Photoresistor And Tamper Alarm
Tamper Alarm Enable the Tamper Alarm, if the gravity of XT-10P changes, the phone will alarm. The Threshold value is smaller, the faster the reaction of device. LED settings Go to Intercom->LED Setting, to configure XT-10P IP Intercom LED settings. -
Page 13: Relay
Description Relay To configure some settings about unlock Relay ID: XonTel XT-10P support 2 relays Relay Type: Different locks use different relay types, default state or invert state. If you connect the Lock in NO connector, select default state. Otherwise using invert state. -
Page 14: Input
Username & password: Users can setup the username and password for HTTP unlock. By default username is admin and password is xontel URL format: http://192.168.10.236/fcgi/do?action=OpenDoor&UserName=admin&Passwor d=xontel&DoorNum=1 where: 192.168.10.236 is XT-10P IP address admin is XT-10P username xontel is XT-10P password Input Go to Intercom->Input, to configure input settings. -
Page 15: Live Stream
(such as http://192.168.35.48/mac=000 ). Then you will check this information which capture the network packet. Open Relay: To choose a suitable relay for input connector. 3.9 Live Stream Go to Intercom->Live Stream, to check the real-time video of XT-10P. -
Page 16: Rtsp
Sections Description RTSP Basic To active the RTSP function, then XT-10P can be monitored. RTSP Stream To enabled RTSP video and select the video codec. XT-10P supports H264 video codec. 3.11 ONVIF Go to Intercom->ONVIF, to configure XT-10P ONVIF settings... -
Page 17: Motion
Password: To modify the password you want. xontel by default. Note: User name and password is used for authentication. 3.12 Motion Go to Intercom->Motion, to configure motion detection settings in XT-10P. Sections Description Motion detection is used to record the change of the Motion Detection surrounding environment. -
Page 18: Card Settings
Go to Intercom -> Card setting, to manage card access system. 3.13.1 Import / Export Card Data XT-10P supports import or Export the card data file, which is convenient for administrator to deal with a large number of cards. 3.13.2 Obtain and Add Card ①... -
Page 19: Door Card Management
3.13.3 Door card Management Valid card information will be shown in the list. Administrator could delete one card’s access permission or empty all the list. -
Page 20: Action
3.14 Action Go to Intercom -> Action, to configure Email, FTP and SIP call notification in XT-10P. - Page 21 Sections Description Sender Email Address: Input the sender email address Email Notification Receiver Email Address: Input the receiver email address SMTP Server Address: Enter the SMTP server format SMTP User name: Enter the SMTP Username SMTP password: Enter the sender email password Email Subject: Enter the subject name.
-
Page 22: Account Settings
3.15 Account settings 3.15.1 Basic Go to Account -> Basic, to configure XT-10P basic account settings. - Page 23 Sections Description SIP Account To display and configure the specific Account settings. Status: To display register result. Display Name: Which is sent to the other call party for display. Register Name: Allocated by SIP server provider, used for authentication. ...
-
Page 24: Advanced
3.15.2 Advanced Go to Account -> Advanced, to configure XT-10P advanced account settings... - Page 25 Sections Description SIP Account To display current Account settings or to select which account to display. Codecs To display and configure available/unavailable codecs list. Codec means coder- decoder which is used to transfer analog signal to digital signal or vice versa. Familiar codecs are PCMU(G711U), PCMA(G711A), G722 and G729.
- Page 26 Session Timer To display or configure session timer settings. Active: To enable or disable this feature, If enable, the ongoing call will be disconnected automatically once the session expired unless it’s been refreshed by UAC orUAS. Session Expire: Configure session expiretime. ...
-
Page 27: Upgrade
3.16 Upgrade 3.16.1 Basic In XT-10P web page go to Upgrade -> Basic. Sections Description To select upgrading zip file from local or a remote server automatically. Upgrade Note: Please make sure it’s right file format for right model. Firmware version To display firmware version, firmware version starts with model name. -
Page 28: Advanced
Export Log: Click to export temporary system log file to localPC. PCAP To make Packet capture for XT-10P Intercom. If you want to start packet capture in XT-10P press “ Start “. If you want to finish packet capture in XT-10P press “ Stop“ ... -
Page 29: Security
New Password: Input new password you intend to use. Confirm Password: Repeat the new password. Session Time Out To set a time out value for XT-10P web login session Session Time Out Value: Enter a time out value in seconds for XT-10P web login session.
Need help?
Do you have a question about the XT-10P and is the answer not in the manual?
Questions and answers