Table of Contents
Advertisement
Quick Links
Advertisement
Table of Contents

Related Manuals for Westinghouse WRCG930SB


Summary of Contents for Westinghouse WRCG930SB
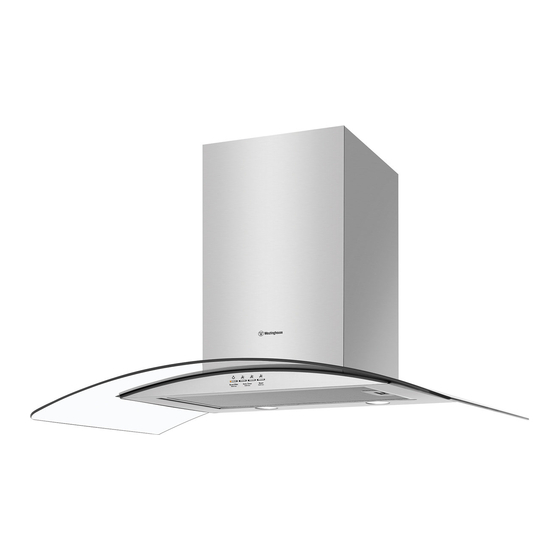
- Page 1 INSTALLATION & USER MANUAL CANOPY RANGEHOOD WRCG930SB, WRCG940SB...
- Page 2 CONGRATULATIONS CONTENTS Dear customer, Important safety instructions ............3 Product description ................5 Congratulations and thank you for choosing our canopy rangehood. We are sure you will find your new rangehood Before using your appliance for the first time ....6 a pleasure to use. Before you use your rangehood, Installing oven accessories .............7 we recommend that you read through the whole user Using your oven .................
-
Page 3: Important Safety Instructions
This manual explains the proper use of your new WARNING WARNING Westinghouse canopy rangehood. Please read this manual carefully before using the product. This manual These warnings have been provided in the interest of should be kept in a safe place for handy reference. This safety. - Page 4 IMPORTANT SAFETY INSTRUCTIONS (CONTINUED) Electrical connection Check that the mains voltage matches with the voltage on the data plate inside the canopy rangehood. Check that the installation complies with standards of local building, gas and electrical authorities. Before connecting to the mains supply ensure that the mains voltage corresponds to the voltage on the rating plate inside the cooker hood.
-
Page 5: Product Description
PRODUCT DESCRIPTION WRCG930SB WRCG940SB Upper Flue mounting bracket Telescopic flue cover Lower Flue mounting bracket Lower Flue cover 150-120 reducer Exhaust transition duct Hood motor body Glass fixing screws x4 Glass canopy Filter Fig. 3 Additional items required for installation Technical specification •... -
Page 6: Rangehood Dimensions
RANGEHOOD DIMENSIONS WRCG930SB Min 730/ Max 1115 Fig. 4 DIMENSIONS... - Page 7 WRCG940SB Min 745/ Max 1130 Fig. 5 DIMENSIONS...
- Page 8 WARNING WARNING Failure to install the screws or fixing device in accordance with these instructions may result in electrical hazards. WRCG930SB WRCG940SB Telescopic flue cover Telescopic flue cover mounting bracket mounting bracket...
- Page 9 INSTALLATION Install flue cover wall mounting brackets with Hang the body hood on the mounting screws then suitable fixings. Install suitable screws for rangehood secure at the anti-tilt locations as indicated in Fig 9 mounting points (to support a total weight of 30kg) to the wall as marked (Fig.
- Page 10 INSTALLATION Insert power cord to power outlet Insure locking tab of lower flue cover to be bent before installing covers Fig. 13 Fig. 11 Fix glass canopy 10. Locate lower flue cover tab Important: Rubber washer to be assembled against glass Fig.
- Page 11 INSTALLATION Slide telescopic flue cover to upper position and fix 13. Replace filter with screws provided Fig. 17 Fig. 15 12. Remove polystyrene packaging foam behind the fan motor. Fig. 16 INSTALLATION...
- Page 12 INSTALLATION Depending on the preferred installation/ducting mode, follow step 14a or 14b below. Recirculating mode (Fig. 18). Using the centre line, 14a. secure the recirculating T-piece to the wall with suitable screws/fixings (optional kit AR610RK). Install flexible pipe between T-piece and reducer. Use cable ties or suitable duct tapeto secure flexible pipe to T-piece and reducer (Fig.
-
Page 13: Using Your Rangehood
USING YOUR RANGEHOOD CARE & MAINTENENCE • Best results are obtained by using a low speed for normal conditions and a high speed when odours are WARNING CAUTION concentrated. External surfaces are susceptible to scratches and • Turn the hood on for a few minutes before you start abrasions, so please follow the cleaning instructions cooking. - Page 14 INSTALLATION Hand washing Changing the LED lamps Soak grease filters for about one hour in hot water with If LED lamps need replacing, they must be replaced by a grease-loosening cleaner, then rinse off thoroughly lamps as stated in the technical specifications. with hot water.
- Page 15 INSTALLATION PROBLEM WRCG930SB Check that the hood is connected to an electrical supply The cooker hood will not start Check that a fan speed has been selected Check that the fan speed is set high enough for the task The grease filters are clean...
-
Page 16: Optional Ducting Accessories
OPTIONAL DUCTING ACCESSORIES AR150RC AR150F AR150WV AR610RK AR150FD AR125FD AR610CF PART NUMBERS DESCRIPTION AR150RC 150mm G/Bond Roof Cowl AR150F 150mm G/Bond Flue 1200m AR150WV 150mm Wall Vent & duct AR610RK Recirculating kit (150–120m reducer, T-piece & carbon filters) AR610CF Replacement carbon filter AR150FD 150mm aluminum flexible duct AR125FD... - Page 17 NOTES NOTES...
- Page 18 NOTES NOTES NOTES...
- Page 19 (c) ‘ASC’ means Electrolux’s authorised serviced centres; the Appliance; (d) ‘Westinghouse’ is the brand controlled by Electrolux Home Products In addition, Electrolux is not liable under this warranty if: Pty Ltd of 163 O’Riordan Street, Mascot NSW 2020, ABN 51 004...
- Page 20 Top Service encompasses the after sales service provided by The Electrolux Group to consumers including delivery, home service and spare parts. and WESTINGHOUSE are trademarks of Westinghouse Electric Corporation. Used under license. All Rights Reserved. © 2017 Electrolux Home Products Pty Ltd.
Need help?
Do you have a question about the WRCG930SB and is the answer not in the manual?
Questions and answers