Table of Contents
Advertisement
Quick Links
Download this manual
See also:
Instruction Manual
Phottix Odin TTL Trigger for Canon
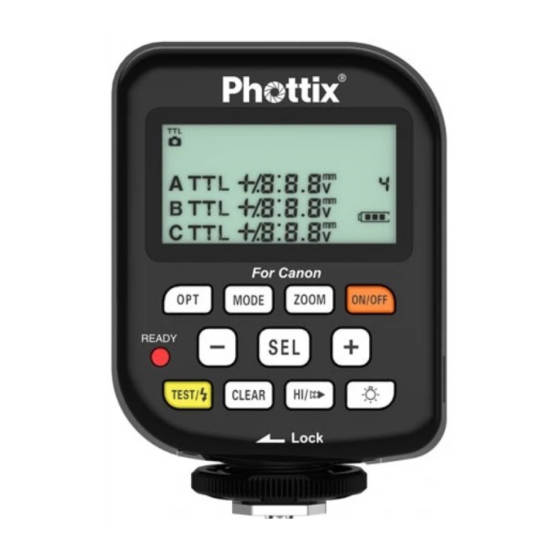
Parts
Transmitter Control Unit (TCU)
1. LCD Screen
2. Options Button
3. Mode Button
4. Zoom Button
5. Power Button
6. LED
7. + / - / Selection Buttons
8. Test Button
9. Clear Button
10. High Speed Sync / Second Curtain Sync Button
11. LCD Backlight Button
12. USB Port
13. Battery Compartment
14. Locking Ring
15. Hot Shoe
Please Note: After adding turning on the Phottix Odin TCU and receivers you
must take one photograph for the TCU to "learn" about your camera and flashes.
The first shot you take will not be properly exposed. Subsequent images will be
correct.
Slave mode does not need to be set on flashes on Phottix Odin receivers.
Many TTL flashes have been tested but the manufacturer cannot guarantee that
all third party TTL flashes will function properly with the Phottix Odin. It has been
designed and optimized for original Canon flashes using the ETTL II system.
Tip: Turn off all devices – flashes/strobes, cameras, and the Phottix Odin TCU
and receivers - when connecting and disconnecting devices.
Advertisement
Table of Contents

Related Manuals for Phottix Odin TTL


Summary of Contents for Phottix Odin TTL
- Page 1 Slave mode does not need to be set on flashes on Phottix Odin receivers. Many TTL flashes have been tested but the manufacturer cannot guarantee that all third party TTL flashes will function properly with the Phottix Odin. It has been designed and optimized for original Canon flashes using the ETTL II system.
- Page 2 6. When the power is very low, the LED will flash red light every 2 seconds. Turning the TCU and receiver on/off 1. To turn on the Phottix Odin TCU: Press and hold the Power Button until an image appears on the LCD screen. To turn off: Press and hold the Power Button until the LCD screen goes blank.
- Page 3 Transmission channels can be changed when CH is active. This will change the channel the TCU uses to transmit. Adjusting flash zoom The Phottix Odin allows the zoom level of flashes to be set wirelessly. Zoom can be set as TTL or Manual. When TTL is selected: The flash zoom setting will change dynamically as a camera zoom ring is adjusted.
- Page 4 Zoom and EV settings currently in the TCU. Using the Test Button The test button will fire all flashes connected to Phottix Odin receivers that are on the same channel as the TCU. 1. Press the Test button. 2. Flashes will fire in sequence: Group A, followed by Groups B and C.
- Page 5 GHz. Its performance can be affected by electrical current, magnetic fields, radio signals, wireless routers, cellular phones, and other electronic devices. Environmental objects, such as large buildings or walls, trees, fences, or cars can also affect performance. If your Phottix Odin receiver will not trigger move its location slightly.
- Page 6 FCC ID: XBYFKT05ZA This device complies with Part 15 of the FCC Rules. Operation is subject to the following two conditions: (1) this device may not cause harmful interference, and (2) this device must accept any interference received, including interference that may cause undesired operation.
Need help?
Do you have a question about the Odin TTL and is the answer not in the manual?
Questions and answers