Advertisement
Available languages
Available languages
Quick Links
THIS INSTRUCTION BOOKLET CONTAINS IMPORTANT SAFETY INFORMATION.
DO NOT RETURN YOUR UNIT
TO THE STORE
Contact us fi rst
www.sauder.com
For immediate service,
our website is available
24 hours a day, 7 days a week
to order replacement parts,
access assembly tips,
register your product,
and view Sauder products.
Mon-Fri - 9am-5:30pm ET
United States and Canada (except holidays)
Consumer Services 1-800-523-3987
Most replacement parts ship from our
facility in one or two business days.
The back pages of this book are French instructions.
Les pages de arrière de ce livre sont des instructions
françaises.
register your new purchase online
www.sauder.com
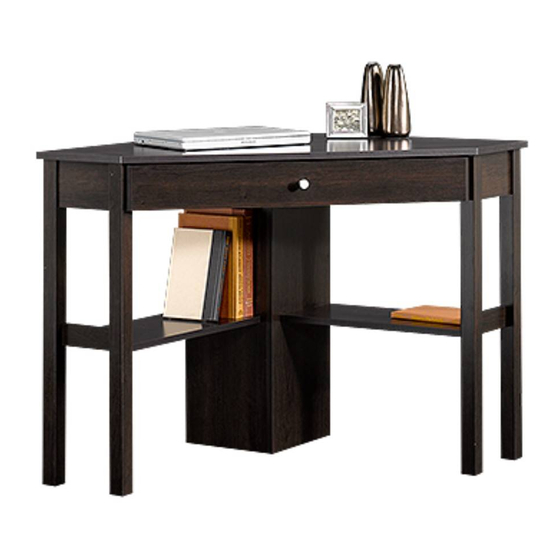
Corner Computer Desk
Model # 412314
Assembly Instructions
PLEASE READ AND KEEP FOR FUTURE REFERENCE.
NOTE
Record the date you purchased this unit and save the booklet for
future reference.
If you ever need to contact Sauder about this unit, refer to the lot #
and the model # when calling our toll-free number. For more
information about our furniture, company, or to order replacement
parts, please visit our web site.
Lot #: 353310
Date Purchased: ____________
05 / 16 / 13
Advertisement

Related Manuals for Sauder 412314


Summary of Contents for Sauder 412314
- Page 1 Les pages de arrière de ce livre sont des instructions françaises. If you ever need to contact Sauder about this unit, refer to the lot # and the model # when calling our toll-free number. For more information about our furniture, company, or to order replacement parts, please visit our web site.
-
Page 2: Parts Identification
PARTS IDENTIFICATION to help identify similar parts. to help identify similar parts. ITEM DESCRIPTION RIGHT UPRIGHT LEFT UPRIGHT SHELF BACK RIGHT FRONT LEG LEFT FRONT LEG RIGHT REAR LEG LEFT REAR LEG KEYBOARD FRONT KEYBOARD BACK KEYBOARD SIDE KEYBOARD SHELF DRAWER UPRIGHT SHELF MOLDING 412314... - Page 3 CABINET LEFT - 1 35GA CABINET RIGHT - 1 35GB DRAWER RIGHT - 1 DRAWER LEFT - 1 35GC 35GD HIDDEN CAM - 31 CAM SCREW - 16 CAM DOWEL - 15 HINGE - 2 KNOB - 1 CAM COVER - 4 412314...
- Page 4 BLACK 7/8” MACHINE SCREW - 1 SILVER 5/8” FLAT HEAD SCREW - 4 SILVER 9/16” LARGE HEAD SCREW - 2 GOLD 5/16” FLAT HEAD SCREW - 8 ASSEMBLY TOOLS REQUIRED TIP SHOWN ACTUAL SIZE NO. 2 PHILLIPS SCREWDRIVER HAMMER 412314...
- Page 5 Push thirty-one HIDDEN CAMS (U2) into the ENDS (A), UPRIGHTS (B and C), SHELVES (E), BACKS (F), DRAWER UPRIGHTS (O), and SHELF MOLDINGS (P). Then insert the metal end of fifteen CAM DOWELS (W2) into the HIDDEN CAMS. www.sauder.com/services 412314...
- Page 6 (16 used) Turn sixteen CAM SCREWS (V2) into the LEGS (G, H, I, and J). www.sauder.com/services 412314...
- Page 7 GOLD 5/16” FLAT HEAD SCREW (4 used in this step) Fasten the CABINET RIGHT (35GA) and CABINET LEFT (35GB) to the DRAWER UPRIGHTS (O). Use four GOLD 5/16” FLAT HEAD SCREWS (GG) through holes #1 and #3. www.sauder.com/services 412314...
- Page 8 DOWELS Surface with HIDDEN CAMS Edge with CAM Surface with DOWELS HIDDEN CAMS Surface with HIDDEN CAMS Fasten the LEGS (G, H, I, and J) to the ENDS (A) and SHELF MOLDINGS (P). Tighten eight HIDDEN CAMS. www.sauder.com/services 412314...
- Page 9 Surface with HIDDEN CAMS Unfi nished surface Unfi nished surface Fasten the SHELVES (E) and BACKS (F) to the LEGS (G, H, I, and J). Tighten eight HIDDEN CAMS. www.sauder.com/services 412314...
- Page 10 Caution Start Tighten Arrow Risk of damage or injury. Hidden Cams must be completely Arrow Maximum tightened. Hidden 210 degrees Cams that are not completely tightened Minimum may loosen, and parts 190 degrees may separate. To completely tighten: www.sauder.com/services 412314...
- Page 11 Unfi nished surface Short unfi nished edge Maximum Arrow 210 degrees Minimum 190 degrees Fasten the UPRIGHTS (B and C) to the TOP (D). Tighten four HIDDEN CAMS. www.sauder.com/services 412314...
- Page 12 Minimum 190 degrees Fasten the SHELVES (E) and BACKS (F) to the UPRIGHTS (B and C). Use eight BLACK 1-7/8” FLAT HEAD SCREWS (AA). Fasten the ENDS (A) to the TOP (D). Tighten four HIDDEN CAMS. www.sauder.com/services 412314...
- Page 13 Roller End Roller End Maximum Arrow 210 degrees Minimum 190 degrees Fasten the DRAWER UPRIGHTS (O) to the TOP (D). Tighten four HIDDEN CAMS. www.sauder.com/services 412314...
- Page 14 Fasten the KEYBOARD SIDES (M) to the KEYBOARD BACK (L). Use two BROWN 1-1/2” FLAT HEAD SCREWS (BB). Fasten the KEYBOARD BACK (L) to the KEYBOARD SHELF (N). Use two BLACK 1-1/4” FLAT HEAD SCREWS (CC). www.sauder.com/services 412314...
- Page 15 (4 used in this step) Fasten two HINGES (X) to the KEYBOARD FRONT (K). Use four SILVER 5/8” FLAT HEAD SCREWS (EE). Fasten the HINGES (X) to the KEYBOARD SHELF (N). Use two SILVER 9/16” LARGE HEAD SCREWS (FF). www.sauder.com/services 412314...
- Page 16 Fasten the DRAWER RIGHT (35GC) and DRAWER LEFT (35GD) to the KEYBOARD SIDES (M). Use four GOLD 5/16” FLAT HEAD SCREWS (GG) through holes #1 and #3. Fasten a KNOB (Y) to the KEYBOARD FRONT (K). Use a BLACK 7/8" MACHINE SCREW (DD). www.sauder.com/services 412314...
- Page 17 Lift the front of the shelf up and slide it into the unit. To make adjustments to the KEYBOARD FRONT (K), loosen the SCREWS in the HINGES, make needed adjustments, and tighten the SCREWS. www.sauder.com/services 412314...
- Page 18 Push a CAM COVER (Z) onto each visible HIDDEN CAM NOTE: Please read the next two pages for important warranty and safety information. This completes assembly. Clean with your favorite furniture polish or a damp cloth. Wipe dry. www.sauder.com/services 412314...
- Page 19 1. Sauder Woodworking Co. (Sauder®) provides limited warranty coverage to the original purchaser of this product for a period of fi ve years from the date of purchase against defects in materials or workmanship of Sauder furniture components. As used in this Warranty, “defect” means imperfections in components which substantially impair the utility of the product. This Warranty gives you specifi...
- Page 20 • This product is not designed to support a not designed to support a television is very heavy. Plus the weight and location television. hazardous. of the picture tube tends to make TVs unbalanced and prone to tipping forward. 412314...
- Page 21 élément TABLETTE DE CLAVIER ....1 et conserver le livret MONTANT DE TIROIR.....2 pour future référence. Pour contacter Sauder MOULURE DE TABLETTE ....2 en ce qui concerne cet élément, faire référence au numéro de lot et numéro de modèle en appelant notre numéro...
- Page 22 Faire tourner seize VIS D’EXCENTRIQUE (V2) dans VIS ARGENTÉE TÊTE LARGE 14 mm 2 les PIEDS (G, H, I et J). VIS DORÉE TÊTE PLATE 8 mm OUTILS D’ASSEMBLAGE REQUIS TOURNEVIS À TÊTE CRUCIFORME PHILLIPS Nº 2 (POINTE GRANDEUR NATURE) MARTEAU 412314 Fr...
- Page 23 Utiliser quatre VIS DORÉES TÊTE PLATE 8 mm (GG) Serrer huit EXCENTRIQUES ESCAMOTABLES. à travers les trous 1 et 3. ÉTAPE 6 Fixer les TABLETTES (E) aux ARRIÈRES (F) et PIEDS (G, H I et J). Serrer huit EXCENTRIQUES ESCAMOTABLES. 412314 Fr...
- Page 24 Risque des dégâts ou blessures. Les Excentriques Escamotables doivent être serrés à bloc. Les Excentriques Escamotables que ne sont pas serrées à bloc peuvent desserrer et les pièces peuvent séparer. Pour serrer à bloc, faire tourner l’excentrique escamotable de 210 degrés. 412314 Fr...
- Page 25 38 mm (BB). Fixer l’ARRIÈRE DE TABLETTE DE CLAVIER (L) ÉTAPE 10 à la TABLETTE DE CLAVIER (N). Utiliser deux VIS NOIRES TÊTE PLATE 32 mm (CC). Fixer les MONTANTS DE TIROIR (O) au DESSUS (D). Serrer quatre EXCENTRIQUES ESCAMOTABLES. 412314 Fr...
- Page 26 22 mm (DD). REMARQUE : Prière de lire les deux pages suivantes pour connaître des informations importantes relatives à la garantie et à la sécurité. Ceci complète l’assemblage. Pour nettoyer, utiliser l’encaustique pour meubles préférée ou un chiffon humide. Essuyer. 412314 Fr...
- Page 27 6. Pour toute question concernant la garantie ou allant à l’encontre de son usage prévu. Sauder ne sera toute demande de réclamation, contactez Sauder en aucun cas responsable des frais de réparation ou en composant le 1-800-523-3987 en adressant un de remplacement de tout article ayant été...
- Page 28 Certifi cate of Conformity 1. This certifi cate applies to the Sauder Woodworking Product identifi ed by this Instruction Book. 2. This certifi cate applies to compliance of this product with the CPSC Ban on Lead-Containing Paint (16 CFR 1303).
Need help?
Do you have a question about the 412314 and is the answer not in the manual?
Questions and answers