
Related Manuals for Malloca MH-02IS


Summary of Contents for Malloca MH-02IS
- Page 1 Operating and Installation Instructions Induction hobs MH-02IS MH-03IS To avoid the risk of accidents or damage to the appliance it is essential to read these instructions before it is installed and used for the...
- Page 3 Contents Important Safety Instructions................Cleaning and Care................... Appliance errors....................Safety Instructions for Installation............Caring for the environment................................MH-02IS Guide to the hob.................. MH-03IS Guide to the hob.................. INDUCTION How induction works..................Noises......................Suitable pans....................Use......................... Safety Features....................
- Page 4 Contents...
-
Page 5: Important Safety Instructions
READ THE OPERATING INSTRUCTIONS CAREFULLY BEFORE USING THE HOB Warning This hob is intended for residential cooking only. Malloca cannot be held re- sponsible for damage or injury caused by improper use or for uses other than those for which this hob is intended. - Page 6 Only use the hob for residential cooking, and for the purposes described in this manual. Other uses are not permitted and can be dangerous. Malloca will not be held li- able for damage caused by unauthorized use or improper operation of any kind.
- Page 7 Important Safety Instructions Injury prevention Children should not be left unattended in an area where the hob is in use. Never allow children to sit or stand on any part of the hob. Caution: Do not store items of interest to children in cabinets above the hob. Children climbing on the hob to reach these items could be injured.
- Page 8 Important Safety Instructions Do not heat unopened containers. Built-up pressure may cause the container to burst and result in injury. Before removing pots and pans be sure to turn off the heaters. Some cleaners may produce toxic fumes if applied to a hot surface. When wiping spills on a hot hob with a wet sponge or cloth, be careful to avoid steam burns.
- Page 9 Important Safety Instructions Damage protection Never place hot pots or pans on the touch controls, this may damage the elec- tronics. Do not drop anything on the ceramic surface of the hob. Even lightweight objects may cause damage. Do not use pots or pans with pronounced edges or ridges on the ceramic hob. These could scratch the hob permanently.
- Page 10 Appliance safety In the event of any damage to the hob, it must be turned off immediately and disconnected from the main power supply. Contact Malloca’s Technical Service Department. Do not use the hob until it has been repaired. Ensure power is not supplied to the hob until repair work is completed.
- Page 11 This hob has not been designed for maritime use or for use in mobile installa- tions such as recreational vehicles or aircraft. However, under certain conditions it may be possible for installation in these applications. Please contact the Malloca Techni- The hob must not be permanently sealed into the countertop when installed. The top.
-
Page 12: Cleaning And Care
Do not use a steam cleaner to clean this hob. Steam could penetrate electrical components and cause a short circuit. Pressurized steam could cause permanent damage to the surface and to components for which Malloca cannot accept responsibility. Do not use any sharp pointed objects which could damage the seal between the ceramic surface, the surrounding frame and the countertop. -
Page 13: Appliance Errors
Appliance errors Appliance errors are the errors which generate the deactivation of the whole hob. When an appliance error is detected, all heaters are switched off, a beep sounds (only if one or more heaters are active) and all displays show a ‘F’ letter and the error code alternately. -
Page 14: Safety Instructions For Installation
Safety Instructions for installation Safety distance above the hob The minimum safety distance given by the hood manufacturer must be main- tained between the hob and the hood above it. See the installation instructions of the hood for these safety measurements. installed over the hob (e.g. - Page 15 Safety Instructions for installation Installation Feed the hob connection cable down through the cut-out. Place the hob centrally in the cut-out. When doing so make sure that the seal ensure an effective seal. (Do not use sealant). Connect the hob to the main power supply. Turn the hob on and check the function.
-
Page 16: Caring For The Environment
Caring for the environment Disposal of the packing material The transport and protective packing has been selected from materials which are environmentaly friendly for disposal and should be recycled. Ensure that any plastic wrappings, bags, etc. are disposed of safety and kept out of the reach of babies and young children. -
Page 17: Cleaning The Hob
Cleaning the hob cloth. Heating the hob Metal components of the hob have a protective coating which may give off a The smell will dissipate after a short time and does not indicate a faulty connec- tion or appliance defect. -
Page 18: Touch Controls
Touch controls touch. To operate the heaters, simply touch the corresponding sensor area(s). Each time a command is registered, a signal will be heard. Be sure to touch only the desired sensor area and keep the control panel clean and clear. Otherwise, the touch controls may not respond, or unintentional com- mands may be given, even causing the cooktop to switch off automatically (see “Automatic Safety off”). - Page 19 Initial Light Conditions When power is initially applied to the Cooktop, the touch control conducts a cali- bration process for the touch keys, which requires a low level of ambient light in the area of the touch keys. If during this calibration process excessive ambient lighting is detected the User Interface displays “FL”...
-
Page 20: Guide To The Hob
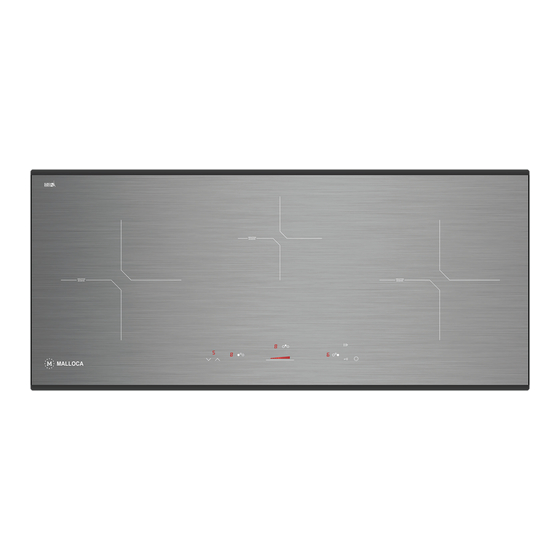
Guide to the hob MH-02IS Heaters Control panel... - Page 21 Guide to the hob Control panel Sensors for Turning the hob on and off Setting the power level Child safety lock Setting the timer Setting the timer Setting the timer Display Power level, residual heat display Timer display Timer display Timer display Indicator lamps Child safety lock...
- Page 22 Guide to the hob Heater data Heater in mm Power Level Rating in W 220-240V 1100 1300 1000 1500 1200 Booster “P” 2000 1600...
-
Page 23: Guide To The Hob
Guide to the hob MH-03IS Heaters Control panel... - Page 24 Guide to the hob Control panel Sensors for Turning the hob on and off Setting the power level Child safety lock Setting the timer Setting the timer Setting the timer Display Power level, residual heat display Timer display Timer display Timer display Indicator lamps Child safety lock...
- Page 25 Guide to the hob Heater data Heater in mm Power Level Rating in W 220-240V 1100 1000 1300 1200 1500 1400 Booster “P” 2000 1800...
-
Page 26: How Induction Works
How induction works An induction coil is located under each heater. When a heater is switched on, this heats it up. The heater itself is heated indirectly by the heat given off by the pan. Induction heaters only work when a magnetic based pan is placed on it (see “Cookware”). -
Page 27: Noises
Noises When using an induction heater, the following noises can occur in the pan, de- pending on what it is made of and how it is constructed. ~ Higher power settings may cause a buzz. This will decrease or cease alto- gether when the power setting is reduced. -
Page 28: Suitable Pans
Suitable pans Cookware Suitable pans include: ~ Stainless steel pans with a magnetic base ~ Enameled steel pans ~ Cast iron pans Unsuitable pans: ~ Stainless steel pans without a magnetic base ~ Aluminum and copper pans ~ Glass, ceramic or earthenware pots and pans To test whether a pot or pan is suitable for use on an induction hob, hold a magnet to the base of the pan. - Page 29 Turning on the hob Put a pot or pan on the desired heater. The Cooktop is switched ON by touching the key for 1 sec. A beep sounds and all the heater displays show a ‘0’ If the selection of a cook set for a heater is not done in 10 seconds, the Cooktop will be turned off automatically.
-
Page 30: Selecting A Power Level For A Heater
Selecting a power level for a heater Once the heater is selected, the power level can be selected by touching the Slider. Each position over the slider surface corresponds to a cooking level. The power level selection is done by sliding the finger or by placing the finger on a specific position of the slider surface. - Page 31 Stop & Go Function The Stop and Go function allows temporary pausing of the cooking process, allowing the users to answer the door or the telephone without worrying that the water is boiling over. This function is also useful to clean the user interface surface without changing the cooking set up.
- Page 32 Timer It is possible for the user to set a switch off time for all heaters at any power level. The timer value can be selected between 1 and 99 minutes. The timer last minute will be displayed in seconds. keys will be locked: If the Cooktop is off, or if the key lock is activated (KEYLOCK LED on).
-
Page 33: Safety Features
Safety Features Child Safety Lock Touching the key for 1 second, the key lock function is activated and deactivated. If the LED associated to the key lock key is on, the keyboard is locked. The locking function can be activated when the heaters are on or when the cook top is off. -
Page 34: Automatic Safety Off
Safety Features Automatic Safety Off Protection from accidental activation of keys If any key/s is maintained pressed for a more than 10 seconds, the cooktop is switched off automatically. A warning beep sounds every 10 sec., while the key/s is/are activated. Heater auto switch off in a specific time After maximum time of operation at the same power level (see the table below) the heater is switched off automatically. -
Page 35: Induction
0 alternating the set power level. at the originally set power level. Overheating can be caused by: - heating an empty pan. - fats or oils being heated on the highest power setting. If the overheating protection mechanism triggers again, contact Malloca Techini- cal Service. -
Page 36: Overheating Protection
Safety features Overheating protection Each zone is equipped with overheating protection (internal temperature limiter). This switches off the heating elements in the cooking zone before the ceramic surface overheats. If the heating element switches on and off even when the highest power level is selected, this indicates that the overheating protection mechanism has triggered. - Page 37 Installation Cut out Make the countertop cut-out following the dimensions given in the illustration. Code Cut out dimension MH 02IS xxx x xxx mm MH 03IS xxx x xxx mm Remember to maintain a minimum distance of 50 mm between the rear wall and the right or left side.
-
Page 38: Electrical Connection
Electrical Connection CAUTION: Before installation or servicing, disconnect the power supply by either remov- ing the fuse, shutting off the main power supply or manually “tripping” the circuit breaker. in accordance with all applicable codes and standards. Repairs and service by responsible. - Page 39 Electrical Connection MH-02IS MH-03IS...
- Page 40 EXCLUSIVE DISTRIBUTOR IN VIETNAM MALLOCA VIETNAM WARE CO., LTD 279 Nguyen Van Troi St., Ward 10, Phu Nhuan Dist., HCM City Tel: (824) 8 39975 893 / 94 Hotline: 1800 12 12 Fax: (824) 8 39970 135 Email: info@malloca.com...
Need help?
Do you have a question about the MH-02IS and is the answer not in the manual?
Questions and answers