Advertisement
Table of Contents
- 1 Installation Instructions
- 2 Wire the Air Compressor
- 3 Wire the Air Compressor
- 4 Install the Proportioning Valve
- 5 Install the Proportioning Valve
- 6 Cautions and Warnings
- 7 Bleed the Brakes
- 8 Install the Air Lines
- 9 Install the Motorhome Monitor System
- 10 Final Connections and System Test
- 11 Final Connections and System Test
- 12 Troubleshooting
- 13 Troubleshooting
- Download this manual
Advertisement
Table of Contents
Troubleshooting

Related Manuals for Roadmaster BrakeMaster 9000


Summary of Contents for Roadmaster BrakeMaster 9000
-
Page 1: Installation Instructions
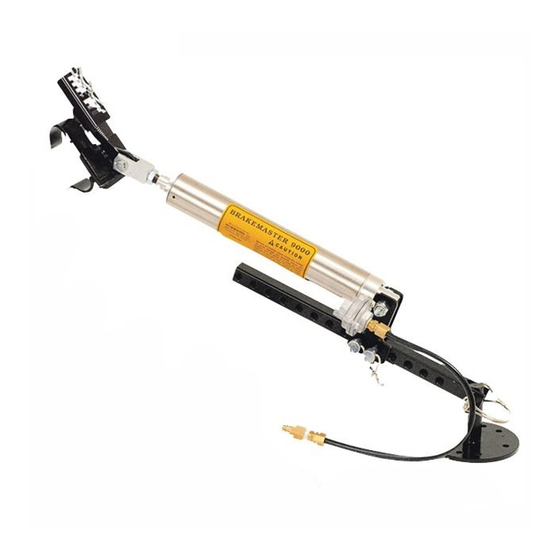
BrakeMaster 9000 and 9060 Second Motorhome Kit part number 98300 Installation Instructions Time Tested • Time Proven ROADMASTER, Inc. • 6110 N.E. 127th Ave. • Vancouver, WA 98682 800-669-9690 • Fax 360-735-9300 • roadmasterinc.com 853811-04 12.17 © 2007-2017 ROADMASTER, Inc. All rights reserved. - Page 3 All illustrations and specifications contained herein are based on the latest information available at the time of publication. ROADMASTER, Inc. reserves the right to make changes, at any time, without notice, in material, specifica- tions and models, or to discontinue models.
-
Page 4: Wire The Air Compressor
Before you begin the installation… 1. Check online at the ROADMASTER web site — unions are difficult to access, a short length of steel www.roadmasterinc.com — for vehicle-specific informa- brake line will be necessary to connect the proportion- tion. Select ‘Vehicle-Specific Info,’ then ‘Supplemental ing valve. - Page 5 Wire the air compressor battery may be near capacity. Any additional power continued from preceding page choose a mounting location for the compressor where draw may blow the fuse(s) to electrical components a ½" hole can be drilled near the drain valve, through already connected to the auxiliary battery.
-
Page 6: Wire The Air Compressor
Wire the air compressor of personal injury or equipment damage, do not connect continued from preceding page ATC fuse into one of the provided fuse holders. The the blue wire until the installation is completed. fuse holders are attached to a short length of wire, with a butt connector at one end and a ring terminal on the other (Figure 3). -
Page 7: Install The Proportioning Valve
Install the proportioning valve sections of brake line are connected. The proportioning valve must be installed near one of these brake unions. If the motorhome is raised at any time during However, some Class A motorhomes, and most the installation, it must be on a hoist or safely and Class C motorhomes, have a one-piece brake line, securely supported and blocked. - Page 8 Install the proportioning valve E. The closer the proportioning valve is to the air continued from preceding page compressor, the less air line will have to be routed between them later. Loop the section of steel brake line, as shown in Figure 13, so that it can expand and contract to absorb road vibrations.
- Page 9 Install the proportioning valve into the fitting on the port on the proportioning valve. continued from preceding page B. If the motorhome has 3/16" brake lines — screw CAUTION the flair adaptor (Figure 17) onto the fitting on the port Check the brake fluid level often after the brake on the proportioning valve.
-
Page 10: Install The Proportioning Valve
Install the proportioning valve continued from preceding page pair of pliers, turn the top section (Figure 16) until the port is at the correct position. After the proportioning valve is installed, bleed Although it has been unthreaded, the top section the air from the valve (as described above), as well as the motorhome’s brake system, before driving of the proportioning valve will be held in place by the... -
Page 11: Cautions And Warnings
Bleed the brakes For ABS (anti-lock braking systems)… The front of an ABS system can be bled in the After the proportioning valve is installed, bleed same manner as the traditional method described be- the air from the valve (as described in step 12 un- low. - Page 12 Bleed the brakes Specific brake line method the brake pedal does not provide firm resistance, there is air in the brake line. Bleed the brake line again, as continued from previous page of the tubing into the disposable container. described above. 5.
-
Page 13: Bleed The Brakes
Bleed the brakes One-person methods continued from previous page container to a hand-held pump. When the bleeder valve is opened, the pump draws the brake fluid and air bubbles out of the brake line and into the container. If you use this method, follow the same sequence of wheel cylinders as described in the traditional method. - Page 14 Wire the proportioning valve The solenoid valve (Figure 9) on the proportioning Figure 12 valve allows air to pass into the BrakeMaster system each time the motorhome’s brake pedal is depressed. The solenoid valve will allow air to pass only when it receives an electrical signal from the motorhome brake light system.
-
Page 15: Install The Air Lines
Install the air lines 1. Find a suitable location at the rear of the motorhome, not be airtight. near the center, to attach the preassembled female Now, push the air line into the compression fitting, quick coupler (with an orange shield base — Figure 14). as far as it can go. -
Page 16: Install The Motorhome Monitor System
Install the motorhome monitor system Step A 1. Connect the male and female quick couplers at Wire the motorhome either end of the air line to the corresponding quick Note: Some motorhomes are manufactured with aux- couplers on the motorhome and towed vehicle. iliary wires pre-strung from the rear of the motorhome Push the couplers together until the housing (Figure to the dashboard, for aftermarket accessories such as... -
Page 17: Final Connections And System Test
Note: the break away system is included with the- mounting post (or seat bracket adaptor) — see “Install BrakeMaster 9060; it is an optional accessory with the BrakeMaster 9000. the air cylinder anchor plate” in the complete Brake- Master installation instructions. -
Page 18: Final Connections And System Test
Final connections and system test Test the system nals do not operate in tandem with the motorhome’s, either install a non-intrusive lighting system or re- continued from preceding page Charge the break away air reservoir — start the mo- wire the towed vehicle according to “Brake light torhome and allow the air compressor to run until it solutions”... -
Page 19: Troubleshooting
Troubleshooting Note: to identify components in the towed vehicle fitting on the solenoid valve (Figure 9). Have an as- described below, refer to the complete BrakeMaster sistant depress the motorhome brake pedal — the pro- installation instructions. For the most recent copy of portioning valve should release air each time the pedal the instructions, visit www.roadmasterinc.com. -
Page 20: Troubleshooting
Troubleshooting The engines in some vehicles, such as the Saturn continued from preceding page all connections are airtight. Vue, must be started periodically during towing. If the 4. If the towing vehicle is a Ford Class C motorhome, towed vehicle’s engine must be started periodically, the proportioning valve must be teed into the front hy- always deplete the vacuum in the vehicle’s power brake system before you resume towing.
Need help?
Do you have a question about the BrakeMaster 9000 and is the answer not in the manual?
Questions and answers