TP-Link RE270K / RE370K User Manual
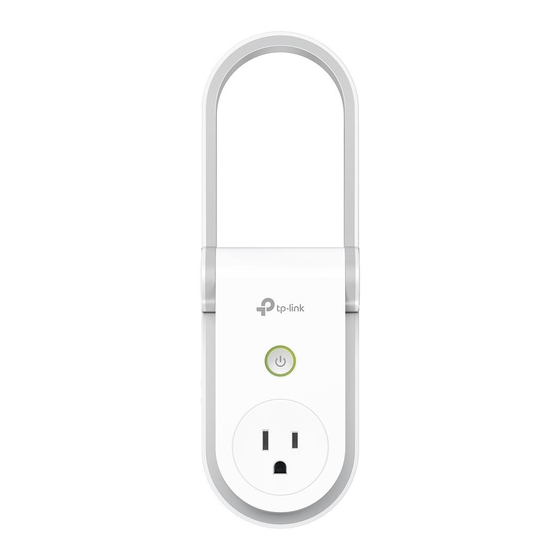
Ac750 / ac1200 wi-fi range extender with smart plug
Hide thumbs
Also See for RE270K / RE370K:
- Quick installation manual (34 pages) ,
- Quick start manual (2 pages)

Related Manuals for TP-Link RE270K / RE370K


Summary of Contents for TP-Link RE270K / RE370K
- Page 1 User’s Manual RE270K / RE370K AC750 / AC1200 Wi-Fi Range Extender with Smart Plug 1910011951 REV 1.0.0...
- Page 2 Copyright & Trademarks Speciications are subject to change without notice. TP-Link is a registered trademark of TP-Link Technologies Co., Ltd. Other brands and product names are trademarks or registered trademarks of their respective holders. No part of the speciications may be reproduced in any form or by any means or used to make any derivative such as translation, transformation, or adaptation without permission from TP-Link Technologies Co., Ltd.
- Page 3 Contents Introduction Product Overview Features Product Requirements Wi-Fi Extender+ Important Safety Information Connect Wi-Fi Extender+ to the Internet Setting Up Wi-Fi Extender+ via Kasa Setting Up Wi-Fi Extender+ via Computer Using Kasa with Wi-Fi Extender+ Kasa Account Kasa Settings Customizing Wi-Fi Extender+ Location Assistant Extending Another Wi-Fi Network Managing Network Access...
- Page 4 Speciications Limited Warranty...
-
Page 5: Introduction
The Wi-Fi Extender+ is also integrated with an intelligent Wi-Fi socket, also known as a “Smart Plug”, that gives you the ability to customize, automate, and remotely control the plugged-in devices, such as lights and other household electronics, via TP-Link’s Kasa mobile app on your iOS or Android devices, no matter where you ind yourself. - Page 6 Flashing green rapidly: SoftAP connection is in progress. Flashing amber and green: When pressing the Reset button for 5~10 seconds to Status trigger a Soft Reset. Flashing amber rapidly: When pressing the Reset button for 10 seconds to factory reset the device. OFF: No active connection. www.tp-link.com...
- Page 7 Kasa app Note: The input voltage should be consistent with the output voltage of the power outlet. Gigabit Ethernet Port Connect Ethernet-only (wired) devices such as Smart TVs, game consoles, and Blu-ray players to your wireless network with Ethernet cables. www.tp-link.com...
-
Page 8: Wi-Fi Extender
The Wi-Fi Extender+ is not intended for use in locations where the temperature may be less than • actual room conditions, such as unheated basements or garages. Do NOT touch the integrated pass-through power outlet with wet hands or when standing on wet or • damp surfaces. www.tp-link.com... -
Page 9: Connect Wi-Fi Extender+ To The Internet
Wi-Fi Extender+ Connect Wi-Fi Extender+ to the Internet There are two easy-to-setup methods to extend your Wi-Fi network. Setting Up Wi-Fi Extender+ via Kasa Download TP-Link Kasa from the App Store or Google Play. Scan QR code Kasa Connect your mobile device to your Wi-Fi network. -
Page 10: Setting Up Wi-Fi Extender+ Via Computer
Turn Wi-Fi Off Wi-Fi TP-LINK_2G_EXT TP-LINK_5G_EXT TP-LINK_2G_EXT Connect automatically Join Other Network... Open Network Preferences... Connect Launch a web browser and enter http://tplinkrepeater.net into the address ield. Then, enter admin (all lowercase) for both username and password to log in. www.tp-link.com... - Page 11 (SSIDs) with _EXT or _2GEXT or _5GEXT as a suix, depending on whether the extender is connecting to the single-band or dual-band router. For example: Main Router Main Router’s SSIDs Extended SSIDs 2.4GHz: MyHome_EXT 2.4GHz Single-Band MyHome 5GHz: MyHome_5GEXT www.tp-link.com...
- Page 12 User’s Manual Wi-Fi Extender+ 2.4GHz: MyHome_2GEXT 5GHz Single-Band MyHome 5GHz: MyHome_EXT 2.4GHz: MyHome_1_EXT MyHome_1 Dual-Band 5GHz: MyHome_2_EXT MyHome_2 www.tp-link.com...
-
Page 13: Using Kasa With Wi-Fi Extender
Synchronization of settings and conigurations to all your mobile devices. • Ability to control and conigure the devices from outside your home. • Ability to customize your TP-Link Smart Home devices with “Scenes” for a truly automated • experience. Use of third-party services and products such as Amazon Echo. -
Page 14: Customizing Wi-Fi Extender
Wi-Fi Extender+. It is important to make sure that you wait until the Wi-Fi Extender+ is fully powered up (for instance, by waiting for the Power and Status LEDs to stop blinking) before tapping Check Again. www.tp-link.com... -
Page 15: Location Assistant
5 GHz EXTENDED NETWORK Save password Network Name Open network (not common) MyHome_2 NETWORK DETAILS Network Password: 12345678 N E X T MyHome_1_EXT Uplink Signal Strength I’d like to use a different network. MyHome_2_EXT Uplink Connection Speed 252 Mbps www.tp-link.com... -
Page 16: Managing Network Access
1. On the Devices screen, tap on the row of the Wi-Fi Extender+ to go to its controls. 2. Tap to switch to the Extended Network view. NETWORK 3. Tap on the (hexagon client count) in the Wireless Clients section. www.tp-link.com... - Page 17 4. On the Client List screen, you can block the current wireless clients listed under the CONNECTED tab by tapping on the row of the client. To unblock a client, tap on the BLOCKED tab to view the blocked clients list, then tap on the row of the blocked client and conirm when prompted. www.tp-link.com...
-
Page 18: Home Automation With Integrated Smart Plug
Android device. If you want to temporarily disable an Event, just turn off its toggle from the Schedule screen. Please note that up to 32 events can be set on a Wi-Fi Extender+. www.tp-link.com... -
Page 19: Timer
4. Set your preferred state (ON or OFF) to be triggered once the countdown timer is complete. 5. Tap Start. Note that if a timer overlaps an existing scheduled Event, that schedule will not run. If it overlaps Away Mode, the device will resume away behavior after the timer expires. However, timer will be canceled www.tp-link.com... -
Page 20: Runtime Report
To view the Runtime report, tap anywhere in the Usage section of the Wi-Fi Extender+’s details screen. 9:41 PM 100% Runtime TODAY Current Runtime Total Runtime 2.80 3.10 PAST 7 DAYS Daily Average Total Runtime 5.00 35.0 PAST 30 DAYS Daily Average Total Runtime 4.00 www.tp-link.com... -
Page 21: Creating Scenes
Wi-Fi Extender+ Creating Scenes Take full advantage of your TP-Link Smart Home devices in your home with “Scenes”. A scene is a preset group of Smart Devices (such as Wi-Fi Extender+, Smart Wi-Fi Plugs Mini and Smart Wi-Fi Switches) that can be customized and controlled simultaneously at the touch of a button from your smartphone or tablet to easily set your mood or it any special occasion. -
Page 22: Coniguring Wi-Fi Extender+ Via A Web Browser
4. Enter your current username and password into the Old Username and Old Password ields respectively. 5. Enter your new username and password into the New Username and New Password ields, then enter the password again to conirm. Be sure to choose a strong, but memorable password. 6. Click to conirm the changes. www.tp-link.com... -
Page 23: Dashboard
Wi-Fi Extender+, detailed information about the uplink connection (the Router), and see who’s currently connected to your extended networks. Normal network connection status. • The Wi-Fi Extender+ is not connected to the router. • www.tp-link.com... -
Page 24: Extending Another Wi-Fi Network
Setup or follow the steps below without using the Quick Setup. 1. Launch a web browser and enter http://tplinkrepeater.net into the URL ield, then log in using the admin credentials. 2. Under the Settings tab, go to Wireless > Uplink Wi-Fi. www.tp-link.com... - Page 25 6. If the selected network is protected, enter the Wi-Fi password. Note that the Security of the selected network will automatically populate. If your router supports the 5GHz band, and you wish to extend the 5GHz network, repeat step 3 to 6. 8. Click to apply your settings. www.tp-link.com...
-
Page 26: Extended Network Settings
Extended 2.4GHz SSID and Extended 5GHz SSID: You can enter a new SSID or click to use the same SSID as the main (host) network. Hide SSID broadcast: Select this checkbox to hide the extender’s SSID from the Wi-Fi network list. 4. Click to save the extended network settings. www.tp-link.com... -
Page 27: Wi-Fi Access Control
(Block) icon on the row of the device. It will be added to the • Device in Blacklist. To block multiple devices, select the checkboxes of the devices and click at the top- • right of the listing. Those devices will be added to the Devices in Blacklist. www.tp-link.com... - Page 28 To modify the device’s name or its MAC address, or remove the device from the Blacklist or Whitelist, click the (Edit) icon or the (Trash) icon on the row of the device. To remove multiple devices, select the checkboxes of the devices and click at the top-right of the listing. www.tp-link.com...
-
Page 29: Changing The Ip Address
IP Address: The IP address to be assigned to the extender. Subnet Mask: The subnet mask associated with the static IP address. Default Gateway: The gateway address of your wireless router or Access Point. 4. Click to apply your coniguration. www.tp-link.com... -
Page 30: Dhcp Server
Default Gateway: Enter the LAN IP address of your main (host) network. This ield is optional. Primary DNS: Enter the primary DNS address of your main (host) network. This ield is optional. Secondary DNS: Enter the secondary DNS address of your main (host) network. This ield is optional. www.tp-link.com... -
Page 31: Wireless Adapter
1. Launch a web browser and enter http://tplinkrepeater.net into the URL ield, then log in using the admin credentials. 2. Under the Settings tab, go to Network. Scroll down to the Ethernet Trafic (Wired Network) section, and select the 2.4GHz option. 4. Click to apply your changes. www.tp-link.com... -
Page 32: Other Administrative Tools
Before enabling the Night Mode feature, make sure the extender’s time zone is set to your proper time zone under Settings > System Tools > Time Settings. 1. Launch a web browser and enter http://tplinkrepeater.net into the URL ield, then log in using the admin credentials. www.tp-link.com... -
Page 33: System Log
Click to update the system log. • Click to permanently remove all system logs. • Click (located at the end of the list) to export the system log as a text (*.txt) ile to your • computer. www.tp-link.com... -
Page 34: Cloud Setting
1. Launch a web browser and enter http://tplinkrepeater.net into the URL ield, then log in using the admin credentials. 2. Under the Settings tab, go to System Tools > Cloud Setting. 3. Enter your Kasa account email address and password. 4. Enter a descriptive name (an alias) for your Wi-Fi Extender+. 5. Click www.tp-link.com... -
Page 35: Maintaining The Wi-Fi Extender
It is important to leave the Kasa app running while it inishes updating the Wi-Fi Extender+. Try not to minimize the app, close the app, or interrupt the update to prevent problems. To upgrade irmware via a computer: Before upgrading the irmware of the Wi-Fi Extender+, visit www.tp-link.com/support to search for and download the latest irmware to your computer. www.tp-link.com... -
Page 36: Backup And Restore
Please DO NOT unplug the Wi-Fi Extender+ or interrupt the backup or restore process. 1. Connect your computer to the Wi-Fi Extender+ via a wired or wireless connection. 2. Launch a web browser and enter http://tplinkrepeater.net into the URL ield, then log in using the www.tp-link.com... - Page 37 The restore process takes a few minutes to complete. DO NOT unplug the Wi-Fi Extender+ or interrupt the restore process. After reverting back to a previous state is inished, the Wi-Fi Extender+ will automatically reboot. www.tp-link.com...
-
Page 38: Resetting
1. Launch a web browser and enter http://tplinkrepeater.net into the URL ield, then log in using the admin credentials. 2. Under the Settings tab, go to System Tools > Backup & Restore. 3. Under the Factory Default Restore section, click and conirm at the prompt. www.tp-link.com... - Page 39 The factory reset takes a few minutes to complete. DO NOT unplug the Wi-Fi Extender+ or interrupt the factory reset process. The Wi-Fi Extender+ will automatically reboot when the factory reset is inished. To log back into the Wi-Fi Extender+, enter the default credentials “admin” for both username and password. www.tp-link.com...
-
Page 40: Troubleshooting
Kasa or its web-based user interface. If both of the LEDs are not illuminated, which means the Wi-Fi Extender+ is not connected to • your router, press and hold the Reset button for 5 seconds until the Status, 2.4G, and 5G LEDs www.tp-link.com... -
Page 41: Usage Tips
• 9. How do I pair the Wi-Fi Extender+ with Amazon Echo? Visit www.tp-link.com/en/faq-944.html or within the Kasa Help section for pairing instructions, then you can interact with your plugged-in devices using voice recognition. For example, to command Alexa to turn on the Wi-Fi Extender+ named “Bedroom Lights”, simply say, “Alexa, turn on Bedroom Lights.”... -
Page 42: Support
User’s Manual Wi-Fi Extender+ Support If you encounter any issues with the Wi-Fi Extender+ or coniguration, please visit for web support and troubleshooting information. www.tp-link.com/support www.tp-link.com... - Page 43 11a: 54/48/36/24/18/12/9/6Mbps WEP, WPA-PSK, WPA2-PSK Security Physical and Environment 0o ~ 40o (32o ~ 104o) Working Temperature: 10% ~ 90% RH, Non-condensing Working Humidity: -40o ~ 70o (-40o ~ 158o) Storage Temperature: 5% ~ 95% RH, Non-condensing Storage Humidity: www.tp-link.com...
-
Page 44: Limited Warranty
User’s Manual Wi-Fi Extender+ Operating Temperature: 0°C~40°C (32°F~104°F) Storage Temperature: -20°C~70°C (-4°F ~158°F) Environment: Operating Humidity: 10%~90% non-condensing Storage Humidity: 5%~90% non-condensing Limited Warranty To learn more about the Limited Warranty for TP-Link products, please visit www.tp-link.us/support/rma. www.tp-link.com... -
Page 45: Fcc Statement
User’s Manual Wi-Fi Extender+ FCC Statement This equipment has been tested and found to comply with the limits for a Class B digital device, pursuant to part 15 of the FCC Rules. These limits are designed to provide reasonable protection against harmful interference in a residential installation. This equipment generates, uses and can radiate radio frequency energy and, if not installed and used in accordance with the instructions, may cause harmful interference to radio communications. - Page 46 User’s Manual Wi-Fi Extender+ The high-power radars are allocated as primary users (i.e. priority users) of the bands 5250-5350 MHz and 5650-5850 MHz and that these radars could cause interference and/or damage to LE-LAN devices. DFS (Dynamic Frequency Selection) products that operate in the bands 5250- 5350 MHz, 5470-5600MHz, and 5650-5725MHz. Avertissement: Le dispositif fonctionnant dans la bande 5150-5250 MHz est réservé...
- Page 47 User’s Manual Wi-Fi Extender+ 用。 前項合法通信 ,指依電信規定作業之無線電信。 低功率射頻電機需忍受合法通信或工業、 科學以及醫療用電波輻射性電機設備之干 擾。 安全諮詢及注意事項 • 請使用原裝電源供應器或只能按照本產品注明的電源類型使用本產品。 • 清潔本產品之前請先拔掉電源線。 請勿使用液體、 噴霧清潔劑或濕布進行清潔。 • 注意防潮,請勿將水或其他液體潑灑到本產品上。 • 插槽與開口供通風使用 ,以確保本產品的操作可靠並防止過熱,請勿堵塞或覆蓋開口。 • 請勿將本產品置放於靠近熱源的地方。 除非有正常的通風, 否則不可放在密閉位置中。 • 請不要私自打開機殼, 不要嘗試自行維修本產品,請由授權的專業人士進行此項工作。 Safety Information • When product has a power button, the power button is one of the ways to shut off the product; when there is no power button, the only way to completely shut off the power is to disconnect the product or the power adapter from the power source.
Need help?
Do you have a question about the RE270K / RE370K and is the answer not in the manual?
Questions and answers