TP-Link RE230 User Manual
Hide thumbs
Also See for RE230:
- User manual (61 pages) ,
- Quick installation manual (2 pages) ,
- Quick installation manual (2 pages)
Table of Contents
Advertisement
Quick Links
Advertisement
Table of Contents

Related Manuals for TP-Link RE230


Summary of Contents for TP-Link RE230
- Page 1 User Guide AC750 Wi-Fi Range Extender RE230 © 2020 TP-Link 1910012912 REV2.0.0...
-
Page 2: Table Of Contents
4. 3. 1. Add TP-Link ID to Manage the Extender ...... - Page 3 5. 7. Adjust Wi-Fi Coverage ............34 Chapter 6 More Features of Your Extender 6.
-
Page 4: About This Guide
Specifications can be found on the product page at https://www.tp-link.com. TP-Link Community is provided for you to discuss our products and share knowledge at https://community.tp-link.com. Our Technical Support contact information can be found at the Contact Technical Support page at https://www.tp-link.com/support/. -
Page 5: Chapter 1 Get To Know About Your Extender
Chapter Get to Know About Your Extender This chapter introduces what the extender can do and its appearance. It contains the following sections: • Product Overview • Appearance... -
Page 6: Product Overview
Get to Know About Your Extender Product Overview Bring Dead Zones Back to Life Tired of Wi-Fi “dead zones”? The TP-Link extender is connected to your router wirelessly, strengthening its signal and expanding its coverage into areas that could not otherwise be reached. -
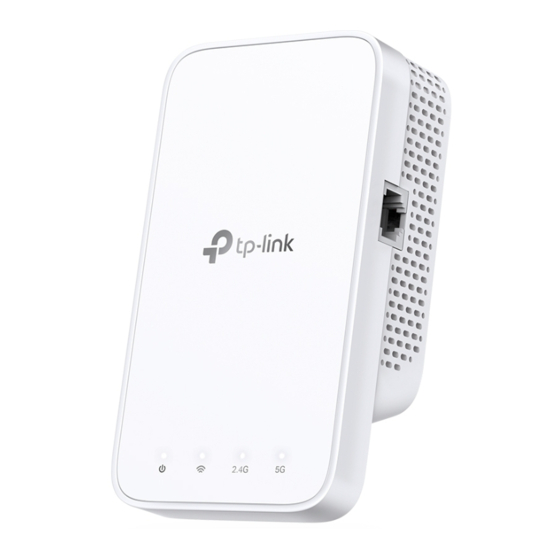
Page 7: Button Description
Chapter 1 Get to Know About Your Extender Name Status Indication On/Off The extender is on or off. (Power) Blinking The system is starting up or firmware is being upgraded. The extender is connected to your router’s wireless Solid white network and is in a suitable location. -
Page 8: Chapter 2 Set Up Internet Connection
Chapter Set Up Internet Connection This chapter introduces how to boost your host wireless coverage. Please follow the step-by-step instructions to set up the internet connection. It contains the following sections: • Power on the Extender • Set Up the Extender... -
Page 9: Power On The Extender
2. For safety, only plug the extender in upright directions as shown below. Set Up the Extender There are three ways to set up the extender: via the TP-Link Tether app, via a web browser, or via the WPS button. - Page 10 Chapter 2 Set Up Internet Connection 3. Tap the icon on the upper-right corner and select Range Extender. 4. Follow app instructions to set up your extender. 5. (Optional) If the extender connects to a OneMesh router, enable Join OneMesh copy the router’s wireless settings for seamless roaming.
-
Page 11: Method 2: Via A Web Browser
Chapter 2 Set Up Internet Connection Tip: For more intuitive location assistant, access extender settings via Tether and go to Tools > Location Assistant. You can also manage your extender via Tether, such as controlling LEDs, sharing passwords of your networks and blocking devices. - Page 12 Chapter 2 Set Up Internet Connection 2 ) Select your host router’s 2.4GHz SSID (network name), enter its password (NOT the password you just created for management), and click NEXT. 3 ) Select your host router’s 5GHz SSID (network name), enter its password (NOT the password you just created for management), and click NEXT.
- Page 13 5 ) Either keep the default SSIDs (network names) or customize them for the extended networks, and then click NEXT. Tip: If you connect the extender to a TP-Link OneMesh router, the extender will automatically join the router’s OneMesh network and copy the router’s wireless settings. For more information, refer to OneMesh with Seamless...
- Page 14 Chapter 2 Set Up Internet Connection 6 ) Follow web instructions to relocate your extender for optimal Wi-Fi coverage and performance, and then click DONE. Enjoy! Connect to the extended network and enjoy the internet.
-
Page 15: Method 3: Via The Wps Button
Set Up Internet Connection Tip: If you connect the extender to a TP-Link OneMesh router and a success screen as below appears at the end of the setup, the extender has successfully joined the router’s OneMesh network and copied the router’s wireless settings. - Page 16 Note: If the LED does not turn solid on, try again or refer to Method 1: Via the TP-Link Tether App Method 2: Via a Web Browser. 3. (Optional) If the extender connects to a dual band router, repeat steps 1 and 2 above to connect to the other band.
- Page 17 Chapter 2 Set Up Internet Connection Tip: • If you want to customize the extended network name, refer to Configure Wireless Network. • If you cannot find the network names with _EXT in your Wi-Fi network list, this means that the extender has been connected to a OneMesh router and automatically copied its wireless settings.
-
Page 18: Chapter 3 Onemesh With Seamless Roaming
Chapter OneMesh with Seamless Roaming This chapter introduces the TP-Link OneMesh feature. It contains the following sections: • What‘s a OneMesh Network • How to Set Up a OneMesh Network • Remove Extender from OneMesh Network... -
Page 19: What's A Onemesh Network
Set up a OneMesh network with a push of WPS buttons. Manage all network devices on the Tether app or at your router’s web management page. To check full list of TP-Link OneMesh devices, scan the QR code, or visit https://www.tp-link.com/onemesh/compatibility. -
Page 20: How To Set Up A Onemesh Network
OneMesh with Seamless Roaming How to Set Up a OneMesh Network Once the extender is connected to a TP-Link OneMesh router via web browser or WPS button, the extender will automatically join the router’s OneMesh network and copy the router’s wireless settings. You can manually join a OneMesh network during the configuration via the TP-Link Tether app. -
Page 21: Method 2: Via A Web Browser
Chapter 3 OneMesh with Seamless Roaming 3 2 2 Method 2: Via a Web Browser 1. Visit http://tplinkrepeater.net, and log in with your TP-Link ID or the password you set for the extender. 2. Go to Settings > OneMesh and enable Join OneMesh. -
Page 22: Remove Extender From Onemesh Network
OneMesh network. 3. Click Remove Device. 3 3 2 Method 2: Via a Web Browser 1. Visit http://tplinkrepeater.net, and log in with your TP-Link ID or the password you set for the extender. 2. Go to Settings > OneMesh and disable Join OneMesh. - Page 23 Chapter 3 OneMesh with Seamless Roaming...
-
Page 24: Chapter 4 Tp-Link Cloud Service
TP-Link Cloud service provides a better way to manage your cloud devices. Log in to your cloud device with a TP-Link ID, and you can easily monitor and manage your home network when you are out and about via the Tether app on your smartphone or tablet. -
Page 25: Register A Tp-Link Id
Manage the User TP-Link IDs. • Once you have registered a TP-Link ID on the web management page, you can only register another TP- Link ID via the Tether APP. Please refer to Manage the Extender via the TP-Link Tether App to install the app and register a new one. -
Page 26: Manage The User Tp-Link Ids
Password. 2. Enter the current password, then a new password twice. And click Save. Manage the User TP-Link IDs The TP-Link ID used to log in to the extender for the first time will be automatically bound as the Admin account. -
Page 27: Add Tp-Link Id To Manage The Extender
3. Click , enter another TP-Link ID as needed and click Save. Note: If you need another TP-Link ID, please register a new one via the Tether app. Please refer to Manage the Extender via the TP-Link Tether App to install the app and register a new TP-Link ID. -
Page 28: Manage The Extender Via The Tp-Link Tether App
Tether” or simply scan the QR code to download and install the app. 2. Launch the Tether app and log in with your TP-Link ID. Note: If you don’t have a TP-Link ID, create one first. 3. Connect your device to the extender’s or host router’s wireless network. -
Page 29: Chapter 5 Customize Your Network
Chapter Customize Your Network This chapter guides you on how to configure network settings that are available for this extender. It contains the following sections: • Check Internet Status • Configure Wireless Network • Change LAN Settings • Specify DHCP Server Settings •... -
Page 30: Check Internet Status
You can view the internet status of your extender to check whether you have successfully set up the extended network(s). 1. Visit http://tplinkrepeater.net, and log in with your TP-Link ID or the password you set for the extender. 2. Go to Network Map to view the internet status of your extender. -
Page 31: Configure Wireless Network
If you want to extend another host network after Quick Setup, you can refer to this section. Moreover, you can change the wireless settings for your extended networks. Visit http://tplinkrepeater.net, and log in with your TP-Link ID or the password you set for the extender. - Page 32 Chapter 5 Customize Your Network • To enable or disable the extended network: 1. Go to Wireless > Extended Network. 2. Extended networks are enabled by default. If you want to disable the wireless function of a certain band, just clear the Enable checkbox.
-
Page 33: Change Lan Settings
If the IP address conflicts with another device on your local network or your network requires a specific IP subnet, you can change it. 1. Visit http://tplinkrepeater.net, and log in with your TP-Link ID or the password you set for the extender. 2. Go to Settings >... -
Page 34: Set High Speed Mode
Additionally, if you are going to disable the 2.4GHz network, it’s recommended to first make sure all your wireless devices support 5GHz network connection. 1. Visit http://tplinkrepeater.net and log in with your TP-Link ID or the password you set for the extender. 2. Go to Settings >... -
Page 35: Set Access Control
Access Control is not available when your range extender is in a OneMesh network, where it automatically synchronizes network settings from your host router. 1. Visit http://tplinkrepeater.net and log in with your TP-Link ID or the password you set for the extender. 2. Go to Settings >... - Page 36 Chapter 5 Customize Your Network • To block specific device(s): Note: Devices connected to the extender via an Ethernet cable cannot be blocked. 1. Select Blacklist and click Add. 2. Select the device to be blocked in the Add Devices table.
-
Page 37: Adjust Wi-Fi Coverage
You can set the extender’s Wi-Fi coverage depending on how large you want your Wi-Fi area to be. 1. Visit http://tplinkrepeater.net and log in with your TP-Link ID or the password you set for the extender. 2. Go to Settings >... - Page 38 Chapter 5 Customize Your Network 4. Click SAVE.
-
Page 39: Chapter 6 More Features Of Your Extender
Chapter More Features of Your Extender This chapter explains how to use the extender as a wireless adapter and as an access point . It contains the following sections: • Use Your Extender as a Wireless Adapter • Transform Your Existing Wired Network to a Wireless One... -
Page 40: Use Your Extender As A Wireless Adapter
The extender can work as an access point, transforming your existing wired network to a wireless one. 6 2 1 To Set Up the Extender as an Access Point 1. Visit http://tplinkrepeater.net, and log in with your TP-Link ID or the password you set for the extender. 2. Click Change Mode in the top right corner of the page. -
Page 41: To Connect Your Wireless Devices To The Extender Via Wps
Chapter 6 More Features of Your Extender 2 ) Confirm the information and click FINISH. 6. Connect the extender to your modem or wired router via an Ethernet cable. Now you can enjoy Wi-Fi. 6 2 2 To Connect Your Wireless Devices to the Extender via WPS Wi-Fi Protected Setup (WPS) provides an easier way to set up a secure Wi-Fi connection. - Page 42 Chapter 6 More Features of Your Extender 1. Visit http://tplinkrepeater.net, and log in with your TP-Link ID or the password you set for the extender. 2. Go to Wireless > WPS. 3. Enable WPS. 4. Connect via WPS: • Client’s PIN: Enable Client’s PIN...
- Page 43 Chapter 6 More Features of Your Extender • Push AP’s WPS button: Press the AP’s WPS button, then enable WPS on your device within 2 minutes.
-
Page 44: Chapter 7 Manage Your Extender
Chapter Manage Your Extender This chapter presents how to manage and maintain your extender. It includes the following sections: • Set System Time • Control LEDs • Set Power Schedule • Upgrade the Firmware • Backup and Restore Configuration Settings •... -
Page 45: Set System Time
Power Schedule function. If you have enabled the Daylight Saving Time feature, the system time will be synchronized with the daylight saving time you configure. 1. Visit http://tplinkrepeater.net, and log in with your TP-Link ID or the password you set for the extender. -
Page 46: Control Leds
The LEDs of the extender indicate its activities and status. You can turn off LEDs when you don’t need them. 1. Visit http://tplinkrepeater.net, and log in with your TP-Link ID or the password you set for the extender. 2. Go to Settings >... -
Page 47: Upgrade The Firmware
Time Settings to modify the time. 3. Click SAVE. Upgrade the Firmware TP-Link is committed to improving product features, giving you a better network experience. You can download the latest firmware file from the Support page at our website www.tp-link.com and upgrade the extender to the latest firmware version. -
Page 48: Online Upgrade
Chapter 7 Manage Your Extender 7 4 1 Online Upgrade 1. Visit http://tplinkrepeater.net, and log in with your TP-Link ID or the password you set for the extender. 2. Go to Settings > System Tools > Firmware Upgrade. 3. Click CHECK FOR UPGRADE and follow the web instructions to upgrade online.
Need help?
Do you have a question about the RE230 and is the answer not in the manual?
Questions and answers