Table of Contents
Advertisement
Quick Links
Vendor: S000242
ASSEMBLY INSTRUCTIONS
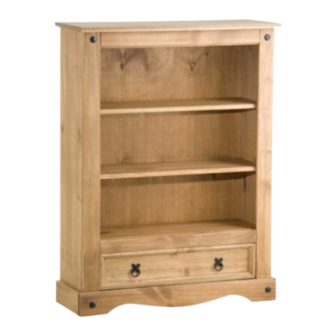
CORONA 1 DRAWER BOOKCASE
IMPORTANT: READ THESE INSTRUCTIONS CAREFULLY BEFORE ASSEMBLING OR USING YOUR CORONA 1
DRAWER BOOKCASE.
PLEASE KEEP THESE INSTRUCTIONS FOR FUTURE REFERENCE.
ASSEMBLY INSTRUCTIONS:
Please check contents and read instructions carefully before commencing assembly.
To avoid damages assemble the item on a soft, clean surface.
Assemble in the room of use.
HEALTH & SAFETY:
DO NOT use this item if any parts are missing, damaged or worn.
DO NOT use this item unless all fixings are secured.
Always use on a level, even surface.
It is recommended that two people handle and assemble the item.
Keep small parts out of the reach of children.
CARE & MAINTENANCE:
This product is manufactured in pine which is a wood with natural characteristics including knots, grains,
clusters or indentations.
On unpacking the item you may notice an odour due to the production process, however, this will disappear
after a period of time.
DO NOT place the item next to a radiator or direct sunlight as this item is susceptible to temperature
change. It is recommended to maintain an even room temperature with no sudden fluctuations.
For general cleaning use a duster or damp cloth (almost dry) not wet – do not use soap and water,
detergents, aerosol sprays or any polish as the use of these materials would invalidate any claims.
You may wish to re-treat the surface to maintain the original finish. This can be done using block wax (un-
perfumed). Please follow the manufacturer's instructions carefully.
DO NOT place the item onto wet or damp flooring as staining may occur to the floor.
Periodically check all screws & fixings to ensure they are secure.
DO NOT push the item as this will damage the base.
Keep any sharp objects away from the item.
www.birlea.com
Page 1 of 8
Advertisement
Table of Contents

Related Manuals for Birlea Corona 1


Summary of Contents for Birlea Corona 1
- Page 1 Vendor: S000242 ASSEMBLY INSTRUCTIONS CORONA 1 DRAWER BOOKCASE IMPORTANT: READ THESE INSTRUCTIONS CAREFULLY BEFORE ASSEMBLING OR USING YOUR CORONA 1 DRAWER BOOKCASE. PLEASE KEEP THESE INSTRUCTIONS FOR FUTURE REFERENCE. ASSEMBLY INSTRUCTIONS: Please check contents and read instructions carefully before commencing assembly.
- Page 2 Vendor: S000242 Parts List Hardware List Part Description Part Description Top Panel 3.5 x 35 mm Screw Left Side Panel 8 x 25 mm Wooden Dowel Right Side Panel 10 x 10 mm Tack Lower Back Crossbeam Shelf Support Front Frame 3.5 x 30 mm Screw Drawer Runner 3.5 x 14 mm Screw...
- Page 3 Vendor: S000242 Step 1: Insert hardware parts A, B and D with a small mallet and screwdriver (not provided). DO NOT use any power tools as this may damage the frame and will invalidate any claim. Page 3 of 8...
- Page 4 Vendor: S000242 Step 2: Attach the left side panel (2) and right side panel (3) to the base panel (9) and lower back crossbeam (4) using hardware part A and a screwdriver (not provided). DO NOT use any power tools as this may damage the frame and will invalidate any claim. Step 3: Attach the top panel (1) using hardware part A and a screwdriver (not provided).
- Page 5 Vendor: S000242 Step 4: Attach the front frame (5) using hardware part A and a screwdriver (not provided). DO NOT use any power tools as this may damage the frame and will invalidate any claim. Step 5: Attach the side plinths (7) with hardware part E. Secure hardware part G using hardware part F. You will need to use a screwdriver (not provided).
- Page 6 Vendor: S000242 Step 6: Attach the front plinth (11) using hardware part E and a screwdriver (not provided). DO NOT use any power tools as this may damage the frame and will invalidate any claim. Step 7: Assemble the drawer components with hardware parts J, K and L with a screwdriver (not provided). DO NOT use any power tools as this may damage the frame and will invalidate any claim.
- Page 7 Vendor: S000242 Step 8: Insert hardware part H then insert the assembled drawer and secure using hardware part B. You will need to use a small mallet (not provided). DO NOT use any power tools as this may damage the frame and will invalidate any claim. Step 9: Insert the shelves (10) and fix the lower back crossbeam (4) into position using hardware part A and a screwdriver (not provided).
- Page 8 • If you have any issues with your item please contact the retailer directly you purchased it from who will be able to resolve any issues with Birlea. • Why don’t you send us photos of your assembled furniture to info@birlea.com...
Need help?
Do you have a question about the Corona 1 and is the answer not in the manual?
Questions and answers