Table of Contents
Advertisement
User Guide
About This Guide
This guide provides information on monitor features, setting up the monitor, using the software and technical
specifications.
WARNING!
Text set off in this manner indicates that failure to follow directions could result in bodily harm or
loss of life.
CAUTION:
Text set off in this manner indicates that failure to follow directions could result in damage to
equipment or loss of information.
NOTE:
Text set off in this manner provides important supplemental information.
TIP:
Text set off in this manner provides helpful hints.
This product incorporates HDMI technology.
Advertisement
Table of Contents

Related Manuals for HP OMEN W9S97AA


Summary of Contents for HP OMEN W9S97AA
- Page 1 User Guide About This Guide This guide provides information on monitor features, setting up the monitor, using the software and technical specifications. WARNING! Text set off in this manner indicates that failure to follow directions could result in bodily harm or loss of life.
-
Page 2: Table Of Contents
Table of contents 1 Getting Started ............................. 1 Important safety information ..........................1 Product features and components ........................2 Features ............................... 2 Side and Bottom Components on the Rear Panel ................3 Setting up the monitor ............................4 Use caution when setting up the monitor ................... 4 Attaching the monitor stand ....................... - Page 3 4 Maintaining the monitor ..........................19 Maintenance guidelines ............................19 Cleaning the monitor ......................... 19 Shipping the monitor ......................... 19 Appendix A Technical specifications ......................... 20 Preset display resolutions ........................... 21 Entering user modes ......................... 22 Power adapter ..............................22 Energy saver feature ............................
-
Page 4: Getting Started
Damage Replacement Policy so you can replace the equipment, if surge protection fails. Use the appropriate and correctly sized furniture designed to properly support your HP LCD monitor. WARNING! LCD monitors that are inappropriately situated on dressers, bookcases, shelves, desks, speakers, chests, or carts may fall over and cause personal injury. -
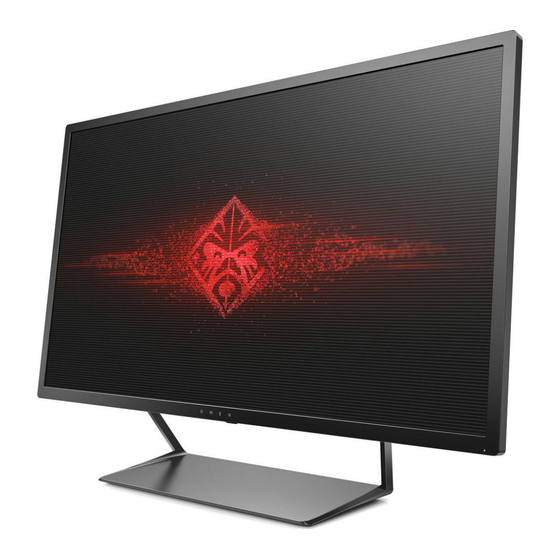
Page 5: Product Features And Components
Product features and components Features This product is an AMD FreeSync-qualified display, which allows you to enjoy PC gaming with smooth, responsive, tear-free performance whenever a picture changes on the screen. The external source connected to your display must have the FreeSync driver installed. AMD FreeSync technology is designed to eliminate stuttering and tearing in games and videos by locking a display’s refresh rate to the frame rate of the graphics card. -
Page 6: Side And Bottom Components On The Rear Panel
Side and Bottom Components on the Rear Panel Item Component Function Menu button Press to open the OSD menu, select a menu item from the OSD, or close the OSD menu. Plus button If the OSD menu is on, press to navigate forward through the OSD menu and increase adjustment levels. -
Page 7: Setting Up The Monitor
Setting up the monitor Use caution when setting up the monitor To prevent damage to the monitor, do not touch the surface of the LCD panel. Pressure on the panel may cause non-uniformity of color or disorientation of the liquid crystals. If this occurs the screen will not recover to its normal condition. -
Page 8: Attaching The Monitor Stand
Attaching the monitor stand CAUTION: The screen is fragile. Avoid touching or applying pressure to the screen; doing so can cause damage. TIP: Consider the placement of the display, because the bezel might cause interfering reflections from surrounding light and bright surfaces. Lift the monitor from its box and place it face down on a flat surface covered by a clean, dry cloth. -
Page 9: Connecting The Cables
Connecting the cables NOTE: The monitor ships with select cables. Not all cables shown in this section are included with the monitor. Place the monitor in a convenient, well-ventilated location near the computer. Connect a video cable. NOTE: The monitor will automatically determine which inputs have valid video signals. The inputs can be selected by pressing the Minus button on the rear panel or through the on-screen display by pressing... - Page 10 Connect a USB upstream cable to the USB upstream connector on the rear of the monitor and the other end to a USB downstream connector on the source device. Connect one end of the power cord to the power supply (1) and the other end to a grounded electrical outlet (2), and then connect the round end of the power supply cord to the monitor (3).
-
Page 11: Connecting Usb Devices
Connecting USB devices There is one USB upstream port and two USB downstream ports on the rear of the monitor. NOTE: You must connect the USB upstream cable from the source computer to the monitor to enable the USB ports on the monitor. Refer to Step 3 in Connecting the cables on page Adjusting the monitor Tilt the monitor panel forward or backward to set it to a comfortable eye level. -
Page 12: Turning On The Monitor
Image retention is a condition that may occur on all LCD screens. Monitors with a “burned-in image” are not covered under the HP warranty. * A prolonged period of time is 12 consecutive hours of non-use. -
Page 13: Mounting The Display Head
Mounting the display head The display head can be attached to a wall, swing arm, or other mounting fixture. NOTE: This apparatus is intended to be supported by UL or CSA Listed wall mount bracket. CAUTION: This monitor supports the VESA industry standard 100 mm mounting holes. To attach a third- party mounting solution to the display head, four 4 mm, 0.7 pitch, and 10 mm long screws are required. -
Page 14: Attaching The Vesa Mounting Bracket
Attaching the VESA mounting bracket A VESA mounting bracket is included with the monitor for use when attaching the display head to a wall, swing arm, or other mounting fixture. Remove the monitor stand. Refer to Removing the monitor stand on page Remove the screw from the center of the rear of the display head. -
Page 15: Using The Monitor
To install the .INF and .ICM files on the computer from the optical disc, if one is provided: Insert the optical disc in the computer optical drive. The optical disc menu is displayed. View the HP Monitor Software Information file. Select Install Monitor Driver Software. -
Page 16: Downloading From The Web
Downloading from the Web If you do not have a computer or source device with an optical drive, you can download the latest version of .inf and .icm files from the HP monitors support website. Select Get software and drivers. - Page 17 To select an item from the OSD menu, use the – buttons to scroll to and highlight your selection, then press the Menu button to select that function. Adjust the item using the – buttons to adjust the scale. After adjusting the function, select Save and Return, or Cancel if you don’t want to save the setting, then select Exit from the Main menu.
-
Page 18: Selecting A Faster Response Time For Gaming
The default response time for the monitor is 7 ms. The response time can be adjusted to as low as 5 ms in the display menu. All performance specifications represent the typical specifications provided by HP’s component manufacturers; actual performance may vary either higher or lower. Using Auto-Sleep Mode The display supports an OSD option called Auto-Sleep Mode that allows you to enable or disable a reduced power state for the display. -
Page 19: Support And Troubleshooting
Support and troubleshooting Solving common problems The following table lists possible problems, the possible cause of each problem, and the recommended solutions. Problem Possible Cause Solution Screen is blank or video is Power cord is disconnected. Connect the power cord. flashing. -
Page 20: Product Support
NOTE: The monitor user guide, reference material, and drivers are all available at this location. Here you can: Chat online with an HP technician ● NOTE: When support chat is not available in a particular language, it is available in English. -
Page 21: Locating The Rating Label
Locating the rating label The rating label on the monitor provides the product number and serial number. You may need these numbers when contacting HP about the monitor model. The rating label is located on the bottom of the display head. -
Page 22: Maintaining The Monitor
If the monitor is not operating properly or has been dropped or damaged, contact an authorized HP dealer, reseller, or service provider. Use only a power source and connection appropriate for this monitor, as indicated on the label/back ●... -
Page 23: Appendix A Technical Specifications
Technical specifications NOTE: All specifications represent the typical specifications provided by HP's component manufacturers; actual performance may vary either higher or lower. Specification Measurement Display, wide-screen 81.3 cm 32 in Type AMVA+ Viewable image size 81.3 cm, diagonal 32 in, diagonal Tilt -5°... -
Page 24: Preset Display Resolutions
Specification Measurement Altitude 0 m to 5,000 m 0 ft to 16,400 ft Operating 0 m to 12 ,192 m 0 ft to 40,000 ft Storage Power source 100 V ac to 240 V ac 50/60 Hz Measured power consumption 72 W Full power 54 W... -
Page 25: Entering User Modes
Preset Timing name Pixel format Horz freq (kHz) Vert freq (Hz) 576p 720 × 576 31.25 720p50 1280 × 720 37.5 720p60 1280 × 720 1080p60 1920 × 1080 67.5 1080p50 1920 × 1080 56.25 Entering user modes The video controller signal may occasionally call for a mode that is not preset if: You are not using a standard graphics adapter. -
Page 26: Appendix B Accessibility
Accessibility HP designs, produces, and markets products and services that can be used by everyone, including people with disabilities, either on a stand-alone basis or with appropriate assistive devices. Supported assistive technologies HP products support a wide variety of operating system assistive technologies and can be configured to work with additional assistive technologies.
Need help?
Do you have a question about the OMEN W9S97AA and is the answer not in the manual?
Questions and answers