Table of Contents
Advertisement
Advertisement
Table of Contents

Related Manuals for Toshiba dynadock WiAC


Summary of Contents for Toshiba dynadock WiAC
- Page 1 User’s Manual dynadock™ WiAC www.toshiba.eu/accessories...
-
Page 2: Table Of Contents
dynadock WiAC Content User? Manual Introduction....................12 Features ....................12 Package Contents ................13 Computer Requirements ..............13 Quick Tour....................14 Front ....................14 Back.....................16 Underside ....................18 Using your dynadock for the first time ............19 Installing the Drivers ................19 Connecting the AC adaptor ..............19 Connecting/Docking your computer ............20 Configuring Audio Ports ................21 Configuring audio playback ports (Headphone) ........22 Configuring audio recording ports (Microphone) .........23... -
Page 3: Safety Icons
dynadock WiAC Conventions This manual uses the following formats to describe, identify, and highlight terms and operating procedures. Abbreviations On first appearance, and whenever necessary for clarity, abbreviations are enclosed in parentheses following their definition. For example: Read Only Memory (ROM). Icons Icons identify ports, dials, and other parts of your dynadock . -
Page 4: Safety Instructions
(including AC adaptor). Disassembly, modification, tampering or repairing the product could cause fire or electric shock, possibly resulting in serious injury. Please contact an authorized Toshiba service provider for any repair service. Handling the AC adaptor and power cables/cords or plugs ■... - Page 5 Always use the TOSHIBA AC adaptor that was provided with your product (that may have been provided with your product), or use AC adaptors specified by TOSHIBA to avoid any risk of fire or other damage to the product. Use of an incompatible AC adaptor could cause fire or damage to the product possibly resulting in serious injury.
-
Page 6: Regulatory Statements
dynadock WiAC Never place your product or AC adaptor on a heat sensitive surface ■ Never place your product or AC adaptor on a wooden surface, furniture, or any other surface that could be marred by exposure to heat since the product base and AC adaptor’s surface increase in temperature during normal use. - Page 7 (1) this device may not cause harmful interference, and (2) this device must accept any interference received, including interference that may cause undesired operation. Changes or modifications to this equipment not expressly approved by Toshiba could void the user's authority to operate this equipment. Industry Canada (IC) This device complies with Industry Canada licence-exempt RSS standard(s).
- Page 8 This product was designed to fulfil the EMC (Electromagnetic Compatibility) requirements to be observed for so-called “Residential, commercial and light industry environments”. TOSHIBA do not approve the use of this product in working environments other than the above mentioned “Residential, commercial and light industry environments”.
- Page 9 WiAC Toshiba will meet all REACH requirements and is committed to provide our customers with information about the presence in our articles of substances included on the candidate list according to REACH regulation. Please consult the website www.toshiba.eu/reach for information about the presence in our articles of substances included on the candidate list according to REACH in a concentration above 0.1% weight by weight.
- Page 10 Other brands and product names are trademarks or registered trademarks of their respective companies. TOSHIBA Support Need help? For the latest driver updates, User’s Manuals & FAQs, please have a look at the TOSHIBA options & services support page: computers.toshiba.eu/options-support For the TOSHIBA hotline numbers, please see computers.toshiba.eu/options-warranty EN-10...
- Page 11 BIOS, hardware driver or operating system updates. The Fn + F4 or Fn + F5 functionality detailed in the electronic User’s Guide for your TOSHIBA computer only controls the internal video controller of your computer. This product does not support 3D programs.
-
Page 12: Introduction
Please select OPTIONS -> CONNECTIVITY -< DOCKS & PORT REPLICATORS -< DYNADOCK WiAC from the drop-down menu, then click SEARCH. The dynadock and dynadock described in this manual refer to the dynadock WiAC. -
Page 13: Package Contents
dynadock WiAC Package Contents Check to make sure you have all of the following items: ■ dynadock WiAC ■ AC adaptor and power cord ■ USB 3.0 cable ■ Wall mount parts ■ Quick Start Guide ■ Warranty leaflet Computer Requirements Component Requirement ®... -
Page 14: Quick Tour
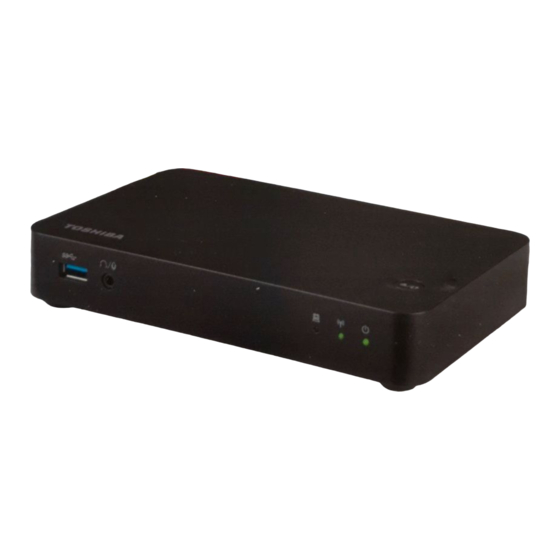
dynadock WiAC Quick Tour This section identifies the various components of the dynadock. Front The following illustration shows the front of the dynadock. For a description of each component, refer to the accompanying table. (Sample Illustration) The front of the dynadock 1. - Page 15 For more information on purchasing an optional security lock, visit www.toshiba.eu/accessories WPS/Undock button Press this button for 1 second to undock the dynadock from the computer and about 5 seconds to enable WPS function.
-
Page 16: Back
dynadock WiAC Back The following illustration shows the back of the dynadock. For a description of each component, refer to the accompanying table. (Sample Illustration) The back of the dynadock 1. Power switch 5. Universal Serial Bus (USB 3.0) port 2. - Page 17 dynadock WiAC Component Description LAN jack This jack lets you connect to a LAN via a network cable (not provided). Connect one end of a network (10/100/1000 BASE- cable to the Ethernet port (RJ-45) on the dynadock TX Ethernet) and the other end to your network for high performance network access.
-
Page 18: Underside
dynadock WiAC Component Description HDMI out port can connect with Type A connector HDMI out port HDMI cable (supports video and up to 5.1 surround sound). An HDMI cable sends video and audio signals. In addition, it can send and receive control signals. -
Page 19: Using Your Dynadock For The First Time
1. The drivers are provided at www.toshiba.eu/download-drivers. Please select OPTIONS -< CONNECTIVITY -< DOCKS & PORT REPLICATORS -< DYNADOCK WiAC from the drop-down menu, then click SEARCH.You can save it to a storage device and then install to your computer. -
Page 20: Connecting/Docking Your Computer
dynadock WiAC 2. Connect the DC output plug of the AC adaptor to the DC IN 19V jack on the dynadock. (Sample Illustration) Connecting the AC adaptor cord to the dynadock 3. Plug the power cord into a live wall outlet. 4. -
Page 21: Configuring Audio Ports
dynadock WiAC ■ The name of the dynadock is displayed as “dynadockWiAC_xxxxxx”, which differs from models. ■ Some computers might not immediately recognize that the dynadock is connected upon start-up. This is related to the computers BIOS start up sequence but not a malfunction of the dynadock. If this occurs, do the following: 1. -
Page 22: Configuring Audio Playback Ports (Headphone)
dynadock WiAC To change the default settings, you might need to adjust the audio settings ® in Windows manually, as described in this section. ■ If there is no audio device connected to the dynadock, the audio ports on the computer are enabled automatically. ■... -
Page 23: Configuring Audio Recording Ports (Microphone)
dynadock WiAC Configuring audio recording ports (Microphone) 1. Right-click the speaker icon in the Notification Area of your Windows ® desktop. 2. Select Recording Devices from the menu. 3. On the Recording tab of the dialog box, select one of the following: ■... -
Page 24: Video Modes
Set up the dynadock for Extend or Mirror Mode 1. Right-click the dynadock icon in the system tray/notification area. (Sample Illustration) System tray/notification screen 2. Select Extend or Mirror from the menu. (Sample Illustration) TOSHIBA Corp. DisplayLink Manager EN-24 User’s Manual... -
Page 25: Adjusting Video Settings
dynadock WiAC ■ If the icon is not visible in your system tray/notification area, make sure that the dynadock is connected and docked, and then click the Show Hidden Icons button ( ), if necessary, to display hidden icons. ■ If you notice certain windows or other parts of your display are missing when you disconnect your computer from the dynadock, you might need to de-select the Extend desktop onto this display checkbox in... - Page 26 Right-click the dynadock icon in the system tray/notification area, the following options appears on the menu: ■ dynadock WiAC Screen Resolution: Change the resolution setting of the external monitor connected to the dynadock. Screen Rotation: Rotate the image on the external monitor connected to the dynadock.
- Page 27 dynadock WiAC ■ To change the screen resolution, select those options on the screen. Be sure to select one of the supported resolutions numbers in the table above. For an external monitor, you can also select any resolution supported by that monitor. ■...
-
Page 28: How Standby/Sleep/Hibernation Mode Affects Devices Attached To The Dynadock
dynadock WiAC How Standby/Sleep/Hibernation Mode Affects Devices Attached to the dynadock External Monitors The external monitor connected to the dynadock goes blank if the computer enters standby/sleep/hibernation mode. When in Mirror mode, the external monitor retains the settings it had previoulsly when the computer resumes from standby/sleep/hibernation mode. - Page 29 ® 1. Click the UDS icon in the Notification Area of your Windows desktop and select “dynadock WiAC Configure Setting”. Or, open your web browser, type in IP address http://192.168.1.1 in the address field and press Enter. 2. Enter Username and Password. Both of them are “admin” by default.
-
Page 30: Wps Function
If the AC adaptor still does not power the dynadock, you should contact TOSHIBA Support. No video on the Make sure the computer is connected with the monitors attached to dynadock. -
Page 31: Others
dynadock WiAC Problem Procedure The USB ports are Remove the USB device from the dynadock and not functioning on the then reconnect it to a free port in order to ensure dynadock. that it is firmly attached. Ensure that any required USB device drivers are properly installed. - Page 32 dynadock WiAC General Specifications Computer Interface USB 3.0 or 2.0 or wirelessly Ports and Connectors 2 x USB 3.0 ports on the back 1 x USB 3.0 port on the front ("USB Sleep and Charge" function (DC 5V/port) with the ( icon) 1 x Ethernet Port (RJ-45 10 Base-T / 100BASETX/1000BASE-T Ethernet Port)
Need help?
Do you have a question about the dynadock WiAC and is the answer not in the manual?
Questions and answers