Table of Contents
Advertisement
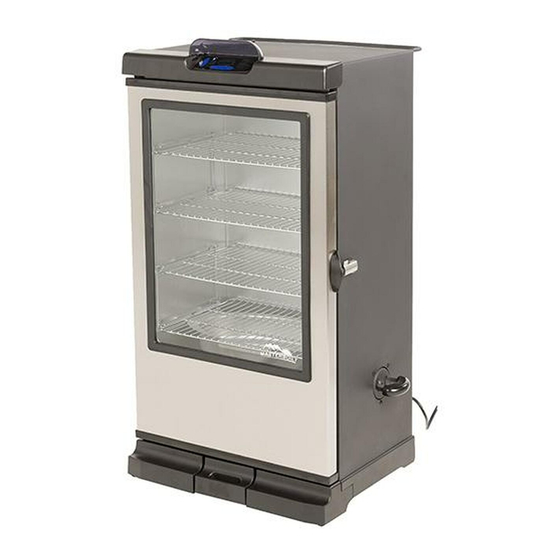
40" DIGITAL ELECTRIC SMOKER
MODEL 20070115
Masterbuilt Manufacturing, Inc.
1 Masterbuilt Ct.
Columbus, GA 31907
Servicio de atención al cliente 1-800-489-1581
www.masterbuilt.com
Approximate assembly time: 25 minutes
Tools needed for assembly: Adjustable Wrench and Phillips Head Screwdriver
ASSEMBLY, CARE & USE MANUAL
WARNING & SAFETY INFORMATION
THIS PRODUCT IS FOR OUTDOOR USE ONLY
www.masterbuilt.com
SEA PARTE DE NUESTRA COMUNIDAD EN LÍNEA "DADGUM GOOD"
BE A PART OF OUR "DADGUM GOOD" COMMUNITY ONLINE
Advertisement
Table of Contents

Related Manuals for Masterbuilt 20070115


Summary of Contents for Masterbuilt 20070115
- Page 1 40” DIGITAL ELECTRIC SMOKER MODEL 20070115 Masterbuilt Manufacturing, Inc. 1 Masterbuilt Ct. Columbus, GA 31907 Servicio de atención al cliente 1-800-489-1581 www.masterbuilt.com Approximate assembly time: 25 minutes Tools needed for assembly: Adjustable Wrench and Phillips Head Screwdriver ASSEMBLY, CARE & USE MANUAL WARNING &...
-
Page 2: Carbon Monoxide Hazard
Read and follow all warnings and instructions before using smoker and during use. La garantía de Masterbuilt no cubre el acabado de pintura, ya que se puede quemar durante el uso normal. La garantía Masterbuilt no cubre la oxidación de la unidad. - Page 3 • Do not operate any appliance with a damaged cord or plug, or after appliance malfunctions or has instala y utiliza conforme a las instrucciones, podría provocar interferencias perjudiciales para been damaged in any manner. Contact Masterbuilt Customer Service for assistance at las comunicaciones por radio.
-
Page 4: Let's Get Started
HECHOS IMPORTANTES SOBRE EL USO DEL AHUMADOR WARNING • La confi guración máxima de temperatura es 275°F (135°C). CALIFORNIA PROPOSITION 65 • NO mueva la unidad a lo largo de superfi cies desiguales. 1. Combustion by-products produced when using this product contain chemicals known to the •... -
Page 5: Parts List
RECETAS PARA EL AHUMADOR MASTERBUILT DO NOT RETURN TO RETAILER For Assembly Assistance, Missing or Damaged Parts Call: MASTERBUILT Customer Service at 1-800-489-1581. STOP! Please have Model Number and Serial Number available when calling. Costillas o costillitas JAMÓN GLASEADO CON These numbers are located on silver label on back of unit. -
Page 6: Hardware List
2. Observe la barra de estado de descarga que DE COCCIÓN aparece bajo el icono nuevo en su teléfono. SONDA DE CARNE 3. Abra la aplicación de Masterbuilt y siga las instrucciones para sincronizar su ahumador PARTS LIST LECTURA DEL con Bluetooth y su dispositivo móvil. Si desea TIEMPO DE consejos para solucionar problemas, visite www. - Page 7 CÓMO USAR EL PANEL DE CONTROL ASSEMBLY • BEFORE ASSEMBLY READ ALL INSTRUCTIONS CAREFULLY. • ASSEMBLE UNIT ON A CLEAN, FLAT SURFACE. • TOOLS NEEDED: PHILLIPS HEAD SCREWDRIVER, ADJUSTABLE WRENCH **Some assembly steps may already be completed due to pre-assembly at the factory.** STEP 1 Remove all components on inside of smoker before...
- Page 8 ASSEMBLY INSTRUCCIONES DE PRE-SAZONADO SAZONE PREVIAMENTE EL AHUMADOR ANTES DEL PRIMER USO. STEP 3 Algo de humo puede aparecer en este momento, esto es normal. Attach side panel (17) to smoker body (2) using screws (B) 1. Asegúrese que la bandeja de agua esté en su ligar y SIN AGUA. as shown.
- Page 9 ENSAMBLAJE ASSEMBLY STEP 5 PASO 11 Insert adjustable screw leg (20) Coloque el tazón de agua through bottom of side panel (17) (19) bajo la última rejilla del as shown, and into smoker body. ahumador. Fije el protector solar (7) sobre el panel de Repeat step on opposite side for control (4).
- Page 10 ASSEMBLY ENSAMBLAJE PASO 9 STEP 7 Alinee los orifi cios guía en los Position door handle (6) on door soportes de la rejilla (9) Y (10) w/window (1) as shown. con tarugos en la parte interior Secure using (ST4x10) fl at del cuerpo del ahumador como head screws.
- Page 11 ENSAMBLAJE ASSEMBLY STEP 9 PASO 7 Align keyholes on grate supports Coloque el asa de la puerta (9) and (10) with studs on the (6) en la puerta con ventana inside of smoker body as shown. (1) como se muestra. Asegure Press grate support down to usando los tornillos de cabeza secure in place.
- Page 12 ENSAMBLAJE ASSEMBLY PASO 5 STEP 11 Inserte la pata ajustable con Slide water bowl (19) under last tornillos (20) a través de la parte smoker grate. Attach sun shield inferior del panel lateral (17) como (7) over the control panel (4). se muestra y dentro del cuerpo del ahumador.
- Page 13 ENSAMBLAJE PRE-SEASON INSTRUCTIONS PASO 3 PRE-SEASON SMOKER PRIOR TO FIRST USE. Some smoke may appear during this time, this is normal. Fije el panel lateral (17) al cuerpo del ahumador (2) usando los 1. Make sure water pan is in place with NO WATER. tornillos (B) como se muestra.
-
Page 14: How To Use The Control Panel
HOW TO USE THE CONTROL PANEL ENSAMBLAJE • ANTES DEL ENSAMBLAJE LEA TODAS LAS INSTRUCCIONES CUIDADOSAMENTE. • ENSAMBLE LA UNIDAD EN UNA SUPERFICIE LIMPIA Y PLANA. • HERRAMIENTA NECESARIA: LLAVE AJUSTABLE Y DESTORNILLADOR EN CRUZ **Algunos pasos del ensamblaje pueden ya estar completados debido a un preensamblaje en fábrica.** PASO 1 Retire todos los componentes... -
Page 15: Lista De Accesorios
¡PARE! Llame al: Departamento de Servicio al Cliente de MASTERBUILT al: 1-800-489-1581 Tenga a la mano los números de modelo y serie cuando llame. Estos números se ubican en la etiqueta plateada en la parte posterior de la unidad. - Page 16 NO DEVUELVA AL ESTABLECIMIENTO MINORISTA para solicitar asistencia en el montaje de la unidad, o para reclamar partes faltantes o dañadas. ¡PARE! Llame al: Departamento de Servicio al Cliente de MASTERBUILT al: 1-800-489-1581 MAPLE GLAZED HAM Pork or Baby Back Ribs Tenga a la mano los números de modelo y serie cuando llame.
- Page 17 IMPORTANT FACTS ABOUT USING SMOKER ADVERTENCIA Propuesta 65 de California • Maximum temperature setting is 275°F (135°C). 1. Los subproductos combustibles producidos a raíz de la utilización de este producto con- • Do NOT move unit across uneven surfaces. tienen químicos cuyos efectos son reconocidos por el Estado de California por causar cáncer, defectos de nacimiento y otros daños reproductivos.
-
Page 18: Fcc Compliance & Warnings
Contacte al Servicio al cliente de Masterbuilt si desea accordance with the instructions, may cause harmful interference to radio communications. -
Page 19: Limited Warranty Information
Use solamente las áreas exteriores donde está bien ventilado. This expressed warranty is the sole warranty given by Masterbuilt and is in lieu of all other warranties, expressed or implied including implied warranty, merchantability, or fitness for a particular purpose. - Page 20 AHUMADOR ELÉCTRICO DIGITAL DE 40” MODELO 20070115 Masterbuilt Manufacturing, Inc. 1 Masterbuilt Ct. Columbus, GA 31907 Customer Service 1-800-489-1581 www.masterbuilt.com Tiempo aproximado de ensamblaje: 25 minutos Herramienta necesaria para el ensamblaje: Llave ajustable y destornillador en cruz MANUAL DE ENSAMBLAJE, CUIDADO Y USO INFORMACIÓN DE ADVERTENCIAS Y SEGURIDAD...
- Page 21 FUMOIR ÉLECTRIQUE NUMÉRIQUE DE 40 PO MODÈLE 20070115 Masterbuilt Manufacturing, Inc. 1 Masterbuilt Ct. Columbus, GA 31907 Service à la clientèle 1-800-489-1581 www.masterbuilt.com Temps nécessaire pour l’assemblage : environ 25 minutes Outils nécessaires pour l’assemblage : Clé ajustable et tournevis cruciforme MANUEL D’ASSEMBLAGE, D’ENTRETIEN ET D’UTILISATION...
- Page 22 AVERTISSEMENTS ET INFORMATIONS RELATIVES Ni Masterbuilt ni le magasin de détail qui vend ce produit ne sont autorisés à offrir des garanties supplémentaires ou à promettre quoi que ce soit qui dépasse ou qui contredise ce qui figure ci-dessus.
- Page 23 FCC. Ces limitations ont été conçues pour offrir une protection raisonnable contre tout Contactez le service à la clientèle de Masterbuilt pour obtenir de l’aide en composant le 1-800-489- brouillage nuisible au sein d'une installation résidentielle. Cet appareil génère, utilise et diffuse 1581.
- Page 24 RENSEIGNEMENTS IMPORTANTS CONCERNANT L’UTILISATION DU FUMOIR AVERTISSEMENT • Le réglage de température maximal est de 135 °C (275 °F). PROPOSITION 65 DE LA CALIFORNIE • Ne PAS déplacer l’appareil sur des surfaces inégales. 1. Les sous-produits de combustion émis lors de l’utilisation de cet appareil contiennent des produits chimiques considérés par l’État de Californie comme provoquant des cancers, des •...
- Page 25 NE PAS RENVOYER AU DÉTAILLANT pour obtenir de l’aide pour l’assemblage, des pièces manquantes ou endommagées ARRÊTEZ! Appelez le service à la clientèle de MASTERBUILT au 1-800-489-1581. Veuillez avoir le Porc ou petites côtes JAMBON GLACÉ numéro de modèle et le numéro de série à portée de main lors de l’appel. Ces numéros se levées de dos...
-
Page 26: Liste Des Pièces
NE PAS RENVOYER AU DÉTAILLANT pour obtenir de l’aide pour l’assemblage, des pièces manquantes ou endommagées Appelez le service à la clientèle de MASTERBUILT au 1-800-489-1581. Veuillez avoir le numéro ARRÊTEZ! de modèle et le numéro de série à portée de main lors de l’appel. Ces numéros se trouvent sur... -
Page 27: Utilisation Du Panneau De Commande
ASSEMBLAGE UTILISATION DU PANNEAU DE COMMANDE • AVANT L’ASSEMBLAGE, LIRE ATTENTIVEMENT TOUTES LES INSTRUCTIONS. • ASSEMBLER L’APPAREIL SUR UNE SURFACE PLANE ET PROPRE. • OUTILS NÉCESSAIRES : CLÉ AJUSTABLE ET TOURNEVIS CRUCIFORME **Il est possible que certaines étapes d’assemblage aient été effectuées en usine.** ÉTAPE 1 Enlevez tous les composants de l’intérieur du fumoir avant... - Page 28 ASSEMBLAGE INSTRUCTIONS D’APPRÊTAGE APPRÊTEZ LE FUMOIR AVANT LA PREMIÈRE UTILISATION. ÉTAPE 3 De la fumée peut apparaître pendant cette période, c’est normal. Fixez le panneau latéral (17) au bâti du fumoir (2) au moyen des 1. Assurez-vous que la cuvette d’eau est en place ET SANS EAU. vis (B) de la façon illustrée.
- Page 29 ASSEMBLAGE ASSEMBLAGE ÉTAPE 5 ÉTAPE 11 Insérez le pied à vis réglable (20) Glissez la cuvette d’eau (19) au travers du bas du panneau sous la dernière grille du latéral (17) de la façon illustrée, et fumoir. Fixez le pare-soleil dans le bâti du fumoir.
- Page 30 ASSEMBLAGE ASSEMBLAGE ÉTAPE 9 ÉTAPE 7 Alignez les trous de serrure sur Positionnez la poignée de porte les supports à grille (9) et (10) (6) sur la porte avec hublot (1) avec les goujons qui se trouvent de la façon illustrée. Fixez-la à...
Need help?
Do you have a question about the 20070115 and is the answer not in the manual?
Questions and answers