Table of Contents

Related Manuals for Schaller RH2


Summary of Contents for Schaller RH2
- Page 1 User manual Air humidity and temperature moisture meter humimeter RH2 Version 2.3_en © Schaller GmbH 2016 Distributore autorizzato : Geass S.r.l. - Torino - Tel.: +39.011.22.91.578 - mail : info@geass.com - web site : www.geass.com...
-
Page 2: Calibration Curves
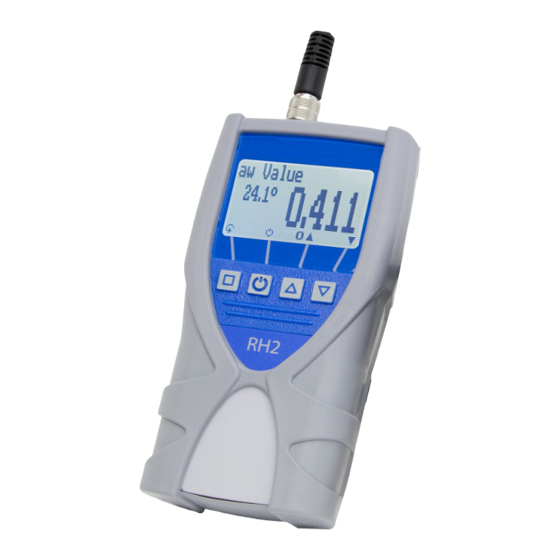
User manual Measurement To switch on the instrument, press the key for three seconds. After showing the logo, the measuring window opens and the current temperature and moisture value is displayed. In the type selection menu the calibration curves can be changed by pressing or . - Page 3 Description of definitions Relative air humidity: indicates the relation between the current water vapour pressure and the maximal possible water vapour pressure (called saturation vapour pressure) The relative humidity shows the degree the air is saturated with water vapour. For example: 50% relative humidity indicates that at the current temperature and the current pressure the air is saturated with water vapour for half of its value, 100 % relative humidity means that the air is totally saturated.
- Page 4 Empty calibration curves: There are another 5 empty calibration curves stored in the measurement device. These curves can be used for the calibration of special fruits or customer specific products. On request Schaller GmbH can develop customized calibration curves for your product. CO2: With the CO sensor and the appropiate calibration curve the air quality can be measured.
-
Page 5: Application Range
Application range Within the normal application range (normal range) the accuracy of the device is as indicated. A long-term application beyond the normal application range (max. range), particularly at an air humidity of more than 80%, can lead to higher measuring errors (+3% after 60hours). Back in the normal application range, the sensor will return to the indicated accuracy automatically. -
Page 6: Design Of The Device
Design of the device option: connection air interface humidity and temperature sensor calibration measuring value curve temperature selection of calibration curve ON/OFF button batteries slot (flipside) Moisture and LF-TB 120 temperature sensor air humidity and temperature sensor connecting plug page 6 version 2.3_en... - Page 7 Infrared temperature Sensor sensor connector sensor With this sensor and the appropriate calibration curve the air quality can be measured. The measuring range is up to 5000ppm (parts per million). The sensor is activated after putting it on and tightening it. The CO sensor measures in intervals of 15 seconds.
-
Page 8: Menu Level Overview
Menu level overview Keypad symbols Measuring window: Rolling Menu Type selection menu Power ON / OFF Switch upper Next calibration curve Switch lower Previous calibration curve Power off Save Hold Store menu Autolog Watch saved data Show last log Store new log Enter supplier´s Power off data... -
Page 9: Operating The Instrument
Operating the instrument Switching on: Press for three seconds. Changing the calibration curve: - Options – date / time Setting date and time: two times Set date and time using the button , according to the format indicated (JJ.MM.TT). After entering the year, press the button for entering the month and again for entering the day. - Page 10 USB mini B connector. The bigger connector has to connected to a USB slot on your Start the LogMemorizer software on your PC and switch on your humimeter RH2. The data transfer can be started on your humimeter or on the software:...
-
Page 11: Print Saved Data
Carefully loose the protection cap on the humimeter RH2. At first plug in the side of the connector with the close plastic casing at the humimeter RH2. Then switch on the device. -
Page 12: Single-Point Adjustment With 50% Humidity Standard
Single-point adjustment with 50% humidity standard For the adjustment the appropriate calibration equipment as well as calibration ampoules resp. humidity standards of 50 % rh are required. Proceedings Preparation To ensure as good as possible inspection results it is essential that the measuring device, the calibration equipment and the calibration ampoules have approximately the same temperature. -
Page 13: Offset Adjustment
3. Take the upper part with the RH2 and attach these carefully at the bottom part of the calibration device. 4. Pick up the RH2 together with the calibration device STRAIGHT and DON´T TURN IT AROUND. Screw it up like shown in the picture. -
Page 14: Reset To Factory Calibration
7. Wait until the bar has risen completely. The device adjusts by itself and automatically jumps back to measuring window. adjustment completed now. 8. Check the result before you remove the device from the calibration equipment. Depending on the temperature the display should show a water content of about 50% now. -
Page 15: Care Instructions
0.5% per year. You can check instruments of the humimeter RHx series by yourself using the calibration equipment (see optional accessories). For a fee, Messtechnik Schaller GmbH can also carry out a calibration at their factory. On demand you can also receive a calibration certificate. -
Page 16: Exemption From Liability
For eventual resulting damages we cannot provide any warranty. In case of a faulty device, please contact Schaller GmbH (www.humimeter.com) or your dealer. page 16 version 2.3_en... -
Page 17: Technical Data
Technical data External sensors Measurement: measuring range / resolution / accuracy Moisture and temperature sensor (12032): rel. humidity: 0 to 100%RH /0.1% calibration 10 to 90% /±2.0%rh (at 25°C) temperature °C: -20 to +85°C /0.1°C /±0.3°C (at 25°C) temperature °F: -4 to185°F /0.3°F /±0.5°F (at 77°F) - Page 18 Measuring instrument: Operating temperature range: -10°C to 60°C / 14 to 140°F Storage temperature: -20°C to 60°C / -4 to 140°F Temperature compensation: automatically Data storage: approx. 10,000 measuring values Menu languages: English, German, French, Italian, Spanish, Russian Power supply: 4 pcs.
- Page 19 Notes ------------------------------------------------------------------------------- ------------------------------------------------------------------------------- ------------------------------------------------------------------------------- ------------------------------------------------------------------------------- ------------------------------------------------------------------------------- ------------------------------------------------------------------------------- ------------------------------------------------------------------------------- ------------------------------------------------------------------------------- ------------------------------------------------------------------------------- ------------------------------------------------------------------------------- ------------------------------------------------------------------------------- ------------------------------------------------------------------------------- ------------------------------------------------------------------------------- ------------------------------------------------------------------------------- ------------------------------------------------------------------------------- ------------------------------------------------------------------------------- ------------------------------------------------------------------------------- ------------------------------------------------------------------------------- ------------------------------------------------------------------------------- ------------------------------------------------------------------------------- ------------------------------------------------------------------------------- ------------------------------------------------------------------------------- ------------------------------------------------------------------------------- ------------------------------------------------------------------------------- ------------------------------------------------------------------------------- ------------------------------------------------------------------------------- ------------------------------------------------------------------------------- version 2.3_en page 19...
-
Page 20: Important! Please Read
!IMPORTANT! Please read! Common reasons for incorrect measurements Sunlight or other sources of heat or cold that doesn´t correspond to the surrounding temperature Dripping or sprayed water Irreversible damage of the sensor due to aggressive gases Danger of condensation because of changing temperature ...
Need help?
Do you have a question about the RH2 and is the answer not in the manual?
Questions and answers