Table of Contents
Advertisement
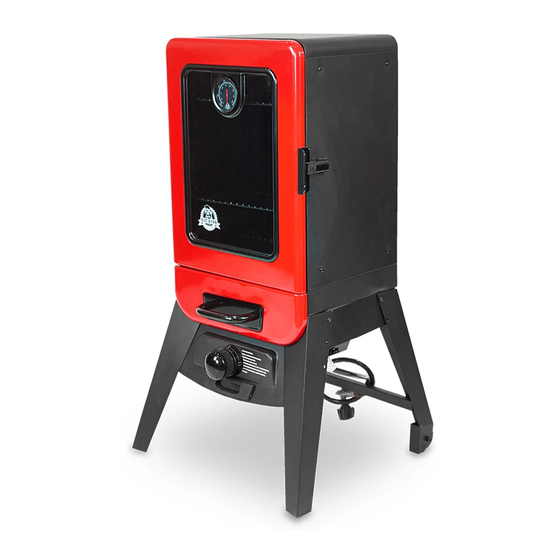
MODEL : PBV2G1
PART : 77425
RED ROCK
GAS VERTICAL SMOKER
(2-SERIES)
SAVE THESE INSTRUCTIONS! MANUAL MUST BE READ
BEFORE OPERATING!
CONFORMS TO: ANS Z21.89-2013/ CSA 1.18-2013
OUTDOOR COOKING SPECIALTY GAS APPLIANCES
ASSEMBLY AND OPERATION INSTRUCTIONS
WARNING: Please read the entire manual before installation and use of this electric, pellet fuel burning
appliance. Failure to follow these instructions could result in property damage, bodily injury or even death.
Contact local building or fire officials about restrictions and installation inspection requirements in your area.
Advertisement
Table of Contents

Related Manuals for Pit Boss PBV2G1


Summary of Contents for Pit Boss PBV2G1
- Page 1 MODEL : PBV2G1 PART : 77425 RED ROCK GAS VERTICAL SMOKER (2-SERIES) SAVE THESE INSTRUCTIONS! MANUAL MUST BE READ BEFORE OPERATING! CONFORMS TO: ANS Z21.89-2013/ CSA 1.18-2013 OUTDOOR COOKING SPECIALTY GAS APPLIANCES ASSEMBLY AND OPERATION INSTRUCTIONS WARNING: Please read the entire manual before installation and use of this electric, pellet fuel burning appliance.
-
Page 2: Safety Information
SAFETY INFORMATION DANGER IF YOU SMELL GAS: 1. SHUT OFF GAS TO THE APPLIANCE 2. EXTINGUISH ANY OPEN FLAME OPEN LID IF ODOR CONTINUES, KEEP AWAY FROM THE APPLIANCE AND IMMEDIATELY CALL YOUR GAS SUPPLIER OR YOUR FIRE DEPARTMENT. FAILURE TO FOLLOW THESE INSTRUCTIONS COULD RESULT IN FIRE OR EXPLOSION WHICH COULD CAUSE PROPERTY DAMAGE, PERSONAL INJURY OR DEATH. - Page 3 Replacement pressure regulator/hose assembly must be part No 601-B, KR-106, RJ-A3, which can be obtained by contacting Pit Boss customer service at 1-877-303-3134. • Do not attempt to adjust or repair a regulator. The regulator is designed to operate at a maximum output pressure of 11 inches of water column (2.74 kPa).
- Page 4 COPYRIGHT NOTICE Copyright 2017. All right reserved. No part of this manual may be copied, transmitted, transcribed, stored in a retrieval system, in any form or by any means without expressed written permission of, Dansons Inc. 3411 North 5th Avenue, Suite 500, Phoenix, AZ, USA 85013 sales@pitboss-grills.com | service@pitboss-grills.com www.pitboss-grills.com Toll-Free: 1-877-303-3134, Fax: 1-877-303-3135...
-
Page 5: Table Of Contents
TABLE OF CONTENTS Safety Information ............3 Operating Instructions Quick-Start Lighting ..............19 Parts & Specs ..............7 Leak Testing ................. 21 Seasoning Your Smoker .............22 Assembly Preparation ............9 How To Use The Wood Chip Tray ..........22 Assembly Instructions Adding Water ................ -
Page 6: Parts & Specs
PARTS & SPECS PARTS & SPECS PARTS & SPECS NOTE: Due to ongoing product development, parts are subject to change without notice. Contact Customer Service if parts are missing when assembling the unit. NOTE: Due to ongoing product development, parts are subject to change without notice. Contact Customer Service if parts are missing when assembling the unit. - Page 7 UNIT ASSEMBLED (WxHxD) UNIT WEIGHT COOKING AREA TEMP. RANGE 38-187°C Cubic Cooking: 0.06 m / 2.1ft 790mm x 1030mm x 540mm 21.kg PBV2G1 TOTAL - 3,480cm² / 540sq. in. / 100-370°F / 46 lb / 31” x 40” x 21”...
-
Page 8: Assembly Preparation
Before assembly of product, review all parts and reference the parts list. If any part is missing or damaged, do not attempt to assemble. Shipping damage is not covered under warranty. Contact your dealer or Pit Boss Customer Service for parts. -
Page 9: Panel Assembly
2. MOUNTING BOTH FRONT LEGS TO Fig.2 LOWER CABINET WITH CONTROL PANEL ASSEMBLY Parts Required: 1 x Lower Smoker Cabinet with Control Panel Assembly (#14) 1 x Right Front Leg (#22) 1 x Left Front Leg (#21) 2 x #10-24*1/2”Screw (#C) Installation: •... -
Page 10: Mounting Support Panels To Legs
4. MOUNTING SUPPORT PANELS TO Fig.4 FOUR LEGS Parts Required: 2 x Support Panel (#19) 1 x Right Front Leg (#22) 1 x Left Front Leg (#21) 1 x Right Rear Leg with Wheel Assembly (#18) 1 x Left Rear Leg with Wheel Assembly (#20) 8 x #10-24*1/2”Screw (#C) Installation: •... -
Page 11: Mounting Dampers To Upper Cabinet Assembly
6. MOUNTING DAMPERS TO THE UPPER Fig.6 SMOKER CABINET ASSEMBLY Parts Required: 1 x Door Assembly (#10) 1 x Upper Smoker Cabinet Assembly (#2) 2 x Damper (#1) 2 x #10-24*1/2”Screw (#C) 2 x #10-24 Lock Nut (#D) 2 x M5 Spring Washer (#E) Installation: •... -
Page 12: Assembly Cooking Grid Supports
9. ASSEMBLING COOKING GRID Fig.9.1 SUPPORT TO THE UPPER SMOKER CABINET ASSEMBLY Fig.9.2 Parts Required: 6 x Cooking Grid Support (#5) 1 x Upper Smoker Cabinet Assembly (#2) Installation: • Assemble three Cooking Grid Supports (#5) in the holes in the left side of the smoker. -
Page 13: Attaching Door Assembly
12. ATTACHING DOOR ASSEMBLY INTO Fig.12 THE UPPER SMOKER CABINET ASSEMBLY Parts Required: 1 x Door Assembly (#10) 1 X Upper Smoker Cabinet Assembly (#2) Installation: •Attach Door Assembly (#10)into the Upper Smoker Cabinet Assembly(#2) as Fig.12 shown. 13. INSERTING HEAT INDICATOR INTO Fig.13 THE DOOR ASSEMBLY Parts Required:... -
Page 14: Mounting Door Handle
15. MOUNTING DOOR HANDLE TO THE Fig.15 DOOR ASSEMBLY Parts Required: 1 x Door Handle (#7) 1 x Silicon Washer (#8) 1 X Door Assembly (#10) 2 x #10-24*1/2”(#C) Installation: • Attach the Door Handle (#7) with Silicon Washer (#8) to the Door Assembly (#10)using 2 x #10-24*1/2”(#C) as Fig.15 shown. -
Page 15: Placing Control Knob Onto Valve Stem
18. PLACING CONTROL KNOB ONTO Fig.18 VALVE STEM Parts Required: 1 x Control Knob (#13) Installation: • Place Control Knob (#13) over the valve stem, making certain to align the flat portion of the stem with the flat portion of the knob and push the Control Knob (#13) onto the stem until it is firmly seated. - Page 16 21. Assembly of the 2.2 Gas Smoker Fig.21 is completed Warning: This is a stationary position for gas smoker assembly with gas cylinder. If Gas cylinder you should want to move the mounting unit, the gas cylinder mounting bracket Regulator bracket and Regulator QCC1 QCC1 Connector must be...
-
Page 17: Gas Cylinder (Tank) Instructions
Operating Instructions GAS CYLINDER (TANK) INSTRUCTIONS LP GAS CYLINDER (TANK) SPECIFICATIONS: The installation of this appliance must be in accordance with all applicable local codes, or the National Fuel Gas Code ANSI Z223.1 NFPA 54. When purchasing or exchanging a cylinder for your gas smoker, it must be: 1. -
Page 18: Quick-Start Lighting
TURN BURNER VALVE “OFF” POSITION " ". IF NEEDED. Operating Instructions for Dual Burner System Your Pit Boss Gas Smoker was designed with a Single Valve Control/ Dual Burner System. The Smoke Burner Top burner is a low BTU smoke burner and the bottom Burner is a Higher BTU main burner. - Page 19 If you have your control knob set on “Low” setting and desire higher temperature, you must rotate your control k 90 degree to the “MED” setting to the “High” setting. LP Cylider Capacity and Specifications: The 20 lb (9.1 kg). LP cylinder used with this smoker must conform to the following requirements. Operating Instructions Diameter- 12”...
-
Page 20: Leak Testing
Operating Instructions LEAK TESTING: WARNING: NEVER USE YOUR SMOKER WITHOUT LEAK TESTING ALL GAS CONNECTIONS, HOSES AND PROPANE TANK. DANGER: TO PREVENT FIRE OR EXPLOSION HAZARD: • Do not smoke or permit ignition sources in the area while conducting a leak test. •... -
Page 21: Seasoning Your Smoker
SEASON YOUR SMOKER PRIOR TO ITS FIRST USE Seasoning seals the interior of your smoker to enhance flavoring, durability and overall performance. 1.Add water to water pan - Fill the water pan to 3/4 full. Do not overfill . 2.Add wood chips to the wood chip trays and burn Smoker at 300°F for 45–60 minutes. 3.Let smoker cool down then clean out the used water and wood chips. -
Page 22: Adding Water
Operating Instructions ADDING WATER TO SMOKER To add water to the smoker, open the smoker door and slowly pour water from a cup or pitcher into the water pan. Fill the water pan to 3/4 full. Do not overfill. LP GAS LIGHTING PROCEDURE (IGNITOR) 1. -
Page 23: Cooking Instructions
COOKING INSTRUCTIONS IMPORTANT: Before each use, clean and inspect the hose and connection to the LP gas cylinder. If there is evidence of abrasion, wear, cuts or leaks, the hose must be replaced before the smoker is used. Refer to the “leak test” instructions. •... -
Page 24: Tips & Techniques
Smoking Guidelines, Tips & Recipes TIPS & TECHNIQUES Types of wood to use for smoke: • Always use a hardwood that has been seasoned for at least 6 months. • We recommend using Pecan, Hickory, Oak, Apple, Alder or Mesquite. •... -
Page 25: Care & Maintenance
CARE AND MAINTENANCE CARE AND MAINTENANCE CARE AND MAINTENANCE TO BE PERFORMED BEFORE EACH USE: CAUTION: All care and maintenance procedures are to be performed only while the smoker is turned off and cooled. • Clean the water pans and cooking grids with hot, soapy water. Rinse and dry thoroughly. You may prefer to coat the water pans and cooking grids lightly with cooking oil or cooking spray. -
Page 26: Cooking Guidelines
COOKING GUIDELINES Smoking and grilling styles of cooking can give you different results based on time and temperature. For best results, keep a record of what you cooked, at what temperature, how long you cooked for, and the results. Adjust to your taste for the next time. Practice makes perfect. - Page 27 POULTRY Size Rare - 54°C / 130°F Medium - 60°C / 140°F Well Done - 82°C / 180°F Turkey (whole) 4.53-5.44 kg / 10-12 lbs. 7 - 8 Hours Chicken (whole) All sizes 5 -6 Hours Drumsticks, Breasts All sizes 4 -5 Hours Small Game Birds All sizes...
-
Page 28: Troubleshooting
Proper cleaning and maintenance will prevent common operational problems. When your Pit Boss smoker is operating poorly, or used less frequently, the following troubleshooting tips may be helpful. For FAQ, please visit www.pitboss-grills.com and click SUPPORT. You may also contact your local Pit Boss authorized dealer or contact Customer Service for assistance. -
Page 29: Accessories Sold Separately
ACCESSORIES SOLD SEPARATELY Available for purchase separately. Accessories not available and supplied by all authorized Pit Boss dealers. ITEM DESCRIPTION ITEM DESCRIPTION COVER Form-fitting, full length cover. Heavy-duty polyester with PVC backing for long-term GRILLING APRON use. Weatherproof. Includes draw-string lock for easy tightening. -
Page 30: Replacement Parts
REPLACEMENT PARTS REPLACEMENT PARTS REPLACEMENT PARTS... -
Page 32: Warranty
WARRANTY CONDITIONS All Electric Vertical Smokers by Pit Boss, manufactured by Dansons Inc., carry a limited warranty from the date of sale by the CONDITIONS original owner. The warranty coverage begins on the original date of purchase and proof of date of purchase, or copy of All Gas Vertical Smokers by Pit Boss, manufactured by Dansons Inc., carry a limited warranty from the date of sale by the... -
Page 33: Ordering Replacement Parts
The serial and model number of your Pit Boss can be found inside the lid of the hopper. Record numbers below as the label may become worn or illegible. -
Page 34: Recipes
Smoking Recipes RECIPES Smoked Pork Tenderloin Take outside wrapper off of meat and wash thoroughly in cold water. Place tenderloin on a paper towel to soak up excess water. Rub your favorite pork rub on the loin. Preheat smokers to 225 degrees and place loin in the center of the smoker. - Page 35 Smoking Recipes Smoked Fish Halibut Select a nice fresh ¾” thick fillet. Wash fillet thoroughly in cold water and lay on paper towel until water is not visible. Melt a whole stick of butter in the microwave and sprinkle a liberal amount of Dill weed in the melted butter. Lay fillets on aluminum foil and fold a lip around edges to contain the butter.
- Page 36 IMPORTANT DO NOT RETURN PRODUCT TO STORE Dansons Inc. stands behind our authorized dealers. Many dealers stock replacement parts and accessories. We strongly suggest that if you need to order parts, options, or require service that you first consult your local dealer. Many dealers do stock current accessories, fuel and service parts.
Need help?
Do you have a question about the PBV2G1 and is the answer not in the manual?
Questions and answers