Pit Boss PBV3D1 Owner's Manual
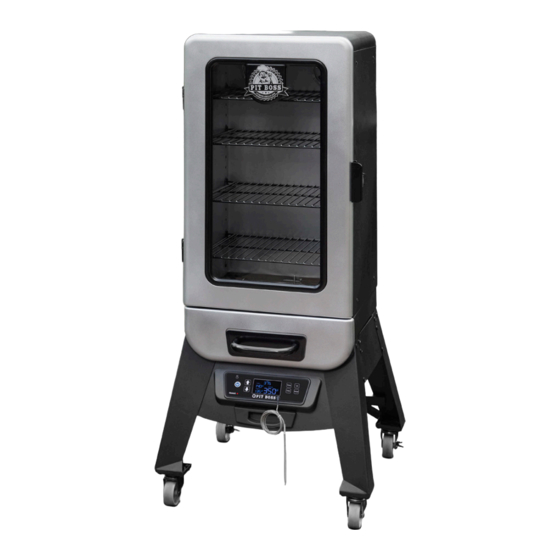
Digital electric vertical smoker
Hide thumbs
Also See for PBV3D1:
- Assembly and operation instructions manual (32 pages) ,
- User manual (60 pages) ,
- Assembly and operation manual (68 pages)
Table of Contents
Advertisement
DIGITAL ELECTRIC
VERTICAL SMOKER
IMPORTANT, READ CAREFULLY, RETAIN FOR
FUTURE REFERENCE. MANUAL MUST BE
READ BEFORE OPERATING!
For outdoor and household use only. Not for commercial use.
CERTIFIED TO: UL1026 (6th edition) Electric
Household Cooking and Food Serving Appliance
WARNING: PLEASE READ THE ENTIRE MANUAL BEFORE
INSTALLATION AND USE OF THIS ELECTRIC APPLIANCE. FAILURE
TO FOLLOW THESE INSTRUCTIONS COULD RESULT IN PROPERTY
DAMAGE, BODILY INJURY OR EVEN DEATH. CONTACT LOCAL
BUILDING OR FIRE OFFICIALS ABOUT RESTRICTIONS AND
INSTALLATION INSPECTION REQUIREMENTS IN YOUR AREA.
O W N E R ' S M A N U A L
ITM#0256539
MODEL: PBV3D1
PART: 10858
Advertisement
Table of Contents

Subscribe to Our Youtube Channel
Related Manuals for Pit Boss PBV3D1


Summary of Contents for Pit Boss PBV3D1
- Page 1 O W N E R ' S M A N U A L ITM#0256539 MODEL: PBV3D1 PART: 10858 DIGITAL ELECTRIC VERTICAL SMOKER IMPORTANT, READ CAREFULLY, RETAIN FOR FUTURE REFERENCE. MANUAL MUST BE READ BEFORE OPERATING! For outdoor and household use only. Not for commercial use.
-
Page 2: Safety Information
SAFETY INFORMATION MAJOR CAUSES OF APPLIANCE FIRES ARE A RESULT OF POOR MAINTENANCE AND A FAILURE TO MAINTAIN REQUIRED CLEARANCE TO COMBUSTIBLE MATERIALS. IT IS OF UTMOST IMPORTANCE THAT THIS PRODUCT BE USED ONLY IN ACCORDANCE WITH THE FOLLOWING INSTRUCTIONS. Please read and understand this entire manual before attempting to assemble, operate or install the product. - Page 3 SAFETY LISTING In accordance with the procedures and specifications by Conformité Européenne (CE), Pit Boss® Grills pellet cooking appliances demonstrates compliance through testing to the standards and directives that comply with all safety, health and environmental protection requirements by the EU (European Union) and the European Economic Area (EEA).
-
Page 4: Table Of Contents
TABLE OF CONTENTS Safety Information ............2 COPYRIGHT NOTICE Parts & Specs ..............5 Copyright 2021. All right reserved. No part of this manual may be copied, transmitted, transcribed, stored in a retrieval Assembly Preparation ............6 system, in any form or by any means without expressed written permission of, Assembly Instructions Dansons... -
Page 5: Parts & Specs
PARTS & SPECS Part# Description Cooking Grids (x4) Cooking Grid Support Brackets (x8) Damper Vent (x2) Back Handle (x1) Logo Plate (x1) Cabinet Door Handle (x1) Cabinet Door Latch (x1) Cabinet Door (x1) Main Cabinet (x1) Wood Chip Tray Lid (x1) Wood Chip Tray Assembly (x1) Water Pan (x1) Water Pan Support (x1) -
Page 6: Assembly Preparation
ASSEMBLY PREPARATION Parts are located throughout the shipping carton, including underneath the smoker. Inspect the smoker, parts, and hardware blister pack after removing from the protective shipping carton. Discard all packaging materials from inside and outside of the smoker before assembly, then review and inspect all parts by referencing the parts list. If any part is missing or damaged, do not attempt to assemble. -
Page 7: Securing The Control Panel To Front Support Legs
3. SECURE CONTROL BOARD TO FRONT SUPPORT LEGS Parts Required: #10–24x½" Screw (#C) Installation: • Near the Control Board, loosen the two screws connecting the front panel to the main cabinet. • Using another two screws, secure the front panel sides to the front- facing support legs. -
Page 8: Mounting The Power Cord Bracket
7. MOUNTING THE POWER CORD BRACKET Parts Required: Power Cord Bracket (#19) #10–24x½" Screw (#C) Installation: • Loosen the screw of the power cord clip on the support leg, and guide the power cord through the power cord clip to secure. •... -
Page 9: 10. Assembling The Main Cabinet To The Cabinet Base
10. ASSEMBLING THE MAIN CABINET TO THE CABINET BASE Parts Required: Grill Probe Bracket (#18) #10–24x½" Screw (#C) #5–32x½" Screw (#F) Installation: • Prepare the main cabinet to be mounted to the cabinet base. Position the cabinet base next to the main cabinet, with both facing the same direction. -
Page 10: Mounting The Logo Plate
12. MOUNTING THE LOGO PLATE Parts Required: Logo Plate (#5) Cabinet Door (#8) Installation: • Remove the washer and wing nut from the packaged logo plate. • Insert the logo plate into the mounting hole on the front of the cabinet door, place the washer on the thread pole on the inside of the door, and hand-tighten by hand to secure. -
Page 11: Connecting To A Power Source
With all outdoor appliances, outside weather conditions play a big part in the performance of your smoker and the cooking time needed to perfect your meals. All Pit Boss® units should keep a minimum clearance of 305mm (12 inches) from combustible constructions, and this clearance must be maintained while the smoker is operational. -
Page 12: Smoker Temperature Ranges
or history of what you cooked, the outdoor temperature, and the cooking time. This will help later down the road to help you determine what to cook and how long it will take. • In very cold weather, increase your preheating time by at least 20 minutes. •... -
Page 13: Understanding The Control Board
The plug-in connection port(s) on the front of the Control Board are for two Meat Probes. When a meat probe is connected, the temperature is displayed on the LCD Screen. When not in use, disconnect the meat probe from the connection port. Compatible with Pit Boss® branded meat probes only. Additional meat probe(s) sold separately. -
Page 14: Understanding The Probes
UNDERSTANDING THE PROBES • GRILL PROBE Located inside the cabinet, on the rear wall along the bottom, is the Grill Probe. It is a small, vertical piece of stainless steel. The Grill Probe measures the internal temperature of the unit. When the temperature is adjusted on the Control Board, the Grill Probe will read the actual temperature inside the unit and adjust to the desired temperature. -
Page 15: Refilling The Water Pan
After preheating is complete, you will notice that your wood chips will be smoking. You are ready to enjoy your smoker at your desired time and temperature! Slide out and place food on the cooking grids, leaving room between each item to allow smoke and moisture to circulate evenly. -
Page 16: Care & Maintenance
CARE AND MAINTENANCE Any Pit Boss® unit will give you many years of flavorful service with minimum cleaning. Follow these cleaning and maintenance tips to service your smoker: 1. PROBES • A meat probe not in use should be rolled up in a large, loose coil. Kinks or folds in the wire may cause damage. -
Page 17: Troubleshooting
TROUBLESHOOTING Proper cleaning and maintenance will prevent common operational problems. When your Pit Boss® smoker is operating poorly, or used less frequently, the following troubleshooting tips may be helpful. For FAQ, please visit www.pitboss-grills.com . You may also contact your local Pit Boss® authorized dealer or contact Customer Service for assistance. - Page 18 No Smoke Is Being No Wood Chips Add wood chips to the wood chip tray. Produced Element Times Out, Not The heating element is not staying on long enough to heat the wood chips, which is due to the TEMP Enough Heat To Wood being set too low.
-
Page 19: Electrical Wire Diagram
ELECTRICAL WIRE DIAGRAM The Control Board system is an intricate and valuable piece of technology. For protection from power surges and electrical shorts, consult the wire diagram below to ensure your power source is sufficient for the operation of the unit. PB –... -
Page 20: Replacement Parts
REPLACEMENT PARTS Part# Description Cooking Grids (x4) Cooking Grid Support Brackets (x8) Damper Vent (x2) Back Handle (x1) Logo Plate (x1) Cabinet Door Handle (x1) Cabinet Door Latch (x1) Cabinet Door (x1) Main Cabinet (x1) 10-A Wood Chip Tray Lid (x1) 11-A Wood Chip Tray Assembly (x1) 12-A... -
Page 21: Warranty
CONDITIONS All electric smokers by Pit Boss®, manufactured by Dansons , carry a limited warranty from the date of sale by the original owner. The warranty coverage begins on the original date of purchase and proof of date of purchase, or copy of original bill of sale, is required to validate the warranty. Customers will be subject to parts, shipping, and handling fees if unable to provide proof of the purchase or after the warranty has expired. - Page 22 Our goods come with guarantees that cannot be excluded under the Australian Consumer Law. You are entitled to a replacement or refund for a major failure and for compensation for any other reasonably foreseeable loss or damage. You are also entitled to have the goods repaired or replaced if goods fail to be of acceptable quality and the failure does not amount to a major failure.
- Page 23 IMPORTANT For all questions, inquiries, or customer support, please contact Genesis International Corporation Pty Ltd. +61 8 9248 9822 | service@genesiscorp.com.au WARNING: THIS PRODUCT CAN EXPOSE YOU TO CHEMICALS INCLUDING CARBON MONOXIDE, WHICH IS A COMBUSTION BY-PRODUCT KNOWN TO CAUSE CANCER, BIRTH DEFECTS OR OTHER REPRODUCTIVE HARM.
Need help?
Do you have a question about the PBV3D1 and is the answer not in the manual?
Questions and answers