Teufel ROCKSTER AIR Technical Description And User Manual
With 4-channel mixer
Hide thumbs
Also See for ROCKSTER AIR:
- Technical description and instruction manual (36 pages) ,
- Technical description and user manual (36 pages) ,
- Manual (29 pages)

Related Manuals for Teufel ROCKSTER AIR


Summary of Contents for Teufel ROCKSTER AIR
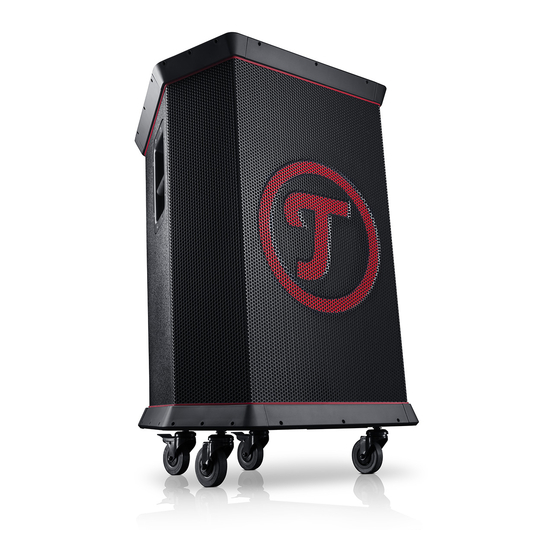
- Page 1 Technical Description and User Manual ROCKSTER AIR Bluetooth Speaker with 4-channel mixer...
-
Page 2: Table Of Contents
Storage ........28 Connections ........13 Front and back side ....13 Troubleshooting .......29 Connection and control terminal 14 Technical Data .........31 Mixing console ......16 Declaration of Conformity ....31 Transport ..........17 Setup ..........18 Location tips ........18 PA tripod ........18 Inputs ...........19 • ROCKSTER AIR... -
Page 3: General Notes And Information
Trademarks packaging. We can only accept the ® The Bluetooth word return of the ROCKSTER AIR with the mark and logos are original packaging. registered trademarks owned by the Empty boxes are not available! Bluetooth SIG, Inc. and any use of such marks by Lautsprecher Teufel is under license. -
Page 4: Complaints
Phone 00800 - 200 300 40 (toll-free) Fax: +49 (0)30 / 300 930 930 2. Serial number or batch number Service: Located on the back side of www.teufelaudio.com/service the device, e.g. serial no.: Contact: KB20240129A-123. www.teufelaudio.com/contact Thank you for your support! • ROCKSTER AIR... -
Page 5: For Your Safety
Proper use The ROCKSTER AIR is intended for CAUTION the amplification and playback of This signal term indicates a low music and spoken word from external... - Page 6 – Power overload due to light- Repairs may only be carried ning strike may damage or out by an authorised special- destroy the unit. If the unit ist workshop. Only parts that is unattended for a pro- • ROCKSTER AIR...
- Page 7 – When storing the device, bridge the contacts. Short also ensure that it stands circuiting caused by bridged safely and that it cannot be rechargeable battery con- knocked down or over. tacts may result in burns or fire. • ROCKSTER AIR...
- Page 8 – Avoid any contact with it. – In the event of accidental contact, immediately rinse with plenty of water and seek medical attention. • ROCKSTER AIR...
- Page 9 This will chargeable battery power. prevent discolouration of the – Recharge your rechargeable floor over the long term. battery frequently. – Store your rechargeable bat- tery in a cool, but frost-free area, ideally at 15 °C. High- • ROCKSTER AIR...
-
Page 10: Explanation Of Symbols
You can hand old electrical devices over to the local reusable materials/ recycling centre. Please contact your vendor directly for more information about this topic. • ROCKSTER AIR... -
Page 11: Overview
Overview Unpacking • Carefully open the box, take out the EPE foam half-shell and carefully lift the ROCKSTER AIR out of the box. Package Contents (1) 1× ROCKSTER AIR (2) 1× mains cord (3) 1× carrying strap (4) 2× eye bolt for (3) Optional accessories (5) “RocksterAir RC”... -
Page 12: Introduction
L stereo R possible. The power can be supplied via the mains supply or the integrated rechargeable battery. Thus, the ROCKSTER AIR is also ideal for out- 220-240 V~50Hz 200W 220-240 V~50Hz 200W door events. The following inputs are available for... -
Page 13: Operational Controls And Connections
Front and back side 220-240 V~50Hz 200W (10) Item Description Threaded hole for eye bolts (4) Infrared receiver for optional remote control Cover cap for the mixing console Connection and control terminal (10) Rechargeable battery compartment cover • ROCKSTER AIR... -
Page 14: Connection And Control Terminal
Connection and control terminal (11) (12) (13) (14) (15) (16) (17) (18) (25) (19) (20) (21) (22) (24) (23) 220-240 V~50Hz 200W • ROCKSTER AIR... - Page 15 CHARGING (22) 5 V, 1 A). Data transmission is not possible. — (23) Fuse holder POWER (24) Mains connector jack Overload indicator, illuminates when the input level CLIPPING (25) is too high. Reduce the volume on your external player. • ROCKSTER AIR...
-
Page 16: Mixing Console
INSTRUMENT (28) Volume control for INSTRUMENT input (13). MICROPHONE (29) Volume control for MICROPHONE input (12). TREBLE (30) Sound control for treble. VOLUME (31) Master volume control, push to switch on/off. BASS (32) Sound control for bass. • ROCKSTER AIR... -
Page 17: Transport
Transport The enclosed carrying strap is provid- ed for comfortable transport of the ROCKSTER AIR. It can be secured as follows: 1. Remove the plugs from the two threaded holes (6). 2. Screw one eye bolt (4) into each of the threaded holes. -
Page 18: Setup
• Lay the connector cords so that they do not pose a tripping hazard. • Do not place any heavy objects on the cables or the ROCKSTER AIR. PA tripod An opening with which you can mount the device on a PA tripod with a 35 mm pivot is located on the bottom... -
Page 19: Inputs
(11) (12) (13) (15) ple ROCKSTER AIR units: The ROCKSTER AIR operated as a companion is sent its audio signal via this connection. All controls of the companion are deactivated and the volume is set to maximum. -
Page 20: Output
LINE OUT/LINK OUT (17) Only in master/companion operation (17) with multiple ROCKSTER AIR units: The ROCKSTER AIR operated as a master transmits its audio signal to the devices operated as a companion via these connections. Use a properly shielded, crush-proof XLR stage cable for this connection. -
Page 21: Operation
Activating With the POWER MODE switch (19), Pushing the VOLUME control (31) you can switch the automatic func- switches the ROCKSTER AIR on. The tion on and off: LED rings around the controls of the mixing console will briefly illuminate... -
Page 22: Sound Control
Adjusting the volume The VOLUME control (31) is the master volume control for the entire system, including the or multiple ROCKSTER AIR units connected as a (26) (27) (28) (29) companion. – Turn the control clockwise to in- crease the volume. - Page 23 ROCKSTER AIR. devices. ® You can also register two Bluetooth 4. Select the ROCKSTER AIR from the devices, which are played in alterna- list of detected devices. tion. The ROCKSTER AIR will now play A Bluetooth ®...
-
Page 24: Master/Companion Mode
(11) To prepare master/companion mode: 1. Make sure that all ROCKSTER AIR 4. On the companion, push the LINE IN/ units are switched off. MIC/LINK IN switch (11) to the “LINK IN”... -
Page 25: The Rechargeable Battery
When the rechargeable rechargeable battery is charged as battery is full, all four LEDs light up. If soon as the ROCKSTER AIR is con- only one is illuminated, the remaining nected to the mains supply. capacitance amounts to 25 %. No LED... -
Page 26: Inserting And Removing The Rechargeable Battery
• The black cable always belongs to the negative pole (+) of the recharge- able battery. 4. Pull the plug shoes off of the re- chargeable battery. 5. Carefully take the rechargeable battery out of the rechargeable battery compartment. • ROCKSTER AIR... -
Page 27: Optional Accessories
Optional Accessories Remote Control You can optionally purchase the “ROCKSTER AIR RC” remote control for the ROCKSTER AIR, which you can (33) use to control a few basic functions. Its range amounts to up to 10 m with a direct line of sight to the IR receiver (7),... -
Page 28: Care And Cleaning
Care and Cleaning NOTICE Storage To store the ROCKSTER AIR for a pro- External influences may dam- longed period of time when not con- age or destroy the device. nected to the mains (e.g. in winter): – If possible, only use plain 1. -
Page 29: Troubleshooting
(see page 4). Take note of the warranty instruc- tions. Problem Possible cause Solution The device The ROCKSTER AIR is Switch the ROCKSTER AIR on by pushing doesn’t off or doesn’t have any the VOLUME control (31). Check the emit any power. mains cord and socket. - Page 30 (LINE, AUX). zero. A hum is The ROCKSTER AIR is Connect the ROCKSTER AIR and the source emitted connected to a differ- device/preamplifier to the same power from the ent power circuit from circuit.
-
Page 31: Technical Data
Max. power consumption 200 watts Declaration of Conformity Lautsprecher Teufel GmbH hereby declares that this product complies with the requirements of the directives 2014/30/EU, 2014/35/EU and 2014/53/EU to the extent they are installed and used in accord- ance with the instructions of the manufacturer. The full text of the EU declaration of conformity is available at the following Internet address: www.teufelaudio.com/declaration-of-conformity.html... - Page 32 Please contact our customer service department with any questions, suggestions, or complaints: Lautsprecher Teufel GmbH BIKINI Berlin Budapester Str. 44 10787 Berlin (Germany) Phone.: 00800 200 300 40 (toll-free) Fax: +49 (0)30 - 300 930 930 Service: www.teufelaudio.com/service Contact: www.teufelaudio.com/contact No responsibility is assumed for the correctness of this information.
Need help?
Do you have a question about the ROCKSTER AIR and is the answer not in the manual?
Questions and answers