Table of Contents
Advertisement
Quick Links
PCE Americas Inc.
PCE Instruments UK Ltd.
711 Commerce Way
Units 12/13
Suite 8
Southpoint Business Park
Jupiter
Ensign way
FL-33458
Hampshire / Southampton
USA
United Kingdom, SO31 4RF
From outside US: +1
From outside UK: +44
Tel: (561) 320-9162
Tel: (0) 2380 98703 0
Fax: (561) 320-9176
Fax: (0) 2380 98703 9
info@pce-americas.com
info@pce-instruments.com
www.pce-instruments.com/english
www.pce-instruments.com
Manual
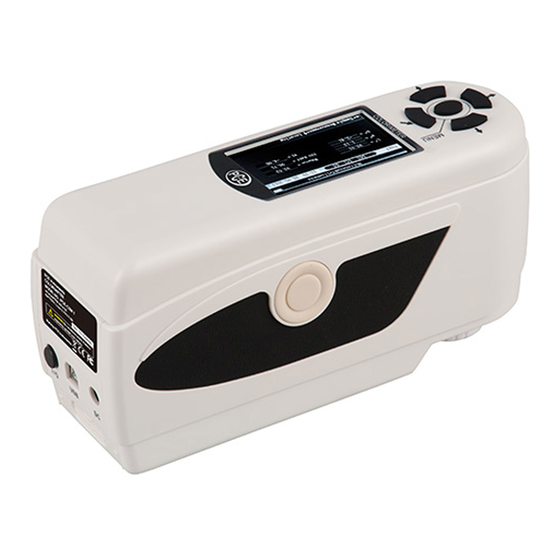
Colorimeter
PCE-CSM 3
Version 1.0
Date of creation: 25.09.2015
Date of last change: 08.02.2017
Advertisement
Table of Contents

Related Manuals for PCE Instruments PCE-CSM 3


Summary of Contents for PCE Instruments PCE-CSM 3
- Page 1 PCE Americas Inc. PCE Instruments UK Ltd. 711 Commerce Way Units 12/13 Suite 8 Southpoint Business Park Jupiter Ensign way FL-33458 Hampshire / Southampton United Kingdom, SO31 4RF From outside US: +1 From outside UK: +44 Tel: (561) 320-9162 Tel: (0) 2380 98703 0...
-
Page 2: Table Of Contents
Powder test box PCE-CSM PTB ....................13 7.1.1 Build-up ............................13 7.1.2 Operation ............................. 13 Measuring device for liquids, pastes and powders PCE-CSM UTC ........14 7.2.1 Build-up ............................14 7.2.2 Operation ............................. 15 Contact ........................17 PCE Instruments UK ........................ 17 PCE Americas .......................... 17... -
Page 3: Introduction
When using the colorimeter, there are two different colour spaces available (CIE L*a*b*C*h, CIE L*a*b*). After a measurement with the PCE-CSM 3, the reading can be used as a standard value. Other readings can be recorded as a sample and later be compared to the reference value. -
Page 4: Specification
Humidity: 0 … 85 % RH, non-condensing Dimensions 200 x 70 x 100 mm Weight 500 g Contents of delivery 1 x colorimeter PCE-CSM 3 1 x USB cable 1 x lithium-ion battery 1 x mains adaptor 1 x calibration plate (white) 1 x PC software... -
Page 5: System Description
Manual System description Button description Interfaces... -
Page 6: Battery
Manual Power button: Press this button to turn the device on (button lock in place). Press the button again to turn the device off (button unlocks). DC interface: Only use the mains adaptor included in the package. If it breaks down, only use substitutions with the following characteristics: output 5 V DC, 2 A. -
Page 7: Operation
Manual Operation Turn on the device 1. Make sure the battery is installed or the device is connected to an external power source. 2. Turn on the device by pressing the power button. After a few seconds, you are automatically directed to the “Standard Measurement”... -
Page 8: Additional Functions
Manual A reading which has been determined by using the “Standard Measurement” automatically serves as a reference value. You can add one or more sample measurements to this reading. To do so, you have to switch to the “Sample Measurement” screen: 1. -
Page 9: Calibration
Manual If there are any samples attached to a standard, you can view those by pressing Enter If there is more than one sample, you can use the arrow keys ( ) for selection. If you want to delete a sample, select it and hold the Back button for ca. -
Page 10: Connection To A Pc Or Printer
Manual 5.3.3 Connection to a PC or printer , select “Comm“ and press Enter To connect the device to a PC or printer, press the Menu button Now, you will get to the communication screen. After that, use the USB cable to connect the device to a PC and press Enter . -
Page 11: Display Mode
Manual 5.3.7 Display mode , select “Display“ and press Enter To change the display mode, press the Menu button . Now, you get to the display mode settings. Here you have three different options: “CIE L*a*b*C*H*”, “CIE L*a*b*” and “CIE XYZ”. Use the arrow keys ) to select the desired option and press Enter to confirm. -
Page 12: Time Setting
Manual Time setting Here you can set the time (“Set time”), date (“Set date”) and how time and date are displayed (“Time format” / “Date format”). Select the desired option by using the arrow keys ( ) and press Enter to confirm. -
Page 13: Optional Accessories
Manual Optional Accessories Powder test box PCE-CSM PTB With the optional powder test box PCE-CSM PTB you can determine the colorimetric parameters of powders. 7.1.1 Build-up The PCE-CSM PTB is built up of a base plate (1), a measuring plate with a powder compartment (2), a lens (3) and a mounting ring (4). -
Page 14: Measuring Device For Liquids, Pastes And Powders Pce-Csm Utc
Manual Measuring device for liquids, pastes and powders PCE-CSM UTC With the optional measuring device PCE-CSM UTC, you can determine the colorimetric parameters of liquids, pastes and powders. 7.2.1 Build-up The PCE-CSM UTC is built up of a base plate (1), an alignment plate for the colorimeter (2), a measuring chamber (3) with a measuring hole (31), a tank with filling level indication (4), a cover plate (5) and an adjuster plate (6) with safety screws (7). -
Page 15: Operation
Manual 7.2.2 Operation 1. Put the colorimeter in the measuring device PCE-CSM UTC (as seen on the picture below) and tighten it by using the adjuster plate (6) and the safety screws (7). The Measuring hole should align with the measuring hole of the measuring chamber (3). Make sure that the colorimeter is in the right place and tightened properly before moving on. - Page 16 Manual 3. Put the cover plate (5) on the measuring chamber of the PCE-CSM UTC. There is an indication on the cover plate, as well as on the measuring chamber. Please make sure that these indications are aligned properly (see picture below). 4.
-
Page 17: Contact
Contact If you have any questions about our range of products or measuring instruments please contact PCE Instruments. PCE Instruments UK By post: PCE Instruments UK Ltd. Units 12/13 Southpoint Business Park Ensign Way, Southampton Hampshire United Kingdom, SO31 4RF...
Need help?
Do you have a question about the PCE-CSM 3 and is the answer not in the manual?
Questions and answers